Celery is also a kind of seasoning for dishes, saturated with various vitamins. Many people like to see fresh herbs on their table, whether it be dill, parsley or even celery. So, you need to learn how to properly grow this plant. Celery has a very specific aroma and spicy taste. People eat celery both as a seasoning and as a side dish.
By nature, petiole or leaf celery is unpretentious in care and can grow in many climatic zones. So, it means you can safely start it in your garden and add it to your daily diet. Do not deny yourself this pleasure, because there is a whole range of various useful substances. In addition, there are a lot delicious meals, where it is simply indispensable to do without it.
Even though there is nothing too difficult in growing celery, special approach and care he needs it just like any other plant. How you take care of it will depend on its quality. The quality of the plant can be identified by the following features:
- Intense aroma.
- The splendor of the leaves.
- Strong and resilient stems.
- Taste properties.
In any case, all plants have their own subtleties that need to be studied and understood.
 The plant can be safely placed both in a shaded area and in areas open to the rays of the sun. Moreover, in areas slightly shaded, celery will grow more fragrant. But at the same time, according to the recommendations, it turns out that it is better to plant on open to the sun territory.
For petiole and leaf celery, the air temperature is considered to be no more than + 20 degrees. The temperate climate for him is a "paradise". In this strip, he will feel as good as possible and even small frosts will not harm him. Frost-resistant varieties of celery are considered, the roots of which have a reddish tint.
Celery prefers soil fertile, slightly loose and with the addition of drainage. But even in this case, it is necessary that such soil retains water well. Well suited soil with high acidity or neutral. Before planting, it is better to add a little lime.
In no case, parsnips should not be chosen as a neighbor for celery. Both plants can simply go bad due to insect pests such as the celery fly.
Seed selection
The choice of celery seeds is very important procedure . Often, it is the choice of certain varieties of seeds that will affect what the plant will be like.
When buying seeds, you should pay attention to the following points:

Especially variety selection plays an important role in the exceptional home cultivation. Which variety was chosen will completely depend on it. appearance and pleasant taste and aroma in combination with other products.
Leaf and petiole variety. Seedling cultivation and care
Before planting seedlings you need seeds rinse and soak for 3 days. Is it possible to grow celery without seedlings on open field? It is possible, but only in this case you have to bother and germination may be incomplete.
 In open ground, the plant grows very slowly. That is why celery is often grown seedling way. That is, you first need to plant the seeds in a small bowl and place it on covered balcony or window sill.
We either make the soil ourselves, or we also buy ready-made soil in the store. For self-study soil it is better to mix leafy soil, sand, humus and peat. In no case, it cannot be solid earth, it must be fluff and loosen.
Sowing seeds of petiole and leaf celery
seeds evenly distribute over the entire surface of the box and sprinkle with a small layer of peat. Since the seeds are very close to the surface, watering with a direct stream of water is not safe. It is better to stock up on a small watering can in advance or use improvised items that everyone has - a sieve or a small colander. The room temperature should be around 20 degrees.
Soaked seeds should germinate on the fifth day after sowing. After germination, it is better to lower the temperature to 15 degrees. It is done so that the seedlings do not start quickly, grow and stretch.
Petiole and stem celery for good cultivation care needed:
- light;
- moderate watering (do not allow the soil to dry out);
- ventilation and temperature.
 After the appearance of 2-3 true leaves seedlings dive. Each seedling needs its own "house" with good soil. For this, as always, you can use cups. At the same time, it is not recommended to deepen the seedlings. The main condition for transplanting is the rosette of the seedling, from which new leaves appear, must remain open. Under no circumstances should you fall asleep. We place the glasses in a well-lit place. Window sills are perfect.
Seedlings are planted outdoors after frost has passed. Usually it is the end of April-May. In order for the plant to take root well in the open field, it is still a seedling begin to harden, taking it outside for several hours in warm sunny days. Seated celery on the beds according to the scheme of 20 by 30 centimeters.
Plant growers advise prepare in advance beds for celery. It is necessary to take care of the location of the future celery since the fall. Therefore, you need to mark and dig furrows. Their width should be at least 40 cm, and a depth of about 30 cm. We fill the furrows with manure or compost and backfill them with earth, carefully leveling them.
 Every stem plant, celery or not, needs loosening and hilling. It is necessary that the roots take on a white hue and have a richer and more pleasant taste without hints of bitterness. Alternatively, you can buy self-bleaching varieties of celery.
Their advantage is that they do not need to be hilled and planted in trenches. But their taste is far from the same, there will be no characteristic crunch. And besides, they are not frost-resistant.
Planting seedlings of petiole and leaf celery in open ground

Concerning self-bleaching grades, then everything is very simple here. They do not need trenches, they can be planted in ordinary beds. It is also not necessary to spud and loosen. To give the petioles of this variety a little sweet taste, it is advised to cover the soil with straw about 20 cm.
Leaf celery is also much easier to grow, unlike its counterpart - petiole is much easier to care for. The leaf has enough ordinary weeding, loosening and moderate watering. One condition is until the seedling sprouts look after the soil. It must not harden otherwise the celery will not break through. In this case, mulching helps.
Harvest petiole cut in late autumn. Self-bleaching variety matures 12-15 weeks after planting in the ground. Sheet on their tables can be seen first of all. Already in July, they slowly begin to pinch him
.
Celery, like a spicy herb, is of Mediterranean origin and is valued by gardeners for its excellent taste qualities. Despite its southern origin, celery grows well in temperate climates and can even tolerate light frosts. Celery is leaf, root and petiole
How to plant petiole celery
Petiole celery loves well-fertilized loose soils. If the acidity of the soil is increased, chalk is added before planting celery. Since autumn, humus is introduced into the soil and a lot, because for good development petiole celery needs nitrogen. Humus is introduced into furrows 30 cm deep and 40 cm wide and covered with earth from above.
Early varieties petiole celery can be sown with seeds in open ground starting from April 20. Seeds are pre-soaked, and then sown to a depth of 0.5-1 cm. Late varieties grown only by seedlings. seedling method generally preferable, because stalked celery seedlings are quite capricious.
How to plant celery seedlings
Seeds of petiole celery before planting on seedlings are soaked for a day in water at room temperature to speed up their germination. It is worth knowing that petiole celery seeds only improve their qualities with age, so one of the seed bags can be safely put aside for 3-4 years and then planted.
For the appearance of friendly shoots, celery seeds can be stratified: first keep them on damp gauze for 7 days at room temperature, then 14 days on the bottom shelf of the refrigerator. After this treatment, the seeds are ready for sowing.
The soil mixture is poured into the container, it is well moistened, then the seeds are evenly sown on the surface of the soil. After sowing, the seeds are slightly pressed into the soil, the container is covered with cling film and put on germination. Before emergence, the soil in containers is regularly sprayed with warm, settled water, once a day the film is removed for ventilation. Celery shoots appear 21 days after sowing seeds. Seedlings are regularly watered. After the appearance of the first true leaflet, the seedlings swoop down, trying not to damage the tap root of the seedling.
Seedlings are planted outdoors when the threat of frost has passed. Basically, this is the second half of May. Seedlings at the time of planting should be 13-15 cm high, have a good root system and 4-5 true leaves.
 Seedlings of petiole celery are planted in holes according to the scheme 25 by 25 cm. A handful of humus and wood ash are placed in each hole before planting, which are mixed with the ground in the hole. When planting, seedlings are buried in the soil to the cotyledon knee. Planted seedlings are watered abundantly and shaded with damp paper for a day. Experienced gardeners recommend planting petiole celery between beds of potatoes, cabbage, cucumbers, as the smell of celery repels pests. Mulch the soil around the plants to retain moisture and control weeds.
 Caring for petiole celery
Planted seedlings need regular watering - the soil in which petiole celery grows should be moist all the time, but stagnant water should not be allowed. Once every 10 days, celery should be fed with liquid organic fertilizers. Some varieties of petiole celery need to be regularly hilled - once every 3 weeks as the plant grows.
4802 02/13/2019 7 min.Petiole celery is now often included in various dishes, especially salads. You can eat it raw, as well as after heat treatment. Petiole celery is considered a very tasty and healthy plant.
How to plant seedlings
If a variety of petiole celery has a long growth period, then it is better to get it with the help of seedlings. It is usually placed on the windowsill. Seedlings are planted in late February or early March. If the seeds are not prepared in advance, then the seeds will germinate for more than 20 days. Usually seeds are soaked in immunocytophyte. The solution is prepared at the rate of 20 ml of water 1 tablet of the substance.
A clean box is prepared in advance, the earth is poured into it. The ground is prepared in advance. Mix the earth from the garden and humus in equal proportions, add a little sand. Now the ground needs to be watered, and a day later a layer of snow is placed on top.
How to care
Now it's important to create proper care after transplanting seedlings. All weeds must be removed, the soil loosened. If germinated seeds were sown, then the non-woven material must be removed. If there is a growth retardation, then shooting ahead of time will eventually occur.
You need to thin out the celery for the first time, as soon as 4 to 6 leaves appear. The distance between the plant must be left at 20 cm. Next time You need to thin out the celery after 10 days. As a result, the distance will be 40 cm.
The video tells when to sow petiole celery for seedlings, planting dates:
The soil must not be allowed to become dense. Therefore, loosening is a must. The depth of loosening should be about 6 cm. But if it rained heavily, then the soil is loosened by 15 cm. In this case, it is advisable to apply a little fertilizer when loosening.
top dressing

Watering
The plant needs to be watered every week. For one square meter 20 liters of water are required. But if there are few rainy days, then the amount of water is increased to 25 liters. There is usually little rain in August and September. When watering, try not to let water get on the leaves themselves. If this is allowed, then the fungus and other diseases can affect the plant.
Light and hilling
If you want to achieve a pleasant aroma and taste from the petioles, then try to remove them away from direct sunlight. Thus the quantity essential oils will decrease, the leaves will become light, the taste will be pleasant. If you spud the plant, it will quickly acquire a light shade. When hilling, the earth should be poured gradually. Keep in mind that you need to spud only with wet earth. First, the plant is spudded so that it does not fall.
The second time to half the stem, and the third time almost to the crown. But this method of hilling has one drawback: petioles can acquire a not very pleasant taste of the earth. Therefore, hilling during the growth period is not recommended. It is better to dig in the greenhouse after harvesting. But in this case, the yield of celery will fall. 
But there is another way to apply. In the first weeks of September, the plant is usually already fully formed, so you can take the fabric and tie the stems. Now the soil can be collected under the plant. Petioles need to be wrapped with wrapping paper and tied with twine. The wrapper should not cover the leaves, but end at the edge. Usually improve the taste of celery 3 weeks before harvest.
Celery, like other plants, is susceptible to pests. Therefore, you need to start fighting them in time:
- Borsch fly. She is able to start laying eggs at the end of May. These pests can and do spend the whole winter in the soil. If you find a borscht fly, then next year you can’t plant vegetables there.
- carrot fly. The larvae of this fly can damage the roots of the plant. Therefore, it is important to carry out weeding on time. Top dressing and loosening is also done on time.
- Carrot blotch. This living creature is able to drink all the juice from celery. Outwardly, the plant will look oppressed.
- bean aphid. This pest is considered the largest. If you find this pest, then celery must be treated with a decoction of tomato or potato tops.
- Early burn. This phenomenon is usually observed when sharp drop temperatures. You will see spots with a brown border on the leaves. If the humidity is increased, the stain will acquire a purple bloom. You can get rid of the pest within 30 minutes using a temperature of 48 degrees.
The video tells when to plant petiole celery for seedlings:
What time is the landing
Whatever variety of celery you take, they all have a long growing season. Usually celery seeds are sown in April: from April 20 to 25. Transplantation into open ground is done in May: May 15-20.
Those who want to have celery on their table every year can start sowing it. Observing simple rules you will get good results.
Celery has been known since Ancient Greece. It was here that the wild variety was bred cultivated plant and elevated him to the rank of sacred. They made decorations for the dead from celery, its image was minted on coins. In Europe, celery was not grown until the 16th century. At the same time, the plant appeared on Russian pharmaceutical gardens. At first it was used for medicinal purposes and only over time they began to be used as an aromatic seasoning that significantly improves the smell and taste of food. To date, there are several varieties of this unique plant, among which special place occupies petiole celery.
What is a vegetable
Petiole celery belongs to the umbrella family. The vegetable boasts kinship with such popular and well-known crops as carrots, cumin, coriander, anise, etc. This is a biennial plant that is planted with seeds, and in the first year life cycle it forms a stem and rhizome, and in the second year it blooms and bears fruit. As a vegetable crop, it is customary to grow petiole celery for only one season, since the stem and leaves of the plant are mainly used for food. Vegetable seeds have more limited uses.
Outwardly, celery resembles parsley: it has pinnately dissected leaves, collected in a rosette, and a taproot. Inflorescences are a kind of umbrellas and consist of a large number of small flowers. The culture can grow up to 1 m in height, it is moisture-loving and cold-resistant.  High-quality petioles are obtained only in the first year of vegetation of the plant.
The benefits and harms of petiole celery
First of all, it must be said about the use of petiole celery in cooking. The stems of the plant are ideal for stewing and frying, they are added raw to various salads. The product goes well with meat and fish dishes. They make very healthy juice and fragrant tea.  The juice of the plant is quickly absorbed by our body, penetrating into the cells through the blood and lymph.
One of the most remarkable properties of celery is its low, almost negative calorie content: the human body spends more calories digesting celery products than it receives from eating them.
In addition, celery is able to actively burn fat, so its consumption is indispensable for people who control their weight and take their health seriously. Experts note the following factors of the beneficial effects of celery products on our body:
- it helps to cleanse toxins;
- strengthens the immune system;
- beneficial effect on digestion;
- slows down the aging process and helps to cope with senile dementia;
- normalizes metabolism;
- cures burns, cuts, inflammations, hematomas and other skin disorders;
- has a calming effect;
- beneficial effect on the condition of the hair.
- hypertension;
- obesity;
- diseases of the genitourinary system;
- rheumatism.
Such a vast area of usefulness is associated with the content in the culture huge amount essential vitamins and minerals, including:
- potassium;
- phosphorus;
- zinc;
- calcium;
- gland;
- vitamins of groups A, B, C, PP, E.
Daily consumption of two tablespoons of chopped celery greens provides the daily requirement human body in carotene and vitamin C.
Contraindications
Refuse to use the plant in any form should be people suffering from stomach ulcers, varicose veins, thrombophlebitis, urolithiasis, epilepsy. A vegetable is not recommended for pregnant women and nursing mothers, since the use of spicy greens can cause increased gas formation, which will negatively affect the fetus, as well as the digestion of the baby, who will receive the product along with breast milk mother. Celery gives milk a specific smell and taste, because of which the child may refuse to breastfeed.
Video: celery - benefits, harms and contraindications
There are three varieties of celery: root, leaf and petiole. Root varieties are grown for a healthy and nutritious root that reaches 10 cm in diameter. At celery root the aerial part can also be eaten, but since the variety has a long growing season (from 150 days), during which it is not recommended to cut the stems of the plant, it is not grown on greens. For this purpose, leaf celery is planted, which quickly forms a rosette with delicate leaves, and petioles have ordinary, small ones.
Petiole celery is also grown for its greenery. It does not form thickenings on the root, like leaf varieties, but it has large leaves and juicy, elastic, fleshy petioles, reaching four centimeters in thickness.
 When growing celery various kinds plant care has a number of features
 Today the market offers a wide range of petiole celery seeds. Among gardeners, varieties of domestic selection are popular, which are adapted to our weather conditions, are not afraid of frost, are resistant to many common diseases, and give juicy petioles with good taste.
Table: varieties of petiole celery included in the State Register of Breeding Achievements of the Russian Federation
| Variety name | Plant characteristic | Ripening terms | Weight of one plant, kg | Productivity, kg/sq.m |
| Arthur |
|
Mid-season, the period from germination to harvest - 110 days | 0,2–0,3 | about 5.9 |
| Atlant |
|
Mid-season, the period from germination to the start of harvesting - 165 days | 0,3–0,35 | over 3 |
| Vyacheslav |
|
Mid-season, the period from germination to harvest - 120 days | 0,15 | up to 2 |
| Groom |
|
Mid-season, the period from germination to the beginning of harvesting - 150 days | about 0.4 | about 3 |
| Gold |
|
mid-season | 0,8 | up to 5 |
| Royal |
|
Mid-season, the period from germination to harvest - 95 days | 0,18 | around 5 |
| Malachite |
|
early ripe | 1,2 | about 4 |
| Pascal |
|
mid-season | 0,2–0,45 | about 4 |
| Tango |
|
Mid-season, the period from germination to the start of harvesting - 160–180 days | 1 | about 4 |
| Crunch |
|
Mid-season, the period from germination to the start of harvesting - 140–160 days | 0,35–0,4 | about 3.5 |
| Utah |
|
mid-season | 0,35 | over 3.5 |
Photo gallery: petiole varieties of celery of domestic selection
Golden - an early variety that allows you to grow juicy full-bodied petioles with excellent taste  Atlant celery petioles need bleaching Groom celery goes well with various varieties of green lettuce, nuts, tomatoes, leeks, it is appropriate to serve it as a side dish for high-calorie dishes. The Royal variety is suitable not only for salad, but also for freezing or drying Early variety Malachite provides the owner of the site with a good harvest of juicy, rich green, tasty and fragrant petioles in short time Celery stalks of the Pascal variety have an intense dark green color and reach a length of up to 20 cm Tango celery stalks have excellent taste and aromatic qualities, they retain their marketable appearance for a long time.
Planting petiole celery
Growing petiole celery cannot be called a simple matter, but if you know the features and take into account the requirements of this plant, then success will be guaranteed. Early varieties of this variety can be planted directly from seeds immediately in open ground. Such sowing is carried out around the second decade of April. However, the following risks must be taken into account:
- do not count on the friendliness of seedlings;
- care for young plants will be difficult. Given that celery develops very slowly at the initial stage of the growing season, it will be problematic to fight weeds, as well as protect seedlings from weather disasters.
Most often, when growing petiole celery, they resort to a seedling method, which is more guaranteed to allow you to get fresh and healthy greens for the dinner table.
Seedlings can be grown in a greenhouse, as celery is a cold-resistant plant and its seedlings easily tolerate frost. If this is not possible, then sowing in containers that will stand on the windowsill is quite suitable.
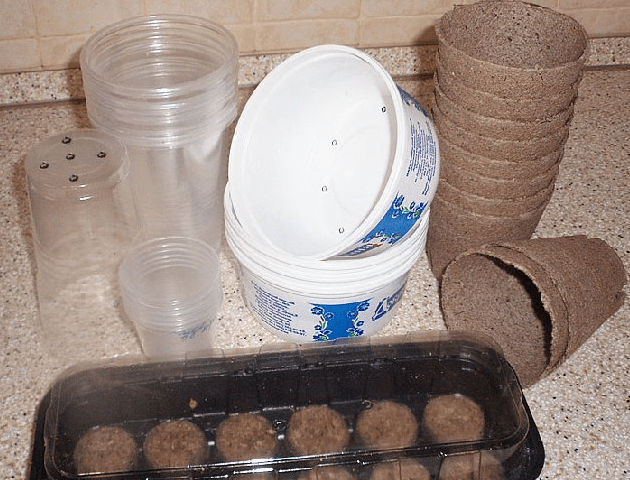
Before sowing seeds, you need to prepare a planting container and suitable soil. As containers, you can use both special containers and trays for growing seedlings, as well as any improvised material: wooden or plastic crates, yogurt packaging and even plastic bags. The main thing is to provide a drainage layer in them, which will not allow excessive moisture to stagnate in containers.  Growing in cassettes allows plants to form a root system that will penetrate the entire substrate and not be damaged during transplantation.
The soil for sowing seeds must be nutritious and necessarily moisture and breathable. The following composition is perfect:
- peat;
- humus;
- coarse-grained river sand;
- sod land
in the ratio 3:1:0.5:1. Urea (1 teaspoon) is added to 10 liters of prepared and thoroughly mixed soil and wood ash(2 glasses).
For disinfection, the soil mixture is poured with boiling water with the addition of potassium permanganate (a slightly pink solution) a few days before sowing.
Seed preparation
This is very milestone in growing crops. Seeds of petiole celery have several specific features:
- their germination depends on age, but over time it does not deteriorate, but rather increases. Therefore, the most friendly seedlings will appear from seeds that have lain for 3–4 years;
- the plant contains essential oils that prevent the seeds from quickly absorbing moisture, and the germination process can take several weeks.
 Celery seeds look very similar to parsley and carrot seeds.
 Exist various ways accelerating seed germination:

Since celery seeds are small, after drying they can be mixed with sand and sown in the ground in this composition.
Sowing for seedlings
The timing of planting petiole celery for seedlings depends on the variety, its growing season. If it is about 120 days, then sowing should be done in the first decade of March. With proper seed preparation, seedlings will appear in 1-2 weeks. It is recommended to plant two-month-old celery seedlings in the ground.
The landing process itself is carried out in a completely standard way. It includes the following steps:

Further seedling care
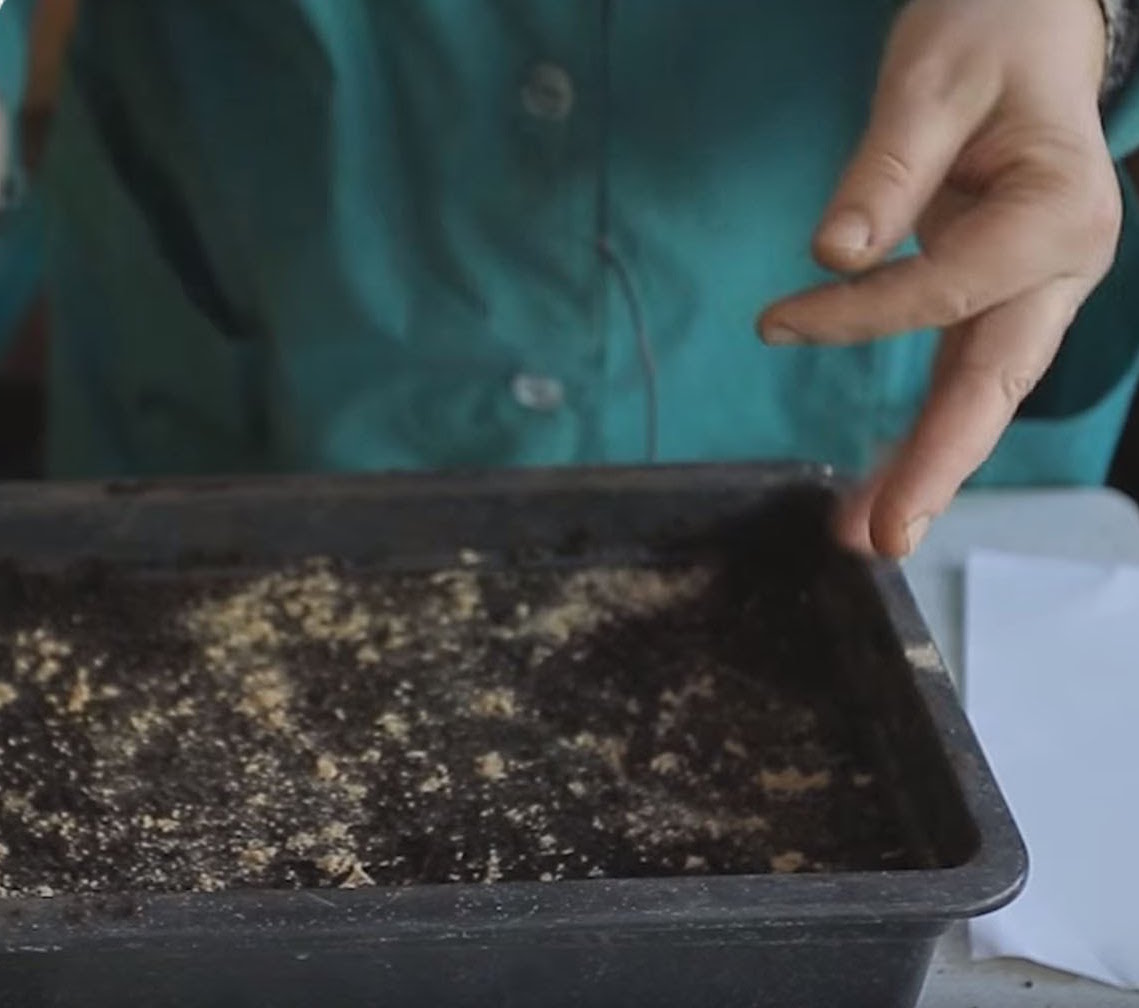
When the first gatherings appear, the seedlings need to be provided with good illumination and a comfortable temperature (about +16 degrees). A higher temperature regime will contribute to the stretching of seedlings. Most often, the sprouts that appear are thin, the first month they grow very slowly. After about 30 days, they will have only 1-2 true leaves. At this time, it is necessary to carry out thinning, leaving the plants at a distance of 4–5 cm from each other, adding soil or diving seedlings, if such a method of cultivation was envisaged.  When two leaves appeared on the celery seedlings, the plants can be planted so that the roots have more room to grow.
If conditions allow, then young plants can be transplanted for growing in a greenhouse. Transplantation is carried out in furrows located at a distance of 5-6 cm, plants are also planted every 5-6 cm.
The picking is carried out carefully, planting the seedlings in individual containers with a depth of at least 10 cm, trying not to damage the root, deepening the seedlings to the cotyledon leaves, while not covering the central growth bud with earth. This procedure stimulates the development of lateral roots in seedlings, which will favorably affect the strength and endurance of seedlings.  When picking, the seedlings are lowered into the prepared hole, making sure that the root does not bend and remains upright.
After picking, the seedlings are watered and shaded from direct sunlight. The optimum temperature for seedlings during this period will be + 15-16 degrees. Finding seedlings at temperatures below +10 can lead to the fact that after transplanting to a permanent place, such plants will bloom and will not give juicy and elastic stems.
If, when preparing the soil mixture, the soil was filled with nitrogen fertilizers in sufficient quantities, then the seedlings will have a rich color. With a weak color of the leaves, it can be fed with urea (1 teaspoon per 10 liters of water). Such top dressing is carried out three times during the cultivation of seedlings (1 time in two weeks), always under the root.
A week before planting in open ground, hardening of plants should begin. They are taken out into the open air, first for several hours, then for the whole day, and before landing, they are left for the night.
Seedlings ready for planting should be strong, at least 10 cm high, have 4–5 true leaves and a root system that wraps around the earthen ball well.
Transplanting seedlings to the garden
It is recommended to plant celery seedlings in the garden in mid-May, after stable warm weather is established and the soil warms up well.  If you do not have the opportunity to grow celery seedlings, you can buy it, but remember: good planting material is plants that reach a height of 13-15 cm, with a strong root system and four to five leaves
Experienced gardeners note that under favorable weather conditions and the readiness of seedlings, it is possible to carry out an earlier planting on the beds. Plants planted at such times most often give best harvest. But with early planting, there is a risk that petiole celery will release flower stalks.
The site for planting petiole celery is selected and prepared in advance. Preference should be given to open sunny place with well-fertilized soil of neutral acidity. In poor, dry soil, you will get plants with thin, fibrous, possibly hollow stems.
Under the autumn digging for 1 square. meter contribute
- humus or compost (10 kg);
- ash (1 glass);
- superphosphate (1 tablespoon).
If necessary, the soil is lime. A bed prepared in this way in the spring only needs to be loosened. Good predecessors for petiole celery will be
- tomatoes;
- cabbage;
- cucumbers;
- zucchini;
- pumpkin;
- salad;
- legumes;
- spinach.
It is undesirable to plant celery after
- potatoes;
- corn;
- parsnip;
- parsley;
- carrots.
Stalk celery can be used as a compacting crop for
- tomatoes;
- legumes;
- any kind of cabbage;
- Luke.
 Celery perfectly coexists on the same bed with cabbage
 Such a neighborhood will benefit these vegetables, because celery has a strong smell that will scare away many pests.
The scheme for planting seedlings in open ground will depend on varietal characteristics: the height of the bush, the spreading of the outlet. Minimum Distance between rows and between plants in a row will be 25 cm. For planting petiole varieties with a high sprawling rosette, it is more reasonable to stop at a 50x40 cm pattern.  Self-bleaching varieties of petiole celery should be planted in a garden bed so that a distance of 25 cm remains between the seedlings. It is better to plant seedlings of varieties that need to be bleached in furrows at a distance of 30 cm from each other
The transplant is carried out as follows:

For weak seedlings, you can organize a mini-greenhouse from a cut plastic bottle right on the garden bed
How to care for celery outdoors
Further care of the plant is simple, fits within the framework standard rules agricultural technology of cultivation of any garden culture:
- watering is carried out based on the needs of the plant and weather conditions. Celery needs a lot of water to grow well. The rate of watering a plant in dry weather is about 20 liters per 1 sq. meter. But excessive waterlogging, leading to stagnation of moisture, as well as drying out of the topsoil, will adversely affect the quality and yield of petioles. With a lack of moisture, the middle part of the stem can become fibrous, cracked and empty, and waterlogging provokes the development of fungal infections that initially affect the leaves, and then the petioles of the plant;
- compaction of the top layer of soil should not be allowed. Its loosening is carried out after each watering or rain. The depth of loosening beds with young plants is 5–6 cm, the soil around adult bushes is loosened deeper - 15 cm.
 In order to prevent evaporation of moisture and provide the roots of the plant with more oxygen, immediately after planting celery, the soil around it must be mulched with peat, sawdust, mowed grass or straw.
 Juicy and thick celery petioles can only be obtained if the plant grows continuously throughout the growing season. Stunted growth can be caused by lack of moisture, nutrients or compaction of the top layer of soil - then the plant receives insufficient oxygen.
Features of feeding petiole celery
Petiole celery actively responds to fertilization. To feed the plant, you can use humus, manure, ash, mineral complexes. A feature of feeding petiole celery is that when choosing fertilizers, they stop at compositions in which nitrogen and potassium are present in approximately equal proportions.
Table: "summer menu" for celery
| Feeding times | View | Composition | Peculiarities |
| Two weeks after planting seedlings or one month after germination with direct sowing with seeds in open ground | Root, dissolved fertilizers | Mullein infusion in a ratio of 1:10 + potassium sulfate (10 g per bucket of solution) | After fertilizing, the plant is watered clean water to prevent burns of leaves and petioles |
| 3 weeks after the first | Root, dry fertilizer | Ammonium nitrate (10 g) + superphosphate (30 g) + potassium sulfate (20 g) per 1 sq. meter | Fertilizers are shallowly buried in the ground in the root zone with a hoe |
| 3 weeks after the second | Similar to the second | Recommended for poor soils | |
 At the stage of increasing leaf and stem mass, celery needs increased nitrogen fertilization
 Petiole whitening
The main feature of petiole celery care is the petiole bleaching procedure. As a result of its implementation, the shoots become not only lighter, but also much tastier, bitterness disappears from them. This work should be done 2-3 weeks before harvest. Whitening can be carried out in various ways:

Sheet plates in both the first and second cases should remain free.
Owners of garden plots often avoid growing petiole celery precisely because high-quality petioles can only be obtained after the bleaching procedure, which for many is complex and difficult to perform. IN Lately self-bleaching varieties of this crop appeared on the seed market - Golden, Malachite, Tango, which we talked about above. It should be noted that in order to achieve the effect of self-bleaching, celery bushes of these varieties should grow at a distance of no more than 25 cm from each other.
Video: grow petiole celery correctly
Growing celery at home
Like many others spices, petiole celery can be grown at home on a windowsill or balcony. The simplest and most easily accessible way is to get petioles and greens from a celery stalk. In this case planting material celery stalks that you purchased at the store or grew on your site will serve. Celery shoots are attached to the stalk, which is usually not used for food. It should be fresh, elastic, without stains, mechanical damage and traces of rot. The stalk is cut off at the base to a height of about 3-4 cm.  Before planting, the stalk of celery is inspected for characteristic damage.
The cut stump needs to be germinated. To do this, it is placed in a container with water at room temperature, immersing the bottom of the stump by about 0.5 cm in water. To speed up germination, you can add a few drops of any root stimulant to the water. The container is placed in a bright place, but not in direct sunlight. Water is changed daily.  Celery stalk produces roots and new greens in 40-50% of cases
In about a week, young greens will appear from the old dried sections. This is a signal that the plant is ready for transplanting into the ground. The soil is prepared in the same way as for growing seedlings. The landing tank can serve as an ordinary flower pot. Planting a sprouted stalk is carried out as follows:

In order to organize the correct and competent care of the planted plant, it is necessary to carry out the main caring measures in time:
- regularly, but moderately water the plant, avoiding moisture stagnation. This is one of the important conditions for the growth of succulent petioles;
- the top layer of soil must be periodically loosened to provide air access to the roots of the plant;
- in late autumn and winter, you need to organize additional lighting. To do this, you can use fluorescent lamps or special phytolamps;
- feed celery every 20 days available fertilizers: mineral complex, wood ash infusion.
In about a month, you will be able to harvest the first crop of vitamin petioles and green leaves, which will be a great addition to the winter diet. Petioles, most likely, will not be as large as when grown in open ground, but they will be enough juiciness and usefulness.
Diseases and pests characteristic of petiole celery
There is an opinion that celery is a crop that is rarely affected by diseases. If you do not comply with the basic agrotechnical requirements and ignore preventive measures, then the plant's immunity will be sharply reduced, and this will lead to the defenselessness of the plant against attacks by aggressive microorganisms. In order for celery not to get sick and be resistant to pathogens, it is necessary to pay due attention to elementary preventive measures, which include the following measures:
- proper preparation and mandatory disinfection of seeds, since many pathogens are transmitted through planting material;
- strict observance of crop rotation. Celery can be returned to its old place no earlier than three years later;
- timely removal and destruction of plant residues;
- regular removal of weeds not only in the garden with celery, but also in the surrounding area, since pathogens of a number of diseases feel great on weeds and easily move to cultivated plants;
- timely liming of acidic soil;
- mandatory application of phosphate and potash fertilizers to the site;
- avoidance of dense plantings;
- destruction of diseased plants.
Compliance with these measures is especially important when growing celery greens, since the application chemicals undesirable, their use is resorted to only in cases of mass infection and a strong development of the disease.
Table: petiole celery diseases
| Disease name | signs |
| cercosporosis | The appearance of irregular or rounded spots on the leaves. Over time, they acquire a purple hue. The affected parts of the plant dry up. |
| Septoria |
|
| powdery mildew | White powdery coating on the aerial parts of the plant, rotting of leaves and stems |
| fomoz |
|
| White plaque on the tissues of the vegetable, which leads to its softening, browning and decay | |
| rust on leaves | The formation of red-brown pads on the underside of the leaf plate. The leaves turn yellow and dry, the petioles lose their presentation |
Photo gallery: symptoms of celery diseases
 Rust appears as red-brown spots with an orange border on the leaves of the plant Septoria, also called celery leaf spot or late leaf burn, is an extremely harmful disease that often manifests itself in fairly solid areas
  Plants suffering from cercosporosis develop poorly, their leaves turn yellow and dry out. White rot is the cause of significant losses of celery and the death of testes during the growing season.
  For the prevention of powdery mildew, it is necessary to use disinfected seeds, destroy plant residues, carry out deep autumn plowing of the soil
Celery pests
Petiole celery can be attacked by harmful insects. To provide good quality harvest, it is important to identify the problem in a timely manner and develop a plan to deal with uninvited guests.
Table: celery pests
| What is dangerous pest | Control measures | |
| Sucks the juice from the plant, as a result, the leaves curl, the petioles are shortened, the plant slows down growth |
|
|
| The larvae of the fly settle in the petioles of the culture. Leaves turn red or yellow, droop in the sun | ||
| The leaves curl, wrinkle, the plant slows down growth, may die. |
Photo gallery: the main pests of petiole celery
Often celery pests are the main carriers of pathogens. To prevent insects from planting celery in or near the garden, you can plant nasturtium, marigolds or thyme. The smell of these plants repels many pests.
Proper harvesting is a guarantee of long-term storage
Petiole celery can be stored for quite a long time, provided that the appropriate conditions are provided and proper collection petioles. When harvesting, you need to pay attention to the following nuances:
- the petiole variety of celery is more sensitive to temperature drops, so it is better to harvest in September-October, before the onset of frost;
- the plant is not recommended to be kept in the garden for longer than specified in the recommendations for growing this variety. Otherwise, the petioles will coarsen, become fibrous;
- cleaning is carried out carefully, avoiding mechanical damage. It is in the injured places that the roots will rot and deteriorate;
- leaves must be cut immediately after digging up the root crop;
- in root crops intended for long-term storage, you can leave the roots, and then dig them into the wet sand in the cellar.
- the harvested crop must be thoroughly dried and only then stored for storage.
 harvested must be thoroughly dried and only then stored
 How to properly store celery
If the celery stalks are planned to be eaten or processed in the near future, then they are carefully wrapped in cling film and sent to the bottom shelf of the refrigerator. For longer storage, gardeners use various methods:

Video: cleaning and storing petiole celery
Celery - very useful vegetable crop. And it does not matter whether you will grow petiole, root or leaf celery on your site. The main thing is that these plants will bring you real benefits. After all, they are grown with care and love!
Dill is the most common spice plant. But in order for its greenery to please the eye, and the taste and aroma to delight our receptors, a minimum set of agrotechnical knowledge is necessary. And it all starts with...
Not every vegetable grower succeeds in growing celery, since not all gardeners know how to sow root celery for seedlings. Many, even experienced vegetable growers, could not wait good harvest of this culture, because they did not find out in advance for themselves how to properly grow root and how to plant petiole celery for seedlings.
What conditions are necessary for growing celery root?
 Harvesting celery in the fields
 The main problem in the process of growing this garden crop is the long ripening of root celery. Planting root celery for seedlings is carried out at the end of the last winter month, or in the first spring week, as it prefers a mild, not frosty climate.

Sow directly into your soil personal plot this plant is possible only in the southernmost regions of the Krasnodar and Stavropol Territories, Chechnya and Dagestan.
In order to harvest a good crop of root celery in advance, you need to take care of the quality of the land in the garden.

The plot of the garden prepared in the fall is dug up, added to the soil organic fertilizers. In the spring, the bed is again loosened and fertilized.
The following components are good for this purpose:

- ash;

- infusion of chicken manure, as well as any preparations intended to improve the quality of the soil. Special funds can be purchased at flower shops.
In other words, in order to sow celery for seedlings in 2018, it was necessary to carry out preparatory work in the autumn of the previous year.
 Celery planted in a garden
 Early plant varieties when grown in southern regions, you can plant immediately on the garden, and with late cultures of root celery, sowing on seedlings is required. One of the main conditions for obtaining a large number of high-quality crops is the availability of high-quality seeds.

In order for the planting of root celery for seedlings to be successful, all selected seeds are placed in a jar with clean warm water and kept in it throughout the day. Those seeds that float to the surface as a result of soaking are unsuitable for planting root celery for seedlings. Sorted high-quality seeds are sown in the soil to a depth of 1 centimeter in a peat base.
Agronomic features in the cultivation of celery root

Knowing the rules for planting root celery for seedlings, the gardener can be sure that he is aware of how to plant petiole celery for seedlings.
Celery root refers to crops that require special care and close attention from the vegetable grower, all the problems of growing this crop are associated with its characteristics. The fact is that the stage of active growth and ripening of celery takes five months or more. Thus, in the northern regions, this plant simply does not have time to mature before the onset of cold weather.

Since the culture has too long ripening periods and for this reason it is necessary to plant root celery for seedlings.
In order to grow a good crop of this crop, you need to know how to sow root celery for seedlings.
Also, in order to ensure a good percentage of germination of root celery seeds, it is necessary to select high-quality seeds.
It is done like this:

- purchased seeds are placed on moistened gauze; kept in a warm room for a week;

- placed in the refrigerator for a period of 10 days.

- After the manipulations, the seeds are placed in a jar of water, and those that have surfaced are removed.
For sowing seedlings, only those seeds that lay on the bottom are suitable.
How to properly prepare the seeds of root and petiole celery for sowing for seedlings
Sowing for seedlings is carried out towards the end of the last winter month, about two and a half months before planting root celery shoots in the soil. Seedlings begin to plant with preliminary manipulations.

The seeds of the plant must be soaked in order to ensure accelerated germination.
The fact is that they do not wake up very actively, since the seeds contain a large amount of essential oils, which impede the process of active swelling in the peat base. The seed may not germinate from three weeks to one month, especially in cases where the air in the room is too dry and the soil contains little moisture.
There are two main processing methods seed material petiole and root celery:

- In the first method, the seed is kept in oxygen-enriched water for a whole day. After that, they are treated in a slightly pink solution of manganese for about 1 hour. All manipulations are carried out in a warm room.

On the last step preparation, the seed is washed in warm water, and then seedlings are sown.
- In the second method, the seed is kept in a solution of manganese weakly - Pink colour about an hour, then washed in warm boiled water.

After that, root celery seeds are soaked for 18 hours in any of the special preparations offered by special stores. Good feedback there is a product "Epin". To create a product of the desired concentration, you will need two drops of the product per 120 milliliters of water. All manipulations with inoculum are carried out at room temperature. Only after the preparation has been carried out, it is possible to sow seedlings.
The manipulation plan for both methods of seed treatment cannot be changed and must be strictly followed.

At the last stage preparatory work, seeds are evenly scattered on the surface of moistened matter and left in a warm room for germination at a room temperature of at least 20 degrees C.
Only after that it is possible to sow seedlings.
Planting celery root for seedlings
To sow celery for seedlings in 2018, the majority of gardeners use pots that are placed on the windowsills.

For this purpose, specially prepared nutrient soil is poured into a container intended for planting root celery for seedlings, in which 1 kg of humus mixed with sand is added to 3 kg of peat.
Then, 250 grams of ash and a teaspoon of urea are added to the prepared mixture.
The germinated seeds are thoroughly dried in the shade, after which the root celery is planted for seedlings in boxes filled with moistened soil. You can pre-place the seeds on the strip toilet paper at an equal distance from one another. The gluing of the seed to the strip of paper occurs due to the paste prepared in advance from flour.

Between planted seeds should be at least 3-4 cm.

Sprinkle paper tape with seeds thin layer sand, which, as it dries, is constantly moistened with a spray bottle. Sand is needed because the seed germinates faster in the open air. In approximately the same way, the planting of petiole celery for seedlings occurs.
How to properly care for seedlings of celery root

A container with sown seeds is placed in a warm room and covered with a film material.

If the room is not well lit, then lighting fixtures are installed above the seed boxes.

From the moment of sowing to the germination of the first shoots, as a rule, a little less than two weeks pass. As the soil dries, the sprouts are moistened with a spray bottle (the water should be at room temperature).
It is strictly forbidden to water the plants at this stage of growth, because this will result in the appearance of the so-called "black leg" on the surface.

To ensure the normal growth of seedlings, the seed container is kept at a temperature of at least 22 degrees.

After the formation of the first sprouts, the film is removed, and the container with the crops is moved to the windowsill most illuminated by the sun, while the temperature in the new place should be at least 16 degrees.
Pick features

A month and a half after planting, celery grows inactive, increasing its volumes very little. After one month from the moment of sowing, when the seedlings have 2-3 well-formed leaves. Seedlings are thinned out, between the leaves there should be a distance of five centimeters.
They also carry out the transfer of plants, suitable for this:

- peat pots;

- disposable cups;

- special boxes for crops, greenhouses, greenhouses.
The required soil density for growing seedlings should be at least ten centimeters.
Important. In the process of picking, the plant is immersed in the prepared soil mixture up to half, without exposing the root system, such an error can provoke delayed development.

When transferring the shoots to the greenhouse, they are placed at a distance of six centimeters, between the rows is left from 7 to 8 cm. The transplanted plants are carefully watered and covered with moistened paper for two days.
The most suitable temperature regime for ensuring rapid rooting of plants after picking is fifteen degrees, and at night it can drop to 11 degrees.
Feeding and watering plants
Care for growing sprouts includes loosening the soil, watering and fertilizing. For the first time, feeding is carried out twelve days after the picking procedure.

For this purpose, a nutrient mixture is used, for the preparation of which one teaspoon of nitrophoska is taken in a bucket of water.
Watered, spending 1 tablespoon of the solution for 1-2 plants.
If the leaves of the plant look too weak, then it is fed with urea at intervals of two weeks. In order not to damage the leaves of plants with chemicals, they are washed with warm water after feeding.

A week before the transfer of crop shoots to a place of constant growth in open soil, the plants begin to harden. To do this, they are taken out into the air for a start for the whole day, and then for the night.

Seedlings are planted on the bed after the appearance of five developed leaves. This happens about 60 days after planting petiole celery for seedlings. Five days before the seedlings are moved to the ground, the plants are taken out into the air, before that they are actively watered for two hours.

A few hours before planting petiole celery, the sprouts are well watered with warm water, so that the soil is well soaked.
Suitable time for planting celery root on garden beds from the end of April to the middle of May. Landing time depends on the climatic conditions of the region. In the southern regions, in warm weather, celery can be transplanted earlier.
planted earlier plants have a better yield compared to those that were planted in the ground later. Too early planting can lead to the formation of too many flower stalks.
It takes root well and gives a good harvest of seedlings, which managed to grow up to 15 cm in height and have 4-5 developed leaves.
From weak, poorly developed shoots, there will be no good harvest.
Sowing petiole celery for seedlings

Sowing petiole celery for seedlings and caring for this crop remains the same as when growing root and leaf celery.
Planting petiole celery for seedlings is carried out at the end of February at the beginning of March. What is the pre-prepared soil mixture.
To sow petiole celery for seedlings, the seeds are processed and germinated. After that, you can plant petiole celery for seedlings.
Only the process of fertilizing must be carried out taking into account several rules. The plant loves good watering and loose soil.

At the same time, too active soil pouring should not be allowed, as this will lead to decay of the root system. To avoid drying out, the soil must be mulched.
Fertilizers are applied to the soil every two weeks. For this purpose, it is best to use organic mixtures, such as an infusion of chicken manure or nettle.
Sowing petiole celery for seedlings, like sowing root celery, requires special skills and knowledge from the vegetable grower. However, if you follow elementary rules to prepare seeds and select them, to feed and water the plants in a timely manner, then the labor expended will lead to excellent result. The main thing when planting celery is to take into account the timing of plant ripening.
Thus, planting root celery for seedlings and further care this plant should be carried out very carefully, adhering to all the rules of cultivation.