The kitchen furniture market is striking in its diversity. Incredible design solutions win the hearts of housewives, versatility delights, and only exorbitant prices make most of us come down to earth and think about an alternative option.
If you have a craftsman's streak and you like to work not only with your hands, but also with your head, the ideal option for you would be to make a kitchen set with your own hands. It will not be difficult for you to find all the necessary material, all the fittings and tools that you may need during the work in stores or markets.
And, believe me, the quality of your homemade kitchen set will not be inferior to its factory counterparts, but the price of the final result will pleasantly surprise you.
With the desire to make a kitchen set yourself, everything is clear - you are ready to completely immerse yourself in work and, perhaps, exceeding all expectations, create something “brilliant” and maximally functional. Fine. Let's decide how you will do this.
 There are several ways to implement your plan.
- You can purchase ready-made kitchen unit parts and assemble them, following the assembly recommendations. This is a very simple option in which you will get a standard kitchen.
- You can contact one of the specialized companies that will help you with the project, cutting necessary details, edging. You will only need to pre-set the dimensions and then assemble everything yourself.
- You do all the work (measurements, cutting, assembly) yourself and as a result you get an exclusive, high-quality and practical set.
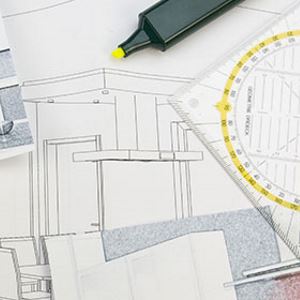
So, you settled on the last option, which means you need to “turn on” your head, arm yourself with a pencil and ruler, and finally get down to business.
Simplicity and practicality of design are the key to comfort. Work triangle rule
The first step in creating a kitchen set is choosing its design.
- – classic version kitchen area any sizes and layouts. Kitchen set, located in one row, will surprise you with its ergonomics, symmetry and functionality.
- Two-line kitchen– ideal for a through or elongated kitchen. The furniture is located along two parallel walls.
- Corner layout– suitable for almost any room. The set is located along two walls, saving space.
- U-shaped layout– is the most convenient and safe, but is only suitable for large kitchens. Placing furniture and equipment in this way ensures the most comfortable work.
- Island or peninsula– preferable for large rooms. Ideal for zoning. The island/peninsula contains a sink, stove, workplace or serving table.

The rule of the “working triangle” is quite simple; it consists in visually combining the main elements of the kitchen. These elements include the stove, sink and refrigerator.
Three main zones - the cooking zone, the washing zone and the food storage zone - are the basis for organizing the kitchen space. Their correct design will further influence the ergonomics of the entire kitchen.
Ideal material
The next step towards your goal will be choosing the material from which your set will be made.
- Chipboard chipboard. Essentially, these are compressed wood shavings and sawdust impregnated with a substance based on formaldehyde resin. This material has many advantages: availability, strength, light weight, moisture and water resistance, resistance to chemicals and mechanical stress, ease of maintenance. Ideal for wall cabinets.
- MDF fiberboard. MDF is a material made from compressed sawdust, “bound” by resins. The set is rarely used in the manufacture of frames, shelves and walls; it is more suitable for facades.
- Natural wood – solid wood. Most often, solid oak and beech are used to make kitchens; models made of birch and pine are also found. They are distinguished by density, strength and flexibility, as well as an amazing noble texture. The material is not cheap - be prepared for this.
These are the main materials used for the kitchen. There are even more options for facades.
Characteristics of the material used for the kitchen facade
Name of material | "Pros" | "Minuses" |
| Painted MDF |
|
|
| Solid wood |
|
|
| MDF covered with PVC film |
|
|
| Plastic |
|
|
| Frame MDF |
|
|
| Laminated chipboard |
|
|
| Aluminum profile at the base of the facade |
|
|
Each material is unique in its own way, each has its own distinctive features.
Do not judge the appearance of the item you are interested in by the photo - go to a furniture store and clearly see that you have made the right choice, or vice versa.
Let's start with perhaps the most important stage- measurements. At this stage, you should already decide what design your set will be and where exactly its main elements will be located.
 We start measuring with the most important distances - the distances between the walls. We designate the protrusions, battery, window and doorway. Don’t forget to measure the location of the switch, sockets, and drain. We check everything repeatedly and transfer it to the drawing.
When taking measurements, measurements must be taken at several levels - closer to the floor, at waist level, near the ceiling. Slight deviations may occur due to uneven walls.
It is better to correct these same “irregularities”, but you can simply take them into account when designing the cabinets.
Pay attention to water or gas pipes - subsequent installation of the kitchen will be difficult if these nuances are not taken into account.
First, create a schematic drawing without following the scale.
Take measurements of the main household appliances and add them to the plan gas pipe and, accordingly, the size of which will determine the size of adjacent cabinets and cabinets.
Now we calculate the height, width, depth of each individual element, and write it down in the plan.
Calculation of each individual element
When the general dimensions of the future headset are known, we will determine the dimensions of its individual elements. The figure shows an example of “cutting out” a cabinet for an oven and hob. Similarly, we calculate each detail of each cabinet.
To simplify the calculations, let’s draw a cabinet and “divide” it into boards. We write down the sizes of each.
Note! The calculation of the internal shelves is carried out as follows: subtract 32 mm from the width of the cabinet (the thickness of the chipboard is 16 mm, you have two boards) - we get the width of the shelf.
Let's make a list of everything you need and go order, not forgetting about the accessories. As a rule, in the workshop where the cutting is carried out, they also work on adhesive edges. Achieve on your own perfect result It’s unlikely to work with gluing, which means we order this service as well. It’s also not worth taking on the responsibility of milling the holes.

The final stage is assembly
So, all materials were brought from the sawing workshop. We lay out all the elements for each cabinet, checking the contents, and begin assembly.
Advice! Make sure everything is necessary tools for assembly you have in stock. If something is missing, it is better to get it in advance rather than then run around the shops in search of this or that item.
You will need:
- drill;
- hammer;
- roulette;
- pencil;
- drill for confirmation holes;
- screwdrivers;
- confirmation key;
- screwdriver
Each detail of each individual cabinet is installed in stages. There are no strict rules in this process, the main thing is accuracy and precision, otherwise the damaged chipboard will have to be replaced and the work will stop.
It is better to assemble cabinets gradually, without cluttering the kitchen. The assembly of the lower part of the kitchen unit is completed by installing the countertop. If the tabletop is not solid, but consists of several parts, it will be necessary to use a special connection.
The optimal height for hanging elements is considered to be 135-140 cm from the floor level. This is the mark of the bottom edge of the wall cabinet, and this is where the wall border is fixed.
We lift one of the cabinets and mark the mounting points on the wall. We remove the cabinet again and use a drill to make holes for the anchor fastenings; they will firmly and reliably fix the heavy structure. We fasten the first and subsequent elements of the headset according to this algorithm.
For a person who has taken up the task of assembling furniture on his own for the first time, the process may seem complicated, but don’t be discouraged - review the materials and assembly instructions again, and you will succeed.
Finish line
The kitchen set is assembled and installed. To get the “ideal picture” we install electrical appliances and equipment. That's all. Job is done.
Your family will rightfully appreciate “your creation,” and it will delight you for many years. And if you want something new, go ahead! Are you already an expert in this issue- go for it.
9. Drying, assembling and installing cabinets in their place in the kitchen. At this stage, the final version of the kitchen was already visible. Varnish, stain and sanding did their job - they are beautiful. Installation in place in the room was carried out in 3 hours, I really wanted to quickly install everything in its place. First, I hung the upper cabinets using pre-installed rails. After which I assembled and installed the main and lower cabinets without installing the fronts.
10. Making a countertop. The tabletop is a separate “song”. I wanted mine too self-made. After searching the Internet, I found several options and settled on a tabletop with a base made of plywood and faced with caramogranite tiles. Here is the process of making a table top. In general, there is nothing to add here, everything is clear from the description. On my own behalf, I will only add that the legs for cabinets need to be chosen really good and strong, so that they can support the entire structure along with the contents of the cabinets.
11. Installation of closing/opening elements and mechanisms on cabinet doors and shelves. Responsible point. It is important to choose the right hinges and rollers so that they meet all the needs of your kitchen, so that the rotation and exit/exit/sliding angles of kitchen doors and shelves are ensured. Each product, be it a loop or rollers, indicates the dimensions that must be observed and maintained when installing it. If you follow these instructions, it won’t be difficult to install them in place. Of course, installing them will require special tools, such as a Forstner drill. The thing is inexpensive so you can buy it. It is important to maintain symmetry when installing hinges and rollers so that the door or shelf does not warp when closing/opening.
12. Production of kitchen facades (cycle according to items 3-8) with milling of the ends and patterns on the front side. I also made the facades by hand. At first I wanted to order, but after learning the price and looking at the samples, I decided that I could do it myself at least as well. I had to buy it again manual frezer. I didn’t take the cheapest one, but the second to last one in price. The work will be one-time and there is no point in taking an expensive router, I don’t need it. The work procedure for the manufacture of facades is similar to those specified in paragraphs 3-8. The coating with stain and varnish is similar to the frame. The only difference is that the cutter applies the pattern to the front surfaces of the facades. Well, I bought a router, I also have hands. I practiced on the scraps and started doing the main work. I started with small doors. For them, a template was made according to which a pattern was transferred using a milling cutter, repeating the arch in the passage of the kitchen and room. Then came the turn of the large doors of the facades. A larger template of the same configuration was made for them. At the ends I processed the facades with an edge cutter, and transferred the design with a groove cutter. The cutters are expensive, I charged 500 rubles apiece and bought two of them: one edge cutter and one groove cutter. I will add that milling work must be done outside, in the open air: there is a lot of dust and shavings. It’s also possible in an apartment, but you’ll have to clean the vacuum cleaner often :)
13. Installation of glass parts, shelves and trays for drying dishes in cabinets and sinks. After assembling and installing all parts of the kitchen in their places, you can install the filling. I screwed the glass parts using special fasteners for glass. I bought pallets and dryers ready-made to fit my size - installation was the simplest, with screws.
Properly selected kitchen furniture will provide comfort during work and will fit organically into the overall design. You can choose a ready-made kit, order custom-made ones, or make a kitchen set yourself.
DIY wooden kitchen set
Advantages
Even with little carpentry experience, you can cope with the task. Making a kitchen with your own hands will allow you to:
- Reduce the cost of the headset several times (at least 2). The difference is especially noticeable if, due to the features and layout of the kitchen, a standard set of furniture is not suitable, you need to make it to order;
- Create individual scheme design that best meets functional requirements;
- Make a unique set, give it an original shape;
- Be sure in high quality assembly at minimal cost.

Luxurious wood-effect corner kitchen with dark countertops
At the same time, you will need to spend time developing drawings and diagrams for making a kitchen set with your own hands, choosing the material, and the manufacturing and assembly process itself. It is necessary to have skills in working with tools - this guarantees quick results.

DIY kitchen set with beautiful top drawer fronts
Material selection
It’s easier to make your own kitchen from chipboard. To make the headset cheaper and maintain good performance characteristics, several types of material are used:
- For the base of the structure, ordinary chipboard slabs are suitable. The back walls can be made of fiberboard, the side and bottom walls can be made of chipboard. When purchasing, you need to pay attention to the leakage class of phenol compounds. It is better to choose E1, it is quite durable and emits less phenol-containing substances than E2, E3. A more environmentally friendly option is MDF and solid wood, but they will cost more;

Do-it-yourself corner kitchen set made of chipboard
- Kitchen furniture fronts - doors and front walls drawers must be made of material that can withstand constant cleaning. They can be made of wood, with carved designs, or glass inserts. Can buy ready-made facades from MDF. A more budget option - smooth chipboards, covered with paint or self-adhesive film. Their service life is much shorter, unlike wooden furniture, which can be stored for more than one generation;

Kitchen made of MDF, painted green
- The tabletop must withstand moisture, temperature, and be scratch-resistant. A chipboard covered with film or varnished will quickly lose its appearance. Laminated or postformed would be more suitable. The last option is a slab covered with a layer of plastic, resistant to impacts, offers many color and pattern options, and can imitate the texture of stone or wood.

Ceramic tiles as countertops for working area
Important! If a stove is built into the kitchen unit, wood for the structure is not suitable for fire safety.
An expensive option is a countertop made of natural or artificial stone. At home, it is difficult to make a cutout to install a sink and appliances. You can do the work in a specialized company, but you will have to spend money.

This is what an artificial stone countertop looks like in a kitchen work area
You should not make a modular kitchen out of solid wood. The material is subject to shrinkage, shrinkage will lead to an uneven overall surface.

DIY kitchen with plasterboard niches
Required Tools
To make cabinets and install kitchen units with your own hands you will need:
- Roulette, ruler;
- Jigsaw;
- Hacksaw, pliers, hammer;
- File, sandpaper;
- Stationery knife;
- Electric drill and drills;
- Screwdriver;
- Screwdriver;
- Electric planer;
- Level (for greater accuracy - laser), plumb line;
- Workbench, vice;
- Clamp.

Necessary tools for DIY kitchen assembly
The fasteners you will need are:
- Confirm screws;
- Guides for drawers, it is better to choose ball ones;
- Furniture ties for connecting sections;
- Crocodile hinges for attaching doors to cabinets;
- Dowels for installing tabletops.

Assembling the bottom drawers of a modular kitchen set
Additionally, you need to select handles for drawers and doors.
Measuring features
First you need to decide what the design will be: angular, as in the photo, or straight. The first allows you to save space. For a beginner, it is easier to perform a direct type modular design. It is easier to move it away from the wall if necessary, and it is easier to replace or repair a separate cabinet. To make a corner kitchen with your own hands, you can use photos of drawings with dimensions:

Project of the lower cabinets of the future kitchen set
Attention! When making a kitchen with your own hands, drawings and diagrams must be completed after purchasing built-in appliances and a sink in order to take into account their dimensions. If you purchase ready-made facades, you should focus on their parameters.

Making a kitchen from plywood with your own hands
When determining the design scheme, you need to consider:
- The presence of gas, sewer pipes and water supply - during installation you will have to make recesses for them, and the sink cabinet is made without a back wall. For stability, you need to secure the walls of the structure with metal corners;
- Size of the hood – a special cabinet can be made for it;
- Dimensions of the dryer in the cupboard. It is better to purchase it in advance and adjust the dimensions of the pendant module to it.

Connecting water filters and other communications
The corner kitchen is designed taking into account the same features. For hanging cabinets you need to determine a convenient height. You can use the drawings and diagrams in the photo to make your own kitchen:

Calculation of a typical cabinet for a modular kitchen


Another drawing that can be used in practice

DIY kitchen assembly process
Main details
After determining the number of cabinets and their sizes, you can proceed to the manufacture of parts.

Marking places for fasteners
A standard cabinet consists of 4 parts:
- Horizontal (2 pcs). It is located between the side walls, to which it is attached with confirmatory screws. Its width should be less than the finished cabinet by two thicknesses of the side walls. If the chipboard is 1.6 cm, and the cabinet width is 80 cm, then the horizontal size is: 80-(1.6*2) = 76.8 cm;
- Side wall (2 pcs);
- Shelf (usually 1 piece). It can be screwed to the walls, then its width should be equal to the horizontal. If you make it removable and lay it on shelf holders, for convenient installation you need to make it 3 mm narrower than horizontal;
- Back wall (1 piece). To make the structure lighter, it is made of fiberboard. The height and width should be fewer parameters housing by 5 mm. This eliminates the wall from bulging with small cutting errors.

Cut material for future headset
The parts are cut out with a jigsaw after careful measurements. You can order a cut when purchasing materials. It will be done for an additional fee. The furniture factory already has blanks that are used for sawing. As a standard, their sizes are multiples of 15, which must be taken into account when drawing up your own drawings and diagrams for a kitchen set. Blanks can be made to individual sizes, but it costs more. Finished parts for each module must be numbered to avoid confusion during subsequent work.

Lower kitchen cabinets assembled
Workpiece processing
When moisture gets inside the cut, the product swells and becomes deformed. Gluing the edges to the edges of all parts will help avoid this. It should match the blanks in color. On one side it is treated with glue, which melts when exposed to high temperatures.

Corners of drawer joints treated with silicone
Edging is done using an iron and thick fabric:
- The iron heats up to medium temperature;
- The part must be placed with the cut facing up, measure and cut off the edge (with a margin of 2-3 cm), and attach it to the cut;
- Heat the edge with an iron, pressing it firmly against the part. The movements are smooth, do not stay in one place for a long time, so as not to burn the tape. The glue will melt a little. Without waiting for it to cool, press it with a cloth folded in several layers;
- After cooling, trim the protruding edges of the edge with a stationery knife without scratching the surface of the workpiece;
- Carefully file the cut edges so that there are no sharp or clinging areas.

Do-it-yourself edge trimming
For convenience, build a stand for workpieces from a board and two bars that are attached to it. You can place the part between them, freeing up your hands for edging.

Varnishing the facade of a kitchen unit
Assembly and installation
Before starting work, you need to sort the parts for each cabinet to ensure completeness and save time during assembly.
Base cabinets

Assembling lower cabinets for the kitchen
All parts are connected in the following order:
- Assemble a drawer (one or several, depending on the model). Attach guides for the retractable mechanism to the outer sides, parts of which are attached to the side walls of the cabinet;
- Twist the horizontal and side parts of the box, secure the shelf or holders;
- Check the diagonal - place the body face down on the floor, use a tape measure to measure the distance from opposite corners, it should be the same;
- After nailing the back wall on one side first, check the diagonal again. Secure along all edges, the distance between nails or screws is 10 cm;
- Screw the legs by turning the cabinet upside down.

Assembling lower cabinets for the future kitchen
Place it in the desired location and then screw the doors. After installing the cabinets, you can fasten the tabletop.
Upper parts
The principle of cabinet assembly is similar to the lower cabinets. You can secure the upper modules using mounting strips: one is screwed to the wall, the other to the cabinet. First you need to determine at what level the mounted modules will be located. To keep the plank level, you need to use a level to mark the line for its future location. You cannot measure the distance from the floor to the plank with a tape measure to avoid unevenness and distortions.

Attaching upper cabinets to a mounting plate
After securing the rail to the surfaces, you can hang the cabinets. Check their location with a level and tighten the modules together using a clamp. Place wooden spacers between the tool and the cabinet walls to avoid damaging the surface.

Upper kitchen cabinets before and after painting
Intersectional ties will help secure the cabinets together, for which you need to drill holes inside the cabinets. To prevent chipping, hold a block of wood where the drill exits. The work is completed by installing the doors on the upper cabinets.

The final stage of kitchen assembly with carved facades with your own hands
Modeled after an old kitchen
If the design of the installed headset is suitable in shape and size, but needs to be replaced, you can use it as a basis for manufacturing new kitchen with your own hands instead of drawings:
- Disassemble the old modules into parts, number the parts of each so as not to confuse them later;
- Clean them from dust;
- Take measurements according to which the parts of the new headset will be manufactured;
- Cut out pieces of the desired shape from a sheet of chipboard;
- Connect, secure new fittings, install in place.

DIY kitchen furniture decor
During the work, you can adjust the sizes of some parts if they are not satisfactory. You can rely on photos of drawings and dimensions to make a kitchen with your own hands.


The question of making a kitchen set yourself often arises after renovations have been carried out in this room. It often happens that a set that seems to be suitable in price and design does not fit into the actual dimensions of the kitchen. There are a lot of offers these days for making custom-made headsets, but the cost is quite high. Having assessed the prices of furniture, as well as their financial capabilities, some owners come to the conclusion that they can save a decent amount if they build a kitchen (hereinafter we mean its furniture content) on their own.
If there is at least minimal experience When working with carpentry tools, in processing wood-based materials, then installing the desired structure yourself according to a drawn-up personal project is a completely realistic task. with your own hands can be assembled from ready-made parts made in a workshop according to a specific drawing, or made “from scratch” from natural wood and furniture panels of various types.
Why is it better to make a kitchen yourself?
Objective reasons for making your own kitchen according to your own sketches and drawings are the following:
- It is possible to create furniture cabinets and shelves that are ideal for a specific room in terms of its parameters and configuration. In addition, when creating a kitchen sketch, you can immediately determine the convenient location of all kitchen accessories, the number and shape of furniture pieces.

- Considerable cost savings are achieved, since a ready-made set will cost significantly more, although it can be made from the same material, which you can choose yourself. Everything is understandable - in addition to the material, you have to pay for the work of the craftsmen, transportation costs, whole list any other taxes and withholdings known only to accountants. All this is included to one degree or another in the selling price of the kit.
- The exclusivity of the design of the furniture set is ensured.
- It will probably not be an exaggeration to say that for the majority of real owners (let’s not take into account pathological lazy people) such independent furniture making becomes a very exciting activity, an opportunity to show their skills and creativity. Well, the finished kitchen furniture, made with one’s own hands, is an indisputable source of pride.
As you can see, there are quite enough reasons for making a kitchen set with your own hands. Well, their totality should generally dispel all doubts. Naturally, if the owner is not a complete layman in these matters.
Creating a future kitchen project
First step - sketch
You should start creating a kitchen set with a project, which is best done in the form of a sketch, and then an exact drawing. The sketch will help you visualize what the kitchen will look like, and the drawing with the dimensions taken from the location of the unit will become a guide both when ordering material for further work and for assembling parts into a single structure.

The sketch takes into account the features of the kitchen space and the possibilities of placing furniture in it. If a project is being developed for a standard kitchen in a multi-storey building, then the most popular options are or kitchen wall, installed in one line.
Taking measurements and taking into account design features
In order to meet all the necessary requirements when creating a project, you should make careful measurements of the kitchen installation area. When conducting them, they take into account following parameters premises:

- The length and height of the walls along which it is planned to install the kitchen unit.
- Wall length from front door to the corner of the room.
- Distance from window opening to wall.
- When taking measurements, it is necessary to separately indicate at what distance from adjacent walls the communications are located - sewer and water pipes, as well as the gas main.
Knowing these parameters, you can proceed to determining the size of furniture cabinets, which should both fit into the designated area and be convenient to use.
 Example of a sketch project corner kitchen with marked dimensions
 The following parameters are standard for a kitchen set:
- For floor cabinets:
— height - 850 mm;
— depth can vary from 500 to 600 mm;
— width - from 300 to 800 mm.
- Wall cabinets may vary slightly in size, as their parameters depend on the height of the ceiling and the preferences of the kitchen owners:
- their standard height is considered to be 850 mm, but it can be increased to 900 mm if you plan to raise them to the ceiling, or reduced to 800÷700 mm;
— cabinet depth - 300 mm;
- the width, as a rule, corresponds to the width of the floor cabinets planned under the wall cabinets - this way they look more beautiful in one “ensemble”. Although this requirement is optional.
In addition, when drawing up the drawing, the following factors must be taken into account:
- The location and size of the sink, as well as the fact that a separate cabinet or section of the countertop will have to be provided for it.
- There should be cabinets on both sides of the sink ( vacant plots tabletops) having a width of at least 300 mm. Their surface will add comfort when using the sink, and the cabinets themselves will serve for storing kitchen utensils. In addition, one of the cabinets can be used to install a washing machine or dishwasher.
- The upper part of the headset must include at least two sections.
- It is necessary to provide space above the hob for.
- When drawing up a plan, you should also immediately indicate the location of the refrigerator if it is installed in one of the headset lines.
 Optimal distance between the sink and the stove
 - It is very important to maintain the distance between the sink and the hob, since according to standards it should be at least 450÷500 mm.

- The distance between the hob and the hood should be 750 mm for gas and 650 mm for electric stove. This will ensure good removal of rising vapors and proper operational safety.
A sketch of the kitchen can be drawn by hand on a checkered sheet, which will help maintain the proportions of the actual dimensions of the area where the furniture will be placed. A more “advanced” option is to use one of the 3D modeling computer programs, for example, “PRO 100”. In the latter case, it will be possible to take into account every millimeter of the allotted area.
 On the Internet you can find many interesting applications that allow you to plan the placement of furniture and get ready-made drawings of each of the parts
 If the sketch will be drawn up manually, then it is additionally necessary to make drawings of the furniture. These graphic documents contain the exact dimensions of the structure, since all its components will be manufactured according to them.

If drawing up a drawing seems to be an impossible task due to inexperience, then you can use one of the options presented on the Internet. Surely, if you wish, you can find options both for standard kitchens of the main series of high-rise buildings, and for non-standard kitchen premises.

When choosing a specific project, you must immediately take into account your capabilities for manufacturing individual structural elements. For example, shelves that have curved shapes, since this will require not only a special tool, but also sufficient skills to work with it.
Chipboard cutting map
Based on the compiled drawing, it is necessary to draw up a chipboard cutting map. It will help you decide on the quantity required material, will reflect the distribution on sheets of all the blanks necessary for the set.
To create this graphic document, you need to know standard parameters chipboard slabs onto which the details of the kitchen unit will be projected.
Today chipboard slabs with polished and laminated surfaces, having different thickness and linear dimensions.
 An example of a cutting card for chipboard sheets to fit the dimensions of furniture blanks
 Chipboard boards can have standard thicknesses of 8,10,12,16, 18, 22, 25, 28, 32 and 38 mm. For the walls and shelves of the floor part of the set, a material with a thickness of 16÷20 mm is most often chosen, and for wall cabinets, 16 mm chipboard is suitable. If desired, you can choose a larger sheet thickness.
 Chipboard sheets of various thicknesses
 The linear dimensions of polished boards are usually 2440×1830 or 2750×1830 mm, and those of laminated material are 2800×2070 and 2620×1830 mm. The parameters of the slabs are designed for standard furniture blanks, so from them you can select options that will be cut with minimum quantity waste.
 Example of countertops from laminated chipboard for desktop
 The worktop for the kitchen work area is purchased separately. The consumer can choose from different models according to options external design and in thickness. The recommended thickness is 38 mm, especially in the area where the insertion is planned hob or washing. However, judging by the reviews of both craftsmen and kitchen owners, even cheaper high-quality countertops with a thickness of 28 mm serve quite successfully for years without requiring any replacement.
But making a decision (in a fit of unbridled savings) to make a tabletop simply from an ordinary sheet of chipboard, even if a large load is not planned on it, is unacceptable. The operating features of this area require a special wear-resistant coating and a special configuration of the front edge, which does not allow the accumulation of moisture from drops flowing from the table. A well-made product is completely closed on all sides, leaving only the unprotected end cuts, which must also receive the necessary processing, but during furniture assembly.
You can draw up a drawing of the slab cutting map yourself or use a computer program for this purpose. Many companies involved in the sale of furniture chipboard (MDF) provide free service to compile such maps, on the basis of which cutting is then carried out.
Both wall and floor cabinets can have separate or common walls, depending on how they are located in the set.
The lower part of the set, installed on the floor, most often uses common walls that divide the cabinets into sections. Thus, this part, after fastening the workpieces, becomes non-separable. However, if you plan to maintain the ability to rearrange the kitchen furniture, then each cabinet should be assembled separately. But in this case, of course, the cost of material for blanks will increase.
So, in the chipboard or MDF cutting chart, according to the developed drawing and dimensions of the structural parts, the following parts of the structure should be placed:
- Side walls of the headset.
- Separating walls that will delimit the common floor and hanging structure for separate cabinets.
- Blanks for shelves.
- Rear walls. They are best made from a lighter material - it can be fiberboard or thin 3÷4 mm plywood.
- Front doors.
On the cutting map, it is best to indicate, in addition to the dimensions of the parts, their numbering or names. This will make it easier to navigate when cutting slabs and during assembly.

The tabletop is selected separately. Its length must correspond to the length of the floor part of the headset, since hob and the sink, as a rule, cut into its surface, and the washing and Dishwasher is installed under it.
In addition to furniture blanks, you must purchase the following parts to assemble the structure:
- The edge of the corresponding Chipboard colors, which forms the front ends of the walls and shelves of the set before its assembly.
- Fittings: hinges and handles.
- Masking strip for the gap between two parts of the table top and end caps.
- Drawers will require slides (pull-out mechanisms).

- Furniture metal fasteners and wooden dowels.
- Metal or plastic corners for fixing perpendicularly located parts.
- Adjustable legs, with which you can set the floor part of the headset strictly horizontally.
If you plan to make doors that open in a special way, for example, by lifting up or folding, they will require special mechanisms - there is no shortage of such products in our time.
Now, knowing what parts and materials will be needed for the manufacture and assembly of a kitchen set, you can go to a specialized store furniture materials, where you can usually immediately order cutting of slabs according to the cutting map provided. If desired and available special tool, cutting and edge processing can be done independently. But you also need to be able to do this, have the appropriate quality tool. That is, it is better not to take risks and entrust this process to professionals working on high-precision equipment.
Carrying out installation and assembly operations
Tools for work
To assemble the blanks into a single structure, you will need tools, some of them are in every home, others will have to be purchased. But they will definitely come in handy later for other repair or construction work.

So, the tools you need to prepare are:
- An electric drill and a set of wood drills, including confirmation ones for furniture screws.
- Bits of different sizes for screwdrivers, including hexagons.
- Construction square.
- Level.
- Clamps, at least 4 pieces.
- Pliers and hammer.
- Scissors.
- A syringe gun for applying “liquid nails” glue and sealant.
- Iron for gluing edges.
Kitchen set assembly
The most difficult thing is to start the assembly process, because craftsmen who do not have experience in this work do not know where to start. Once the first steps are completed, the process will go faster. In fact, the blanks are a kind of “constructor” from which the kitchen must be assembled.
| Illustration | Brief description of the operations performed |
|---|---|
 | The first thing to do is to sort out the blanks, arranging them by size, guided by the project drawing, which also shows all the parameters of the headset. After the parts are distributed into piles, it is recommended to sign them, indicating their belonging - walls, shelves, etc. Such preparatory activities will greatly simplify the work. |
 | After cutting, the ends of the panels facing the facade, as well as those intended for cabinet doors, must be covered with a special edge tape of a color that is in harmony with the main shade of the set. The tape is fixed using a heated iron. When the tape is heated, it should protrude slightly beyond the edges of the panel. After the material has cooled, this excess must be carefully cut off immediately. sharp knife. An ordinary stationery knife with a new blade will be suitable for this purpose. |
 | The process begins with assembling the floor part of the headset. Therefore, it is necessary to take the lower panels of the structure and immediately attach adjustable legs to them, if they are provided for in the project. To do this, the panels mark the installation locations of such supports. Then the legs are applied to the marked points, and the points are marked on the panel with a pencil through the holes provided for fastening. Next, blind holes for fasteners are drilled along the marks. It is best to first place the legs on glue, and then additionally screw them with self-tapping screws. The legs can be attached in different ways - this depends on the selected model of the part. The legs should be secured to all bottom panels. |
 | The next step is to assemble the walls of one of the cabinets. To make them stand at right angles to each other, you can use perforated corners made of metal 2 mm thick, so the connection must have a certain rigidity. Of course, it is recommended to first check these corners to see how perpendicular their shelves are. You can come up with another “conductor” that will help align the two mating panels exactly at right angles. The corners are fixed at the top and bottom at the junction of the panels using clamps. |
 | Then, the fastened walls must be screwed together with screws, for which socket holes are drilled using a commercial drill. The drill is designed to form a hole that has different levels different diameters required for this euroscrew. Thanks to this configuration of the socket, the screw will tightly hold the two panels, and its head will fit into the chipboard flush with the wall surface. It is certainly possible to apply regular drills, but you will have to constantly rearrange them, and the work will go much slower. A special drill is not so expensive, especially since it will have plenty of work to do when assembling the set. |
 | The panels must be fastened at three points by drilling sockets at a distance of 50 mm from the top and bottom edges, as well as in the middle of the joining pieces. To accurately mark the location of the hole, 8 mm should be retreated from the side edge, with a chipboard thickness of 16 mm and 9 mm, with a panel thickness of 18 mm. To screw a furniture screw into the screwdriver, a hexagonal bit attachment is installed. All chipboard panels are fastened together in a similar way. |
 | To make it clearer, the illustration shows the principle of connecting two perpendicular parts with confirmations. |
 | The bottom panel of the cabinet is also first fixed to the side walls with clamps, and then twisted with furniture screws. |
 | Another way to mutually fix the panels can be wooden choppers - dowels with a diameter of 8 mm. They are installed in sockets drilled in the end of one panel and along the edge of the other. The dowels are carefully driven into these holes, previously coated with glue. This installation method is more complex and requires perfectly precise marking of the drilling holes. |
 | In order for the marking to be accurate, after gluing the dowels into the lower end of the wall, it is laid with a shift on the bottom panel, leveled and tightened with clamps. After this, on the bottom panel, focusing on the already installed dowels, mark the points at which holes are drilled, with a diameter and depth corresponding to the size of the fasteners. Then, the holes are filled with glue and the side wall of the cabinet is joined. In order for the panels to be assembled exactly at a right angle, they should be fixed on them in the same way as in the first option using clamps. metal corners. They can be removed after the glue has dried. |
 | After the walls are fastened to the bottom panel, the back panel, made of fiberboard or thin plywood, is nailed with small nails, staplers, or screwed onto small self-tapping screws. |
 | In the upper part, the side walls are connected to each other by two narrow boards, which will give rigidity to the design of the cabinet and will be the basis for securing the tabletop. They are installed on the inside of the walls and are also screwed with confirmatory furniture screws. You will need 2 of them for each side to be secured. |
 | If a cabinet for drawers is being assembled, then before fastening the walls to the bottom panel, their internal surfaces are marked, and according to the markings, retractable mechanisms are installed on them (they can have different designs). It is clear that the installation of these guides on opposite walls must be strictly symmetrical. Of course, this process can be carried out already assembled closet, but this is inconvenient and quite difficult to do - it’s both dark and cramped. |
 | If you plan to attach front doors to the cabinet, then before installing hinges, you need to mark and arrange mounting slots for them in advance. To drill the mounting holes, a special cutter of the required diameter is used. When marking, it is necessary to maintain a distance from the edge of the panel to the edge of the mounting socket - it should be 5 mm. |
 | To ensure that the hinges are installed evenly and the doors are not skewed, the wall and door are laid on flat surface, and markings for arranging mounting slots and mounting holes are made on them simultaneously. A socket of the required diameter is drilled on the side wall, and the corresponding part of the loop is installed into it. Then, focusing on it, the attachment points of the reciprocal mounting pad on the door are marked. Holes for self-tapping screws are drilled according to the markings. After this, the hinges are screwed on and their operation is checked. Further, they can be temporarily dismantled and installed permanently after assembling the cabinet. |
 | This photo shows the installation of the assembled cabinets into the overall structure. In this case, each of the floor cabinets has its own walls, but an option is possible when the walls act as partitions in the overall structure. However, it must be taken into account that in the latter case, a higher load will fall on the partitions, so it is not recommended to have many shelves and drawers. The assembled structure is leveled, adjusting the height of the support legs if necessary. |
 | Next, the front doors can be finally fixed to the walls of the cabinets (cabinets). Installing them will not be difficult, since the necessary holes have already been prepared for their fastening. The door handles are screwed on. |
 | The next step is to install a worktop on the cabinets that are level and fastened together. It can be solid or have different connecting joints - straight or diagonal, depending on the layout of the kitchen unit. Having prepared and adjusted the parts of the countertop, mark the areas where the sink and hob will be embedded. |
 | The edges of the sink, depending on its model, can be installed on top of the countertop or flush with it. The illustration shows the mortise version kitchen sink. It is best to mark the window for it using a pattern, which manufacturers often include with the sink. If there is no cutting diagram, then you should do it yourself: place the bowl on a sheet of cardboard and trace its outline with a pencil. |
 | The opening for the kitchen sink is cut using an electric jigsaw. First, a through hole is drilled on the marking line in the tabletop - it is necessary for inserting a jigsaw file. WITH external line When marking, some craftsmen prefer to secure it with masking tape, which will prevent the edges from chipping and will be a good guide when carrying out work. In the same way, a hole for the hob is marked and cut. |
 | An important nuance. In a cut-out opening for a sink or hob, the end walls are completely defenseless against moisture penetration. And water that has leaked onto the chipboard and penetrated its structure can cause it to swell and deform. That's why experienced craftsmen It is strongly recommended to perform another operation. A strip is applied to the cut ends of the opening silicone sealant, and then distributed so that the entire cut is densely covered with this composition. After this, without waiting for the sealant to cool, you can proceed to installing the sink or hob. |
 | Attaching a kitchen sink to a countertop window can be done in different ways, depending on its model. Most often, such sinks are attached to the back of the countertop using special adjustable hook brackets, which are included in the delivery package. |
 | On the underside of the supporting sides of the sink, before installing it in the prepared opening, it is necessary to apply a layer of sealant that will close the gaps formed between the sink and the countertop and prevent water from leaking. |
 | Before the final installation of the tabletop, its cut ends must be covered with special aluminum overlays that exactly follow the shape of the cross-section of the panel. These pads are available left and right. Before installing the overlay, a strip of silicone sealant is applied to the end... |
 | ...which is then distributed over the entire surface in an even layer. This is easy to do with your finger dipped in soapy water. |
 | After this, the overlay is installed, aligned exactly along the edges and fixed with self-tapping screws - for this purpose there are holes on it. That's it, the end is protected. Similarly - on the other edge of the tabletop. |
 | Next, the tabletop is installed on the assembled floor structure the headset and is fixed with self-tapping screws from their inside through the crossbars discussed above. |
 | Of course, they always try to make the countertop solid, that is, consisting of one piece. The length of standard panels (up to 4000 mm) usually allows this. On a straight section, it is best to do without joints. But if the set has a corner configuration, then you will have to make a perpendicular joint. Gaps between in separate parts The table top is covered with a strip specially designed for this purpose. Installation of the strip is similar to the end strip. But in this case, this connecting part already has a somewhat named configuration, ensuring the joining of a round front side with cut end. |
 | You can decorate the edge of the tabletop adjacent to the wall in different ways. Some people prefer to frame the work surface with a special plinth, while others prefer to frame it with a strip of the same material from which the table top is made (as shown in the illustration). Still others even install it as an apron; they fix an entire panel of the tabletop on the wall with the curly edge up, connecting it to a horizontal surface. |
 | To install wall cabinets, special adjustable hangers can be used, on which you can move the cabinet around metal profile, and also pull it closer to the wall, removing unnecessary gaps between the surfaces. |
 | To secure the hangers to the cabinet, you need to cut them into back wall slots-sockets. Brackets are inserted into them and screwed from behind to its side wall. |
 | The brackets fixed to the cabinet are inserted into the profile, which is pre-fixed with dowels to the wall along the entire length of the set and, of course, is aligned strictly horizontally. Thanks to the profile, all cabinets will be located on the wall at the same level, and they can be moved slightly if the need arises during the final installation of the entire set. |
 | The assembly of table drawers follows the same principle as floor cabinets and wall cabinets. The difference is that the four walls of the structure are fastened together. To facilitate the process, it is recommended to mark the workpieces, that is, mark the area of their joint on the parts to be fastened, placing one of them end-to-end on the edge of the other, and then draw a line with a pencil. |
 | Next, in the marked area, using a thin drill, you need to mark two holes, exactly in the middle between the edge and the drawn line, departing from the upper and lower edges of the workpiece by 20÷25 mm. The same process must be carried out with the other part of the box - these will be its front and back walls. |
 | Next, parts with drilled holes are pressed against the end of the side walls, and through drilled holes are fastened together with furniture screws. |
 | When all four walls of the cabinet are connected to each other, the bottom of the structure, made of fiberboard or plywood, is nailed using nails 20 mm long. At the same time, the resulting box will be “automatically” aligned strictly according to the shape of the rectangle. If you plan to store fairly heavy kitchen utensils in a drawer, then the bottom can be screwed on with 3x20 mm self-tapping screws in increments of about 50 mm. |
 | Guides for drawer mechanisms are usually attached to the lower side edge of the drawer. But there are other designs of similar runners. In any case, they must be combined with the counterpart parts of the mechanism attached to the walls of the cabinet body. |
 | The lowest drawer is installed first. After the operation of the retractable mechanism has been checked, the drawer is removed from the body to install the front panel and handle on it. The width of the façade overlay must be equal to the width of the cabinet body. First, the location of the handle is marked, then the facade is fixed on the front wall of the drawer using clamps, and through the markings, through holes are drilled through both panels. |
 | Next, two holes are drilled on the inside of the box, which should be located at a distance of 80÷100 mm from the side edges. The holes in the drawer wall should be through, and in the front panel they should be deepened by 8÷10 mm. The diameter of the holes should be 8 mm. Then glue is poured into the hole and wooden dowels are carefully driven in. The last step is to screw a handle onto the box from the inside, which will tighten the wall and the facade together. It is best to remove the clamps after the glue has dried. |
 | Once the bottom drawer is completely finished and installed, the same process is performed with the drawer that will be located above it. But façade panel, of course, is fixed on it taking into account the height of the front of the lower drawer. The rest of the retractable parts of the structure are installed in the same way. |
* * * * * * *
As can be seen from the description, when assembling blanks into a single set you will have to face quite a few big amount small inconvenient nuances. But, at the same time, this work is extremely interesting.
In addition, by making your own kitchen you can save a lot of money. family budget. To make sure of this, it is necessary, just for fun, to find out the cost of everything necessary for independent work and calculate the purchase budget, compare it with the cost of the finished headset.
Find out how to do it in a special article on our portal.
As a bonus, we offer you to watch an interesting video. It shows the process of self-manufacturing an original kitchen set, which is completely uncomplicated even for a novice craftsman, in which exclusively natural lumber is used.
Video: DIY kitchen - no chipboards, only boards and timber
Modern life places demands on housing, which include not only beauty, but also functionality. Every person knows that multifunctional appliances have a high cost, just like an aesthetically furnished kitchen. A modern kitchen set of good quality will cost a tidy sum. Despite the fact that the concept of “inexpensive” has different limits for each person, a family with an average income will not be able to afford such a purchase. For this reason, many families try to make kitchen furniture with their own hands. From this article you will learn how to assemble a kitchen set with your own hands and what you will need for this.

Features and Benefits
To make your own furniture, you don’t have to be a carpenter or joiner. All you need is desire and availability of free time, as well as tools. When creating furniture with your own hands, you will receive the following advantages:
- individual project of exclusive quality;
- financial savings;
- new experience;
- enjoying manual work;
- Of no small importance is the fact that a kitchen created according to certain brands will fit perfectly into the interior of your kitchen.

There are several ways in which you can implement your plans. For example, you can contact specialized company, where you will be provided with cutting and edging services, or buy ready-made components. The last option is the simplest. However, in this case, your set will have standard sizes. There is a third option, which involves making full-fledged kitchen furniture yourself.

How to make it yourself
You can make homemade table for the kitchen using available materials. Initially, you need to decide on the dimensions, and how to prepare a sketch in any other work. You can draw a sketch from scratch yourself or use ready-made option. You can take the drawing as a basis or add the necessary details.


With your own hands you can create not only a kitchen set, but also a transforming table, high chair for the kitchen, or furniture for the garden. You can read the instructions for making furniture in more detail below.


Materials
First of all, you should decide on the material from which you will make the furniture. In the modern world there are many solutions, and each product has its own characteristics and advantages.


As a rule, wood is the basis of any furniture. Many people use it in their chipboard work European production, because it has best characteristics compared to Russian products. If you prefer MDF, remember that it requires further painting.

MDF is more expensive than chipboard and better in quality. This material can be used to create decorative elements, and it is also convenient for molding. In some cases, MDF is superior to natural wood in density, which is why it is in demand on the Russian market.


If you are a supporter of natural and healthy materials, you can make a kitchen set from wood. Remember that such furniture will be sensitive to changes in temperature and humidity. Each workpiece will need to be treated with a special impregnation and antiseptic.


Table tops are made of chipboard, MDF and natural wood. The main load falls on this part, so many experts advise using natural or artificial stone in their work.


Some elements, such as the bottom of the drawers, can be made from plywood, as well as the side parts.


Furniture panels have gained popularity today. They are a wooden product made in the form of a shield. Such a shield is glued together from several parts using special glue. Several wood species can act as a material:
- birch;
- pine;
- larch;
- aspen;
- cedar.


A kitchen set made from furniture board is more convenient because there is a wide selection of standard sizes.

OSB boards Suitable as decoration, for example for covering an apron area, or for creating an original shelf. They are also used to make openwork cabinets and bookshelves in other rooms.


You can also make kitchen furniture from plasterboard. To the benefits of this material low cost and availability, along with ease of use. GKL sheets can accept any fastening, even glue. All you need to do is calculate the load. Each product should be decorated with finishing materials, because in its original form gypsum board is not attractive.

Brick kitchen furniture deserves special attention. This style is called “walled”. He is not very popular, but he still has fans. Brick furniture looks impressive in the room and gives it solidity. This material will look best on large kitchen, since it will be difficult small space place full lockers.


Required Tools
To make furniture yourself, you will need to prepare the following tools:
- electric drill;
- electric jigsaw;
- screwdriver

Don’t forget about furniture hinges, confirmants, self-tapping screws, dowels, drills, a pencil and a tape measure.

Preparing all the necessary components will help you quickly complete the task and not be distracted by shopping trips.

Step-by-step instruction
Using these instructions, you will be able to assemble the kitchen set yourself and avoid possible mistakes that may occur during the work process:
- The first step is to take measurements and create a sketch. Take accurate measurements of the room and record them on paper. Draw the room in a scale convenient for you so that the finished kitchen set fits into it with maximum benefit.

- Decide where the sink and stove will be located. If the current arrangement of the furniture does not suit you, indicate on the drawing the place where you will move them. The issue of the location of the stove should be thought through to the smallest detail, because the dimensions of the kitchen furniture depend on it. Consider the dimensions of the refrigerator and its location.


- Now you should fit kitchen furniture into the resulting free space. Consider not only the bottom row, but also the top cabinets and the hood.

- If you have the opportunity, you can order the required components for the kitchen, taking into account the selected dimensions. When calculating the parameters, pay attention Special attention size of drawers. The size of the decorative facade will depend on these dimensions. Solving the issue with the location of the shelves will help you decide on the required quantity.
- Remember to record all measurements in your sketch and decide what type of material will be optimal for your kitchen.


Restoration
Most people will agree that only the most patient person can restore old furniture, since this process is comparable to real art. Not every person will like to work with a headset, gradually restoring the previous appearance of the products.


To make a decent product out of old furniture, you will need to carry out the following activities to create a new design:
- carefully disassemble the product;
- carry out cleaning and rinsing;
- eliminate defects in the varnish surface;
- work with wood defects;
- carry out repairs and strengthen fastenings;
- wood should be painted and primed;
- decorate the appearance of furniture using “aging”, varnishing, painting and polishing.

The most difficult task is restoring the table, or rather remaking its legs. To do this, you will need to remove the old veneer and restore its original shape using liquid wood.


Assembly of the finished headset
Sections of components must be edged in advance. They are first sanded using sandpaper. After that, edge tape applied to the cut site and glued using a hot iron or hair dryer.

If you use a regular iron, then when gluing it is necessary to attach a piece of thin material to the edge.
Trim the edges when cool. This technique can make the furniture attractive and keep it from swelling under high humidity.
The next step is to mark and drill holes for mounting and shelf holders. Do not rush to work with the drill, because a mistake will lead to a through hole.

The cabinets are assembled like a box. Vertical side walls should be attached to the lower horizontal surface. The lid is screwed on last.

Roller guides must be installed using building level. They should be positioned horizontally and parallel to each other. Otherwise, the boxes cannot be placed in the designated space.

The legs are installed on a fully assembled and inverted cabinet. The front part needs to be installed last, after which they are hinged to the side wall.

To update your interior, you can use simple decorating techniques:
- themed stickers on the wall and ceramic tiles;
- ornament using a stencil;
- various panels and signs;
- painting furniture and walls.

Such decorative elements can give furniture or individual elements bright accent. Interesting stickers are sold in various stores or you can cut them yourself from self-adhesive film. A decorated area above the table, on the apron area or above the work surface will add style to the kitchen interior.

For small rooms, you should select decorations with small and elegant elements, and for large or empty walls large parts should be purchased.


Stencil painting looks very stylish on kitchen furniture. You can make a pattern from thick cardboard or plastic and make original ornament. Artistic painting will look very stylish.


The following items will look great in the kitchen interior:
- various plates;
- cutlery;
- wine corks;
- seashells and pebbles;
- molds made of paper and silicone, as well as pasta.


If your kitchen furniture is different from beautiful and fashionable interiors, don't be upset. With the help of creative ideas that you can implement with your own hands, a standard set will turn into a real work of art.

How to decorate furniture:
- coloring;
- decoupage;
- non-standard fittings;
- plastic decorative overlays with imitation carvings;
- film.
