Not everyone knows how easy it is to glue vinyl wallpaper on a non-woven base. What is correct gluing vinyl wallpaper and the most important secrets This construction and repair process will be described in this article.
Today, many are trying to find out how to properly glue vinyl wallpaper on a non-woven base in order to prevent major mistakes. After all, those who want to create an exceptional home interior with the help of this building material is not enough, especially since a magnificent palette of colors and high practical characteristics this wallpaper will satisfy all tastes.
Vinyl wallpaper manufacturers guarantee the undeniable advantages of vinyl wallpaper over other wall design products. First of all, they note durability, wear resistance, the excellent ability of vinyl to resist moisture, temperature changes, and drafts. The external presentability of the repair, as well as the cost, attracts (vinyl wallpaper will cost less than tile, PVC panels, plastic and other building materials).
Required construction and assembly tools
To glue vinyl wallpaper on a non-woven backing with high quality, you should use a special working tool.
Required tools:

- Glue brush and seam smoothing roller. The strength of the attachment of the wallpaper material to the wall directly depends on the quality and quantity of applied vinyl glue... It is possible to economically process the wallpaper surface with vinyl glue only with a convenient brush. Narrow or wide vinyl wallpaper is glued joint-to-joint, which means that the contact points of the wallpaper stripes should be as invisible as possible. A special roller is required to smooth the seams.
- A well-absorbent sponge and a clean rag will be useful for removing glue from the seams and smoothing the surface of the glued fabric qualitatively (removing air bubbles, evenly distributing the glue).
- Tape measure, ruler and sharp scissors, a special ruler for trimming the ends after gluing and a knife for trimming excess.
- A plastic or enamel bucket for diluting the glue (not metal, so that an oxidation reaction does not occur!).
- A spatula for removing scratches and remnants of old wallpaper, sanding irregularities from the wall.
- Stepladder and plumb line.
This is the main tool for work to securely fix vinyl wallpaper in the interior.
Advantages and Disadvantages of Vinyl Wallpaper

Among wide range materials for wall decoration, non-woven wallpaper have significant differences. What is the difference between vinyl wallpaper and other repair analogs according to experts?
- According to experts, German vinyl wallpaper has a lifespan of more than 15 years. And this is without losing their own physical properties(strength, density) and visual characteristics (color content, brightness, gloss). Modern production technologies offer the buyer foamed vinyl wallpaper, hot-embossed wallpaper on a paper or non-woven base and other types. Each type has an article, i.e. alphanumeric designation, which will provide the buyer with information about the material of manufacture of this type, manufacturer, model and color palette, roll width (meter or half meter), etc. There is an article and a sticker with the manufacturer's label on each roll.
- Can non-woven wallpaper be glued to the wall absolutely dry? Yes, it is enough to smear only the wall with glue. Such one-sided processing does not cause the wallpaper linen to soak, simplifies the technology of fixing the joints, and also does not tighten the sheets when drying.
- The non-woven surface does not undergo delamination over the years, which allows you to easily remove worn wallpaper from the walls.
- If you choose vinyl wallpaper for the kitchen with pores on a non-woven base, then there will never be any condensation or mold on the wall.
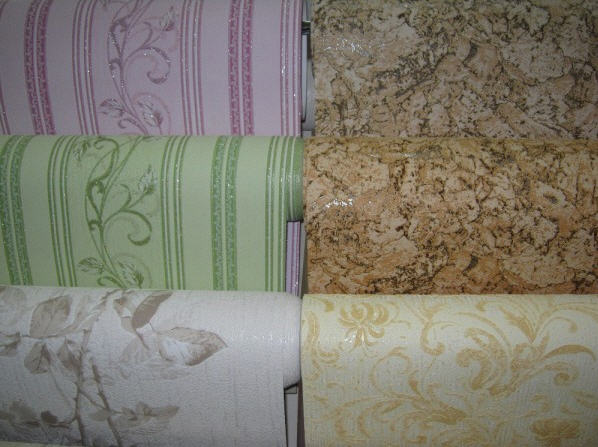
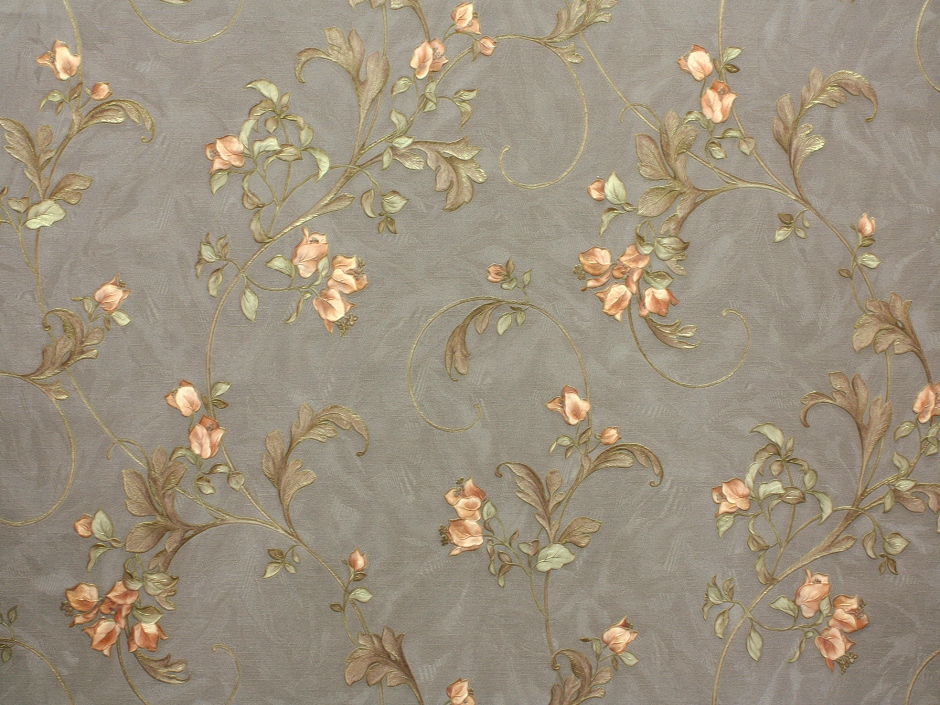
- A collection of vinyl wallpapers with a chic palette of floral coloring will satisfy the wishes of the most capricious buyer!
This is far from full list the advantages of a non-woven vinyl product. A logical question: can vinyl wallpaper for renovation be considered the standard of quality? Perhaps yes! This option for creating coziness in the house is worthy of attention!
Stages of gluing vinyl wallpaper
The problem of how to glue vinyl wallpaper for the kitchen or any other room will become easily solvable for everyone. The technology is simple and straightforward! And the process itself will not cause difficulties.

- Prepared necessary tool, bought a multi-colored or white vinyl wallpaper on a non-woven base, cleaned and primed uneven surfaces walls.

- If the wallpaper sheets are glued to the ceiling, then you can measure the length of the wall and start cutting strips of the same size from a roll. But, if the gluing level deviates from the ceiling height by a certain distance, then using a tape measure, a ruler and a marker, you need to draw the boundaries of the upper level. Measure from the floor. Connect the upper marks with a marker into continuous lines along the perimeter of the room. This is a kind of hint test for the master during the gluing process.

- It is necessary to cut washable vinyl or other type of wallpaper into strips of a certain length with an increase of 5-7 cm. This is for safety reasons, and at the end of the work, these surpluses are removed.

- When the strips of the required length have been cut, and the wall for the first wallpaper strip is prepared (i.e., primed with glue), you can begin to glue the strips onto the wall. We start from the corner closest to the window. Using a plumb line, draw a vertical line - this is the so-called lighthouse. We apply the sheet from top to bottom, and we try to connect the edge with the lighthouse as accurately as possible. It is necessary to smooth the canvas carefully from the middle of the strip to the edges, also from top to bottom.

- All the following strips are glued in the same way. The beacon will be the edge of the previous wallpaper strip. This is how easy it is to glue the joints. Part of the wall must be primed with glue immediately before gluing the wallpaper. The joints should be strengthened with a roller to smooth the seams.
ADVICE: Do not allow even the slightest drafts or temperature fluctuations in the room until the wallpaper in the corners is completely dry!
Vinyl wallpaper: selection, gluing and tips
DIY pasting technology

With a quality guarantee, repairmen will be able to quickly and efficiently glue colored or plain vinyl wallpaper on a non-woven base. Is it possible to carry out such repairs yourself? Yes, you can glue it! All work will be done with success a common person easy.
To quickly complete repairs, you need to try to follow these tips.:
- Participation in the repair of at least 2 people will facilitate and speed up the process.
- Don't skimp on your purchase building materials and tools.
- Follow the steps indicated exactly, even if any of them seem insignificant to you.
- It is forbidden to fuss and rush in repair business!
The question often arises: at what temperature is it better to glue the material on the non-woven? The answer is simple: with a normal room.
How to glue different types of vinyl wallpaper in corners

Gluing wallpaper in the corners of a room is perhaps the most difficult moment the whole renovation. Experts have developed and tested in practice a number of rules, thanks to which all difficulties can be easily neutralized.
There are two solutions:
- In order to glue erismann vinyl wallpaper with a pattern in the corners with high quality and beauty, you should lead one canvas from 1 to 5 cm around the corner, and glue the other with an overlap exactly along the corner.
- In order to beautifully decorate vinyl wallpaper flowers in the interior of the Erismann company (article 5652) in the corners of the room, then both the first and second halves of the wallpaper are glued with an indent of 5 cm from the corner overlapping to each other. Then, carefully, strictly along the corner, an incision is made and the five-centimeter parts are removed. Determining how to glue the joints of these strips is quite simple. Apply a new layer of glue to the corners and smooth out thoroughly with a dry, clean cloth.
Any of these methods will allow you to easily and quickly, and most importantly, decorate the walls beautifully and create coziness in the room.
ADVICE: If, according to the design idea, painting of vinyl wallpaper is necessary, then it will completely hide even hints of wallpaper joints in the corners.
How long does wallpaper dry

Hot-stamped vinyl wallpaper (article starts at 40) or foamed vinyl (article starts at 28) on a non-woven base is a fairly dense material. Even if you smear wallpaper glue only on the wall surface, it will take much more time for the adhesive to polymerize than for the paper base to dry. Practitioners say the period is up to 48 hours. During this time, it is not advisable to paint the floor here, paint vinyl wallpaper, or perform other work.
ADVICE: For high-quality drying of wallpaper sheets, close the door and windows to the room where the renovation is in progress, and do not go there for 2 days.

Is it necessary to visually “hide” the unevenness on the wall in the room? More profitable and simple solution than light vinyl wallpaper, you will definitely not find it! For example, beige ones will help to qualitatively hide damage on the wall, as well as visually expand the room and make the atmosphere "warmer" in it.
Vinyl canvases are ideal for kitchens or other rooms. It is especially convenient to glue meter-long canvases on the walls. It is easy to wash washable vinyl wallpaper from grease and dust: ordinary soap solution will cope quickly.
It is effective to use vinyl material for painting, because the charisma of the interior will only benefit from this. In addition, painting vinyl wallpaper multiplies its already indicative operational durability and endurance. Special rules how to paint vinyl, the builders do not. If you choose paintable vinyl wallpaper, the boundaries for your own creativity disappear completely!
Often amateur craftsmen ask: is it possible to glue non-woven canvases on a painted wall? Or is it necessary to remove a layer of paint before the layer of plaster?
ADVICE: water-based or paintwork on the wall causes further flaking, swelling or deformation of the glued strips!
Modern manufacturers produce wallpaper products in rolls with a meter width. Such wide stripes make the renovation process a pleasure. Thanks to fewer joints, the surface is smooth and neat.

Choosing a kind of vinyl canvas, I want to draw Special attention the wallpaper is silk-screened meter. Silk-screen printing is a material where a bright palette of colors is complemented by an exquisite gloss. With their help, the interior of any room becomes a super-realistic design of the 21st century. A chic palette of color assortment, silk-screen printing is presented to customers by Erismann and other manufacturers of wallpaper products. In company stores, such products can be bought inexpensively.
Erismann meter silk-screen wallpaper belongs to the category of light vinyl. Information on all varieties will be prompted by markings or other designations on rolls.
It is believed that vinyl wallpaper is harmful to human health. Doctors do not yet have scientific substantiation of such a hypothesis.
Choosing exactly this good material for decorating the walls in the room, you can safely expect that the need for subsequent repairs will not arise soon. Beauty, comfort and pride in your construction and repair feat (if you glued vinyl wallpaper yourself) will delight the owner for a long time.
How to glue vinyl wallpaper - DIY vinyl wallpaper
Nowadays, manufacturers make vinyl wallpaper in two main versions: on a heavy non-woven and lighter paper backing... The surface of foamed polyvinyl canvases looks original. He has a different texture, he is dense. The walls glued with such material in the room look very original. Hides minor imperfections and surface irregularities.
Non-woven, dense vinyl
Manufacturers indicate information and icons on each roll.
Very important feature that vinyl wallpaper, which has a paper base, is coated with glue and so they are placed on the wall. Non-woven materials are placed directly on the wall. It is lubricated with an adhesive, and then the canvases are applied and aligned. These are two completely different technologies.
It is important to do everything right and not to mix it up. There is also a third technology. The glue is applied to the wallpaper at the factory. At home, all that remains is to separate the paper from the strips and carefully glue it to the wall. such wallpaper is called self-adhesive.
Peculiarities
Designers love to use vinyl wallpaper. They especially like thick non-woven fabrics. They imitate a tree a natural stone, brick, tiles, decorative plaster and other original surfaces.
Such wallpaper is two-layer. On top of PVC or vinyl, which has small pores, and the base is made of paper or fabric. Those wallpapers that are made on a fabric basis are allowed to be washed with a soapy sponge. They are often pasted over hallways, kitchens, toilets, and sometimes bathrooms. They are good in halls, bedrooms and nurseries.

Wallpaper imitation of a real brick wall
Vinyl does not tolerate well high humidity and the cold season. Therefore, it is not worth decorating premises with them in the country. Wallpaper can peel off the walls. The cost of vinyl wallpaper is affordable and can now be purchased by a middle-income family. If you really want to urgently carry out repairs, then you can try to take a small loan.
Choose canvases to your liking. In a construction supermarket, a sales assistant will show you both simple paper-based and original textured materials in a wide range.
Cooking the walls
Take your time, gently dampen the old wallpaper and remove it from all walls of the room. You need to delete and old plaster, peel off the paint. If the walls were painted before the start of the renovation.
If you notice gaps or holes, they need to be covered with a special plaster. Buy the mixture at a construction supermarket or in the market. The assortment of stores contains mixtures for any money. There are also inexpensive, but fairly high-quality mixtures.

Popular German finishing putty
It is highly desirable that the walls be treated with a special antifungal compound before pasting. The finishing plaster is often applied with a diluted adhesive that has anti-fungal properties. When it dries, the surface is ready for wallpapering in one way or another.
Remember not to start repairs if the walls are wet. Wait until completely dry.
Turn off the air conditioner during repairs. There should be no air movement in the room. Close the windows tightly and do not open until the wallpaper is dry. This will take several days, it sometimes takes a week, when the wallpaper is based on non-woven fabric and you want to install an air conditioner in the room.
When applying canvases to the wall, close not only the windows, but also the doors tightly. Try not to go back and forth once again, do not drive the air.
The wallpaper can be easily removed by taking a roller used in construction, dipping it in water and wetting the wallpaper. They will get wet and you will quickly remove them with a spatula.
If, before the repair, the wall was covered with water-based paint, then remove it with a moistened large sponge. Covered oil paint either the walls are cleaned with enamel, wearing glasses, gloves, and a brush attachment is hooked onto the drill. You can do it all yourself. It is not necessary to hire an employee. The main thing is to study the technology, to want and realize the desire - to repair the room with your own hands.

In some cases, removing old wallpaper is not so easy.
Now examine the walls. If you see large defects in the form of cracks, depressions, holes, they need to be removed, puttyed. Get a primer that will penetrate deeply and correct any imperfections. The primer must dry. The primer can now be applied. It can be a finishing layer, or if the wall is problematic, there will be one more final, final layer.
If you are going to paste over the walls with vinyl wallpaper, then it is often enough to putty and level the surface, polish with a large sandpaper... Now be sure to prime the surface with high quality.
In the construction supermarket, you will find a primer that you like and will do. There this material is presented in a large assortment. For vinyl wallpaper, special glue is most often produced. You will definitely find it, it says "for vinyl wallpaper" on it.
Vinyl wallpaper with a paper backing can be glued efficiently with ordinary wallpaper glue. This glue is diluted with plain water. It must be liquid. Many people use this compound as a finishing primer.

Special adhesive for vinyl wallpaper
Now you need to draw a straight vertical line. For example, start gluing from a corner. To carry it straight, take a plumb line - attach the load to a string and bring it to the ceiling. Fasten and start drawing along the thread straight line... This is done most often with a ruler and pencil.
Vinyl wallpapers are dense on any basis, they hide surface imperfections. Therefore, a thorough final putty is not done for them. And this is, after all, saving materials.
Apply glue
How to glue the material so that the joints are barely visible? They do not overlap, but move the canvases back to back. Is the primer dry? You can proceed.
Vinyl wallpaper on a non-woven base is not greased with glue. They only lubricate the wall itself, and then apply and level the wallpaper from the ceiling and downwards, for example, with a construction roller.
Make sure that there are as few bubbles as possible in which there is air. They will have to be removed with a rag or spatula. This technology allows you to simply and effectively glue non-woven wallpaper.
Vinyl wallpaper, which has a paper base, is smeared with glue, for some time they absorb it and you can glue it, starting at the ceiling, going down. How to apply the glue correctly, read on the roll. This is information from the manufacturer.

Gentle application of glue to the wallpaper
Vinyl wallpaper with paper backing
Above, we have already said that such wallpapers should be moderately and better to be fully lubricated with special glue. This takes from 5 to about 10 minutes, and they are completely saturated with the composition. The fibers of the material swell and the canvases are ready to be applied to the wall surface.
Time yourself. If you decide that the fibers smeared with glue will swell for 7 minutes. do this for all strips. Try to distribute the glue evenly. If it is applied too thick, it will go beyond the joints and ruin front side... It will be noticeable and ugly.

Applying glue to the wallpaper
While the strip is impregnated with the compound, you de-energize and remove the sockets in the room. Glue the strips over these holes and mark where they are. Later in this place, cut holes for the sockets and reinstall them yourself or call an electrician.
How to glue optimally in the corners
Start gluing wallpaper from the corner of the room and there will be no problem. For example, you stand on a stepladder and apply wallpaper at the ceiling, and let your friend align their edges along the line that we are guided by in order to paste over the material evenly. We drew this line using a plumb line, as we wrote about earlier.
How to optimally place and glue heavy non-woven wallpaper? Unroll the roll. Measure the distance from the ceiling to the floor and add 5 cm or more. If there is a pattern, try to fit the material so that it matches.
Lay the strips face down on the floor, one on top of the other. They should line up a bit. Now twist each so that the drawing is inside and let it lie like this for a day. After this procedure, the canvases will not curl when you apply glue to them with a construction roller (clean).
If you have a new roller, rinse it under running water. But even after such a procedure, fur lumps may remain on the wallpaper after using it. That's why, experienced builders prefer rollers with which work was previously carried out.

Working with a good velor roller
You need to gently smear the glue. Take plastic wrap suitable for the wallpaper size. Place a strip on it. Apply glue evenly on it, smear it carefully. Now fold in half. So, the glue will saturate the material efficiently.
The main thing is to smear and distribute the glue evenly, if there is not enough somewhere, there the wallpaper can lag behind the wall. How much to impregnate the wallpaper, the manufacturer writes directly on the roll. Read the instructions on the opposite side of the label carefully.
Is the impregnation time out? Directly from the ceiling, leveling the edges, place the canvases from top to bottom. If excess glue appears at the joints, wipe it off immediately with a clean kitchen towel or a napkin made of material.

Wallpapering in the corner of the room
Vinyl wallpaper, which has a paper base, if too tight, can tear when the heating is turned on in houses in the fall. This problem arises from sharp drop temperatures.
Do not forget that it is correct to apply stripes at the ceiling, and then level them with a roller and along the strip or with adjacent wallpaper end-to-end and at the end to the floor. Instead of a roller, someone uses a brush, spatula, rubber roller. It is important to immediately squeeze air out from under the wallpaper.
Vinyl wallpaper does not stretch and then you have to pierce small bubbles with a needle, and larger ones with a knife along the edge. It is not easy and can be noticeable. You can immediately do the work conscientiously, with high quality and you will not have any problems.
Non-woven wallpaper is the most popular finishing material. High demand of this type the canvases are due to the fact that they are convenient in terms of gluing and maintenance. Compared to traditional paper wallpaper, non-woven wallpaper has many advantages. In addition, this finishing material is not smeared with glue, and this greatly simplifies the pasting process. For correct installation wallpaper, you need to know the main points of this procedure, and the skill will already appear after gluing the first canvases. So why is it not necessary to smear the canvases themselves when gluing wallpaper fiz non-woven, let's figure it out.
Preparing the walls for gluing non-woven wallpaperWhy you don't need to smear
The assortment of the presented wallpaper products is huge today. There are wallpapers that are smeared with glue before fastening them. They must definitely swell, otherwise it will be impossible to stick them or after a while they will come off themselves. But non-woven wallpaper does not require compliance with this paragraph. All that is required of you is to measure the size of the canvas and glue only the wall with glue.
In this case, you must ensure that it does not have time to dry before gluing is performed. finishing material... For this reason, the glue is either smeared in two layers or the surface is pretreated with a weak adhesive solution.
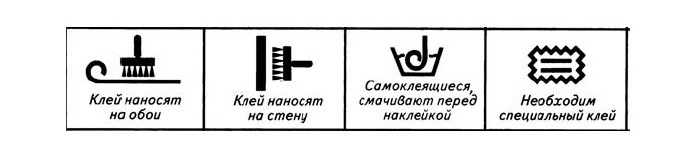
But before gluing, it is recommended to carefully study the markings on the roll. If you see an icon with a brush parallel to the wall, this indicates that the glue is being applied directly to the wall. When the brush is drawn parallel to the horizontal plane, then adhesive composition it is also distributed on the canvases.
 Wallpaper designations
 If you use paper-based canvases, then the glue is smeared not on the wall, but on them. While you smear the canvases, they are saturated, swell, and there is no deformation after the gluing has been made. If you distribute the adhesive already on the wall and attach the material on a paper basis, then they will begin to swell right on the surface, folds will begin to form, and air bubbles will begin to form under the wallpaper. The assortment of shops can be seen. On their back there is an adhesive impregnation. It is enough just to sprinkle the canvas with water and start gluing.
Glue application process
Before gluing wallpaper, you need to decide on the type of glue used. It is best to follow the directions on the wallpaper roll. There, manufacturers indicate the brand of adhesive that is optimal for the selected type of finishing material. The process of gluing canvases on a non-woven backing should only take place on the condition that the surface of the wall is clean.
If before that paint was used to decorate the walls, then first it is necessary to sand it, and then rinse it with special detergents. Then rinse the walls with pure water... Wait for the surface to dry thoroughly. It is from the correctness of the surface preparation that the quality of gluing the considered canvases will depend.
 It is very important to properly prepare the walls for wallpaper.
 Be sure to completely eliminate the previous wall decoration. If there are absorbing surfaces such as wood, gypsum, drywall, then a primer must first be applied to them. To prepare the glue, you need to take a bucket, pour 5 liters of water intended for gluing the canvas in question or 4.5 liters cold water for canvases intended for subsequent staining.
When the water is thoroughly mixed, smoothly add the glue flakes or powder. Leave them for 10-15 minutes, and when the flakes swell, mix them thoroughly.
Now you can start gluing non-woven wallpaper on the wall. According to the technology, only the finishing surface is smeared with glue. Before doing of this condition, from the window or doorway, you need to draw a vertical line, the length of which is 50 cm. Thanks to this trick, it is possible to accurately determine the location of the cut of the canvases at the level of the door frame. Spread the glue on the surface using a roller. It should have a small pile length. You can use a wallpaper brush. The process of applying wallpaper glue should take place along the line shown earlier.
 Works on gluing wallpaper on walls
 It is important to understand that non-woven wallpaper is not smeared with glue. Distribute the glue not only over the width of the roll, but slightly increasing the area on both sides. Be sure to carefully glue all corners and places along the plinth. To do this, use a small brush. If the non-woven wallpaper was glued correctly, according to the technology, then it will be impossible to notice that they are peeling off.
Non-woven wallpaper can be glued from a roll or by preparing strips of the required size in advance. The first method is best used by those who are not the first time finishing with non-woven fabrics.
Once attached to the wall, it is necessary to carefully smooth the surface, moving from the middle to the edge. When smoothing, it is necessary to remove accumulated air bubbles. Using scissors mark the bottom fold along the skirting board and cut it off. But do this only after the non-woven wallpaper is thoroughly dry.
Although non-woven wallpaper does not need to be smeared with glue, the process of gluing them is no less responsible than when finishing with other canvases. If you do not follow the technology and make your own additions, then over time you can start repairing again, as you will notice that your canvases are peeling off.
Non-woven wallpaper is considered a universal coating, both externally, and high-quality they will "like" the average buyer. True, he may immediately have questions, but will it be difficult to glue non-woven wallpaper, is it possible to do it yourself, is it easier to glue meter or standard wallpaper? And how to prepare the surface of the walls for gluing?
A big plus is that non-woven for walls does not need special care. If it is for painting, then dispersion and acrylic dyes will look great on it. Most of this wallpaper is not afraid of moisture, so you can wash it using a soapy solution.
As for the preparation of the walls before work, it is very important that the entire surface is of a uniform color and, if possible, that its color does not contrast with the color of the wallpaper.

Some important points in gluing non-woven wallpaper:
- Good non-woven wallpaper has a high-quality edge, which allows it to be glued back to back. And the adjacent canvases outwardly will look like a continuous coating, and the seam, one might say, will not be visible.
- The preparation of wallpaper is carried out only after checking it for defects. Always adhere to this rule: first inspect the entire unfolded roll, and only then cut.
After that, start preparing the tools for gluing.
Non-woven wallpaper: how to choose (video)
Tools for gluing non-woven wallpaper
Everyone who glues the wallpaper himself, with his own hands, has his own list the right tools... But if you are doing this for the first time, or are unhappy with past experience, you can use the following universal list.
Sticking tools:
- Building level (if there is a laser - ideal);
- Roller with long pile;
- Roulette 5 m;
- Plastic spatula for rolling wallpaper;
- Sharp knife to cut wallpaper;
- Narrow spatula (metal);
- Pencil;
- Foam sponge;
- Glue bucket and water bucket.

Perhaps some additional tools may be needed to prepare the walls. Wide wallpapers glued using the same tools.
How to properly glue non-woven wallpaper
Non-woven wallpaper is remarkable in that it can be glued to virtually any surface - on plaster, wood, drywall, chipboard, paper, concrete. Be sure to clean the surface of the walls from the previous coating, if the wall is painted - the paint must also be removed. If there are good reasons not to remove the paint, at least sand the painted wall so that the wallpaper adheres more easily to the surface.
Is it possible to glue non-woven wallpaper on old wallpaper
Theoretically, this is possible, but there are some nuances.
How to properly glue non-woven wallpaper on past wallpaper:
- The previous coating should be papery and thin;
- Old wallpaper must adhere firmly to the surface of the walls;
- Old wallpapers cannot be much darker than new ones.

It is worth warning that the risks of defects in this case are great. For example, bubbles may appear under the wallpaper, or the wallpaper may begin to flake. It is believed that the service life of a new coating from such gluing is reduced.
Do I need to glue non-woven wallpaper
It happens that during the repair, a person is overcome with doubts, and he still smears both the strip and the wall. If, as it happens, you have already smeared the strip, then you do not need to apply glue to the wall. Just wipe it off with a cloth at the joints.

But it is easier to apply on the wall, and then glue the prepared strip. Mistakenly, many smear the entire surface of the walls, but only the area of the nearest work is needed. If the wallpaper is one meter long, this zone increases.
Is it possible to glue non-woven wallpaper onto non-woven wallpaper

Use a needle roller to roll over the surface so that as much as possible more holes formed on the old wallpaper, then the coupling with the new one will be better.
Do I need to prime the walls before gluing non-woven wallpaper
It is always worth priming, of course, no matter what wallpaper you glue. And already non-woven wallpaper definitely needs to be glued to the primed wall.
A primer is not needed only if:
- If the repair is temporary, and the wallpaper, in principle, is not intended for a long service;
- The wallpaper is lightweight and papery.

What is a wall primer for? It's simple - it increases the adhesion (that is, adhesion) of materials, they will stick better to the base.
Is it possible to glue non-woven wallpaper on a concrete wall
Of course, you don't need to glue it on concrete. First, level the surface with your own hands, apply the putty and primer.
How to prime a concrete wall:
- Take liquid adhesive solution... In the first layer, apply evenly glue, and in the second layer, the glue solution should be thicker.
- The double coating will increase the adhesion, which guarantees a successful wallpaper application.

Without a primer, you can still relatively successfully cope with paper wallpaper, but heavy non-woven wallpaper must be glued with a preliminary primer.
Is it possible to glue non-woven wallpaper with an overlap
If you have not glued with your own hands in this way, you can use the trick of the masters. They glue the non-woven wallpaper with an overlap, and then, as the glue is absorbed, they cut the line with a clerical knife along the level so that the extra tape is removed from the adjacent wallpaper.

It turns out that the joint will be perfect, exactly in the middle of the "overlap". But, nevertheless, it is quite difficult to glue this way, so the best way is end-to-end.
How to glue non-woven wallpaper on drywall
Somehow, this gluing will not be fundamentally different. But there are some peculiarities worth considering.
How to properly glue non-woven wallpaper on a drywall wall:
- Draw vertical markings on one wall, and glue from there;
- When gluing the first canvas to drywall, adjust in height;
- Tuck the other side of the non-woven wallpaper at an angle;
- If the wallpaper protrudes slightly above plasterboard wall, you can trim them later.

Cut off excess wallpaper sharp knife, and the guideline for the cut will be a flat spatula applied to the wall.
Technology of pasting walls with non-woven wallpaper
After the wall is primed, the vertical markings are done, you can start gluing with your own hands.
Gluing non-woven wallpaper step by step:
- Mix the wallpaper glue and apply it to the wall section with a roller;
- Bring the cut canvas to the wall, you need to start pasting either from the window or from the corner;
- You can smooth the canvas with a plastic spatula;
- If vertical lines are drawn on the wall, the work will go faster;
- Cut off the excess at the floor with a sharp knife.

It is good if the wallpaper 1 or 2 cm goes over the skirting board, which is first removed and then put back in place after pasting.
To make the surface of the corners even, even in the process of filling, you need to arrange the corners plastic corners... If the surface of the corners is uneven, the wallpaper will be the first to peel off there.
How to glue wallpaper on a non-woven base (video)
Features of gluing non-woven wallpaper
Even if in each instruction it will be clearly written several times how to glue, with what glue, and in what sequence, people often decide to "do it yourself".
However: always level and prime the wall. Always mark and cut the canvases in advance. Always use special glue without experimenting with its composition.
Is it possible to glue paper wallpaper with non-woven glue
If there is glue from the previous repair, or for some reason you decide to glue not non-woven, but paper wallpaper, then you can use non-woven glue.

The only thing is that paper wallpapers are thinner in structure, so the glue for them should be lighter. In this case, when mixing the non-woven glue, more water must be poured so that it is not so heavy.
Is it possible to stick wallpaper on non-woven wallpaper
You will need to remove old non-woven wallpaper, be it standard or wide meter. And you can remove them if you walk the wallpaper with a needle roller, and then moisten it.

If you decide to use a steam generator, be sure to:
- Put on gloves (rubber);
- Tuck the sleeves into the gloves;
- Protect the floor from water.
If the old wallpaper is not removed, then fresh glue will begin to absorb into the pores of the old wallpaper, soften old layer glue, which can cause bubbles.
Why non-woven wallpaper peels off
There are several reasons that affect the poor-quality gluing of wallpaper.
Why is the non-woven wallpaper peeling off:
- Poor wall preparation. Even if there are small holes on the wall, the wallpaper may come off. All defects must be removed, the wall must be leveled and primed.
- Use of unsuitable materials. The wrong glue - and already all the work can get up.
- Wrong sticker. Apply glue only to the wall, and only the part of the wall that will have to be glued in the near future. Butt-glue.

Do not also resort to forced drying, then the wallpaper will definitely come off. Sometimes this method is used if wide meter wallpaper... But even such meter-long wallpaper is glued according to the same principle, and they are also afraid of forced drying.
Bubbles on non-woven wallpaper after gluing
How to glue non-woven wallpaper to prevent bubbles? They appear, as mentioned above, due to insufficient preparation of the wall.

To eliminate bubbles, you need:
- Make an incision on the bubble with a sharp clerical knife;
- After that, try to gently straighten the wallpaper, put the glue in the syringe and squeeze it through the cut into the wallpaper;
- Spread the piece of wallpaper well and press it against the wall with a clean cloth.
Wide meter wallpapers can also have bubbles after gluing, do not tackle them alone, the risk of bubbles and peeling will be great.
How to properly glue non-woven wallpaper (video)
If you understand how to properly glue non-woven wallpaper, the process itself will not be difficult. After a good primer and correct markings, the strips will adhere easily and the process will not be delayed. Quality materials and good preparation walls will provide a good result.
Happy renovation!
In the list of materials in demand in interior decoration, paper wallpaper is far from the last place. Invented in medieval China, they are practically the cheapest and, most importantly, environmentally friendly solution, with which you can create a cozy and pleasant-looking environment without bothering too much. But in order for the interior, made with paper wallpaper, to serve as long as possible, without delivering unnecessary hassle, it is important to study the main criteria for their selection and understand practical subtleties gluing and caring for them during operation.
Types and features of paper wallpaper
Paper is a fibrous material, the structure of which is easily penetrated by moisture and grease. It is an excellent springboard for dust and is even capable of absorbing odors. All this must be taken into account when decorating the premises - if you choose the wrong wallpaper, the atmosphere that prevails here will soon leave its indelible mark on them.
Protection of the paper web from aggressive operating factors is provided by a number of modern technologies... In accordance with them, the following types of paper wallpaper are distinguished:
- Smooth
The basis is paper of various sorts, sometimes with a lightfast base, and the design on the front side is applied by typographic method.
- Duplex
They have 2 layers, so they do not tear, and, if necessary, can be easily removed from walls or ceilings.

- Embossed
Also double-layered, but the front side is embossed, i.e. has a certain, often patterned, relief.

- Structural
Manufactured with the addition of seals - sawdust, crushed nutshells, etc., due to which they acquire a unique facial relief.

- Acrylic (foam wallpaper)
They are a two-layer fabric, on the front side of which it fits thin layer foamed acrylic - the result is rather unusual patterns.
- Moisture resistant
This type of wallpaper has a moisture-resistant coating, thanks to which it can be cleaned and washed.

Obviously, the more aggressive the atmosphere in the room being trimmed, the higher the wear resistance the wallpaper should have and the more it will cost. But the most important thing when buying is not to confuse different kinds canvases. For example, some paper wallpapers are virtually indistinguishable in outward appearance from vinyl, which cannot be said about their price. In short, be careful not to accidentally overpay for properties that you do not need.
Preparation for gluing

Paper wallpaper is a fairly simple material to work with, which is easy to cope with even in the absence of gluing experience and alone. But first, it is necessary to properly prepare the surfaces to be trimmed: dust, remnants of whitewash and old wallpaper, etc. will not allow gluing normally, and defects in the rough finish will immediately appear on the front side of the canvas.
For gluing paper wallpaper you will need:
- roller or brush;
- wallpaper brush;
- tracer;
- plumb line;
- construction knife;
- sponge;
- container for glue;
- wallpaper table;
- ladder;
- roulette;
- long ruler;
- wallpaper glue.

Having collected everything you need, you can start preparatory work. They are performed in the following order:
- Removing old wallpaper, whitewash and peeling plaster
Old wallpaper is very easy to remove if you scratch it and moisten it with a sponge before soapy water... It is most convenient to work with a metal spatula. Those areas that are peeled off poorly will have to be moistened again.
- Removing paint residues
Oil paint or enamel is removed with coarse emery. Water emulsion and whitewash, similar to old wallpaper, are first soaked with soapy water, and then removed with a spatula.
- Elimination of defects of the glued surfaces
For high-quality gluing of paper wallpaper, it is necessary to carefully plaster all cracks and smooth out irregularities on the walls or ceiling, after which they should be cleaned with a plaster mesh.
- Primer
Before gluing the wallpaper, the surface of the walls and ceiling must be primed. This will ensure proper adhesion of the adhesive and prevent air bubbles from forming under the wallpaper.
- Cleaning
After finishing preparatory work it is necessary to carry out wet cleaning in the room. This will avoid contamination of the new wallpaper during the cutting process.
Preparation for gluing paper wallpaper on a photo
Preparing the canvas
Wallpaper is sold in rolls, which are printed immediately before starting work. But first, you should mark the walls. To do this, you need a plumb line and a tracer. In the absence of the latter, you can use a level, a long ruler and a pencil or chalk. You should mark the top level of the wallpaper (for rooms with high ceilings) and mark the joints of the canvas with vertical lines.

There are two methods of gluing wallpaper: end-to-end and overlap. If the first option cannot be used, the canvas should be glued in the direction towards natural or electric light.

Immediately before pasting, you can lay out the walls: along the lines of the corners, as well as the area along the plinth and the ceiling line, a 10-cm strip of glue is applied. After 2-3 minutes, the wall will be ready for gluing.
When starting to cut wallpaper, you should wipe the surface of the table or, in the absence of the latter, the area of the floor on which you will temporarily fold the cut pieces of canvas. Cutting is done with a 3-5 cm margin on both sides of each section for a slight overlap along the plinth and ceiling. The finished stack is shifted with a 10-15 cm indent, due to which, applying glue to top sheet, you will glue the seam strip on the next one. And remember that paper tends to get wet quickly, so the glue should be applied in a moderate layer.

After gluing, the upper strip is folded in half, after which the same action, only in the opposite direction, must be repeated. The folded strip is set aside, after which you can proceed to the next one, while the previous one is saturated with glue. It is not worth taking into work more than 3-4 strips: you may not have time with pasting, since wallpaper glue dries very quickly in the air.

Selection, preparation and application of wallpaper glue
For gluing medium-density paper web, glue for lightweight wallpaper, for example, CMC, is ideal. As for its quantity, it depends on the area to be pasted, which, like all the necessary proportions, must be indicated on the package. When buying, it is very important to pay attention to the presence of a quality certificate. The adhesive must not contain substances harmful to health.

Wallpaper glue preparation:
- 5-7 liters of water are poured into a pre-prepared container;
- the water is shaken and a dry adhesive mixture is poured into the resulting whirlpool;
- the resulting mass must be thoroughly stirred, and then left to swell for a while.
The thickened wallpaper glue should be uniform. If you find lumps, they can be easily removed by stirring the mass again.

Glue on the back of the wallpaper should be applied evenly, spreading it over the entire surface. It is most convenient to use a roller for this. After applying the glue, you need to wait 5-7 minutes so that it is well absorbed by the paper web.
If glue accidentally gets on the front side of the wallpaper during application, it must be removed with a damp sponge. Too much effort should not be applied at the same time - it is better to use more water... This will preserve the texture and color of the front surface.

Some types of wallpaper glue have special additives that reduce the setting time. Therefore, before cooking, you must carefully read the instructions, otherwise you will face unpleasant surprises in the form of a composition that thickens too quickly.
Technology of pasting walls and ceilings with paper wallpaper
You need to glue the wallpaper quickly and accurately. That is why it is advisable to work together. Paper wallpapers are almost always laid with a slight overlap, otherwise, due to the low wear resistance of the canvas, the joints will wear out very quickly.
The sheet of canvas that you glued first, after 5-7 minutes, is unbent so as to gain access to the upper edge. Next, you need to stick the top strip on the wall - just on that section of the wall that you processed with glue. Now, holding the canvas by the top, it must be carefully unbent and glued to the wall. Along the way, with smooth arcuate movements using a dry sponge or rag, you need to smooth the wallpaper until it adheres properly.

Small air bubbles can be left alone. When the glue dries, the paper wallpaper will shrink slightly and drive out the air. If the bubbles are large, they need to be carefully pierced with a needle and the air out. In such areas, it will not hurt to add glue. This can be done with a syringe, while the edges of the canvas are best glued with a brush.

After gluing 4-5 sheets, it is very desirable to remove indents - after the glue dries, carefully cutting them off without affecting the main canvas will be very problematic. Do not forget to control the orientation of the pattern in adjacent areas of the canvas - it must match.
Sticking wallpaper to the ceiling is performed in the same way, with the only difference that the canvas should be placed perpendicular to the direction of illumination. Please note that the wallpaper is always glued end-to-end on the ceiling.

The joint lines between adjacent sheets must be rolled with a narrow rubber roller. It will not hurt to perform this operation when gluing wallpaper on the walls with an overlap - as practice shows, it is here that they most often come off due to the different microstructure, and therefore the absorbency, of the front and back surfaces of the wallpaper. You also need to remember about cutting out the canvas in the currents of the placement of switches and sockets. It is advisable to do this before gluing - after the hole, it remains to fix it with a clerical knife.

If you have carefully prepared for gluing, have chosen a reliable glue, cut and pasted paper wallpaper correctly, they will serve you as long as possible. Of course, provided that you protect them from damage, moisture and dirt.