Furniture made from solid wood has been highly prized at all times. Now it can rightfully be considered a luxury item. However, anyone with basic carpentry skills and sufficient desire can dotable from an array with minimal investment.
Furniture should be durable, reliable, beautiful, and meet its functional purpose.
Of course, buying a finished product is much easier and faster, but making it yourself has a number of advantages:
- Price. The cost of a natural wood table is quite high.

However, when made at home, it will decrease significantly.
- Quality. Choosing wood yourself reduces the risk of using low-grade materials.

You can choose exactly the breed that will meet all the necessary technical and aesthetic requirements.
- Durability directly related to the build quality of the product. When creating furniture for himself, even a novice carpenter will assemble the structure neatly and reliably.

Pre-treatment of all boards with special protective agents guarantees a long service life.
- Design ... Despite the huge selection in stores, situations often arise when you like everything, but I would like to change some small detail.

Making the table yourself, you can take into account all the nuances and create the perfect model for yourself.
- And of course, there is nothing more enjoyable than admiring and using your creation every day.

This is a great opportunity not only to save money, but also to bring a piece of your soul into the house.
Choosing a table model
Before proceeding with the selection of material and directly creating a piece of furniture, you need to decide on its design. The model directly depends on the functional purpose and characteristics of the room.
For example, if the room is small, it is better to choose compact products.

In this case, a neat round table with 1 leg will do.
For a spacious dining room, living room, the ideal option is a classic rectangular table.

It can also be an oval roomy table with a massive underframe.
If there is a need for a product with a large capacity, but the room does not imply the presence of large-sized items, you should think about a sliding or folding structure.

The table top can be extended if necessary.
For novice craftsmen, it is easier to make a piece of furniture of a square or rectangular shape on 4 medium-sized legs.

Such a table is manufactured without additional mechanisms.
Which wood is best?
Each type of wood has its own characteristics that should be considered when designing furniture.

People have long considered wood as the main building material.
For a more convenient and detailed comparison of characteristics, let us refer to the table.
Table 1. The most common types of wood used in the furniture industry
| Name | Average density kg / m3 | Shear strength | Characteristics |
| Oak | 700 | 9,9 | A very durable breed, resistant to decay processes. It has a beautiful, noble texture. |
| Beech | 670 | 12,1 | A representative of hard rocks, easy to handle, pliable. However, it is prone to decay, which requires careful antiseptic processing. When dry, it deforms more than oak. |
| Larch | 660 | 9,8 | Strong, resistant to decay and deformation, has a tendency to cracking. Therefore, it is not recommended for rooms where changes in humidity and temperature are constantly observed. |
| Birch tree | 630 | 9,0 | Strong enough, resistant to deformation, chipping and cracking, but at constant humidity tends to rot. This disadvantage is easily neutralized with the help of antiseptic treatment, since the tree is easily impregnated with special compounds. |
| Pine | 500 | 7,4 | Strong, soft, lightweight, slightly deformed. Due to its natural characteristics, it is flexible when working. Easily impregnated with antiseptic compounds. |
| Spruce | 450 | 6,8 | Less even texture in comparison with pine, has more knots. Not so well processed with an antiseptic, more capricious in processing. |
| Aspen | 380 | 6,5 | The texture is not particularly expressive, the color is whitish-green. Due to its softness, it does not crack, it is easy to process, it is not very susceptible to decay. However, traces of mechanical stress may remain on surfaces made of this material (for example, if a child draws with strong pressure on a pen or pencil) |
| Fir | 370 | 5,9 | It is soft, does not tolerate moisture well, is prone to decay processes, therefore it is not suitable for furniture that will be used outdoors or in rooms with high humidity. Easy to process, making it easier for novice joiner craftsmen. |
So, having carefully studied the table, it becomes clear that soft wood species (aspen, fir) will be easy to work with, but during service they can disappoint because of their susceptibility to mechanical stress and low moisture resistance. It is better to opt for harder varieties such as pine, larch, beech and oak.

We did not consider super-strong wood species (hornbeam, yew, etc.), since their processing is extremely difficult at home.
Necessary materials
To make a table, you will need the following materials.
- Beam 40 mm x 40 mm for attaching the support to the table top and giving the structure strength and stability.
- Beam 70 mm x 70 mm for making legs. If the design provides for classic carved balusters, and the experience of woodworking does not allow you to make them yourself, you can always choose a suitable option in a furniture accessories store and purchase ready-made elements of the product.
- Board and for countertops (thickness not less than 40 mm).
- Wood glue.
- Furniture dowels and confirmants.
- Antiseptic.
- Varnish or glaze for woodwork.
The number of boards depends on their width and the expected size of the table.
Tools for work
All tools necessary for work can be divided into 3 groups.
- Measuring tools:
- Metal ruler 50-100 cm;
- Roulette;
- Metal square;
- Manual level 50-80 cm.

DIY tools for creating furniture.
- Tools for working with wood surfaces:
- Saw / hacksaw;
- Jointer;
- Grinder, sandpaper.

The necessary set of tools.
- Assembly tools:
- Wedge or screw clamps;
- Mallet (suitable for both wooden and rubber strikers)
- Screwdrivers with different points;
- Drill, screwdriver.
Do-it-yourself wood table: step by step instructions
Table top
Handle everything thoroughlyboards.
Having achieved a perfectly flat and smooth surface, drill holes in each end for the dowels with a step of 10-12 cm (for the extreme boards, they should be made only on one side).

All edges must be milled and the surfaces sanded.
After thorough cleaning of chips and dust, they must be coated with special wood glue (PVA can be used).

Then the boards are fastened together using wooden dowels placed in the prepared holes.
Important! When gluing, direct the pattern in different directions. This increases the strength of the product, and reduces the risk of deformation.

When the canvas is assembled from the boards, it is necessary to dry it, securing it with clamps.
After complete drying, cut off the excess glue with a construction knife and sand the surface with a grinder.Treat the finished shield with a special antiseptic.
Thus, it takes one day of work to make a canvas from wood.
Underframe
Consider the process of creating a standard underframe (4 legs and a rectangular frame).
Saw off the required size beams for all elements, process them with a grinder or manually with sandpaper and cover with an antiseptic.

To save time, it is better to perform the procedure in parallel with the table top.
When the prepared elements are ready, fasten the pairs of legs with smaller transverse beams using furniture screws.

They can be greased with glue beforehand.
Important! Self-tapping screws are screwed from the inside at an acute angle to the surface.
In the same way, fasten the legs with long beams.

Drill holes in the center of each leg for further assembly of furniture.
If you are planning to dotable two-color, the painting of the prepared elements should be carried out before final assembly. If the product is the same color, assemble the structure and paint it as a whole.
Final assembly of the product
Place the countertop face down on a flat, clean surface and start working:
Attach the underframe on top as it should be attached and draw along the inside with a pencil.

Mark the joints of the parts with a pitch of 200 - 230 mm on both surfaces.
Drill holes in the underframe and countertop, remove the shavings from them, coat with glue and assemble the product using special furniture fasteners (as in the manufacture of a wooden canvas). Use a mallet if necessary.

Leave the garment to dry for a day (at least 12 hours).
The final stage
When the structure is assembled, make the final sanding, apply decorative elements in accordance with the design project and cover with several layers of varnish or glaze.

Adhering to the instructions, you can easily make a wooden table with your own hands.
Important! Each coat must dry completely. Therefore, finishing the table will take at least another 1 day. Therefore, the process of creating your own masterpiece from the array will take you about 3-4 days.
Spending the minimum amount of money and a few days, you will get a reliable and durable diningboard table and oak, pine or other material you like, and a lot of positive emotions.

So you learned how to make your own solid wood table.
VIDEO: Do-it-yourself solid wood dining table.
A do-it-yourself kitchen table is both an opportunity to save money and a way to provide the kitchen with unique furniture that fits perfectly into the available space. However, it is important to correctly determine the dimensions and shape of the future structure.
How to make a wooden dining table
A solid wood table is beautiful, natural and, as a rule, expensive. But buying such a table is not necessary, because you can make it yourself with no less high quality and for much less money.
So, to make a dining table with your own hands, you will need:
- 4 things. legs-balusters for the table, 73 cm high and not too thin;
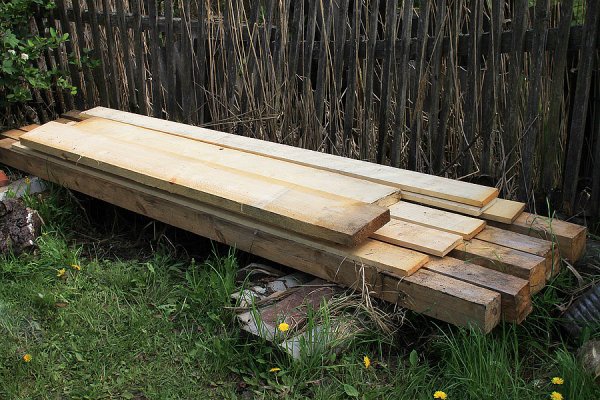
- For the table top: 4 dry edged wooden boards 1 m long (for a table 60 cm wide);

- For the frame: 2 boards 80 cm long and 2 boards 40 cm long.
Prepare the tools: a plane, a grinder or a sander, a jigsaw for cutting boards, a circular saw, a drill (with an 8 mm drill), a screwdriver, sandpaper, self-tapping screws (30 mm), wood glue, dowels, clamps (preferably). And of course a pencil, tape measure, gloves and goggles come in handy.


To finish the table, you will need varnish, stain or paint along with a primer. First, let's make the countertop. To do this, you need to fit all 4 boards as accurately as possible to one length - 100 cm. If your boards were not sawn on a sawmill, then they must also be trimmed in width and thickness. Then they need to be carefully sanded with a plane. The better you sand the wood, the smoother the countertop will be. Finish the edges well so that the boards fit together as tightly as possible.
We will not connect the boards with screws and nails, but with glue and dowels (chopiks). To do this, on the edges of all boards, we make the same marks with a step of 10-15 cm and drill holes for the dowels with an 8 mm drill. Then we sand the edges and apply wood glue to them and into the holes made. Now we drive the chopiki processed with the same glue into the holes and, in turn, connect all 4 bars. Remove excess glue on the surface with sandpaper and grind it, as well as all the edges with a plane. At this stage, you can walk along the countertop with a metal sponge to give the wood texture.

So, the table top is ready. Now you need to fasten the legs and make a base for it.

To do this, you need to evenly fasten the balusters with short transverse boards with glue and screws. The glue dries for at least 12 hours.


We attach the legs to the long crossbars and drill holes in them in order to install the tabletop later.

After the glue in the frame dries up, you can start installing the countertop on it (frame).

If you want to make the table longer and wider, then you need to strengthen the table with two additional transverse strips, as shown in the photo.

So, the table is almost ready, it remains only to process it with varnish or stain or paint it, having previously primed it.

What color to paint the table? Start from personal preference and the color of the rest of the furniture. Below is the most versatile option - the table top and legs are stained.

You can watch the main mistakes of wood staining with your own hands in this video.
If you like gloss, then the surface of the table can be stained, and varnish on top (example in the photo below), or simply varnished.

You can paint the legs white, and cover the table top with a stain to get the design like in the next photo.

How to make a kitchen table from chipboard
A do-it-yourself kitchen table made of laminated chipboard is a practical and budget solution. Such countertops are covered with decorative plastic that is resistant to abrasion. In a typical version, the dimensions of the tabletop canvas are 3000x600x36 (26) mm, but today it will not be difficult to purchase a chipboard sheet, sawn to the required dimensions, or agree in a furniture workshop to sell a suitable trim.
You will also need:
- Connecting and end strips;
- End edges;
- Screeds.
Even if you purchase a worktop of suitable dimensions, you will need to additionally process the ends - this will make the result more attractive, as well as protect the base from moisture. For these purposes, you can use a special furniture edging based on polyvinyl chloride or glue an edging tape. The piping option is considered more practical for the dining table and suitable for DIYers.
For the kitchen table, you will also need the appropriate supports - you can buy the legs separately or give preference to a ready-made base. It all depends on what option your drawings provide. The most common option is round legs D \u003d 60 mm and 71 cm high. They can be collapsible, adjustable in height, and also differ in design - matte, painted, shiny.
In our case, it will be chrome-plated shiny rod legs with a diameter of 60 mm, as well as a table top made of white chipboard with a thickness of 36 mm and a white plastic mortise T-shaped edging with girths is matched to it.

So, how to make a dining table with a chipboard top:
- The material is marked according to the drawing. At the corners, the curvatures must have a radius of 60 mm.

- The table top is shaped with a jigsaw.

A saw with reversible teeth should be used, otherwise the plastic coating may chip. First, the corner of the chipboard is cut off with a jigsaw with a margin of 2 mm, and then it is finally rounded off with a grinder.
- A groove is milled for the furniture edge.

- The edging is stuffed. Before this, the ends of the product must be covered with silicone sealant. The sealant is applied both to the edging and to the top edge of the countertop. A rubber mallet is used to stuff the edge. Then the excess sealant is removed.

- Legs are attached. To do this, a pencil is marked on the back of the tabletop. In most cases, the legs are placed 100 mm from the edge.

For fastening the holders, self-tapping screws with a countersunk head about 20 mm long are used. After that, the legs are put on the holders and fixed with a hex wrench - that's it, your new table is ready.

How to correctly determine the dimensions
According to the principles described above, tables can be made larger or smaller in length and width. How to choose the best size for your family?
If we are talking about a standard kitchen with dimensions from 6 to 8 squares, then the drawings will show a typical construction with a height of 750 mm and a perimeter of 800 * 500 ... 1200 * 600 mm.

A do-it-yourself dining table should be designed for a certain number of people. Usually it corresponds to the number of tenants - 3-9, but a couple of free places are still added for guests. For large companies, it will be a good solution.

Calculations are carried out as follows: the number of persons is multiplied by 60 ("working" perimeter per person). As for the width of the countertop, here we follow the recommendations of experts - its optimal values \u200b\u200bare from 800 to 1100 mm. Narrow tables are difficult to serve, and wide tables are inconvenient for seated ones.
If you decide to make the kitchen table with your own hands oval (round), then you will have to calculate the circumference - diameter * 3.14.
Form selection rules

The shape of the kitchen table plays a significant role in the perception of space. Universal design - rectangle or square with right angles. It is balanced and can be installed close to a wall or in the center of a room, saving space.

Oval models are also quite comfortable and beautiful, but they do not differ in their large capacity - the largest product can fit no more than 8 people. In addition, they require large areas - more than 8 sq. meters, because you can't put them against the wall.

It can also be called a versatile and traditional option, suitable for both very and large kitchens. But it has less capacity than a rectangular table.
The best option is a rectangular table with rounded corners. We have already described how to make just such a chipboard table with our own hands.
Furniture care rules
After the dining table is made, you will need to take care of the long operational period of the product.
So, furniture made of wood, polished and lacquered, needs careful maintenance, since it can easily be scratched. In addition, traces of contact with hot are possible here. A universal polishing compound is selected as a basic wood care.
If we are talking about a countertop made of MDF or chipboard with a plastic coating, then caring for it is not difficult and consists in regular washing with detergents.
Do not forget that kitchen furniture must be moved away from heating appliances and from walls bordering the street. Direct sunlight will also be harmful to wooden furniture.
You should start working, of course, after you have chosen a certain model of the subject. If, as such, there are no skills in carpentry, then aiming at a whole work of art is not worth it. But even the easiest option in terms of manufacturing may look quite decent and even more beautiful from the fact that it will be made on its own.
List of required tools or how to make a wooden table with your own hands using what is in each pantry
After examining and sorting through with your own hands many drawings of wooden tables, you can come to the conclusion that you need the entire carpentry toolbox. Indeed, for comfortable and fast work, you will need to acquire the following:
1. Electric jigsaw.
2. .
3. Grinder.
4. Screwdriver.
5. A set of drills of various diameters.
6. Brushes.
7. Sandpaper with zero grit.
8. Materials for processing (stains, varnishes or paints).
9. Materials for elimination of defects (wood putty and similar).
10. Joiner's vice and glue.


The list is rather big and you can think about whether it is easier to buy a ready-made piece of furniture than to puzzle over how to make a table out of wood with your own hands with a minimum of available tools. But there are no hopeless situations, so we will contrive and find new ways to achieve the goal.
- The jigsaw is replaced with a regular saw (however, there will be an order of magnitude more work to eliminate irregularities).
- There is no need for a router if the table top is made from a single sheet, and not separate segments.
- For the same reason, joiner's glue along with the vice can be removed from the list.
- You can also cross out the grinder, but it is worth clarifying that it is almost impossible to manually polish the surface to the required state. Therefore, we choose a more budgetary option - a grinding attachment for a screwdriver.
- It is unlikely that you can do without a screwdriver, but this tool is available in almost every home.
Other parts and materials, even if they are absent in the house, then their purchase is not so expensive.
Do-it-yourself assembly according to the drawings of a wooden table with a simple and waste-free design
To assemble a table with your own hands from wood according to this drawing, you do not need to be a trained specialist. The design is simple and straightforward, the main thing is to do everything carefully and slowly. This option is also attractive in that it can be made in two forms: both a coffee table and a dining table. The only condition is that in the manufacture of the latter, support stands will be needed (they can be easily purchased at a hardware store).
Wooden table drawing of a wooden table scheme No. 1
So, the instruction on how to make a table out of wood with your own hands is as follows (see diagram number 1):
1. The preparation of the canvas is carried out (sanding, cleaning, treatment with antiseptics, sealing microcracks, etc.).
2. Transfer the separation lines from the drawing to the canvas.
3. If you move from the left edge of the horizontally laid sheet to the right, then the markup will look like this:
40 mm - line (this cut will serve as a support bar).
250 mm - curved line (this cut will play the role of legs, in the case of a coffee table, and if the dining option is chosen - as a support stand for high legs).
900 mm - curved line (the largest segment, of course, will be used as a tabletop in the future).
250 mm is the last straight line (divides the remainder into a leg and a support bar).
4. Elements that will be supporting (legs and strips) must be shortened by 30 mm on the sides. This is done so that their edges are not visible from under the countertop.
5. Putting the leg with the arc downwards, we see that it rests on sharp edges. In this case, we will not get the stability of the product. Therefore, we measure 30 mm from the top of the corner and make a horizontal cut on both sides.
6. Attach a bar to the upper part of the legs with self-tapping screws. The step between them is 150 mm.
7. We step back from the edge of the table top 250 mm and put the legs in this place. Self-tapping screws (4 pcs) will be screwed into the worktop through the bar, so make sure that they do not fall into the transverse fasteners.
Our article on how to do it yourself for a summer residence will be useful.
We paint or varnish the completely assembled product. To obtain a high-quality mirror-smooth surface, sanding on clean wood is not enough. After covering with the same varnish, one way or another, but small villi will "stand on end". Therefore, after each applied layer, it is necessary to sand the surface with fine sandpaper. And the applied layers should be at least three. The end result is a wonderful piece of furniture without any extra money.
We will send the material to you by e-mail
Not everyone likes to buy finished products for home use. The soul of some people requires creative and practical self-realization. The editors of the online magazine, the site invites those who wish to learn how to make a table out of wood with their own hands, what is required for this, and whether there are pitfalls in such work.
A beautiful wooden product for the kitchen or living room, made with love
Our step-by-step recommendations are unlikely to be useful to professional carpenters, but advice to novice amateurs will come in handy. First, let's consider what products you can make with your own hands from wood.


Of course, the more skills a person has, the more difficult the model he can make. But in order to build a table with your own hands from wood, there are ready-made drawings and photos to help beginners.
How to choose material for self-production of a wooden table for home and garden
What to make a dining table with your own hands? Best of all - from wood. The most pliable for the newly-minted master will be a pine. Poplar products will look more solemn. For the street you can take mahogany.
If you want an option for home and easier, then you should consider laminated chipboard with an optimal thickness of 25-35 mm. On the countertop, you can take wooden boards, birch plywood with a thickness of 35 mm. The legs can be made of metal or timber (about 50 mm thick).
In order not to be mistaken with the amount of material, a preliminary drawing of the future structure is made with exactly the specified dimensions.
Advice! Suitable product heights vary between 750-800 mm.
Related article:
DIY furniture made of wood : for a garden, a nursery, a kitchen, a bath, a garden, a gazebo; how to restore pieces of furniture, useful tips and advice from specialists - read our publication.
What tools are needed to make a wooden table with your own hands
It doesn't matter what shape the future table will be: a certain set of tools is required to work with wood. You cannot do without a jigsaw, and it will be much easier to work with an electric model. To fix all structural elements, use either a drill with a multistage drill for holes, or confirmations. To grind the product to perfection, you need either a special drill bit.

For greater fastening strength, the tools include wood glue.
How to make a wooden table with your own hands - step by step instructions
We have selected four types of structures that you can make on your own, even with a minimum of carpentry skills. We invite you to learn about the stages of making a round and rectangular table, a coffee table and a model for a garden gazebo.
Making a wooden round table
The easiest way to make a round table top and tie ring is from or in sizes 1500 × 1500 mm and 1280 × 1280 mm. You will also need two laminated chipboard strips (1110 × 120 × 25 mm). We will make the legs from four wooden blocks measuring 120 × 50 × 750 mm.

How to make a countertop
How to draw a circle perfectly straight? On a sheet of plywood in the center, place your own thumb with a string and a pencil attached to it. The length of the rope from the base to the top should match the radius of the future countertop. Holding your finger in one place, draw a circle around the full length of the rope. It remains to cut it out with a jigsaw.
The circle underframe is cut out in the same way.


Making legs
A round table made of wood or chipboard will look charming if you do everything consistently. You won't have to bother with the legs if there is no excessive originality in the plans. The bars are divided into 4 parts according to the desired table height minus the thickness of the table top. First, one leg is cut off, and the other three are already aligned along it.
All processing by the grinding machine is carried out immediately.
Advice! You cannot rush to sanding, since the first varnish will reveal all the flaws.
Assembly of the structure and processing of the finished product
The assembly is carried out in stages. First, the strips are aligned groove into groove. Then the crosspiece of the slats is connected with the legs with confirmations, as in the figure below:

If you want to make the structure stronger, before connecting the legs to the table top, their upper base is coated with glue.
Advice! Nails are not used in such work: a self-tapping screw or confirmat can be unscrewed without problems, and the connections will be much stronger.
Making a rectangular wooden kitchen table
The rectangular design is classic and very useful in everyday life: it is convenient to cook on such a table and you can comfortably dine at it.

How to make a countertop
A wooden table top for a table is made either from a whole sheet of plywood, or from individual edged boards processed to perfect smoothness.

Having fastened the boards with screws and glue, they begin to make the frame.
Making wooden legs for the table and frame
At the heart of the quadrangular models is the frame. It serves to securely fix the legs, ensuring the stability of the entire structure. Turn the tabletop over, measure 3-4 cm deep on each side and transfer the measurements to the boards. As a result, you will need two boards of shorter length and two more.

The frame is made of four elements: according to an approximate ratio, these are two boards of X cm and two of 2X cm. They are overlapped with each other alternately, building a rectangle. In order not to break the angle of 90 °, any board is used while working with a screwdriver: they press the structure with it while tightening the screws.
As soon as the frame box is ready, they begin to make the legs. You can take ready-made balusters for the table, buy metal supports, or cut them out of bars according to the desired length according to the drawing.

Both the frame and the legs must be carefully polished!
Product installation and final finishing
The frame is screwed to the tabletop with glue or self-tapping screws. Then the product is turned over and the legs are attached.

Important! Better to make the screw holes well in advance. This eliminates the possibility of tree splitting.
Why not use nails and a hammer? Not everyone has the skills to work with a hammer - here it is dangerous not only to knock on the finger. Excessive zeal can easily damage wood by splitting it. Confirmates and screws hold the tree much stronger.
As soon as the leg is fixed, the angle is immediately checked: there should be no deviation from 90 °. The operation is repeated with other legs. You can attach the legs directly through the countertop, but this will affect the aesthetic component of the product.


Related article:
: photos of the best ideas. What can be made of pallets for an apartment, office and summer cottage; rules for the selection and handling of pallets; master classes on making a table, sofa, bench, chair and rack - read our publication.
DIY wood coffee table
Not only a beautiful element of the interior, but also useful. No need to look for where to put a book, gadget, glasses, TV remote control in a prominent place. Such necessary structures are made from different materials: metal, glass, plastic, chipboard, wood. But let's leave the other materials alone and concentrate on working with wood.


The choice of a wooden table top for the table depends on the expectations of the owner of the product. Someone wants something massive, while others prefer light options. Let's dwell on a simple solution.
We buy five boards of 30 × 150 mm and process them to perfect smoothness. We immediately saw off the desired length on the countertop: you should get 6 identical canvases. We take four bars on the legs, 6 canvases of shorter length on the lower tabletop, 4 narrow slats for the frame.
| Illustration | Action Description |
|---|---|
 | To brush wood, use a grinder with a brass brush head. The procedure will expose the structure of the wood, giving the product a special flavor. |
 | We go back and forth along each board from the side that will be the front. |
 | We process the tree with fire. The flame is gradually moved from place to place: the board will acquire a beautiful darkish tint. The procedure will finally destroy unnecessary soft wood fibers. We actively wipe the entire surface with a felt boot or a piece of felt. |


We begin the process of assembling a small table with our own hands from wood.
- The lower and upper countertops are laid on the work surface with the wrong side facing you. The boards are laid tightly to each other, gluing them together. As soon as the boards grab, the slats are attached to the top tabletop. They will serve as a frame and fastening element. They can be glued or screwed on with self-tapping screws. A self-tapping screw is screwed in the center of the rail into each of the boards.
- The legs are screwed to both the tabletop and the slats. You can use the furniture corners.
Video: the process of making a coffee table from wood
DIY wood table with benches in the gazebo
It's time to set aside time and build a wooden garden table.


It is best to take boards of standard sizes. Studs (suitable with a length of 16 cm), washers (24 pieces) are purchased at a hardware store. Long nails (8 cm) will do for a garden gazebo.

Painting a product or just varnishing is a matter of taste.

Who said that a table is a simple piece of furniture? In fact, creating a table is an exciting experience, especially with your own hands from natural wood. Today, in the review of our editorial office, we will tell you how to make a table out of wood with your own hands, what knowledge you need to have in order for your design to serve for many years without complaints.
Ideas for making a wooden table with your own hands: photos, recommendations, drawings and step-by-step instructions
Before getting to work, it is important to decide on the following points:
- Dimensions and operating conditions. The functionality and additional activities that need to be taken will depend on this.
- Find (draw) a plan diagram.
- The choice of material and accessories.
For a novice master, it is better to choose simpler sketches. Here are some sketches you might find useful.


Related article:
Photo examples, drawings, diagrams, materials; features of making furniture for the garden, nursery, baths, gazebos, advice and recommendations of the masters - read in our publication.
Wooden table for summer cottages and home: choice of material
It is best to use natural wood. Even old boards are suitable for an experienced craftsman. A few strokes with a plane and now - the raw materials are ready for work. The prepared wood must be dried.


Tools needed to create a do-it-yourself wooden table
For manufacturing, for example, you need a minimum set of hand tools: a hacksaw, a hammer, a miter box, a screwdriver, nails, screws, a tape measure or ruler, a square and a pencil.

Related article:
: what is it, advantages and disadvantages; step-by-step production of a coffee table, armchair, sofa, bench, rack; decor features with photos - read the publication.
DIY wooden table: drawings, photos and step-by-step instructions
For work, you can use both solid boards and. Check your old furniture, you may find materials that can be used.
Making a round wooden table
Let's look at the process of making a simple round table from boards for a summer residence. We need ordinary boards and slats to secure the structure.
Important! Before starting work, the boards must be processed with a plane and sandpaper.
| Illustration | Action Description |
 | We lay out the processed boards in the sequence in which we will knock down the table. In our case, they have grooves and we will connect them according to the thorn-groove system. |
 | We connect the boards with the help and squeeze with clamps. The clamps can be removed after 24 hours. |
 | With the help of the bars, we build up the countertop. Further, on the received shield, find the center and, using a compass or auxiliary means (a nail, twine and a pencil), draw a circle with a diameter of 1000 mm. |
 | Next, with the help, we cut out a circle along the outlined contour. |
 | Grinding the work surface. |
 | We will make the legs from 4 × 4 cm blocks. We process them with a grinder. |
 | We fix the legs on the corners. |
 | Here we have such a simple table for giving. |
Related article:
: photos of the stages of work, the advantages and disadvantages of such beds, their varieties, as well as a step-by-step master class on the manufacture of such structures, how to choose the right mattress for pallet beds - in our publication.
How to make a wooden kitchen table
A very simple and stylish table can be obtained by literally spending one evening at.

By the way, this model is very popular, if you want the same in your kitchen, you can make it yourself.
And here is another option for making a simple kitchen table with your own hands -
Photo gallery of various options for do-it-yourself wooden tables
For example, we suggest exploring several options for wooden tables for different rooms in our photo gallery.
1 of 8


