It often happens that after taking water procedures in the bathroom, a puddle forms on the floor. Of course, the most economical option is to hang a curtain. But if it doesn’t help, and puddles on the floor still collect, then water seeps through the cracks between the bathroom and the wall, it’s time to think about how to close this gap somehow.
Problem resolution options
Experts know many ways to deal with this problem if water is leaking. Before you choose how to eliminate the leak between the bathroom and the wall, you should familiarize yourself with all the methods in detail.
Gap between bathroom and wall
Usually one of the following methods is used:
- seal the gap with mortar;
- foam the joint with mounting foam;
- filling the gap with silicone sealant;
- curb tape installed.
A plinth is installed along the edges of the bath and between the wall - made of ceramic or plastic. According to Soviet standards, a bathroom was included in the project of a house or apartment based on the standard dimensions of the bath itself. If the size of Soviet baths is 170 cm, then a typical bathroom was also 171 - 172 cm wide.
At present, the approach to the design and construction of apartment buildings has changed. The dimensions of the bathrooms have also changed. In addition, the range of bath models has significantly expanded, which differ from the standard ones, both in configuration and size. Naturally, when buying a non-standard bathtub, a gap appears between the bathtub and the wall.
Small gaps, as well as methods for sealing them, will be discussed below, but what should I do if there is a gap of 4 cm? In this case, you can not do without installing a protective screen. Under it, it is necessary to install a frame made of wooden blocks, boards or a metal profile. This design is sheathed to choose from:
- waterproof GVL;
- plywood;
- fiberboard sheets.
On top of this base, as an option, you can glue ceramic tiles (using "liquid nails"). Fill the gaps between the tiles with a special grout, and fill the junction with the bathroom with a waterproof sealant. For small gaps between the wall and the tub, there are other ways to stop the leak.
Solution
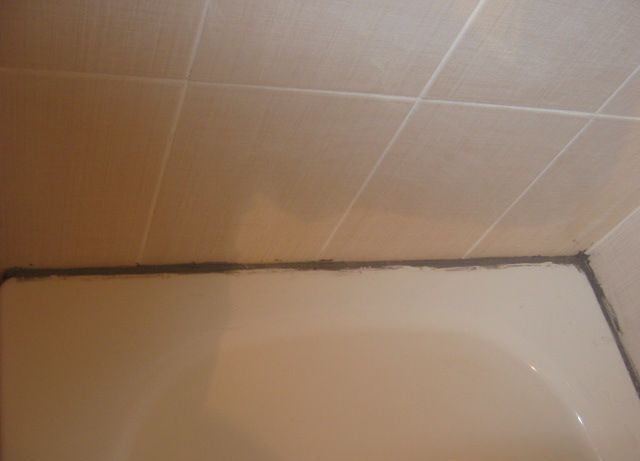
The easiest way to fix a leak is to fill the joint with cement mortar.
The procedure is as follows:
- joint surfaces are cleaned of dirt, dust;
- in order to prevent the solution from falling through, the gap is filled with rags soaked in cement mortar;
- a solution of medium density is applied to a pre-moistened surface;
- a tile border is laid on top;
- if the walls of the bathroom are simply painted, the joint can be painted over with the same paint.
 Filling the gap with mortar
 Mounting foam
I don’t want to knead the cement mortar - mounting foam is used.
The algorithm of actions is as follows:
- the joint is being prepared - it is cleaned of dirt and dust, the surfaces are treated with degreasing liquids, then dried;
- the foam bottle is thoroughly shaken before use;
- the gap is filled with foam. The foam in the process, when it gains hardness, increases in volume by 30 times;
- excess foam, after it dries completely, is cut off;
- the surface treated with foam can also be improved with ceramic tiles or paint.
 Seal the seam in the bathroom with polyurethane foam
 Silicone sealant
Before you start work, you need to remember some subtleties when working with sealant. It must be understood that in rooms with a high moisture content, there is a high risk of mold growth. This must be taken into account and choose a sealant with mold additives.
The material for all occasions is a universal transparent sealant. But it is also permissible to pick up a colored sealant for sale, which will be in harmony in color with both the surface of the walls and the enamel of the baths. On sale there are sealants in different packages - in tubes or in tubes.
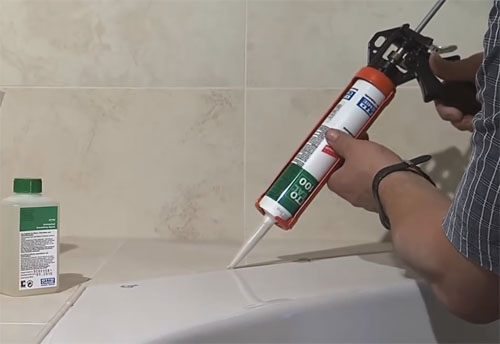
When choosing a sealant in tubes, you also need a mounting gun.
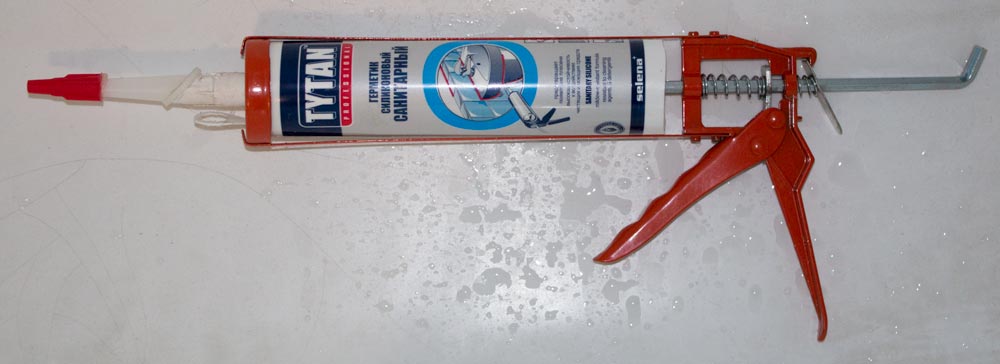 An example of silicone sealant in a gun
 The sequence of actions is as follows:
- the junction of the bath and the wall is being processed. Surfaces are cleaned of dirt and residues of previously used finishing materials;
- applied to cleanse or solvent or alcohol. Surfaces must be thoroughly dried. This will degrease the surfaces;
- before applying the sealant, the nose on the tube is cut off;
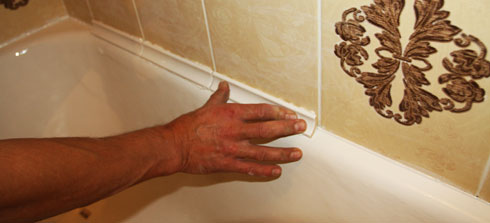
- a smooth line is filled with silicone seam.
The width of the seam can be the same as the angle on the tube with sealant. Sharper angle means thinner line width.
When the gap is completely filled, the seam surface is carefully leveled. You can cover the surface of the seam with either a ceramic border or a plastic plinth.
 Use of sealant
 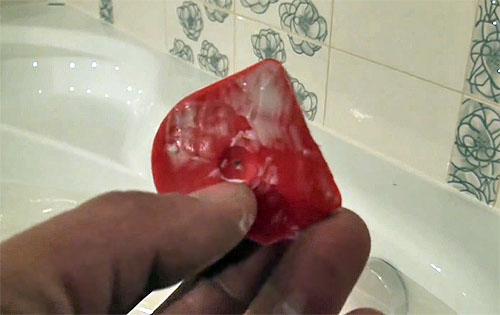 Using a special spatula to level the sealant
Covering the gap with plastic plinth
Another way to seal gaps is to install PVC skirting boards. They block the flowing drops of water on the walls.
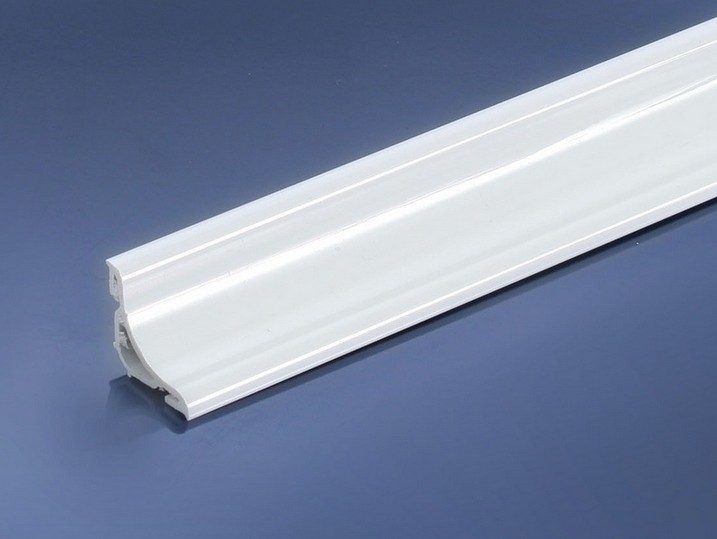 Plastic plinth
 The use of self-adhesive borders is unjustified in rooms with high humidity. Which glue is suitable for installation work:
- it must be transparent. Glue protruding along the edges of the plinth will not spoil the appearance;
- the glue should have the property of quickly gluing, so that the curb does not have to be held for a long time during installation until it completely sets.
For example, those adhesive formulations that are used for plastic and vinyl products are well suited for such work. If the bathroom is already tiled, then a ceramic border is better suited for these works. It is perfectly glued with adhesives specially designed for ceramic tiles.
The process of gluing plastic plinth:
- joints are cleaned of dust and grease with solvents that remove stains of grease, and dry well;
- measure the skirting boards in size, then cut the desired strips. It should be noted that the cut angle should be 45 °;
- border strips are placed on the edges of the bath;
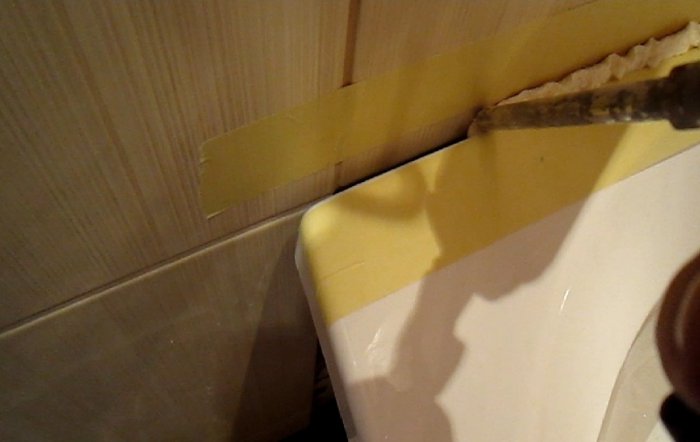
- a special adhesive tape is glued to the wall and to the side of the bath. It will protect the surface from drops of glue;
 Using tape
 - remove the plinth strips, and the adhesive composition is applied on the wall;
- each strip is put into place, pressed against the surfaces and finally fixed;
- after the glue is completely dry, the adhesive tape can be removed;
- the remaining gaps are filled with either transparent or matched to the color of the tile, silicone sealant.
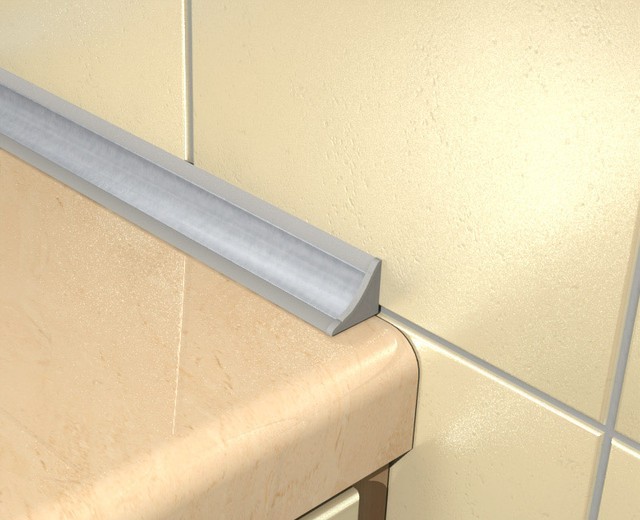 Border example
 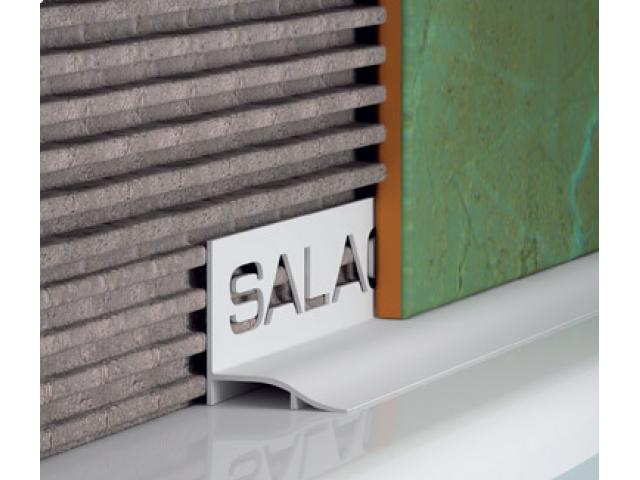 Laying plastic plinth under the tile
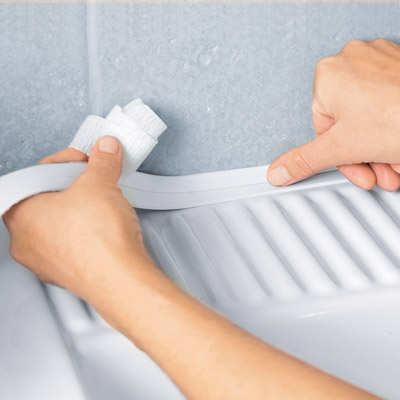
 Application of curb tape
Closes the seam very quickly and comfortably. It is specially made from materials that prevent mold.
 Border tape example
 We mount the curb tape.
- when buying a tape in a store, you must first determine the width of the gap between the wall and the bath;
- the surface of the wall is cleaned of dirt and degreased;
- carefully fill the bath and wall space with silicone;
- measure the desired length from the roll;
- special “liquid nails” are applied to the tape and then pressed to the wall surface and glued;
- During the day, the glue should dry completely.
 Seal the seam in the bathroom with curb tape
 While the glue dries, it is necessary to prevent water from entering the joint. So, various options were considered to eliminate the leakage that can occur between the wall and the bathroom. Residents themselves and construction professionals in practice use them both individually and in combination of different methods. The gap that appears at the junction with the wall is filled with foam, and either a plinth made of plastic or a curb tape, special for these works, is mounted on top of it. The leak is usually no longer visible.