In rooms with high humidity and active use of water, you should definitely take care of high-quality waterproofing, because this is a guarantee that moisture will not spread to neighboring rooms, and also dirty smudges on the ceiling and walls will not appear from the neighbors below.
How is the waterproofing of the bathroom floor done? What methods and materials are there? It is these questions that will now be considered.
Waterproofing the bathroom floor - methods and options
Among the main options are:
- Application of mastic;
- Roll materials;
- Special polymer blends;
- Penetrating water protection;
- Special hydro-barriers (rubber is the main part).
In order for the waterproofing of the bathroom floor to turn out to be of high quality and reliable, and you can also perform it on your own, we recommend that you consider the mastic and roll materials, the installation of which will be discussed in this article.
Each option has its positive and negative qualities, therefore, having familiarized yourself with the installation features, as well as the main characteristics, it will become much easier to make a choice.
Waterproofing the bathroom floor under the tiles with mastic
The main material for coating waterproofing works is considered to be the application of mastic. Here, as with all types of finishes, you need to take care of the tools and materials. And you will need:
- Primer;
- Brush;
- The mastic itself;
- Roller for applying mastic;
- Special tape.
Waterproofing the bathroom floor under the tiles with mastic implies careful preparatory processes from the very beginning. For this, oddly enough, in no case need to wash the surface, just sweep it thoroughly, thereby reducing the amount of dirt on the floor. In order to clean the surface of dust as much as possible, use a vacuum cleaner.
Next, cover the entire floor with a brush with a primer, preferably with deep penetration. Let's say even more - it is desirable to cover the surface with the composition at least twice. The application of a primer increases the adhesion between the surface and the mastic.
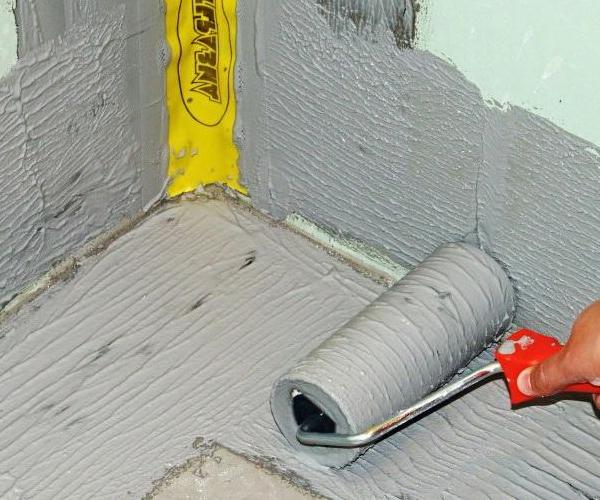
And now - we proceed directly to waterproofing the floor in the bathroom with mastic. The mastic itself is a fairly dense material that is not easy to apply, so please be patient and use a high-quality roller to run over open surfaces. In hard-to-reach places and corners, it is better to apply the mastic with a brush.
Important! The mastic dries for about a day and at this time it is strictly forbidden to walk on the floor.
Mostly bituminous or polymer mastics are used, but I must say that bituminous mastic is usually used for waterproofing foundations, since it is diluted with either gasoline or an organic solvent, and these substances are usually accompanied by a very strong odor, which is easy indoors. can cause poisoning, therefore, if you decide to use mastic, then stop at the polymer one.
Waterproofing the bathroom floor with roll material
Self-adhesive materials are considered the best option for self-assembly. They are not as reliable as those that are glued with a lamp, but these jobs are much cheaper and easier to do at home.
Waterproofing the bathroom floor with roll material will require the following materials and tools:
- Primer brush;
- Primer;
- Capacity for primer;
- Roller;
- Sealant;
- Construction gun;
- Building level;
- Roll material itself;
- Painting knife.
To prepare the floor, again, you need to thoroughly clean it of dust, and it is also recommended to check that the height differences are not more than 2 cm - since only in this case you can be guaranteed an excellent result of waterproofing the bathroom floor.
Further, as in the previous case, the floor is covered with a primer, which in itself serves as a minimal method of waterproofing the surface, and if it is based on bitumen, its waterproofing properties increase significantly.
While the primer is dry, you can cut the material. However, keep in mind that you will need to give the walls an allowance of about 15-20 cm on each side.
After you have prepared and cut the strips - peel off the protective film and install the waterproofing strip.
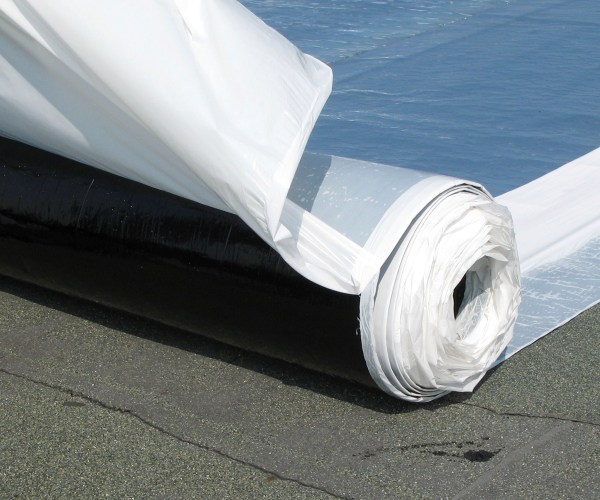
The material itself is overlapped, not less than 5 cm, on average 10-15 cm. After laying, it is necessary to walk over the glued sheets with a roller, thereby "expelling" excess air. Also, experts recommend gluing the joints with a sealant, which will serve as additional protection.
How to waterproof a bathroom floor - results and conclusions
You have already met the basic options, as well as how to make the waterproofing of the bathroom floor, so all that remains is to make a choice in favor of one or another option.
Taking into account the fact that the construction market is developing, we can say that polymer, mastic waterproofing nevertheless has an indisputable advantage over roll, even with a self-adhesive layer, since it is the presence of joints, as well as some difficulties in installation (a particular difficulty lies in the organization of overlaps on the walls - you need to properly measure and cut to ensure waterproofing of the corner) and even taking into account the fact that the mastic has a rather thick consistency and is quite difficult to apply, however, this process will be possible for a person who does not have much experience, better than a waterproofing device made of roll materials.