Do-it-yourself bathroom repair is worth considering in any case: the payment for the work is at least 50% of the cost of materials, that is, self-repair will cost at least one and a half times cheaper, and repairing a bathroom and toilet is expensive in itself. But you need to approach the matter with all responsibility: repairing a bathroom requires not only solid knowledge, but also quite high skill. Therefore, first of all, you should calculate the costs of self-repair, then carefully study the proposals of professionals and, if there is a master or a company ready to make a bathroom renovation inexpensively compared to your estimated costs, then contact them. In any case, we start preparing for the repair by studying the prices.
Prices and costs
Materials for bathroom renovation must be chosen carefully. In addition to the usual parameters, the coefficient of moisture absorption is important (a bathroom is a room with high humidity), the coefficient of thermal expansion (sharp temperature changes are frequent in the bathroom) and porosity - it is important from a sanitary and hygienic point of view. So you can’t count on “just being cheaper”.
Most likely, it will not be possible to find accurate data on the parameters of the materials, and it is difficult for a non-specialist to understand them, so you should choose materials specially designed for bathrooms or for outdoor use. Prices for materials suitable for bathroom renovation are approximately as follows:
- Tile for the floor - from 40 rubles / piece (30x30 cm) produced in the CIS and from 60 rubles / piece from European production, with not the best quality, but often the best decor.
- Wall tiles - the price per piece is the same, but the size of one tile is smaller.
- Porcelain stoneware tiles - from 50 rubles / piece.
- Glue, cross patterns, tile grout - plus 50% of the cost per unit area.
- Glass magnesite sheet (SML) 1220x2440 mm - from 250 rubles / sheet.
- Laminate - from 300 rubles / board 300x2950 mm.
- Self-leveling floor - from 220 rubles / 10 liters of ready-made compound.
- The same, with the effect of insulation (ThermoPlast compound) - from 640 rubles / sq. M.
- Teak or larch floor - from 500 rubles / sq.m.
- PPN polypropylene pipes for cold water - from 24 rubles / sq.m.
- The same PPR for hot water (reinforced) - from 35 rubles / sq.m.
- Sewer pipes 50 mm - from 45 rubles / sq.m.
- Fittings for pipelines and valves - 60% of the price of pipes.
- PVA emulsion - from 240 rubles / pack of 5 liters.
Guided by these prices and knowing the area of the floor, ceiling and walls in your bathroom, you can estimate how much it costs to repair a bathroom on your own. When calculating, consider the following:
- You do not need all the names of materials. The selection criteria for a particular case are indicated below when describing the stages of work.
- All specified materials are equivalent in quality of the final result. The use of cheaper materials only complicates the choice and delays the work.
- For battle and waste of small tiles, a stock of 3-5% should be given by the piece: for example, 300 pieces come out in area. on the floor. You need to purchase 310-315. If a small bathroom is being repaired, 5-7% should be put on waste and battle.
- The waste of panel materials is calculated in preparation for the corresponding stage of work, see below for sections.
- For other materials (cement, sand, putty, silicone, etc.), add 35-40% to the amount received.
- The total time for doing work with your own hands will be at least 2 weeks for a bath and toilet and at least 2 months when replacing a floor screed.
- Prices for plumbing fixtures depend on your choice by name and manufacturer.
Advice:
- Focusing on prices, be sure to ask potential contractors not only the total cost of the work, but also their prices for individual materials. Suppliers give a discount to good craftsmen, and prices will be lower than store prices. If it comes out more expensive, contact someone else: in front of you are either hack-seekers, or clumsy ones.
- When choosing a heated towel rail, consider a custom made stainless steel option. Chromed brass is most often more expensive, and other varieties are either very expensive (such as with additional electric heating) or are of no use in terms of quality.
- Also consider purchasing a faucet with an infrared sensor. It automatically turns on when you bring your hands to it and gives water at a predetermined temperature. The device is not cheap, but the real savings are about 50% (half!) Of water and 35-40% of electricity for heating it.
Sequence of work
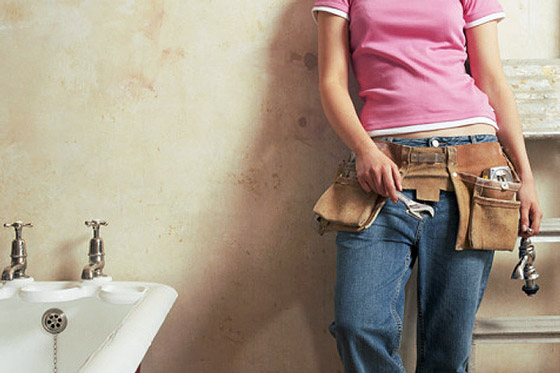
Let's say you decide that you can do an economical bathroom repair yourself. In this case, you need to know that bathroom repairs are carried out in a certain sequence:
- Selection of the number and range of plumbing fixtures.
- Development of design and selection of its colors.
- Calculation of the quantity and purchase of finishing materials.
- Preparation of the premises.
- Revision of the condition of the floor and the choice of a method for its repair.
- Purchase of materials for floor renovation.
- Floor repair: waterproofing, screed replacement, insulation.
- Laying of pipelines.
- Laying of electrical wiring.
- and the ceiling.
- Ceiling decoration: insulation and cladding.
- Floor covering.
- Wall decoration: cladding, grouting, corner sealing.
- Installation of ventilation.
- Plumbing installation and assembly.
As you can see, the recommended sequence of work is somewhat different from the traditional one. Explanations follow in the text; we, before describing how to make repairs in the bathroom, will further clarify some important points:
- A warm, damp bathroom is a favorable environment for the growth of microorganisms. Therefore, finishing methods like drywall on the crate are not considered: any deaf cavity in the wall will sooner or later become a breeding ground for infection.
- The bathroom, according to the degree of risk of electric shock, is a particularly dangerous room: high humidity, high temperature, electrically conductive (wet with any type of coating) floor. Consequently, the question of sockets and switches in the bathroom disappears - it is fraught with risk to life and a considerable fine. How to get around this limitation, without formally breaking the rules and without putting your life in danger, is described in detail in another article; here we will only give general guidelines.
- When planning work in the bathroom, you should in every possible way avoid the use of ordinary industrial wood, parts and fasteners made of plain steel with any coating, aluminum and other materials that corrode with constantly high humidity or actively absorb moisture.
- In a small apartment, it makes perfect sense to install a shower cabin instead of the previous bath; possibly combined with a corner sitz bath. At the current prices for drinking water and hot water supply, residents of budget housing do not often want to soak up the bath, and in a small bathroom, space is freed up for a washing machine.
Getting started with the repair
Plumbing and design
How to start DIY bathroom renovation? From the development of its design, and design - from the choice of plumbing. Let's not joke about the combination of high and low matters: the complexity of the repair and the cost of it largely depend on these stages. For example: a tulip washbasin greatly simplifies the laying of pipes, but requires tiles of increased smoothness and without relief for wall cladding, otherwise dirt will slowly creep along the walls from the stand under it. A bathtub faucet also makes piping easier, but then a separate washbasin faucet is needed.
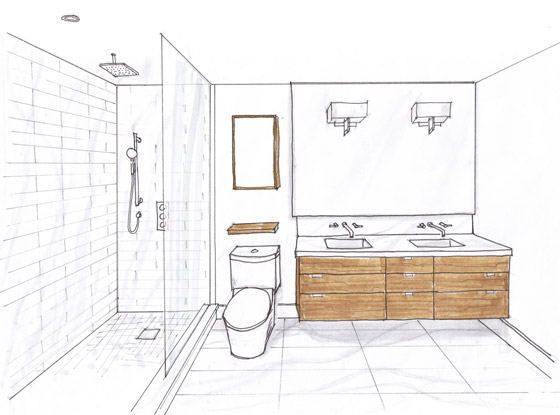
It is impossible to list all the nuances, we will only inform you of the fact: in the same apartments of the same house, the bathrooms are approximately the same in appearance, with the same materials from the same supplier, the cost of repairs differ by up to 20%. Considering the total cost of such an expensive object as a bathroom, the amount is considerable. So - we think, consider, estimate.
You can also notice that in an ordinary house you don't even have to think about a mixer built into the wall: the possibility of this kind of luxury is laid down at the stage of building design. In typical houses, gouging a niche for it is unacceptable.
Materials (edit)
Pipes
The only suitable pipe material is polypropylene. Reinforced plastic is more expensive and, in terms of technical and economic indicators, is more suitable for long or long pipelines with many bends. They are not observed in the bathroom, but gaskets in fittings for metal-plastic will someday flow, but propylene can be welded into a solid monolith and hidden in walls without fear.
As for PVC or polyethylene, pipes made of them, in terms of their combination of properties, are suitable for country houses, prefabricated panel houses and other cheap short-lived buildings. Steel pipes are still the cheapest, but, as you know, they rust from the inside, it is difficult to work with them, and in an apartment or a small private house all their cheapness comes to naught.
Advice: when choosing pipes, measure their outer diameter with a vernier caliper. Otherwise, it may turn out that instead of one expensive diamond drill you will have to buy two.
Fittings and fittings
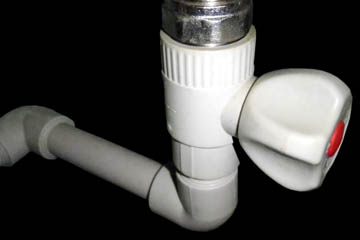
It is worth talking about propylene fittings especially. In the bathroom, where even open connections are difficult to access, fittings should only be made of solid plastic. The transition to metal is permissible only when connected to consumers, for example, a boiler (see Fig.). It is with the help of such fittings that you can assemble a one-piece water intake and hide it out of sight, without thinking about leaks. Of course, this requires a special soldering iron.
Butt joint is completely unacceptable. Accordingly, if it is necessary to connect two pipe sections, then this is also done using a special coupling.
The shut-off valves are ball valves, but again, soldered into plastic, also see the figure on the right. For connection with metal - a branch pipe with thickened walls and a thread in plastic. Practice shows that on hot pipes, the metal threaded liner weakens over time, squeezes out and a leak appears.
Tile
For the floor, the best choice is porcelain stoneware. It is only slightly more expensive than tiles, which in a small area results in a penny, but much stronger and not slippery even with a smooth surface. The last thing in the bathroom is vital: Fractures and traumatic brain injuries of those who slipped in the bathroom are not the least in emergency medical statistics.
When buying, it is imperative to check the dimensional accuracy and surface condition of the tiles:
- Demand from the seller several pieces from different packages. Refuses - we go to another.
- Put the tiles on the bottom on a flat surface close to each other in pairs and, turning 90 degrees, look at the upper edge. If the difference in size does not exceed 1 mm for 3-4 pairs, you can take from this batch after checking the "face" and glaze.
- We also apply the tiles in pairs with the front surfaces to each other. There should not be a bump, "trough" or "propeller" visible to the eye.
- Next, we take the tile, bring it close to the eyes and look along its surface against the light. There are dots, cracks, a micro-rainbow - we reject it: it will soon become overgrown with dirt in the bathroom and cannot be cleaned.
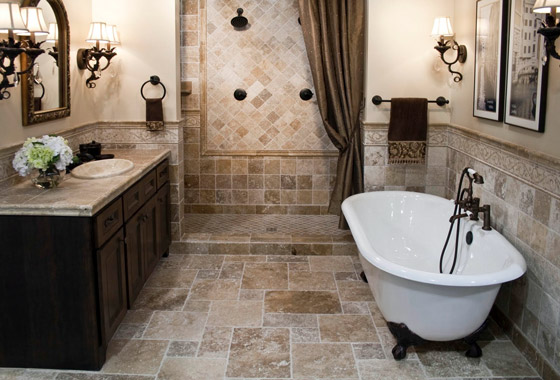
Such high requirements for bathroom tiles are explained not so much by aesthetics as by hygiene: dirt invisible to the eye will become a hotbed for the spread of infection, and under the bathroom it is both difficult to control the surface condition and it is difficult to wash it. Therefore, it is better not to consider options for "alternative" products at all.
Tool and glue
It is better to take tile glue that dries slowly - 12-24 hours. When self-laying, this will allow you to work slowly and eliminate flaws without deteriorating the quality of the coating. In the first place, again, hygiene: the tile can still hold firmly, but in a tiny shell under it, microbes will find themselves a cozy and inaccessible habitat for you.
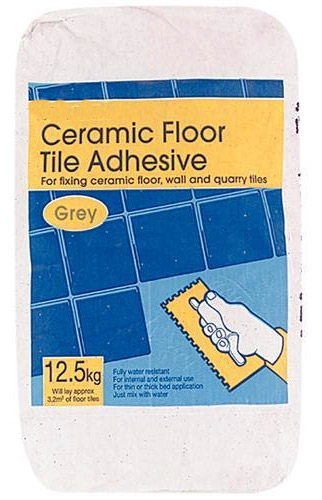 The glue spatula must be selected with the pitch and depth of the teeth indicated on the glue package. If there are no such indications, and this glue was previously tested and proved to be reliable, then the teeth are from 3 to 6 mm. A coarse-toothed trowel for gluing the floor will give too high rustic glue, and cavities will probably remain under the tiles.
Look immediately for a diamond core drill for the outside diameter of the pipes you have purchased. Patterns for laying tiles are plastic crosses, it will be difficult to work with others in the bathroom. You don't have to worry about a trowel for grouting: instead of it, a cut of an electric cable with a diameter of 5-6 mm in vinyl insulation will go perfectly, see below. But be sure to stock up on flannel rags (for the same grout), and it is better to purchase 5-6 cheap microfiber cloths for cleaning glasses.
The rest of the materials for bathroom renovation are selected according to the usual criteria for construction work.
Room preparation
First of all, you need to decide what to do with the old bathroom. If cast iron - it is better to leave and. If it is tin, but without chips of enamel and somehow sealed fistulas, then the best solution would be. Well, and it is better to hand over the "killed tin" for scrap and put acrylic instead. New cast iron is not much better in quality and durability, and you will have to turn it over and over and risk damaging the newly laid decor.
Next, we turn off the water, disconnect the cold pipe after the drain to the cistern and throw the temporary huts into the kitchen, at least from the garden irrigation hose. Sitting completely without water for 10 days at least is certainly "neither there, nor here." You just need to remember to shut off the branches from the risers at night or when leaving the house: the hose is a hose.
Then we remove everything from the bathroom to the bare walls. We are not touching the sewerage system yet. We plug the pipes of heating pipes suitable for the heated towel rail with screw plugs. Disconnect the bathroom wiring in the junction box; for lighting during operation, you will have to use a portable lamp on an extension cord.
Now you can start cleaning the surfaces, starting from the ceiling. This work must be done in goggles and a respirator: there will be a lot of dust. But before starting, we knock and try to drill the walls with a REGULAR drill.
In the panel house of some "Brezhnev" projects, a "pleasant" surprise can await you: an internal insulating box made of GVP (gypsum fiber boards). It certainly needs to be removed; see the inside of the slabs and the lathing - you will understand why. Work is being added, and you need to work carefully with the ceiling: substitute supports so that it does not collapse.
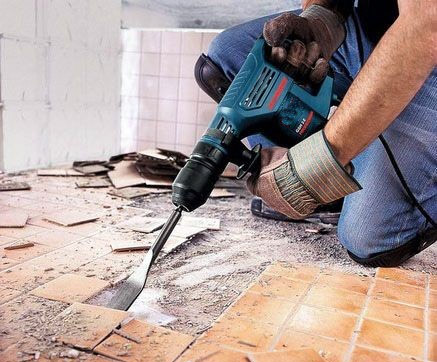
We knock down the old tiles with a perforator with a chisel on concrete. If the tile was laid on a cement mortar, you will have to tinker: there should be no residues. We remove the paint and the top layer of plaster with a drill with a round metal brush 80-100 mm; this is the dustiest and most unpleasant part of the work, so it is advisable to get rid of the household somewhere, and close the door to the bathroom tightly or, if already removed, tightly tighten its opening with a film. Otherwise, upon the return of the household, as they say in Odessa, you will have something to listen to. And what to buy again, especially furniture and carpets.
Suddenly the old plaster turns out to be loose and fragile (most often in old houses), we remove it to the concrete or brick on the walls. If you are lucky and strong - we align with a drill with a scrubbing brush, checking with a level. There will be a lot of gimmicks, but in the future it will be reimbursed. We beat the plaster over the electrical wiring with a perforator with a chisel (do not forget to turn it off in the junction box or on the dashboard!) And remove the wires.
Floor revision
We remove the remains of the cement substrate under the tiles from the floor with a perforator with a chisel. If there is a reason not to touch the old screed (for example, the washing machine once completely leaked out, and not a drop leaked to the neighbors), then it is better to use a grinder with a diamond cup (bowl-shaped cleaning wheel). The tool is expensive, but in further work it will pay off with interest.
This is followed by a thorough wet cleaning and a careful examination of the old screed. One crack means either replacing the screed or filling with a liquid leveling compound. The latter, in terms of the total cost of money, labor and time, is optimal, except for the case when a cast-iron bath remains or will be installed - its weight with water is more than permissible.
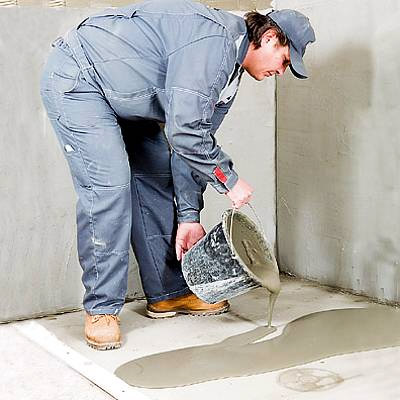 If a bathroom is being renovated in a Khrushchev building, then the self-leveling floor option turns out to be doubly attractive: for a small room, the costs even for the expensive ThermoPlast will be insignificant compared to the general ones, and the leveler can be poured directly over the old tiles. And we immediately get an insulated floor. The layer of the self-leveling floor, taking into account the shrinkage upon hardening of 10%, must be at least 30 mm; from this calculation, the required volume is determined. But in any case, a new waterproofing of the floor will be needed.
Waterproofing
You cannot use ordinary film for waterproofing in the bathroom. It is not for nothing that in relation to the bathroom they say "waterproofing" and not "vapor barrier". There is no alternative material here - aquaizol or its analogs made of polyester (polyethylene terephthalate). If you pour water into a bag made of such a film, tie it up and hang it in July in the very heart of the Karakum Desert, then the water will not decrease within a month.
Waterproofing joints are either glued with a special mastic, or welded with an industrial hair dryer. The latter requires skill, so you need to practice on the pieces first. The insulation is placed on the walls by at least 25 cm (4000 liters of leaked water per 10 sq. M; the ultimate strength of the overlap by weight) with folds (no cuts!) In the corners. After the insulation has been laid, the floor can be poured or a new screed can be made.
Self-leveling floor
A two-component composition for a self-leveling floor should be taken: an initial, viscous filling - it will not leak to neighbors - and then a leveling liquid or ThermoPlast.
New screed
To insulate the floor, it is impossible to use expanded clay backing in the bathroom - it is very hygroscopic. Foam concrete or foam concrete are also not suitable - they are fragile. In essence, the only option is glass-magnesite slabs, LSU, especially since they are at the level of drywall. The strength of LSU allows you to immediately lay reinforcing mesh on them and place beacons.
The composition of the cement mortar for the screed and the technology of its formation have some features:
- Cement - grades of at least 400.
- Sand - sifted quartz.
- The proportion of sand to cement is 4: 1.
- Water - in a volume equal to the volume of cement.
- Additive to water 10% by volume of PVA emulsion.
- Formation - according to markers - "beacons" with a layer of 40-50 mm.
- After leveling with the rule - rubbing to smoothness with a slicker.
The latter is necessary, since it is impossible to lay a finishing floor along the logs in the bathroom, and in the case of a tiled floor, the base surface should also be perfectly flat. Consider also: the newly formed one must stand at least 40 days before continuing the work.
Communications
Open pipelines in the bathroom are not pleasing to the eye, and it takes a long time, dusty and tedious to cut the walls under them. In a block house, it is generally impossible to hide a sewer in a gutter: the fittings will not give, but it cannot be violated. In addition, welded joints are not made on sewer pipes, which means that the sewage system should be available for inspection and repair, especially since it is most often clogged.

Sloping pipes
Based on these considerations, we get a combined solution: we run all pipes in a bundle along the bottom and close them with a galvanized slope (see the figure on the right). Facing tiles are glued to the slope with silicone to match the walls or contrasting, and with silicone, the slope is glued to the walls and floor after finishing. If necessary, the silicone is cut with a mounting knife, and at the end of the work, the slope can be glued back into place. In a bathroom with a typical slope layout, you will need about a meter from the wall to the bath screen.
Grooves for pipes will also be needed, but in a minimal amount and short vertical ones: one - if the mixer is common; two - if there is a mixer in the washbasin; 3-4 - if the boiler is installed in the bathroom. The latter is far from the best option; the natural place of the boiler in the "holiday home for need"; those who have not read "1001 Nights" are in the closet.
We start replacing pipelines with the sewerage system: waste pipes are quickly collected on seals with a sealant. It is quite possible to cope with them in a day, and then solder the water pipes without haste. In the grooves, pipes are foamed - this is an additional protection against fogging and heat loss, and electrical wiring is laid in front of the plaster.
The electrical wiring is carried out with a double-insulated wire, tightened into a corrugation. Most often, inexpensive plastic is used, but if during the repair it is planned to replace the electrical wiring in the apartment, then metal is desirable - then all the wiring will be shielded, which is good in all respects.
Heating pipes
But what about the heat pipes of a heated towel rail? We change to metal-plastic. They will go into the wall (shallow grooves are needed) and come out from there with a bend; metal-plastic can be bent. The bottom adapter fittings will hide under the slope, and the top ones will remain where they were - on the dryer. Full cycle of heated towel rail replacement.
Plaster
Floor finishing
The tiles on the floor are laid with glue, but unlike walls (see below) without seams. Glue streaks are immediately removed as described above. The glue is applied with a spatula with longitudinal strokes of approximately 0.25-0.35 m2; for tiles 30x30 cm - for one next tile.
Laying is carried out from the door so that the cut tiles are under the bathroom and under the slope covering the pipes. The cut rows (possibly the penultimate one-piece) are laid after the glue hardens under the already laid ones, so as not to trample on them and not knock off the coating.
Each newly laid tile is tapped with a rubber hammer starting from the previous one. They tap in rows of punches, gradually moving towards the free edge. It is important that there are no voids left under the tiles, which is why the glue rusts should be parallel, not very wide and deep.
Complete instructions for installing tiles on floors and walls.
A separate issue is the wooden floor in the bathroom. It is warm, it is even pleasant to stand on it with bare feet. And you can put a cast-iron bath with any screed: the pressure of the legs will be distributed due to the elasticity of the wood. But a wooden bathroom floor requires special execution and will cost more than a slab.
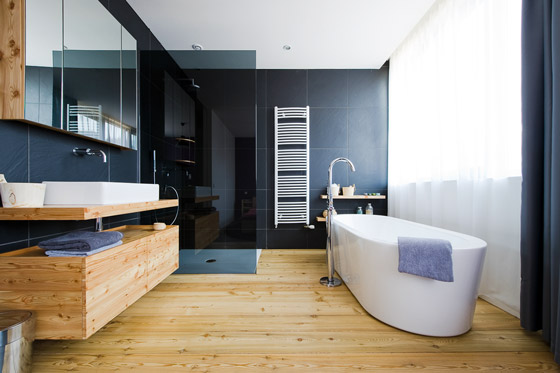
Teak and larch are suitable wood. After impregnating PVA with an emulsion and finishing with a liquid (deep penetration) acrylic varnish, you don't have to think about durability: the larch piles, with which the coast of Vasilyevsky Island was reinforced during the reign of Peter the Great, are still standing. But boards or tiles for such a floor need to be taken grooved and laid similarly to the ceiling, but with an indent from the walls of 20-25 mm for wood swelling. The gap before installing the skirting boards must be filled with polyurethane foam - there should be no cavities!
Wall covering
Most often, the walls of the bathroom are finished with tiles. Porcelain stoneware is also suitable, but it is still more expensive, and nothing is dropped or spilled on the walls; splashes don't count. Recently, the decoration of the bathroom with plastic panels, inexpensive and hygienic, has become widespread, but the description of materials for it and methods of work is the subject of a separate article.
Facing the walls with tiles is carried out with cutting the seams, for which, when laying tiles on glue, crosses are first inserted between the tiles. The laying technology itself is the same as for the floor. Holes are drilled in the tiles, which will fall on the outputs of pipes and electrical wiring, with a diamond crown.
Note: if the design uses a mixer with decorative caps, then the crown is bought with a larger diameter than the pipes. Otherwise, measuring out the places for the holes is akin to jewelry art.
After the glue hardens, the corners are first sealed with silicone. A piece of electrical cable is placed on the silicone sausage through a thin plastic wrap, pressed and immediately removed. The silicone is pressed into the seam and forms a smooth concave surface. Leaks and slugs of silicone are removed with a rag and vinegar. Additionally, the fillet weld can be covered after cutting the rest with a decorative overlay on the same silicone.
Cutting the seams on a plane is carried out with a special compound - it is cheaper than silicone, but not a sealant. They take out the crosses, fill in the seam, press with a piece of cable (now it is already possible without the film) and immediately, without delay, remove the remnants with flannel or microfiber. Cutting the seams with your finger will leave microroughnesses in which dirt will accumulate.
Plumbing, ventilation and electrical
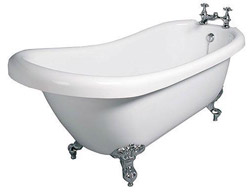 The installation and installation of plumbing fixtures has no peculiarities and has been described many times. In particular, you have to:
- , sink, in some cases -.
- Optional - .
When installing ventilation, you should inspect the old box, removed in preparation for repair. In most cases, even the boxes of the very first Khrushchevs after cleaning and repainting are quite suitable for further use. In this case, it is immediately advisable to mount a clapper valve in it: cold blowing in winter is excluded.
From stationary electrical appliances in the bathroom, an exhaust fan and a ceiling lamp in a waterproof design are acceptable. The fan must also be adapted to moisture: a three-core cord, with a protective conductor and a Euro plug, with a one-piece sealed (molded) lead into the casing. The washing machine does not apply to stationary electrical installations; its connection when installed in the bathroom -.
About the "combination"
Repair of a bathroom combined with a toilet - what can be done here? Surely there are some nuances. Yes, there are enough features of repairing a combined bathroom. Therefore, their discussion -.
Output
Taking on the bathroom renovation on your own, you can save a lot: the event is expensive, and the wages of the workers make up a considerable part of the cost. But a lot can be miscalculated: the work is difficult, responsible, requires both basic knowledge and a good qualification of the builder.
Video: a lesson on self-repairing a bathroom
(No ratings yet)
Discussion:
Paul said:
Repair of odnushki in a new building. We agreed with the workers. For two months now they have been busy in the room and in the kitchen without touching the bathroom. I thought the bathroom was being renovated first. I feel some kind of catch, but I do not understand why. Tell me, knowledgeable people, why pull with the bathroom?
Vasily said:
Renovated the bathroom this summer. I did not dare to hire private traders, but ordered it from a company. I am very pleased with the quality, everything is done at the highest level, I bought plumbing fixtures and tiles at a discount through this company. The guarantee was given for 2 years, and they also gave insurance for the whole apartment. In short, do not get involved with private traders, there is only one hemorrhoid, and there will be no savings!
Roman said:
During the renovation in the bathroom, I hid all the pipes (polypropylene) in the wall and laid them with tiles, so I don't have any pipes in my bathroom. Already 4 years have passed, but there are no problems. but so much space was saved by the machine and the washbasin-"washbasin", and the bathtub are firmly pressed against the wall. The main thing is to buy quality material and do the job in good faith. and besides myself, I do not trust anyone.
Dmitry Rogoza said:
And I had such an interesting story, I live in an apartment on the first floor, and naturally the basement is not big under my apartment. Well, the bathroom itself is not big, so I decided with my wife to put a shower stall in order to save a lot of space in the bathroom, but since the house is old, I decided to look into the basement, I had a constant feeling that we would fail, well, I went down to the basement and there the boards are rotten, the house is old, they had to change the floor and put iron beams. Everything seemed to go well. Said:
In terms of the cost of materials and plumbing, the bathroom occupies, perhaps, the first place among other areas of the apartment. Provided, of course, if you are doing major repairs here. Toilet bowl, bathtub, faucets, shower - all this pours out a pretty penny. Plus to this - the complexity of the work. if you like. for example. hide water pipes in the wall. but instead of a new bath - cast iron or steel - you can insert into the old acrylic insert. the bathtub will look like new and keep warm well. The ceiling can be sheathed with plastic panels - it will be beautiful and aesthetically pleasing for years to come.
Alena Demchenko said:
Hello, my husband and I bought a house and decided to start repairing the toilet. We changed all the plumbing to plastic. The pipes that turned out to be hidden under the tiles were hidden, and the sewers, then they made a box from the lining and hid, since no one from the neighbors wanted to change the sewers, they said everything was fine with them. Everything turned out beautifully, neatly. With a new bathroom, plumbing.
Oksana said:
I have a separate bathroom and in my opinion it is very convenient when the family is large. Both in the bathroom and in the toilet there are tiles on the walls and floor. Glued very neatly without seams. I have never heard of such a technique before. It turned out awesome! But I chose glossy tiles - they are easily soiled. But after cleaning it looks gorgeous! Our technology is not expensive, but durable - it suits us.
Christina said:
We somehow also had to tinker with repairs in the bathroom. Although it can be called a renovation with a big stretch ... The fact is that at that time we lived in a rented apartment, to put it mildly, with not very good repair. They decided to change the bath - the old one was in a terrible state. I sent my husband for a new one, but inexpensive. Bought. I brought it. Italian. I'm shocked. She's low-low! Straight almost knee-deep to me! Like a bidet, just a big, honest word! I had to think about how to lift it. They came up with it) We made a “layer cake” from fiberboard plates and polyurethane foam that were lying around in the apartment, and laid them one by one. And then they just put a bath on them. Of course, the design still had a look, but it became convenient to use the bathroom. For temporary housing - a great option. Then I also had to clean the sink so that the washing machine could fit. But there were no problems with this.
Anna said:Bathroom renovation is not easy. We tore down completely the old floor, right down to concrete, because we installed pipes for heating, so that there would be a warm floor. This is not an easy task, but it is worth it, there is much more warmth in the apartment and you can sit on the tiles. My daughter constantly plays on the floor, so a warm floor is an even greater plus. By the way, we have such a floor in the corridor, bathroom, toilet and kitchen. Plus, the bathroom and toilet were combined, because there was no place at all.
Elena said:
In general, we left a different bathroom and toilet in exactly the same Khrushchev to our parents. There are two parents, cramped, yes, but who needs to go to the toilet, and who needs to wash. During the repair of the toilet, a box in the form of a useful pedestal with a removable hatch cover was installed on pipes with water meters in order to view the readings. And they also made a small corner sink with a shower-bidet, although the door now has to be opened outward, everything is at hand.
Said):
Renovated the entire apartment last summer, including the bathroom. The biggest expense went to bathroom renovations. Despite his wife’s persuasions, he himself made a frame for a built-in sink and a washing machine, sheathed the frame with moisture-resistant drywall, pasted over tiles in a mosaic on all sides. Relatives are generally delighted with the result!
Vadim said:
In our case of repair, the most difficult thing was, oddly enough, dismantling the old plumbing. Making repairs did not cease to be amazed at the club-handedness of the builders of the house - not a single even corner, everything is kept on parole. And in the combined bathroom, the toilet was installed so tightly that the day was killed to dismantle it. Well, after dismantling, it took as much leveling solution as it did not go to the kitchen to level the floor!
By clicking the "Add comment" button, I agree to the site.
