Alexander. Moscow.
Immediately after the renovation of the bathroom, I discovered water under the bathtub. It turned out to be leaking between the wall and the bathroom itself due to the gap between them. How to close the gap between the bathroom and the wall so that water does not leak?
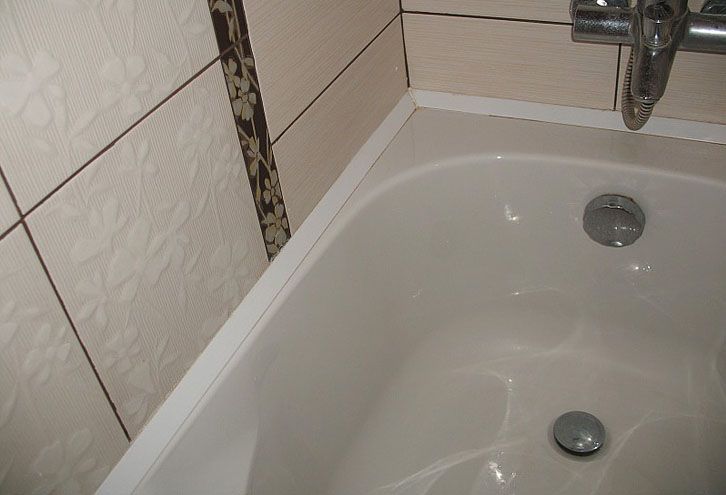
When installing bathtubs, for various reasons, gaps may occur at the points of contact with the walls.
According to statistics, the main influencing factors are: non-observance of the dimensions or geometry of the plumbing and premises, or errors were made during the installation work.
If gaps or gaps are not sealed in a timely manner, then in the future this threatens to accumulate moisture and develop mold or fungus between the wall and the bathroom, and also affect the deterioration of the decorative properties of the tile.
How to properly close the gaps formed at the junction of the walls with the bathroom will be described in this article.
How to eliminate the minimum gap up to 10 mm?
The easiest way to seal joints is to use waterproof sealant based on silicone.
With a gap size of up to 3 mm, it is enough to apply a uniform thin layer of sealant with a mounting gun and gently level the surface with a clean silk cloth.

Owners of acrylic baths before using the sealant need to fill them with water. When the composition solidifies, shrinkage will occur and either a gap will remain, but smaller, or the acrylic walls will lead a little. Therefore, throughout the entire drying time, which is indicated in the attached instructions, the bath should be kept under load.
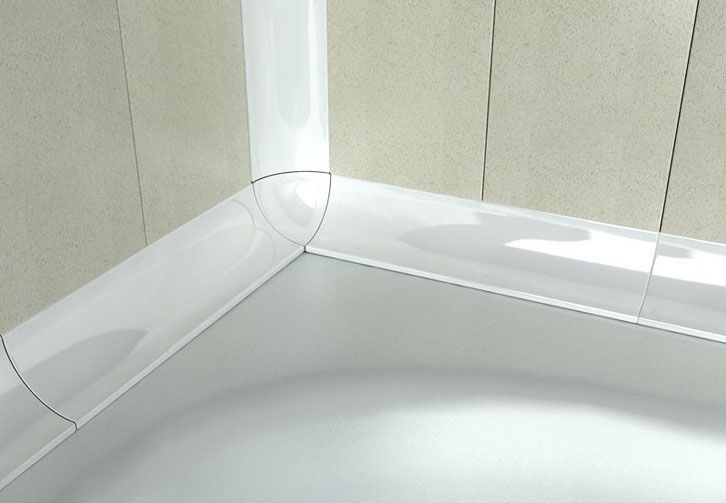
To eliminate the continuous gap between the bathtub and the wall, it is recommended to use special plastic lining.
They perform not only a decorative function, but also a sealing one. With their help, you can eliminate gaps with sizes up to 1 cm.
Do-it-yourself sealing of the gap with plastic elements is carried out as follows:
- Clean the surfaces at the joints.
- On plastic inserts that will be installed at the joints of the bath, cut off the end parts at an angle of 45º with a knife or hacksaw, and then clean them with sandpaper (“zero”).
- Fill the seam with silicone sealant so that when the plastic parts are inserted, it comes out. That is, the amount of applied composition should be in excess.
- After the sealant has hardened, use a construction knife to remove its excess.
- Wipe the seam with a soft, lint-free cloth.
Another budgetary way to seal a joint of minimum dimensions from 3 to 10 mm is the application of mounting foam, which has high water resistance.
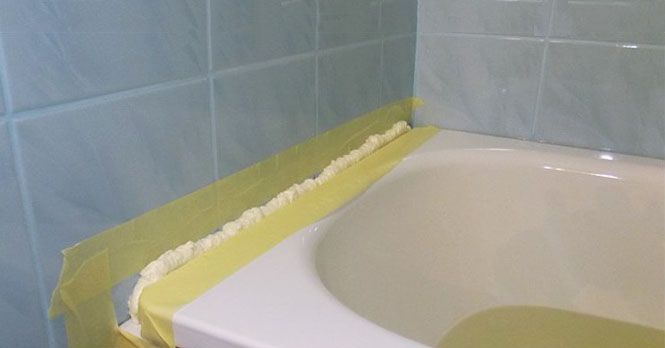
Before use, shake the can several times and warm it up a little so that it is 2-3º warmer than the environment. Clean the joints of dirt and dry with a dry cloth.
To prevent foam from getting on the finishing materials and the bath, glue them with tape. After that, seal the cracks.
Since the foam expands during solidification, then again, if the seal is made for an acrylic bath, then you must not forget to fill it with water first.
Curing time is usually up to 12 hours, depending on climatic conditions.
Sealing a gap with sizes from 1 to 3 cm
The joint between the wall and the bathroom up to 30 mm can be sealed with plastic decorative plinth or self-adhesive border. The installation method is similar to the installation method of plastic inserts.
However, the only nuance of the work is the impossibility of completely sealing the joint only with sealant. But this is not required, since the main task is the tightness of the plinth seams.
To close the seam between the bathroom and the wall, proceed as follows:
- Clean the gap area intended for sealing from grease and dirt, and then dry them thoroughly.
- Coat the surfaces of the joints of the bath and the wall with sealant.
- Install the plinth fastening with the alignment of its position horizontally using a level.
- Fasten the plinth.
- Remove excess composition.
To seal the gaps between the bathtub and the wall with self-adhesive skirting boards, it is enough to clean the surfaces, remove the protective tape and put them back in place.
The main difficulty in this case will be the presence of adhesive surfaces with high adhesion, which almost instantly stick to various materials.
Therefore, you must first carefully glue the upper part, and then, by pressing, gradually install the plinth in place.
You need to do it slowly
as any mistakes made will cause the impossibility of secondary gluing and the water will stably flow under the bath.
Another easy way to close the gaps is to stick curb tape. It is made on the basis of rubber with plastic additives, which allows it to have not only decorative properties, but also resistance to mechanical stress.

Therefore, it will easily fit into any classic or modern. When installing it, you need to know that it is flexible in the middle only about 1/3 of the width.
Thanks to this property, it is much easier to install it with self-adhesive skirting boards.
Sealing gaps more than 3 cm
To close the gap between the wall and the bathroom more than 30 mm, you need to be creative. Its essence lies in the selection of suitable materials for operation in conditions of high humidity and with high strength.
In most cases, concreting is suitable to eliminate gaps.
Do-it-yourself method is implemented as follows:
- Clean the surface of the wall and the end part of the bath from dirt and grease stains in the place where the gap is formed.
- From wood, make a formwork, which should be installed below the upper edge of the bath by about 5-7 cm and securely fixed. To do this, measure all distances with a tape measure, mark the dimensions on paper and, according to the sketch, make a sealed design. The main purpose of the formwork in this case is to close the leaks of the cement mortar.
- Knead the required volume of mortar in a plastic container, determining it by multiplying the length, width and height of the structure with a small margin of 5%. The proportions must be made as follows: 1 part of M300 cement, 2 parts of sand and 0.4-0.5 parts of water. It is important to first knead the dry mixture until a homogeneous composition is obtained, and then gradually add water, without stopping mixing.
- Lay the formwork with a plastic film to seal the structure and close the direct access of the solution to the walls: water should not be absorbed into the wood or leak out.
- Pour the cement mortar into the formwork at one time to close the gap. Sometimes filling is allowed for two times between kneading, but with an interval of 5-10 minutes.
- Use the mixer attachment on the drill to mix the poured cement in order to remove air bubbles.
The terms of partial solidification, provided that the minimum humidity is maintained, are 7 days, and complete - 29.
To remove the formwork, you must wait a period of two weeks after pouring. The surface is then tiled.
The only limitation for this method, especially with a large opening distance to the wall, is the significant weight of the structure, which only a cast-iron bath can withstand.
For acrylic plumbing, it is recommended to completely pour concrete from the floor.
To seal joints, gaps or gaps between the wall and the bath, an individual approach is required to select the appropriate sealing method.
All of them are quite simple to implement and are available for development in the absence of suitable experience.
However, to do everything right, you need accuracy and thoughtfulness. Sometimes the consequences of non-compliance with technologies are much more difficult to eliminate than initially adhering to the recommendations of specialists.