Platbands are an important component for any window. They are often associated with beautiful carvings that serve purely for decorative purposes. But they do not always have a catchy look, and they have much more functions. It is a versatile element that is essential for protecting windows and improving their insulating properties. Therefore, their installation is recommended in almost any wooden house.
What are platbands for?
The platband decorates the window and makes it much more colorful. But initially its purpose was defensive. Platbands are used as an external element of the window frame, which not only protects it from damage, but also closes the mounting gap between the frame and the wall of the house.
This approach provides:
- Reducing heat loss;
- Elimination of through holes;
- Dust and noise protection;
- Moisture protection.
Interesting ! Previously, platbands were also used as amulets. Because of this, they were given a colorful and non-standard look.
While these advantages are not so significant in concrete and brick structures, they are extremely important for timber houses. Over time, wood can dry out and deform, leading to gaps between the frame and the rest of the structure. Platbands allow you to slow down this process, as well as reduce the damage from existing holes.
Types of platbands
For houses, a lot of varieties of trims are used. Often they differ in the material used, since they have a similar design. The main classification of platbands follows the installation method and marks two types of platbands:
- Overhead;
- Telescopic.
The overhead version is considered the most common, being the old type. It is installed by a simple method on top of the window frame, thereby blocking access to the sun and precipitation to the joint. Installation of this type is very simple and does not require much effort.
The telescopic casing is more modern. Its fastening does not require additional elements such as screws or nails, because it is placed in the gap between the wall and the frame. Thereby, it is securely fixed around the entire perimeter.
Use the telescopic mounting method as a priority. It is more convenient, because it more reliably covers the gap and prevents its deformation. However, its installation is complicated by the fact that for it it is necessary to completely remove the window, which is not always possible in wooden houses. In such cases, it is easier and more efficient to use the overhead platband.
Platband materials

Materials for platbands can be different. Wood is often used for these tasks, which is recommended for wooden structures. But here several options are allowed, including:
- Wood;
- Plastic;
Wood is a practical and natural option for any construction. Due to its versatility, it can be given any ornament and style, and the use of the same type of material will allow it to perfectly complement.
Advice! For better alignment, it is recommended to make platbands from the same wood as the structure. But if the texture is the same, then the color can be changed through special compositions.
Often it is chosen precisely because of the variety in the decor, because other materials require special processing on machines and rarely have such decorating elements.
While wood is reliable and durable, it has its drawbacks. These include vulnerability to moisture and high temperatures. In addition, frost also affects it negatively, destroying and deforming the structure.
Plastic in this regard is much more convenient. It is practical and reliable, and its wide production possibilities allow you to give it any texture, including woody. But at the same time, it does not deform from moisture and temperature extremes, and its lifespan is much longer. Another advantage of plastic is that it has fasteners in advance, which makes it possible not to spoil the appearance of the platbands with nails or screws.

Perhaps the only drawback of plastic is its artificiality. Many owners do not want to supplement their home with artificial materials and reduce its environmental friendliness. The third option can help here.
MDF is a board made from wood waste. They are natural, but at the same time impregnated with special compounds, which significantly increases the life of the material and protects it from external factors. Often, such platbands are laminated, which increases their lifespan and reliability. The only drawback of such elements is their relatively low strength compared to plastic and wood.

What material to take is a purely individual choice. Each of them has its own advantages, but there are also disadvantages.
Which wood is better
If the choice fell on wooden platbands, then it is important to note the choice of wood species. In fact, almost all options are suitable for this task, because they do not need to transfer any load. But here, too, there are some nuances.
The best option for platbands is oak or beech. It is a solid rock that can last a long time and will not deform from moisture or heat. But the problem is that it is extremely difficult to work with. It is extremely difficult to independently cut patterns on such material, and not every master will undertake this.
Advice! The way out of this situation is special milling machines, the pattern on which is pre-loaded into the program.
If you need a softer and more inexpensive breed, then you can choose linden. It's easy to work with, but without careful handling, it will quickly collapse. It is necessary to use high-quality antiseptics and some kind of coating, which can worsen its appearance.
An intermediate option for such a task is birch or pine. It is a fairly sturdy strain that requires only basic maintenance. But it will be easy to work with her.
Preparing for installation
You must first take all measurements from the window. It is important to choose the appropriate dimensions so that the frame contour does not peep out from behind the casing and is reliably hidden. Further, the preparatory stages are carried out with the material.
If wood is used in the process of work, then you need to pre-cut the blanks of the platbands, decorate them at your discretion and process. Plastic and MDF do not require processing, but wood needs to be impregnated with protective compounds against moisture, as well as to protect against insects.
Important ! All work is carried out with dry lumber. If it is poorly dried, then deformation is possible after installation, which will ruin the whole work.
After measurements and processing, it is important to mark in advance the joints and fasteners on the platbands. All holes are pre-drilled. Platbands are carefully polished.
It is also important to prepare the work site itself. Window joints are carefully insulated, because in the future access to them will be limited. If any insulation or repair work is planned, then they must be done before installation.
You must first select the mounting method. It is not required for telescopic trims, but there are several options for overhead trims. Among them, the most popular are:
- Nails;
- Deaf thorn;
- Through thorn.
The first option is the simplest, but spoils the overall picture and creates an extra load on the material during installation. Therefore, the cleats are more comfortable. A blind spike implies the installation of small spikes on the window frame, and small holes are made in the casing for them. A through thorn implies the same technology, but a through hole in the casing.
If the house is built from a log house, then you need to make room for the platbands. To do this, it is worth cutting off the protruding edges, which can be done at an angle.

Installation of platbands in a wooden house

After carrying out all the preliminary procedures, the installation stage begins. To begin with, all the components of the casing are connected to each other. To do this, you can use the same spike technology, nails or glue. But the latter is often used as an auxiliary component.
During installation, when using spikes, you need to do the following:
- Mark the future location of the studs on the frame and trim;
- Make or purchase spikes for this task;
- Drill the corresponding holes in the pre-marked places;
- Place the platband on the spike and fix.
The first stage includes a preliminary marking of the perimeter where the fasteners will be placed. It is important to evenly distribute the load, so they should be placed around the perimeter of the structure.
After the acquisition or manufacture of thorns, future holes are drilled for them. This is a simple step, after which the installation process itself begins. The platband is neatly positioned so that all the spines fall into the holes.
The task is quite simple, it is only important to accurately mark the future location of the fasteners. It is recommended to use glue during work in order to securely fix the structure after installation. This will reduce the risk of it falling and improve hole insulation.
You can simplify the process by using ordinary self-tapping screws. Although they will degrade the appearance, their use greatly simplifies installation.

Upon completion of the work, it is worth treating the working holes with a composition so that they do not absorb moisture. Next, you just need to monitor the state of the structure and take care of it as needed.
The whole process is quite simple, it is only important to qualitatively connect all the elements and not neglect the preparatory stages of installation. Thanks to this, such a structure will last a long time, decorating the house and protecting residents from drafts and moisture.
Hello dear reader!
I spent the weekend superbly: I was resting with my family at the dacha of friends, which they recently acquired. Everything in the house was pleasing to the eye, except for the design of the window joints at the point of contact of the frames with the walls. I decided to help the guys by sending one of my specialists in the installation of platbands to them. Everyone is happy with the result. Are the trims on your windows flawlessly installed? Or are there several annoying looking "jambs"? Next, I'll tell you how to fix the situation quickly and on your own.
How to make PVC window trim yourself?
When finishing any plastic window, you need to work according to the standard algorithm. For example, if preliminary work is to be done, then all actions must comply with GOST 30971. If you wish, you can get a visual presentation of information about the finishing process, for example, the window perimeter at the stage of mounting anchor plates, and find out what the purpose of the vapor barrier membrane is.
Compliance with the requirements of GOST is the best prevention of problems during the operation of a self-supplied window: it will not come out of the frame under the influence of the wind or as a result of shedding of the mounting foam.
Because most of the problems arise due to errors in the installation of the main structure, and not due to errors made during finishing work.
The finishing works also have a sequence, without which the finished product will not look as dignified as we would like. But this problem is more an aesthetic than an applied one. However, most of us are more pleased when the end result is not only reliable, but also appealing to the eye.
Preliminary work
When the frame is installed, the flight is still unattractive. Bubbling foam strips and other beauty flaws do not add to it. But soon everything will change. To begin with, if the installers forgot, it is necessary to perform protection from a vapor barrier membrane so that moisture does not leak from the thermal insulation layer later.
Ever noticed the small plastic plugs on the outside of the frames? These are plugs in the openings of the insulating glass unit to prevent the suction effect. - a phenomenon that could appear due to the abundance of rubber seals inside the structure. If it were not for these traffic jams, due to moisture, some of its percentage is still inside the structure, it would be difficult to open the doors. As well as replacing double-glazed windows if necessary.
As practice has shown, the plugs are not installed in vain.
It follows from this that the vapor barrier membrane should not be neglected either - standards are developed for a reason, and the dryness of the seal in the glass unit is very important. Therefore, I do not advise trying to save a couple of cents by using hand-perforated polyethylene instead of a vapor barrier membrane when finishing plastic windows.
What did the "smart" comrades think of when they decided that nothing terrible would happen when a special film was replaced with polyethylene for greenhouses?
- you will get greenhouse polyethylene instead of the vapor barrier film required for finishing PVC windows;
- you find or do something like a rolling car (in the USSR, such fresh asphalt was manually rammed);
- if it was not possible to find the typewriter, you take an even log, saw off the desired piece and attach long handles to it on the sides;
- you turn a smooth shaft into a "hedgehog" by hammering in many small nails (each nail should stick out 3-4 millimeters above the surface);
- for the final resemblance of the rolling car to the aforementioned animal, all carnations must be deprived of their caps, wielding ticks at an acute angle;
- you carry the resulting product on a greenhouse film, after which it becomes, supposedly, an excellent vapor-permeable material for finishing PVC windows.
In principle, how does such a film differ from a store membrane? The latter also lets water through. Yes only the rate of passage of moisture through the membrane and homemade vapor barrier film is different. The volumes of moisture passing through will also be different. And the most important thing: the film will not let moisture back through, and leaky polyethylene is very even.
Why cover mineral insulation with vapor barrier material? If you do not leave room for moisture to escape, then with a cold snap, condensation will begin to form in the cotton wool. In a short time, bacteria will breed in such an environment, from whose vital activity the insulation layer will begin to rot. A vapor-permeable membrane will protect against such an outcome, and will not allow atmospheric precipitation, and the vapor formed from the breath of people, pets and indoor plants to penetrate in a significant volume inside the window structure.
What happens if you decide to use leaky polyethylene rather than a membrane?
Polyethylene will cope with excess water, but only when it accumulates in the lower part of the window structure. Also it is itself an excellent material for condensation formation, which will only increase the volume of liquid that will be located near the window sill.
How everything will happen:
- after the rain, all drops that have fallen under the window frames will seep to the perimeter, covered with polyethylene;
- the holes in it will perfectly let all the moisture through;
- the insulating layer will become saturated with liquid and begin to rot (for example, the heat that has come will not help the moisture evaporate from the mineral wool, but will only speed up the process and will take place at any time of the year).
If the window opening is covered with a vapor-permeable film, such an outrage will not happen - it lets steam inside and only takes it out.
Therefore, working with a membrane is a mandatory basic action before starting finishing work around the perimeter of the window.
If it is not there, then you pull it on, if there is one, you skip this step, glad that the pros have worked on the window.
Installation of slopes, platbands
If the vapor barrier film is installed, you start installing the platbands. If there is no membrane, you clean all the excess foam, lay the film, and then look for an L-shaped (as in the Old Russian alphabet - with a squiggle on the top bar) starting profile in the mass of profiles. Start a new stage of work with it.
Screw the plank with the long side to the street to the window perimeter using semi-cylindrical self-tapping screws. In this case, the upper edge of the profile should lie on the edge of the window, so that the joint will immediately look more attractive. On the other hand, for the slopes, you need to place the crate. Attach a rail along the inner perimeter of the window opening. How to determine its width? If you have experience in household work, then choose a rail that withstands the impact of dowel-nails and the head of the pressure screws does not look over its edges.
 T now proceed to the direct installation of slopes, the profile for which has an inner edge similar to the English letter F. Fill the resulting gap with a glazing bead, or stick pieces of plastic into it to provide better strength. Mount the slope on the starting profile, and screw the opposite end to the crate. Corner joints are masked by platbands, which are, in fact, the same F-profile, mounted with a middle border under the slope itself. Above the places opposite the self-tapping screws, you will make 2-3 cm recesses, after which you will carefully install the platbands.
The final stage of the work is associated with the sealing of joints with silicone. Cover generously, in all corners, and remove all smudges by hand or using something, for example, a board. We can assume that he has prepared for the installation of the window sill.
How to mount a window sill?
Educational videos for customers purchasing a product make life easier for customers. People receive information on how to properly use what they have bought. Potential customers, on the other hand, learn about new technologies through training videos and are more willing to purchase innovative products from those suppliers who helped them get acquainted with new market offers.
Now I offer a verbal description of the steps for installing the Werzalit window sills.
Thanks to the special design of its products, you can perform installation of the window sill using one of the methods you like:
- planting on cement;
- fixing on glue;
- by installing consoles.
For the first method, use regular cement.
While the solution made is ripening, give the window sill a perfectly level position, focusing on the level readings. The rear part of the profile should be brought under the window, and the front part should protrude somewhat above the edge of the lower window span. I recommend pushing the product no further than 10 cm. And if possible, reduce the distance of the edge of the window sill - so it is less likely that it will be broken off during the operation of the window. Leveling planks, I advise you to take thin planks, too, should not be located further than 10 cm from the wall.
All the boards that remain under the windowsill must be treated with an antiseptic compound. How many of them are needed for each window sill depends on the evenness of the wall relief - you need to achieve the ideal location of the canvas. After all corrective maneuvers, reinforce the structures in the given position with portions of cement. Place the fixing plates underneath for security. For a better connection of the window sill and the fastening layer, put bricks on top of the panel for a couple of days, having previously placed something non-marking under them.
Installation of a window sill with glue will appeal to those who do not like to tinker with cement due to a shortage of sand or difficulties with its delivery to the construction site.
Given the peculiarity of the bonding mixture, it is necessary to coat with it not only the surface of the wall and the window sill, but also all the planks placed under the panel. In terms of reliability, the design will not be inferior to that performed with the help of cement. And fill all the resulting voids with construction foam or even mineral wool. Plant the window sill on the console with glue.
For the device of window frames, see the video:
Photo of carved plastic platbands
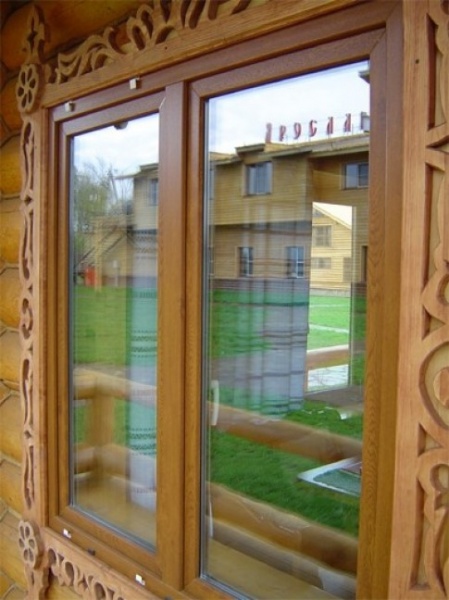
Unlike wooden platbands, plastic frames do not lose their original attractiveness over time, since they do not dry out, do not peel off, do not rot and do not change their appearance under the influence of a fungus. Their functionality is similar: to prevent moisture from flowing into the mounting gaps, to reduce heat loss and increase the sound permeability of glass units, to mask the joints between the box and the wall.
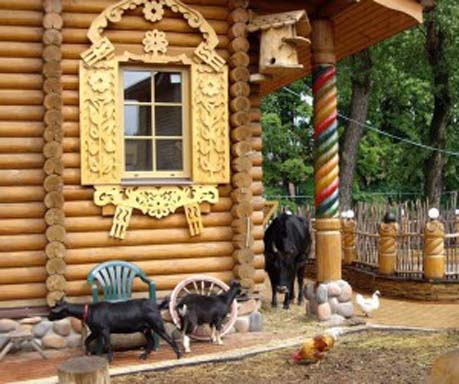
The plastic origin does not interfere with the use of carved platbands both when finishing frames with PVC panels, and structures with wooden frames. If desired, platbands can be made in the same color as the window profiles. The technology makes it possible to imitate the wood of ash, oak, wenge, etc. There are no restrictions in design and texture either, so finished products can be matched to the overall facade or in sharp contrast with it. But the stylistic unity should not be broken so that the building does not look comical. So the smooth PVC casing does not suit the log tower, but the carved "wood-like" will be more than appropriate. In the photo, I cite many worthy examples to guide you in options with successful style combinations.
 When choosing platbands, don't forget about polyurethane options. Like those made of PVC, they are not afraid of typical climatic tests, do not deform under moderate mechanical stress. Due to their plasticity, they are best suited for windows in the form of portholes or with a semi-arch on top. Polyurethane is a light material, so the platbands made of it are very light, as are various elements for creating catchy bas-reliefs, other decorative elements for facades.
Don't settle for styrofoam options. Yes, the price for them is junk, but this is not material for the street. It is too fragile - you are busy with its editing, and a day later, after a strong wind, you again have a field of unpaved work in front of you. Not only will you have to take a replacement, but also you cannot do without stripping off the remains of foam products.
Platbands for windows are overhead, and there are telescopic, with locks for connecting the elements that make up the structure. Often, the second option comes complete with extras, which is very convenient - it is much easier to create a single ensemble. Therefore, even when deciding in favor of an invoice platband, it is better to immediately purchase an addition to it.
What are the platbands fixed with? At your disposal are nails, screws and glue pastes. If there are no fastening locks in the details, then individual elements at the joints will have to be sawed off at an angle of 45 degrees. I think the most convenient way of fixing is mounting on metal fasteners. It is necessary to refresh the facade by painting or washing - removed the platbands, then put them on. I wanted to replace a part - please, some kind of platband is deformed - you can also change it without problems.
 Double-sided tape is only good for indoor use. To use it for installation of platbands on the facade - just add work to yourself. Platbands will scatter both from strong winds and in the event of a particularly hot or rainy season.
If necessary, you can easily find both flat and profiled trim options.The second type of product has a lot of options: asymmetric, symmetrical, combined and curved. Due to the fact that the plastic does not swell from water, does not deform from heat, products do not swell from moisture from the street, therefore, the fitting of structural elements according to the pattern will be preserved under any climatic conditions.
Range
PVC windows give the facades of buildings a special nobility. But do not be on the windows that are flush with the wall of platbands, the impression of the view is much worse. Therefore, platbands were invented, ennobling the joint gaps between the building wall and the window frame. After all, even with the ass in the installation of plastic windows, the joints in the wall will not go anywhere. If only they are not covered with a pretty and practical platband.
Why do we need it?
The main decorative task of the platband is to make the place of contact between the window frame and the wall attractive. But it also has more applied functions: it does not allow the sun's rays, wind, moisture to affect the joint seam, which means it protects the foam from the weathering process.
Varieties
I'll start with a typical flat. Budget proposal, pleasing not only by the affordability of the price, but also by the simplest installation scheme. When the appearance of the facade is not required to cause a surge of emotions, installing a flat casing is the best solution.
 Platbands with a profiled core have some kind of bulges that retain their shape in frost, heat or increased humidity. There are many options with different patterns, so choose what you like - everyone will have the same impeccable quality.
But remember that at the corners you will have to perform trimming and registration, so be realistic about your strength.
I do not recommend stopping the choice on carved platbands if the drawing is clearly discordant with the general style of the task. If you cannot find the platbands of the desired color, do not rush to purchase something from the assortment available in the nearest stores - look in those farther away. Or use the network - today there are a lot of color options, so it is still possible to find the desired color of the trim.
What are they made of
Sheet monolithic or structured plastic – it is the most demanded material in the production of flat products. It tolerates temperature fluctuations well, does not lose its qualities under prolonged exposure to ultraviolet radiation, and is not afraid of moisture. When mixed with pigments, a high-quality colored base is obtained, so there are almost no problems with the selection of the platband of the desired color.
Plastic almost does not lengthen if it does not come under the influence of extremely high temperatures (they do not happen in everyday life). It does not change its given shape when exposed to water. therefore no clearance is provided in plastic structuress, which are indispensable when working with other materials.
Polyurethane (PVC) platbands most often embossed. The properties of the material allow you to embody any design ideas into real forms, to use finished products on facades and indoors.
Like plastic, polyurethane platbands are not afraid of heat, moisture, frost.
High-quality flat or embossed MDF platbands anyone will be enchanted with beauty. But i recommend placing them only indoors - products are deformed upon prolonged contact with a humid environment, so for outdoor use this is not the most practical option. Of course, no one can prohibit. But will everyone raise a hand to personally send a beautiful platband, and even more expensive, to the correct deformation?
The most affordable are the foam platbands... But they are as light as they are susceptible to mechanical stress. Because of this, neither excellent thermal insulation performance, nor resistance to low temperatures and moisture should tempt you to buy such an option. Except for indoor use.
For dessert left platbands made of natural wood. Profiled, flat, shaped - any are good. Even without hand or machine made threads. But if during the manufacture the manufacturer deviated from the technology or tricky with the finishing, then you will not admire the beauty for very long. After a year or two, deformation will begin, the canvas will begin to crack.
When choosing platbands, focus on your capabilities, the final price of the products and the functionality declared by the manufacturer. Don't take the cheap, but it's not worth paying big money, if you are not sure that the purchase will work for at least a decade, without losing its original appearance.
Platband installation technology in video:
How to fix platbands?
The installation of the platband on the PVC window can be done by yourself, taking into account the most appropriate mounting option in your case.
If you like to follow the beaten path, mount the elements on the PVC frame itself or on the wall near it - these are the most popular ways to fix the cladding panels. If you have chosen removable elements, then do not rush to attach them tightly with self-cut or something else - look for latches on the products. But in order for the panels to hold, special metal elements will need to be placed on the frame. Then click-click and you can decorate the window, tired of the platbands - took off in five minutes and all the cases. Faster only glued on double-sided tape. But such decorations will only last until the first strong wind.
Why does a plastic window need trims?
Cover strips, strips, platbands - these are all names for the same elements for sewing mounting gaps. These not so wide seams, no matter how hard you try, even after the work of professionals, they do not look the most attractive way. All the same, there are gaps, irregularities, drops of foam, which do not improve the appearance of the wall with a window. The seams look especially sad a couple of years after the installation of the window: whether the building led a little or natural erosion processes are to blame, and the gaps near the window frame began to grow. In general, there is no question of aesthetics if the seams are not covered with platbands.
 But if you do not care about the appearance of the window, but only care about the quality and reliability of installation work, then you will also have to spend money on the purchase and installation of platbands. Because overhead panels block the access of moisture and wind to the seams, do not allow the foam layer to collapse and postpone the next corrective work to restore the state of the insulating layers. Therefore, platbands have not only decorative purposes, but also applied ones, that is, useful.
Platbands can be installed on the outside and on the inside of the window. What they will be, decide for yourself, choosing overhead or telescopic, curly, flat or rounded.
If you are planning to bring the Internet down, then I advise you to purchase platbands with an existing cable channel.
Installation Algorithm
First, clean as best you can the installation site of the panels: remove excess foam from the joints, clean out debris and fill drops adhering to the walls. If the platbands are edged, carefully adjust the appearance of the panels using a level and other auxiliary tools.
Cover panels on frames are fixed with special glue, self-tapping screws or liquid nails. Well, I think you understand that the use of hardware is preferable if your region is systematically very windy. Although it seems that this work does not require special professionalism, if you are not particularly confident in your abilities, it is better to invite a specialist. Masterful work is more pleasing to the eye and the result will last longer.
For clients looking for a flawless result, falling into a trance at the sight of a pair of nail hats, telescopic platbands were invented. In such strips there is a special protrusion for insertion into the groove of the box, so the front side of the strips has an impeccable appearance - all fasteners are hidden under the protrusion.
How to keep an attractive look longer?
Proper maintenance of cladding panels is simple.
Like all plastic products, platbands can be wiped with a damp, clean cloth or sponge, using a soapy solution of detergent without aggressive components.
Gently rub heavily soiled places, you can soap the dusty area harder. But do not use a brush with coarse fibers, especially do not use a metal brush - micro stripes may remain on the surface of the plastic, into which street dust will begin to cram and the platband will soon lose its original attractiveness.
Where can you buy?
In the same place where you will order, or ordered double-glazed windows or a complete frame structure. The panels are considered accessories, so they are not included with the main product - their availability and installation must be ordered as a separate item. Although, if you want, you can purchase panels in another place, and fix them in place yourself, or invite any master you trust.
You can buy ready-made platbands or order the production of individual elements with a unique design. The length of the standard panels is 2 m 20 cm, the width is from 4 to 7 cm. The color assortment is also pleasing, so you can decorate the windows of your house with white, colored platbands or order laminated elements.
Platbands for plastic windows
Modern options and types of fastening
 Platbands are designed to give a window or door a complete look. Panels have been used to decorate windows for more than one century, but on modern facades they look appropriate if they are selected in accordance with the general style of the building. In addition to the decorative function, they also have practical purpose - they cover the mounting gaps between the window frame and the sides of the span. In the presence of panels, a beautifully designed window will not lose its attractiveness if the gap between the window and the walls slightly increases due to, for example, the shrinkage of the house.
It is easy to choose the right platbands, since most of the distributors are ready to offer you flat, curly, rounded elements of any desired color from veneer, aluminum, PVC, MDF, steel. I think you can find the right ones yourself. If you are at a loss with the choice of material, then consult with the managers. But anyway, if the house is made of wood, then the platbands must be selected from or under a similar material. Then the view of the house will sparkle with new colors and will delight the eye with its elegance.
The most popular type of platbands with customers is PVC products, for fixing which on surfaces you can use glue, ordinary and liquid nails, screws, self-tapping screws. If you yourself still do not have experience with such elements or are not sure that it will turn out neatly enough, then invite the master.
Platbands are fixed by overlapping or by inserting into a groove (telescopic). The last option is attractive because after the end of the work, no fasteners are visible on the front side of the strip.
When the window structure takes its proper place, the mounting gaps and slopes must be closed with platbands. Having placed the top strip in the profile for fastening, bend the platband onto the wall surface and secure it with screws. After that, it is the turn to draw up the slopes using the same algorithm. Using a miter box, make corners at the ends of the planks, and then join the strips. At the points of contact between the strips, treat the seams with sealants, acting quickly and as carefully as possible.
By the same principle, you can decorate the frame of the door frame.
In order not to lay a television cable or other "cords" next to it, it is better to buy platbands with a cable channel once.
Then all the wires will be hidden from prying eyes, but masking will not affect the quality of communication systems in any way. You will not have to use nails, screws, self-tapping screws if the products have a special fastening system.
Installation of PVC platbands on windows and doors in the video:
Homemade platbands
I would like the country house to look, albeit small, but a palace, so you spend energy, time and money on decorating it. After installing plastic windows, you cannot do without installing platbands - if you want the new "eyes" of the house to look beautiful, and the assembly seams do not become unusable due to moisture and wind. Handy owners can make platbands on their own, and not buy ready-made overhead elements.
When making the platbands yourself, first take the necessary measurements. Be sure to calculate the distance from the bottom point of the box to the top, taking into account the width of the future casing. Then arrange the edges of the strips, making sure that the platbands cut off by an angle have exactly 45 degrees - then the contacting plates will ideally adhere to each other, which is very important for the attractive appearance of the entire structure.
After cutting the products, fasten them to their permanent place of residence, taking into account the strength and weight of the plates. Wooden ones are best fixed with small, thin carnations. If the surface for fastening is brick, then you cannot do without a drill - fastening with glue, in my opinion, is not a very good idea. Although many practice just this type of installation.
PVC

Do you want a plastic window to look perfect on the wall? Then take care of the installation of platbands, elements for which can be bought both in a hardware store and from a supplier of a metal-plastic structure. Which material is best for you? Make your choice taking into account what your house is built of, the shape of future platbands. Usually sellers are always ready to offer plastic, wood, plywood and metal trims.
I think the most convenient option is the universal platbands that come with beautiful panels. Such a product looks good on a window with any profile, forming a harmonious complex with it.
Installation of platbands is so simple that even a novice home craftsman can master the technology.
In a wooden house
If in wooden houses the windows do not have platbands, then the appearance of such buildings has a somewhat official appearance. Which is not very beautiful, in my opinion. Even a simple platband with uncomplicated carvings, which even an inexperienced joiner or carpenter can do, will make the facade of the house much more attractive.
To make a nice platband to the window of a house made of wood, you will need the usual tools: a jigsaw (electric will simplify the work), a cutter, a drill.
You can make patterns of any complexity with a jigsaw. It will be easier to work if you choose an aspen, linden, alder or pine board with a thickness of 0.5 to 5 cm as the base material.
Do not go to extremes when trying to achieve an attractive platband with an abundance of small details.
Let there be fewer of them, but each element should have an impeccable look. When an element has clear edges, you can admire it from afar.
Templates
To use a template, you first need to make a basic drawing, and then use it to make a template out of wood.
Should you make it yourself?
If the installation of platbands seems to be a difficult task for you, then go to the company where you bought the windows without any remorse. There, even if they themselves are not engaged in the implementation of panels for decorating windows, they will always prompt a couple of addresses where you can purchase everything you need. They will also give the addresses of several craftsmen who take orders for the installation of platbands.

Do not worry that in the assortment of platbands you will not find the option you need. Manufacturers have calculated everything a long time ago, so they are ready to please you with simple and carved elements made of metal, wood, plastic, and in an amicable way dazzle you with color options. I'm sure you will definitely find an option that suits you completely. And the master will install each of them on the windows of your house, if not in no time, then much faster than you.
Of course, if you are a jack of all trades, then you will not go to the store for wooden platbands. Who among the needleworkers will give up the chance to decorate their home with a hand-made product? If the plans are to install platbands made of some modern material, then home Kulibin will cope with such a product without any special difficulties.
For clients who do not strive to independently carry out at least some construction work, a staff of installers, builders and designers is always available. A joint alliance of experts will help you achieve the desired result and make your home special and attractive.
For euro windows
A beautiful platband is appropriate not only for windows from old Russian fairy tales, but from modern metal-plastic double-glazed windows. In addition to the decorative purpose, each platband performs a useful function - it protects the assembly joints from water, wind, destruction under the influence of ultraviolet radiation.
Mounting
The process of installing platbands is preceded by the dismantling of the old window structure and the installation of a new window with modern glass units. After foaming the joints with foam and installing the slopes, even if all the work is done professionally, it is advisable to equip the openings with platbands.
The exception is windows "recessed" deep into the wall - then the platbands will look like an inappropriate addition.
Most often, residents of the first floors, the owners of their own cottages, are especially sensitive to the look of windows. Those people who live on floors 5 and above are not particularly concerned with how their windows look from the street side.
What will the presence of platbands on the windows of the house give you?
Unconditional pluses:
- an exclusive look (yes, not all windows have this addition that is pleasing to the eye and useful for the windows themselves);
- attractiveness;
- protection of assembly seams from adverse factors;
- strengthening of noise and thermal insulation properties of the window.
I did not notice the minuses of the platbands. We will not accept for such a small cost of purchasing and installing these elements?
Platbands for interior decoration of windows are rarely ordered. But if you want to give your room a particularly elegant look, then PVC cladding is a very affordable and easy way to achieve this. You will not make your windows worse, but I will say right away that such a solution has no practical component. After all, the windows from the side of the premises are not threatened by moisture, wind or sun.
Examples of making carved platbands in the video:
Rare decorative options
If you are a fan of decorative elements, then you will have to upset you a little: manufacturers have nothing to offer you if you look for a solution among standard options. But who's stopping you from making an individual order for the production of exclusive platbands? Moreover, they can be both plastic and wooden. And the last option, I think, is much easier to get. You only need to find a suitable carpenter or joiner. It will come out cheaper, since craftsmen often work on single non-standard options, and manufacturers of a mass product are simply limited in the tools for fulfilling individual orders according to individual sketches. And if they do, they demand a lot of money for their services.
Beautiful platbands are guaranteed to transform the look of your home. Especially if the color and material of additional elements is chosen taking into account the general style of the house. And what is important: such a wonderful decoration is quite affordable, does not require great professionalism from a person who decides to independently decorate the windows of the house with pretty platbands.
The appearance of the house largely depends on how the windows are decorated. It is they who emphasize and sometimes shape the style of the building. And the main way to give them character is window frames. Here we will talk about them further.
Purpose and classification
Platbands are narrow, long slats that frame windows or doors. According to this principle, window and door are distinguished. They usually differ in width, but, in order to maintain a uniform style, they must be made of the same material. In addition, they are made in a similar manner using repeating elements and painted in the same color.
Door and window frames serve not only to give the building / room a finished look, although this is also important. They also close the technological gap that forms between the frame of the door or window and the wall. After installing windows and doors, this gap is filled with insulation, but the view does not get better from this, and water, dust and sound continue to penetrate the room, albeit in smaller quantities. So they came up with once to close that gap with planks, and even decorate them.

At the place of installation, platbands are external and internal. Platbands for outdoor installation mainly play a protective role. Therefore, they are made from materials that are resistant to climatic factors (or they are covered with protective compounds) and the thickness of this material is usually greater. Internal platbands mainly perform a decorative function. They are operated in gentle conditions, therefore the requirements for the properties of the material are different - decorativeness is important, and not resistance to climatic influences.
Materials used to make window frames
Window frames are selected depending on the overall style of the house. Houses are built and finished in different ways, respectively, and the materials and style of additional decorative elements are selected differently. For brick houses, for example, plastic or metal is better suited, but not wood (this is if there are platbands at all). Windows are also decorated with plastic or metal. For wood, on the contrary, wood is more suitable. But this is not a rule either. The choice of platbands is a personal matter of the owner. He sets what he wants. It is only important to understand all the pros and cons of each material.
Wood
Platbands for a wooden house are most often made of wood. But any kind of wood requires constant care - painting and / or varnishing. The coverage has to be renewed every two to three years. Only in this case, products from it look normal for many years.

The advantage of wooden window frames is that they can be carved, with figured elements of various shapes. This gives you an almost infinite number of options. There are also very simple models - ordinary planks, possibly with some additional elements. The choice depends on the style of the house.
Wooden platbands are used, both from the street side and indoors. Just when installing, they will use different protective impregnations and coloring compositions.
Plastic
If PVC windows are installed in the house, then plastic frames are also installed. They are good in that all care is periodic wiping from dust and dirt. No other operations are needed.
Plastic platbands are made from climatic-resistant plastics by adding a fade-resistant dye to the composition. Components are added to the mass that protect the material from high and low temperatures.

The advantage of plastic platbands is their low price. The downside is the limited choice of models and styles, not too large a range of colors. There are usually white, a couple of shades of brown available. The rest - may be available only on order, and even then not always. And one more minus - it's still artificial material. Not everyone wants to put plastic platbands on a wooden house. Even though wooden ones are not cheap at all.
The area of \u200b\u200buse of plastic platbands is indoors or outdoors. If you need external plastic platbands, pay attention to the temperature mode of operation. Plastic must withstand the most severe frosts in your area.
MDF
Platbands made of MDF - an option for indoor use. You can't put it on the street - it will quickly become unusable. Represents compressed crushed wood fibers, from which the products are formed. Their surface is laminated with a film that can be smooth, colored, imitate the surface of a stone (marble, for example) or wood.

If you don't like plastic on the windows, the second possible budget option is MDF platbands. In any case, most often it is them. There are even special telescopic models. They are good because a special additional board is cut to the required size, due to which they can change the width and become in any opening. With their help, the doorway is formed quickly and efficiently.
Caring for MDF platbands is no more difficult than for plastic ones - wet wiping. For stubborn dirt, you can use non-abrasive (liquid) and non-aggressive (no chorus, etc.) detergents.
Metal platbands
This type of platbands is usually placed on the street with plastic or metal-plastic windows. It is a thin sheet of galvanized metal coated with a weather-resistant paint (usually powder paint).

Metal window trims belong to the budget category. They don't cost very much. Suitable for modern style private houses. Metal platbands are perfectly combined with houses finished with metal and aluminum composite. The second area of \u200b\u200bapplication is for industrial and office premises. They are good because they combine practicality, durability, low price.
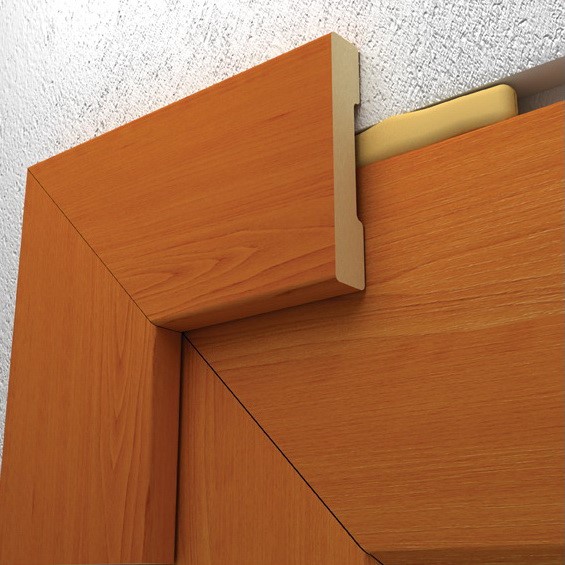
Platbands device
Classic window trims consist of four elements: upper and lower trim, two side trims. They can be connected using a single spike (as in the picture). They can also be joined end-to-end, since they do not carry any load. In this case, the strips are simply tightly fitted to one another, fixing each element separately.

If the window provides for a window sill, there is no need for a lower strapping. During installation, the window sill is first fixed, then the side strips and the last - the upper trim.

The width of the platbands is selected individually each time, but usually is in the range of -100-250 mm. When choosing the width, two technical parameters are taken into account:
- the platband should go over the frame by at least 5-10 mm;
- in order not to interfere with the opening of the windows, they should recede from the hinges by 10-20 mm (the further, the wider the sashes open).
Finally, the width is chosen based on the style of the house. Somewhere narrow strips are more suitable - 100-130 mm wide, somewhere wide ones are required - 200-250 mm. In order not to be mistaken, you can “try on” the planks by pinning them on a couple of nails and watch from afar which option you like more.

The thickness of the strips for the manufacture of platbands is 20-35 mm. In most cases, a board 20-25 mm thick is used, since this is the optimal size for self-execution - not too difficult to process, but rather voluminous to obtain a decorative pitchfork.
Platbands in a wooden house
Most of the questions arise when decorating windows in a wooden house. Most are inclined to believe that only wood trims are suitable for a wooden house. There is a reason for this - wood with wood looks the most organic. But choosing a material is far from everything in this case. There are several important points to pay attention to:

So the choice of the appearance of the platbands is far from the last, of those that will have to be decided. It is also necessary to choose the method of wood processing, the method of installation, and the type of platband too.
Types of wooden platbands
Wood is an extremely plastic and very beautiful material, therefore the number of variations in the design of platbands tends to infinity ... All of them can be conditionally divided into several types: simple and carved. Simple ones look great on modern houses, carvings are good for ethnic buildings.

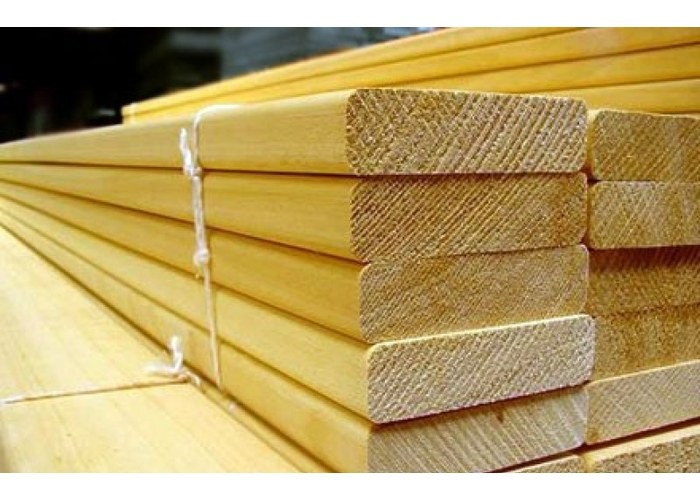
Simple in shape from molded
Industry and private traders sell planks of various sections:

You can make simple platbands from this molding with your own hands. To do this, you need to calculate the amount of material required (based on the results of measurements of the windows). It should be borne in mind that the length of one plank is 220 cm. You are unlikely to make component elements, therefore it is worth considering that there will be a lot of scraps. The most successful case is when it is possible to "cut out" two elements from one plank - usually the sidewall and the upper / lower part.

The planks are joined in two ways - at 90 ° and floor at 45 °. At the same time, the appearance of the platbands is different. When docking the floor at 45 °, a neat frame is obtained, when docking at 90 °, a more expressive design. The protruding edges can be left straight, they can be cut at any angle, rounded, curly trimmed ... At this point, as you like more or what is enough skill, desire, imagination.
The simplest homemade platbands
The option differs from the one described above in that we carry out the primary processing ourselves. Edged and unedged boards are suitable. From the edged ones, a modest finish for a country house or for a house from planed / glued timber is obtained. We grind the board first with coarse sandpaper, then more and more thinner. When the surface is smooth and level, you can start cutting.

Nothing fancy at all - just well-finished boards
The bark is removed from the unedged board, the surface is also polished. There are options here. You can achieve smoothness by removing flaws. You can only remove the top rough layer, leaving all the imperfections of the wood in the future, only to emphasize it during processing.
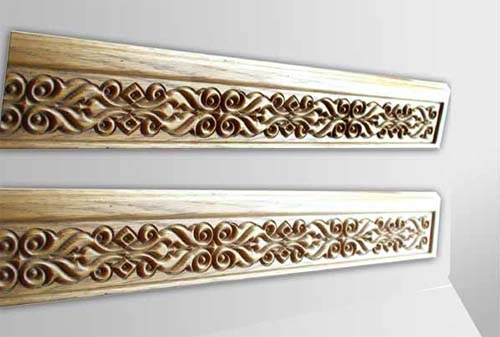
Carved platbands
Openwork wooden frames for windows are a beautiful but expensive option. Expensive - if you order their execution, and laborious if you do it yourself. There are, however, simple, but spectacular patterns that, if you have a jigsaw and desire, you can make yourself.

There are two types of openwork platbands - with slotted and overlaid elements. Slotted - this is when the holes in the casing are made through and through them the wall is visible. Overhead - this is when the window is decorated with ordinary strips, and on top of them are slotted thread elements or decorative protruding elements (overlays in the form of rhombuses, rectangles, etc.).

In the case of overlays, contrasting colors are often used. For example, the planks are painted in a dark color, and the openwork is painted in a light one. But this trick is easy only at the installation stage - you can paint both parts separately. Subsequently, you have to carefully apply different paints with a thin brush.
How and what to fix platbands in a wooden house
In a log or log house, windows and doors are placed on the casing - a special frame of the opening made of wood, which is not rigidly fixed to the walls, but is held by the frictional force in the ridge / groove type lock. The casing is made from a thick wooden beam. The frame of the window or door is attached to the casing. When installing platbands, they are also attached to the casing. Since there is no load on them, the strips are usually attached from both sides, stepping back 10-15 cm from the edge.
There are two types of fasteners:

Fastening with dowels is more laborious, but it is absolutely invisible. If the process is too difficult, use finishing nails.
How to attach platbands to a log wall
There are no problems when installing platbands on an ohm from a bar: the surface is flat, it is easy to attach to it. If the blockhouse is made of logs, everything is more complicated. There are two options:

Which method to choose is your decision. Both are viable and both are not perfect - it is difficult to ensure tightness.
How to prevent moisture leakage under the platbands
Ensuring tightness is the main concern when installing platbands on a wooden house. Most of the questions arise about how to prevent moisture from flowing under the upper bar. Water, flowing down the wall, inevitably gets into the gap between the casing and the wall. There are several options for solving the problem, mostly traditional, but using new materials.

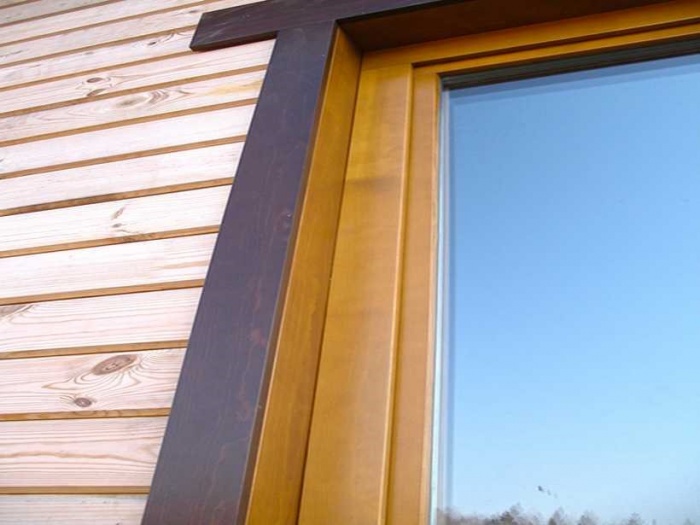
Platbands with a wooden "visor"
Such platbands are also called "Finnish", since almost all houses in Finland are framed in this way. In them, in addition to the traditional four slats, an additional inclined visor is made, which is supported by the consoles resting against the side slats. It is advisable to choose the angle of inclination of the plank the same as the angle of inclination of the roof or close to it. Although a minor detail, such a finish looks more organic.

When installing, under a visor in a log or a bar, you can cut a few millimeters, "drown" the edge of the visor there, seal the remaining gap from below and from above with a sealant (silicone, frost-resistant, with adhesion to wood).
Finnish platbands are good for everyone, but they are poorly combined with carving. The style is not the same. They are great for simpler, more concise designs. Although there are similar options in the Russian style, it's just not easy to make them.
Metal visor
By the same principle - to divert water from the platbands - this method solves the problem. Only the metal strip is used in the shape of the letter Z - part of the standard molding. The color is matched to the walls or the color of the cashing.

The installation method is the same: they make a cut in the wall, only its size is much smaller - the thickness of the plank is several millimeters. The installation is the same as described earlier: we put one part into the groove, seal the cracks with silicone sealant. The only difference is that the free edge can be fixed to the upper platband strip (using self-tapping screws).
Installing the bottom harness at an angle
The lower plank of the casing can simultaneously serve as protection from precipitation. For this, it is installed at an angle. The choice of the angle of inclination is no different - close to the angle of inclination of the roof.

With the installation of this bar, everything is simple. From below it is supported by triangles carved from wood, fixed to the frame. The water will not flow down the wall, but at some distance from it. Here it is already important to be correct - that the water does not undermine the foundation.
Photo of platbands on windows of different types


Simple platbands with only small elements of carving - these are often seen on a Scandinavian-style house

Carved overhead platbands - delicate carving on a dark background


Shutters and platbands - this can often be found on old houses


Any owner dreams of making his home memorable and beautiful. If the house is no longer new, it is not so easy. One of the possibilities is carved platbands. They will even turn an ordinary "box" into a masterpiece.
Material for platbands
Carved platbands are made mainly of coniferous wood. The best option is pine, it is normally cut, inexpensive, due to its high resin content, it is durable. In principle, you can use any other coniferous board, but it is better not to try with spruce: it is too fibrous, it cannot be cut even with the sharpest tool.
You can also make carved platbands from hardwood - linden (the softest), poplar, maple, oak, cherry, etc. But with each species you need to be able to work, get your hands on and there is no guarantee that something digestible will turn out, and hardwood is expensive. Therefore, window frames are often made of pine. You just need to pay attention to the quality characteristics.
Carved window frames - a way to make your home unique
If there is wood or a board that has lain for 3 years or more, you can use it: it is already definitely dry, only processing and calibration will be required. If there is no woodworking equipment at home (thicknesser and circular saw), an edged board will be needed. Wood of the first or highest grade is suitable for carved platbands. This means that there should be no knots, chips or resin pockets on the board. Take wood from a chamber drying, with a moisture content of no more than 8-12%. This is not for sale in the markets, you need to look at sawmills and in hardware stores.
Why chamber drying? Because it is dried in a special chamber, rapidly removing moisture. In this case, some of the boards crack, bend - these go to rejection, the rest are sold. If you make carved platbands from oven-dried wood, they will definitely not be crumpled and they will not crack.
Tools
To make carved platbands with your own hands, you will need the following minimum set:
- drill with a set of drills;
- an electric jigsaw with a smooth start and a bunch of different saws for wood;
- chisels;
- sandpaper with different grain sizes;
- flap disc made of sandpaper for wood on a drill.

To reduce the time it takes to create carvings and sanding, it is better to have a router and sander.
One by one or in bulk?
Carved platbands usually consist of repeating elements. At least two vertical strips on each window are made the same. And since usually several windows are drawn up, many identical elements are required. If the platbands are going to be slotted, naturally there is a desire to cut several pieces at the same time, folding the boards in a pile and somehow fixing them.

The desire is understandable, but difficult to realize, and the benefits over time are not as great as it seems. The first difficulty is that home craftsmen usually have jigsaws that are not too powerful. To cut through several planks, you have to move the file more slowly along the intended pattern. On straight lines the speed is still tolerable, on curves it is low. And, the smaller the bending radius, the slower you have to move the file. If you are working with one board, there are no such problems. So, if there is a gain in time, it is quite small.
One more point. Even thick, good, expensive files are deflected with a large thickness of the workpiece. So, when cutting several boards at the same time, the quality of the cut on the bottom (or two) remains a big question.
The procedure for making a platband with a slotted thread
Using a template, transfer the desired drawing to the board (where to get it, how to enlarge it, how to make a template, read below). If necessary, we correct, draw the details well. Next, we will describe the procedure step by step.

We remove the wood in the slots of the picture

Since they will look at the carving from afar, some inaccuracies are not fatal, but it is still worth striving for the ideal.
Making a curly edge
Some platbands have a straight edge. Then we skip this stage. If the edge is curly, you will still have to work with a jigsaw.

If the cut is difficult, it may not be very attractive places. It's not scary, then we will process them where necessary - with chisels, the same jigsaw, emery. When you are satisfied with the result, you can move on.
Final refinement
The owners of wooden houses probably know everything about how to handle wood. But, just in case, let's repeat the general rules again.

The choice of paints and varnishes is very wide. Any for outdoor work. But keep in mind that opaque paints will have to be renewed periodically - just like that once a year. And that means removing old paint, priming, painting again. The situation is simpler with oils for wood - they do not give a film on the surface of the wood, but are absorbed into the fibers. It is also necessary to renew the coating, but just remove dust and cover with a new layer. And the processing frequency is less. Cons of oil for wood - higher price, fewer flowers.

How to enlarge a template
Simple carved platbands can be made without templates. Several examples will be in the video - it shows how to outline, how to cut. But not everyone will be able to draw more or less complex patterns on their own. You need skill, and talent. The easiest way is to find a diagram, print it in the desired size, transfer it to cardboard and cut it out. This will create a pattern that you can trace.
The second way is to sketch from a photograph. Not all schemes can be found. Some, especially the antique window frames, you won't find anywhere. If you have at least some drawing ability, you can sketch them.

Even such an ornament can be drawn ... if you have the skill
Questions may arise about how to increase the size of the found schema or template. There are three options:
- Using any graphics editor. The simplest one - Paint - is available in any computer running Windows (the "Image" tab, the "Resize image" line, select "centimeters" and set the desired length (height) in the box. The resulting file can be printed. If the printer is small format, it may be necessary to split into several pages, then glue them together and, according to the resulting picture, make a template.
- Using a photocopy. Copier has a zoom function.
- Taking graph paper, transfer the drawing to the desired scale. To do this, divide the original image into squares with a side of 0.5 or 1 cm (you can print it on a piece of paper in a cage). Then we transfer the lines to graph paper, increasing them in the desired proportion.
The first two methods are faster. But when scaling, the picture may turn out to be fuzzy and blurry. It can be corrected by hand, it can be drawn in some editor, for example, CorelDRAW. How to do this, see the video. Just an example of drawing a diagram for a thread.
Related Videos
Schemes, templates, patterns


The style is completely different ...
After installing windows in a wooden house, there is always a gap between the wall and the window frame. The easiest way to fix it is to install platbands. In addition to functionality, they play the role of a decorative element that adorns the facade of the house and makes its appearance unique and complete. Some of the most beautiful are the carved wooden frames.
Types of platbands made of wood
Today, platbands exist not only wooden, but also wood-fiber, plastic and even ceramic. But the most demanded material for their manufacture is still wood. This is due to its environmental friendliness, affordable price and high aesthetic qualities. In addition, wood can be restored, thereby extending its service life.
Smooth or profiled from solid bars. If in the future the platbands are painted, then conifers are used, most often pine. When made from precious wood, they are varnished. Fasteners are nails, screws or liquid nails.
With figured carving from solid bars.They are mainly made of fine wood and varnished. They can be attached both to screws and to simple and liquid nails.
Smooth or profiled from glued lumber. They can be produced already finished with laminated film or veneer of expensive wood species, which eliminates the need for additional finishing. But, there are also no finishing, intended for painting.
Stylized for a specific style.The most expensive type of platbands, which are made exclusively to order.
In addition, they are divided in appearance into flat, shaped and figured platbands.
Flat.The cheapest and simplest type of platbands. But it has a low aesthetic value.
Shaped... Most often, they have a convex surface that has cuts, protrusions or grooves. They cost more than simple flat ones. This is due to the production technology, which requires the use of special equipment.

Curly wooden platbands... They are decorative elements and add personality to the house. They are produced on special machines equipped with vertical cutters. In this case, the desired pattern is programmed, and the machine automatically mills the surface. But, despite the latest technology, the capabilities of such equipment are limited.
And only a master can make an openwork relief. The price of a handmade wooden platband will depend on the complexity of the ornament and the type of wood.
But the main difference between manual milling and machine milling is that the machine does not make a through thread, but only applies a pattern to a certain depth of wood.

Wood for the manufacture of platbands
If it is necessary to make a flat or shaped casing, then a simple pine is used. To make carvings, you need soft wood, such as linden. It is easy to process even with hand tools and is easy to grind. But due to its high hygroscopicity, it needs a high-quality topcoat. This involves the application of several layers of paint and varnish composition.
In regions where significant temperature differences are possible, as well as high humidity or, conversely, a dry climate, wooden platbands are made from dense and hard wood. These include birch and oak, which are extremely difficult to process, but they will last more than one decade. Therefore, platbands from these types of wood are most often made on milling machines.
The only drawback of all types of wooden platbands is their high hygroscopicity, which eventually leads to their cracking and drying out. This can be avoided by periodically renewing the protective paint and varnish layer.
Tools required for the manufacture of carved platbands
Through thread is the most affordable way of decorating platbands for non-professionals. It does not require special skills, you just need to have patience, diligence and a sense of beauty.
A large number of firms offer, various platbands made in an industrial way. But it's much more pleasant to make it yourself. As a tool, manual milling machines, conventional or electric jigsaws, various types of drills, chisels and hacksaws can be used.
Basic rules for making a platband
When making wooden platbands with your own hands, it is important to take into account that after installation, they should not interfere with the normal opening of windows. Therefore, the internal dimensions of the casing are made larger than the size of the window frame by 2-3 cm.
The upper part of the casing is called "kokoshnik", if necessary, it can be extended by fastening the parts with thorns. The lower part is called "towels" and is attached at an angle from the wall to drain water. It also has a thread that matches the style of the "kokoshnik" thread, but the bar for it should be 1 cm thicker than the top bar.

Before installing the platband, it is necessary to nail the slats around the perimeter of the entire window - this will completely close all the unevenness of the wall. The joints, however, must be carefully fitted.
All platbands are made in the same style.
Preparation for work
To make a carved wooden casing, you should choose a board 3-4 cm thick. It is ideal for free opening of window sashes. The width should be sufficient to cover the edges of the walls and protect them from moisture. Alder, linden, aspen or conifers can be used as wood.
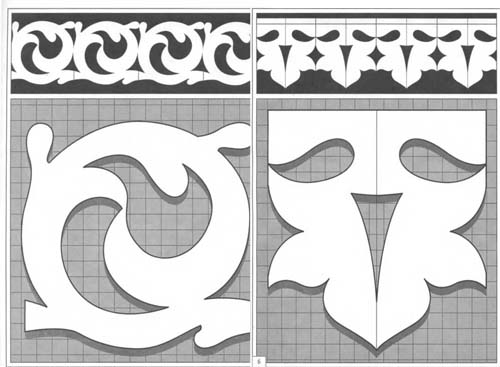
Choosing a small ornament is not the best solution. It will be difficult to distinguish from a distance, and it will take more time and a special thin tool to manufacture. Therefore, the ornament should have large elements that are clearly visible from afar.
The arrangement of the carved elements along the grain of the wood will protect the platband from cracking. This is especially true for coniferous wood.
Use simple patterns at first. The easiest for those new to carving are the round pattern elements, which are simply drilled with a drill. Below are sketches of samples of wooden platbands.

You can watch the video in more detail about their manufacture.
Installation of platbands on windows
You can make stencils yourself or transfer a drawing from ready-made sketches. First, a pattern is applied to the workpiece, then a hole is drilled with a drill and the necessary ornament is cut from it with a jigsaw. Further, the cut out platbands must be well sanded with sandpaper.
After the carved blanks are made, they should be connected correctly. In total, there are two ways of connecting: on spikes or half-tree connection. The first method is much simpler and more popular, the second is used extremely rarely.
Special glue is used to fasten the platband. It is important that it is synthetic, since fungus can appear in the organic compound, and moisture can collect. All this is very harmful to the wooden platbands.
If the elements are attached to nails, it is advisable to first grease all joints with glue, and only then fix them with nails. Do not forget about the glue treatment of all joints and especially the thorns.
It is easiest to install platbands on windows using wood screws. You can decorate their hats with sawdust mixed with glue, which will be painted over later. But even without this work, the screws will be almost invisible against the general background.
Finished platbands must be covered with a protective compound that will extend their service life for many years. For this, it is better to use special impregnations, which should be periodically renewed. The paint, no matter how high-quality it is, will begin to crack and peel over time, and it will be much more difficult to fix it.
When choosing a pattern for the future platband, it is very important to take into account the style of the whole house, because they should harmoniously complement it. Here are some examples of photos of carved wooden platbands.