When installing a bathtub, there is often a problem of gaps that form between it and the walls. Even the ideal geometry of the walls does not eliminate this defect. And although modern manufacturers offer a huge selection of standard sizes, cases when the dimensions of the bathtub completely correspond to the dimensions of the bathroom are rare. Therefore, most often the final point in finishing this room is not only grouting the tile joints, but also the elimination of all unwanted gaps, which do not look aesthetically pleasing and are harbingers of problems in the future. So how to close the gap between the bathroom and the wall?
There are several simple and affordable options for sealing cracks in the bathroom. The choice of the option for arranging joints between the walls and the bathroom is due only to the size of the joints and the owner's budget. However, regardless of the method, the filling of the cracks begins with the preparation of the surface.
First of all, all kinds of dirt, old paint are removed from the junction plane. Then the solid base is washed and dried well. Cover with an antifungal agent.
If the width of the gap is more than 3 cm, it is necessary to purchase a strip or metal profile in advance. They are screwed to the wall in place of the gap. This addition will serve as a reliable basis for the finishing material, increase the durability and strength of the seam.
Basic methods of sealing cracks in the bathroom
The oldest and most proven method is to fill the gaps that form between the bathtub and the wall, cement mortar... This material is durable and reliable, not afraid of moisture, so using it as a base always gives a reliable result.
IMPORTANT!
Usually cement mortar is used in the following proportions: 3/1 - 3 parts of sand, 1 part of cement. It is better to knead such a solution in water mixed with PVA glue. The adhesive combines perfectly with cement and has a positive effect on the quality of the joint. The consistency of the solution should be similar to thick sour cream.
The gap is only 2-5 mm wide, carefully sealed with the ready-made mixture, pressing it with a spatula along the entire perimeter of the gap. It is recommended to level the visible part of the seam immediately, since such a solution quickly begins to harden.
If there is a gap more than 5 mm wide, the mortar is applied to the supporting profile pre-mounted in the wall. You can start decorating in 24-72 hours (it all depends on the thickness of the layer).
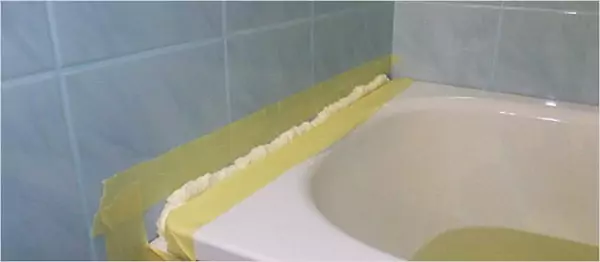
The gap is quickly and easily sealed with construction polyurethane foam. The main condition is that the foam must certainly be moisture resistant in order to withstand the level of humidity typical for the bathroom, and maintain the strength of contact with the wall. This method allows you to eliminate large gaps without resorting to using a metal profile.
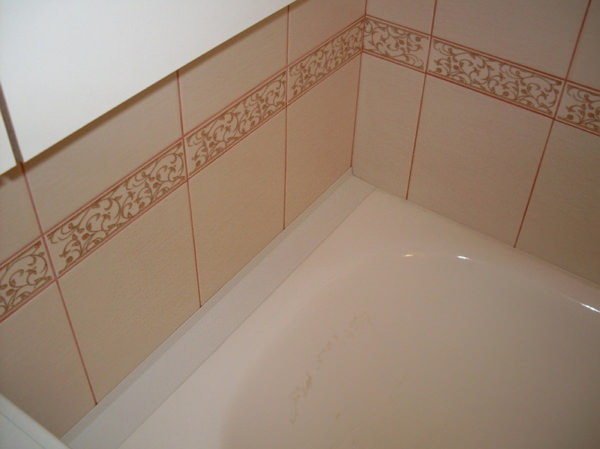
To remove the gap between the bathroom and the wall with a width of 0.5 cm or less, you can use a mixture to fill the tile joints - grout... The gap is covered with a special rubber spatula, and the remnants of the product are carefully removed from the surfaces. This material is sufficiently moisture resistant, therefore it prevents moisture penetration and the formation of mold and mildew. It is not possible to use the bathroom immediately after grouting. The composition should dry well.
Decorative solutions
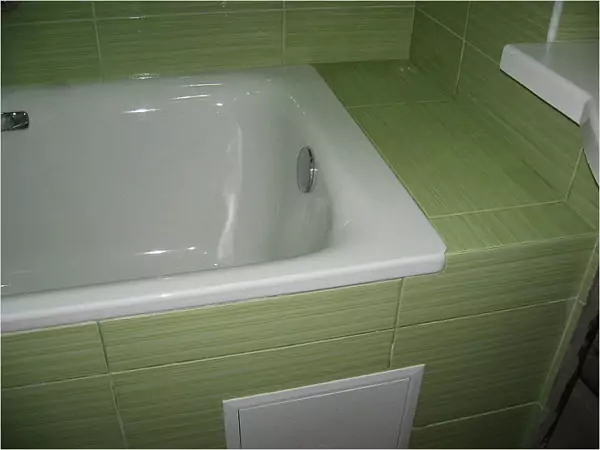
A plastic corner is the most common and affordable option for decorative finishing of various joints in the bathroom. The use of such a corner helps to hide all the defects of aesthetic nature that arise as a result of rough sealing of the seams. The corner can cover gaps up to 3 cm wide. It is recommended to fix the skirting board with transparent sanitary silicone. Silicone is an excellent glue, provides additional sealing, and also contains anti-fungal additives, which is necessary when decorating a bathroom.
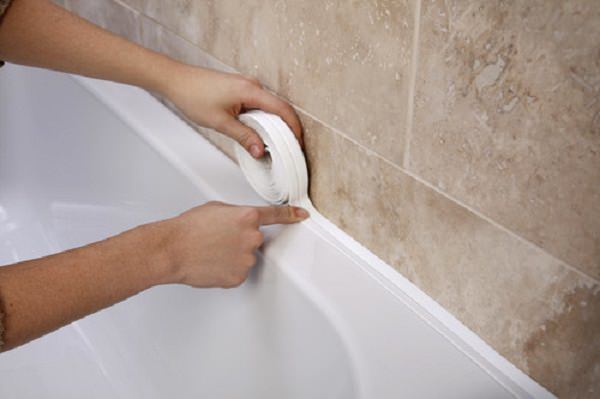
Curb tape is the easiest and fastest way to close a gap up to 3 cm. The tape is a strip of polyethylene with an adhesive backing. To glue it, you just need to degrease the work surface, measure and cut off the necessary piece and attach, pressing with your fingers, to the place of the gap. The curb tape without an adhesive layer is mounted with silicone.
You can fill the gap with tiles. It is better to use the tiles left over from the wall cladding. If there are no tiles left after the repair, you can purchase several pieces of white tiles with a size that requires a minimum of trimming. If the bathtub is white, the tiles will merge with it and the borders will be practically invisible.
Combined method - triple protection
If desired, methods of sealing cracks in the bathroom can be combined. For example, use three methods at once to eliminate the gap:
- fill the gap with polyurethane foam and wait until it is completely dry;
- carefully cut off the excess with a knife and cover the seam with a layer of silicone sealant (this will smooth out the rough surface and increase the water resistance of the structure);
- after the sealant is dry, stick on the border tape.
Thus, the sealing of the joints between the bathroom and the wall will be three times more reliable.
It's important to know
- Acrylic bathtubs are characterized by the ability to bend. So that the work on sealing does not go down the drain, the plumbing must be fastened on three sides with four fasteners - two fasteners from the ends and two more fasteners on the long side.
- Filling the gap between the walls and the acrylic bathtub is performed by filling the body with water. Drain the water only after all the adhesives are completely dry.
- Steel and cast iron baths are installed so as to exclude possible vibrations and wobbles during operation.
- All baths should be level, adjusting the position by twisting the legs.
The work of removing cracks in the bathroom should be entrusted to master tilers. They will quickly and efficiently close the unnecessary gap, and the owners will only have to accept the job. But if you have free time and strictly follow the instructions, even a woman can do this work on her own. Whichever method you choose, the main condition is water resistance and aesthetic appearance. You will learn about the pros and cons of this or that sealing method by watching the video below.