It is very convenient when, after working in the garden, you can wash your dirty hands in the yard without entering the house. For these purposes, many people buy a washstand or a stationary outdoor washbasin. It is cost-effective in a private house. If you have a dacha that you visit a maximum of once a week, then it is more convenient to make a washbasin from a plastic bottle with your own hands and adjust it on a vertical basis. The article describes in detail the manufacturing methods and various options for the execution of the plan. It is not difficult and even an inexperienced master can do it.
Simple and temporary
Such a simple device can be installed even in nature while relaxing with the whole family. You can hang this device on any branch of a tree away from the tent or bedding, so that the flowing water does not form dirty puddles near vacationing tourists. It is not difficult to make a washbasin from a plastic bottle with your own hands. You need to have a 1.5- or 2-liter container, a rope, a sharp knife and find a suitable place to place it.
First you need to rinse the bottle so that it is clean. Then cut off the bottom with a sharp knife. The picture shows a completely cut off bottom, but you can cut it off completely, leaving a narrow strip. Then it will be possible to cover the hole like a lid. In this case, leaves, dirt, and insects will not fall into the container from the tree. The water will remain clean and you can wash dishes from the washbasin with it.
From a plastic bottle with your own hands, you need to cut two round holes on top, not far from the cut. Stretching the rope through them, tie knots on both sides. For this thread we hang the bottle upside down on a suitable horizontal branch. Then water is poured.
To wash your hands, you will need to slightly unscrew the cap of the bottle, but so that the water flows in a thin stream. After the hand washing process is over, screw the lid back on tightly.
Placement on the fence
You can also make such a convenient washbasin from a plastic bottle with your own hands in the country, hanging it on screws to a wooden fence. So that the edge of the cut of the bottle is not sharp, it can be rubbed several times on the surface of a hot iron. The sharp part will melt and will not be able to injure. It will be possible to entrust the filling of the container even to the baby.

In order for the screw not to rust from constant contact with water, it must be screwed from above. The photo shows that the master used a cap from another bottle for better grip. In order for the container to be in an upright position and water does not pour onto the fence, you need to nail a small wooden block just below the top. From the bottom you can make a soap dish and adapt it nearby.
Multi jet fixture
We bring to your attention another option for making a washbasin from a plastic bottle with your own hands. A feature of this device is that water flows from it in several streams. Such a washbasin can be used in a summer yard shower.
To make it, you need to take a 5-liter bottle and cut a large round hole in the bottom. Through it, water will be drawn into the container in the future. As in the previous version, holes are made on the top of the bottle, and then you need to hang it on a rope.

Several holes are drilled in the lid like a shower. The only drawback of this option is that water cannot be stored in such a container. It must be used immediately. When pouring water, you need to hold the lid with your hand so that the liquid does not spill out of it. And hung on a hook in the roof of the shower, immediately begin to wash.
Real washstand
Presented below is a very convenient option for making a washbasin from a plastic bottle with your own hands. In the photo below, you can see that this is a real washstand, from which water does not flow at all. It can be used in the same way as the purchased option, by pressing on the stick at the bottom. Such devices are now installed in almost all trains.
The container can be used both small and bulky, 6 liters. But you still have to cut a hole in the bottom so that air enters the bottle. Otherwise, there will not be the necessary pressure, and the water will not flow.

The only difficulty in this design of the washbasin will be the preparation of the lid. In the photo, a purchased plastic pin intended for washstands is inserted into it. It's easy to find in the household goods section. The product is sold with a lid. If you can't find this tool, don't despair. Its role can be performed by a simple medical syringe.
To do this, cut off the part where the needle is inserted. Get a piston cylinder. A hole is cut in the lid, into which the syringe will fit tightly. The retractable piston must hang down. When you press the valve, water will flow. Naturally, you need to use a rubber gasket so that the cylinder is held tightly and water does not flow out of the slots.
Do-it-yourself plastic bottle washbasin
Step-by-step instructions for installing a device equipped with a crane:
1. Take a five-liter bottle and cut out a small round hole for pouring water.
2. A small hole is drilled in the bottom according to the size of the run.
3. Rubber gaskets are put on both sides of it, and with the help of nuts and washers it is firmly fixed.
4. After that, you need to install a tap or stretch a plumbing hose to the place where it is more convenient to wash.
5. Attach the bottle to the location by the handle or brackets: tree, fence or pole.
6. It remains only to pour water into the container - and the washbasin is ready.

big tank
Before you do, you need to think about where you will place it. In addition, it is important to know the estimated volume of water. If there is a need only for washing hands, for example, after working in the garden, then you can use the bottle options presented above. Their volume is quite enough for your needs.
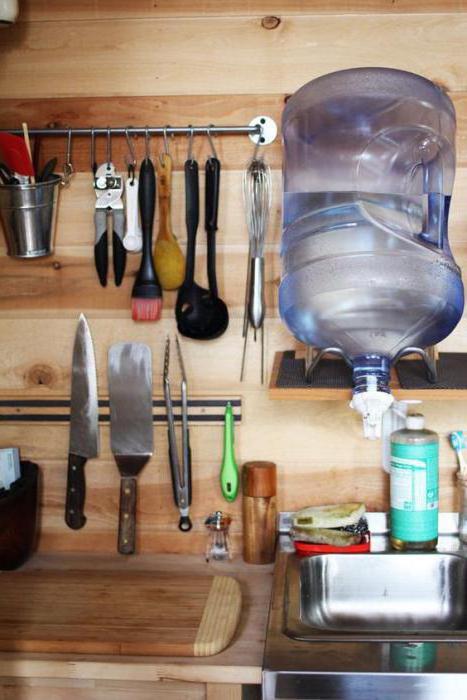
If there is a need for constant use of water in the country: washing hands, dishes, for cooking, then it would be reasonable to install a large plastic tank with a faucet in the house itself. It is not necessary to pour water into such a container often. In addition, thanks to the faucet, it is very easy to use. Yes, and there is no need to constantly run into the yard to wash some fruit or a plate.
But for such a large tank, you need to hang holders on the wall that can withstand the weight of 25 liters of water. A sink must also be installed with a drain in a cesspool or in a large bucket.
When the preparatory work is completed, you can mount the tap on the bottle cap. For this type of do-it-yourself plastic bottle washbasin, instructions for installing a faucet can be found in the previous block. She is practically no different. The only additional tip: add linen rope when installing the crane for better insulation of parts. Then the device will hold tightly in the container. There are special covers with ready-made taps that will save you the hassle of mounting.
When choosing a site, remember that water with detergents should not flow onto the roots of plants or trees. This will destroy them. In the place where the water will drain, you can put a bucket for dirty water or dig a small hole for drainage.
Before starting work, remember that the cut bottle has sharp edges that can seriously injure you. Therefore, be careful, especially if there are small helpers nearby.
A necessary thing in the country or at a picnic is a washstand or washbasin that can be hung on the site. This practical device will allow you to rinse your hands after gardening, wash tools, rinse vegetables or fruits without entering the house. Such a country washstand can be made easily from plastic bottles, and there can be many ways, we will consider only a few of them.
The most elementary country washstand made of plastic bottles

A large plastic bottle with a lid is taken, then the bottom is cut off with a knife or scissors. The bottom can be cut off not completely and bent (this will be a place for soap). After that, we pierce holes on the sides with an awl, through which we thread a cord or wire, and hang the resulting washstand.


Alternatively, you can nail the washstand to the holder. Or, if you have holders, attach the washstand to them, as shown in the photo.

Pour water into the wash basin. When you need to wash your hands, just unscrew the lid a little.
Inverted plastic bottle option:

You can also adapt the washstand like this:
we take a plastic bottle, make holes in the lid with an awl heated over a candle or stove (there should be a lot of them), we also make holes for the lace in the middle of the bottle so that it turns over easily, and hang it so that it is lid up.
When washing hands, simply turn the bottle over.
Our country washstand from a plastic bottle is ready! To make it, as you can see, is very simple.
The option is more complex and functional:
We take two plastic bottles of the same size. First, we deal with one bottle, which will be the washbasin itself. We cut off the part with the bottom, but not evenly, but leaving a small eye on the remaining part (this will be the mount for our country washstand).
At the second bottle, we cut out the widest part (closer to the base), then finish it as in the figure. We need to make (closer to the top) several pairs of horizontal cuts, 2-3 cm long (we will insert toothbrushes here). We cut a rectangular window below (we cut it from 3 sides and turn it to the side so that a tube of toothpaste can fit in this tube). We fix the folded rectangle around the edges with a stapler.
We put the second blank on the first one and get a washstand with additional functions. On top we put an inverted bottom (for soap).
For convenience and comfort in country estates, you can create a washbasin for a summer residence with your own hands. An inexpensive and effortless device can make life so much more enjoyable. Even if the country house has a full-fledged water supply system, an outdoor washstand on the site allows you to quickly rinse your hands after working with soil, fertilizers, and weeds.
Types of washbasins
It may seem that a do-it-yourself washstand for giving with your own hands can only be made of the simplest design. In fact, even a novice master is able to create a comfortable and very beautiful washbasin using the simplest tools. The degree of comfort is determined by the design of the structure.
At your own choice, you can give preference to one of the most common models:
- hinged (with a clamping spout or crane),
- on a stand that can be easily carried and installed anywhere on the site, even where there is no suitable support,
- "moydodyr" - a design with a pedestal in which a container for collecting waste water is located,
- heated products.
If you need to pick up or without it, then our review article will help you with this.
And the characteristics that the popular and inexpensive have are presented in other material on the site.
We also have instructions on how to make . Selection of materials and sequence of work.
Washbasin from a plastic bottle
If you are thinking about how to make a washbasin in the country with your own hands easily, quickly and simply, a plastic bottle design will be the best solution. You can create such a design in a few minutes with virtually no cost. Such a washstand will serve perfectly until you build a more perfect structure, and maybe it will be in demand in the future.
The general principle of creating such washstands is the same - a plastic bottle is suspended and fixed vertically with the neck down. Such a bottle can be filled through the neck, but for this the bottle will have to be removed from the support. If a rigid fixation is provided, the bottom can be cut off at the container. In this case, it is better to provide the washbasin with a top cover (for example, made from a cut-off bottom) to prevent dust and debris from entering the water.

Variations usually relate to the water supply device.
- The simplest outdoor washbasin for a summer residence is a plastic bottle, in the lid of which a hole is made, and an ordinary nail with a blunt point is placed in it. The cap of the nail is inside the bottle, and the diameter of the hole is greater than the diameter of the nail, but less than the diameter of its head. Thus, in a free position, the nail head is pressed against the hole, blocking the exit of water. If necessary, wash your hands, just lift it up by pressing on the free end of the nail from the bottom up. The advantage of the design is its simplicity, however, there are significant drawbacks. For example, a nail that is constantly in water quickly rusts. In addition, using such a pressure device is not always convenient. The model may well work as an outdoor washstand for giving, but it is difficult to wash dishes with it because of the inconvenience of the drain part and because of the small capacity.
- A street-mounted washstand from a plastic bottle can be used as a drain device the usual "native" cover with a hole in the side. When such a cap is fully screwed, the opening is blocked by the neck of the bottle. Partially opening the lid, you release the hole, the water begins to flow from the washbasin. The inconvenience of using this design lies in the difficulty of regulating the intensity of the water supply. The advantage, like the previous version, is the simplicity of the device.
- A more comfortable outdoor washstand for giving your own hands from a plastic bottle can be made, having provided the neck of the container with a small faucet. It can be purchased or removed from faulty equipment (washing machine, etc.). It is not difficult to fix the tap on the neck with electrical tape.
Mounted models from canisters
If a do-it-yourself summer washstand built from bottles in the country does not meet the needs of the family even with temporary use, you can install a larger model from a plastic or metal canister, or even a bucket. To do this, cut or knock out a hole in the container into which the tap is installed.

If necessary, for better tightness, first a squeegee is installed in the hole knocked out in the canister, supplying it with rubber gaskets on both sides. The position of the drive is fixed with nuts on the outer and inner sides of the canister. A crane is installed on the slope.
At installation, it is important to ensure the tightness of the joints. If you choose a model from a canister, it should be borne in mind that the volume of the drain will be larger, which means that you should think about diverting drains.
The following options are possible:
- a container for collecting liquid, installed under the washbasin,
- drainage ditch,
- drainage channel to etc.
If the site has permeable soil, into which water easily drains, you can allow the liquid to soak into the soil. In this case, it is recommended to fill the space under the washbasin with gravel, crushed stone or expanded clay for better drainage.

Rack Models
Washbasins on racks are containers with taps fixed on a frame. The frame has "legs" at the bottom that go into the ground. Thus, the washstand on the rack moves freely and is installed in any part of the infield. For ease of installation, a transverse crossbar is made above the support legs - this is a kind of “pedal”. You can quickly and reliably install the structure by pressing the crossbar with your foot.
The frame structure of the washbasin on the rack must be reliably protected from moisture, especially its supporting parts, which are immersed in the ground.

A tank with a tap can be purchased or made independently. Please note: the depth of immersion of the legs for reliable stability increases in proportion to the mass of the structure. This is an important factor when choosing the material of the tank and its volume.

Washbasin with cabinet
A more solid and convenient do-it-yourself country washbasin can be made with a pedestal and its own support for a bulk container. Such a model can be installed outdoors, on a covered veranda and in the house. To create it, you will need materials, however, for reasons of economy, you can not purchase them specifically, but use improvised or leftovers from construction and installation work in another direction.
The main elements of such a washstand, called "moidodyr", are a sink (in this capacity, you can even use an old sink dismantled during repairs) and a filling tank, which can be purchased ready-made or made by hand. In the second case, certain skills will be required. If a washstand is provided for giving without heating, the tank may be plastic. If you want to provide maximum comfort and provide "moidodyr" with a heating element, it is advisable to choose a container made of metal.
A washbasin with a cabinet is a frame structure sheathed with sheet or panel material. It can be used as:
- plywood,
- plastic,
- polycarbonate,
- polymer panels,
- sheet steel, etc.
 The photo shows another version of the cabinet, in the manufacture of which wooden boards were used.
 For the frame of the washbasin with the cabinet, wooden bars with a square in cross section (the side of the square is 50-80 mm) or a corner made of steel 25x25 or 40x40 mm are used.
Work is performed in the following order:
- Measurement of the sink and calculation of the dimensions of the cabinet.
- Cut the frame material (bar or corner) according to the given dimensions (8 identical segments to form the upper and lower horizontal squares).
- Cutting off vertical racks (4 bars).
- Assembly (knocking down, welding, etc.) of the frame.
Important: When installing the washbasin outdoors, materials that are not resistant to moisture are recommended to be painted or varnished.
Drainage of water is organized in the most convenient way.
- The easiest way is to substitute a bucket to collect wastewater.
- For stationary structures, you can arrange a drain into a sewer or ditch.
- With good soil permeability, water can be drained into the soil by first filling the drain site with drainage material (crushed stone, gravel, etc.) to a height of 25-35 cm.
When sheathing the frame on all walls of the pedestal, except for the front, sheets or panels are fixed rigidly. Two or one (depending on the dimensions of the product) doors are arranged in the front part. A tank or bucket is placed in the cabinet under the sink, where water will drain.

A frame vertical superstructure should be installed above the sink, on which it will be fixed.
Such a washbasin can be additionally equipped with a countertop and a dish dryer made of slats.
Do you want to know, ? Then read our separate article with step-by-step instructions for work.
Heated washbasin
A washbasin, in which there will be not only cold, but also hot water, is a real luxury for a summer residence. Such structures, as a rule, are installed permanently, since they require connection to the mains. By design, such a metal washstand for giving can be a “moidodyr” or a model on a stand.
To heat the liquid in the tank, you can use a conventional boiler, but experienced craftsmen recommend purchase a special heating element with a thermostat. Please note that the power of the heating element must be selected in accordance with the volume of the tank. With insufficient power, you will have to wait a long time until the water heats up, and with too much power, it is likely that the water will overheat. In addition, you should choose the optimal design and heating mode. If there is only one tank and it is not divided into chambers, the water will need to be heated to a temperature of about 40 ° C, with a divided tank (one section for cold, and the other, with a heating element, for hot water), the heating temperature should be higher. The tank in this case is equipped not with an ordinary tap, but with a mixer.
When making your own electric washstand for a heated summer house, to ensure safety, it is important to take care of the insulation of the current-carrying wire, as well as to provide the structure with a float level indicator or its more complex analogue, and also, in the absence of a thermostat, a thermometer to control water heating.
Another option on how to make a washstand in the country is shown in the video.
A convenient and functional outdoor washstand for giving is an indispensable attribute of a comfortable stay in the countryside. If necessary, it is quite possible to make high-quality
country washbasin at low cost and with their own hands, but most consumers prefer to use ready-made purchased models.
Street washstand for giving: the main types of purchased models
A garden washbasin or a country sink should combine ease of use and affordable cost. When choosing a purchased model you need to pay attention to the following parameters:
- the street model should harmoniously fit into the overall decor and the whole concept of the summer cottage;
- for frequent outdoor use, it is best to choose a wall-hung washbasin with a large water tank;
- for rare, periodic use, it is advisable to give preference to small washbasins, which will prevent stagnant water.

An outdoor washbasin can be portable or portable and stationary. Such a device is usually located in the working area of \u200b\u200bthe personal plot and can be represented not only by a primitive hanging tank, but also by a device with an increased level of comfort:
- washbasin without cabinet or, the so-called, bulk street washstand. This is the simplest design, represented by a capacity of three to five liters. Water is poured into the tank from above. The tank closes the lid, and at the bottom there is a tap or a special outlet float is installed. For drainage, a bucket or a drainage layer on the ground is used. The best option is a durable plastic model. The most modern type is a plastic hanging tank with sometimes lids and a pressure magnetic outlet;
- feature plastic model on the stand is the possibility of fixing on a metal rack. You can firmly install such a device on the ground by pressing your foot on the lower crossbar. Some models are characterized by the presence of such an additional element as a sink with water outlet directly to the ground with an equipped drainage layer represented by fine gravel or gravel. The device can be installed between beds or flower beds, as well as anywhere in the garden.
How to assemble a washbasin Moidodyr (video)
The cost of models depends not only on the volume, but also on the material used in the manufacture, as well as functionality and ease of use.
How to make a garden washstand with your own hands
Washbasin from a 5-liter bottle
This option is based on a 5-liter bottle, as well as wire, an awl and candles, perfect for hygiene procedures in field conditions:
- light a candle and heat the awl;
- make about ten holes in the lid, distributing them as evenly as possible;
- make a pair of parallel holes in the middle of the container with an awl and thread the wire;
- pour water to the middle and tighten the lid;
- turn the bottle over and hang it on a driven nail or branch.
The disadvantage of this design is the risk of capsizing during strong gusts of wind, as well as the possibility of filling with water only up to half.

Wooden washbasin Moidodyr
"Moydodyry" belong to the category of serious structures, and can be represented by different modifications. Such a stationary device is quite difficult to move, so it must be installed in a pre-prepared and carefully selected, permanent place.For self-production, you need to use a cabinet, a sink and a tank with a tap for water. Wooden "Moydodyr" can have different dimensions. The dimensions of a square pedestal are 50x50 cm. The rectangular design is made with dimensions of 45x50 cm. The side parts, back and door are made of moisture-resistant plywood.

You can make a design from boards 2.5x15 cm. In vertical blanks, you need to make eyes for arranging spikes. They are performed using a milling cutter, cutting grooves 2.0 cm deep and 8.0 cm wide. Spikes are equipped on the end parts of horizontal blanks using a circular saw. The parts are assembled into a single structure, and securely fixed with galvanized self-tapping screws. Sheet plywood can be glued or fixed with small carnations.
A water tank is installed between the side walls in the upper part. The floor should be made of slats measuring 2.0x4.5 cm. At the final stage, a door with a handle is fixed, which will simplify the operation of Moidodyr. It is recommended to carefully sand the finished structure, paint, and then install the sink. If necessary, in such a design, instead of moisture-resistant plywood, PVC panels are used, thanks to which the outdoor washbasin can become not only a necessary plumbing fixture, but also a real decor element for a backyard or garden area.
Washbasin with heated water (video)
Canister outdoor washbasin
To make such a functional plumbing fixture, in addition to the container, you will need to prepare:- tap for water supply;
- nuts for clamping;
- drive;
- a couple of rubber pads.
In the purchased plastic container, you need to drill or cut a hole. The squeegee is installed in a drilled hole in the container. Then, on both sides, gaskets are put on the drive and clamped with nuts. At the final stage, a tap is attached, after which the tank is filled with water.
When arranging such a washbasin, it is required to provide a high-quality drainage, which will transfer wastewater to a cesspool. If it is not possible to equip a drainage system, then you can use a bucket to collect used water, or place the washbasin above the ground, sprinkled with a layer of gravel, which in this case acts as a drain and prevents the formation of puddles around the washbasin.

Heated washbasin: features of installation and connection to the mains
Work on the plot is not always done in the warm season, so the use of cold water can create significant discomfort. In this case, the best option would be to use an outdoor washbasin equipped with reliable heating. There are several different modifications that differ not only in appearance, but also in design features:
- mounted models are a rectangular tank equipped with a crane and are mounted on walls or any type of reliable support. A special heating element is built into the tank. As a rule, such a plumbing fixture is installed under a canopy, and has an anti-corrosion coating. However, outdoor installation requires very strict adherence to all safety measures prescribed in the attached instructions;
- hinged plumbing fixtures with anti-corrosion supports are more advanced models and can be installed outdoors, and the presence of a high-quality reliable metal frame allows you to give the entire structure an additional level of strength and stability;
- The most complete set of a country outdoor washbasin equipped with water heating is a model consisting of a metal, plastic or wooden cabinet, complemented by a sink made of steel or polymers and a tank for water heating. A voluminous cabinet most often has a collapsible structure. Such a device may well be connected to the sewerage system.

The complete set with heating elements is typical not only for complex plumbing fixtures, but also for fairly simple devices without a pedestal. With the help of one such built-in element with a power of 1.25 kW, 15-17 liters of water are heated in half an hour to a temperature of 75-80 ° C.
Appliances equipped with a heating system must be connected to a normal electrical outlet. Electricity consumption depends on the power of the heating elements installed in the water heater. Usually, small heating elements are mounted at the bottom of the bulk tank. Modern plumbing fixtures are equipped with thermostats, with the help of which the required temperature regime of water is set within 30-70 ° C. Some models are equipped with a very convenient automatic shutdown mode.
How to make a washstand for a summer residence with your own hands (video)
When installing such an outdoor washbasin, it is very important to remember that the main requirement for operation is installation under a roof or a special canopy that will protect the device from precipitation. It is strictly forbidden to use the so-called "temporary huts" for connection.
The quality of a country holiday directly depends on the availability of basic plumbing fixtures, which include outdoor washbasins. With the right choice of such a device and its competent installation, you can make your stay as comfortable and convenient as possible.
As they say, if the little things determine the consciousness of everyday life, then the washstand determines ... I don’t know what. But it definitely makes life easier with him. I don’t have a stationary washstand on the site, and the builders took theirs. So somehow I got ready and went shopping in search of. I didn’t like everything I saw on sale, so this article appeared here.
Method number 1: a nail in a cork
The simplest and most obvious, of course. We make a hole in the center of the cap from a plastic bottle, insert the nail with the cap inside, screw the cap.
Problems: water leaks, the nail rusts. And besides, there is a problem common to all washstands with a stem: while you press from below, water flows, but your hands are busy and you can’t wash them, and when you let go, your hands are freed and you can wash, but the water doesn’t flow anymore :).
Method number 2: a hole in the cork
Making it in a bottle cap triangular cutout on the side. Then, by turning the lid, the water will flow out, by turning it back, the faucet closes. Original and simple.
Problems? Read a funny story from one forum:
“I built a washstand from a 5-liter bottle according to the described recipe: you turn the lid slightly - a thin stream flows. The unit hung at the corner of the gazebo, dug a shallow hole at the bottom and poured a bucket and a half of PGS into it. Everything worked perfectly while I was busy putting the dacha in order. And then - relatives began to arrive ...
The mother was the first to get caught: she wanted it to flow better and turned away more - the lid flies off, all the water goes down at once! I explain that it is necessary to unscrew less. An hour later, the mother-in-law comes to the washstand ... Well, you understand. He explained the same thing, though not so calmly. And then the wife goes to wash her hands ... yes, not once, but twice within an hour! Taking into account the fact that the day is just beginning, and the water is imported and it is almost gone, my educational speech begins to resemble a motorcycle without a silencer.
And here the washbasin attracts the attention of children. Usually you can't force them to wash their hands, but this is under a normal faucet. Well, I make a special step for them from a large block of wood. Voila! Children unscrew the lid in the same way twice in a row! Scolding children does not turn language ... The next day I go to the store and buy a regular 3-liter plastic washbasin. Hung in the same place ... "
Method number 3: a faucet in the neck of a bottle
By analogy with the first two practically. We take a faucet from the washing machine, for example, a couple of turns of electrical tape, and you're done.
Method number 4: faucet in a plastic container
Instead of a bottle, we just take a five-liter plastic container, drill-cut a hole at the bottom, insert a purchased faucet. Voila. It remains to come up with a drain :)


Method number 5: a faucet in a regular bucket
Whoever likes it. Of the benefits - the bucket is easier to decorate (see the video below).

Method number 6: pin + cork + bottle
We make several holes in the lid of a large plastic bottle, plus 1 in the center. Insert a pin into the center. Attach a handle to the bottom. Inside we insert a rubber plug-plug attached to the pin. Like a drain plug in a bathroom or a faucet from an apothecary heating pad.

Method number 7: "for advanced"
We take a 5-liter bottle. We cut a hole 10 × 8 cm in its bottom.
We take a steel bar 18 cm long and 5 mm in diameter. With a hacksaw for metal, we cut the upper end of the rod along the axis. We separate the ends of the rod with a screwdriver. At the opposite end, I cut the M5 thread. On the rod we make two transverse cuts with a depth of 1 mm at a distance of 65 mm from the end. We hook a washer and a fixing bracket made of wire with a diameter of 3 mm onto the rod. We insert a clamping spring with a diameter of 10 mm into the bracket. Its height is 15 mm more than the height of the bracket. On the rod to the support washer we put on a rubber gasket with a diameter of 10 mm. Put a rubber washer on the bottom. Drill a hole in the center of the lid. We assemble everything: we fasten the bracket with equipment to the roof with two self-tapping screws, fasten the cap from the tube of toothpaste to the lower end of the rod. We cover the metal parts with enamel so that they do not rust, put them in a tank to dry. Everything…

Method number 8: a washbasin from a kettle
What could be easier? We hung up the kettle, put a basin underneath - that's all.

Do-it-yourself video on creating washstands
Method number 9: designer washbasin from buckets
A master class on creating a washstand from a galvanized bucket and a faucet, as well as a washbasin from a larger bucket, a colander and a siphon. The buckets are beautifully pasted over with a film, so they called it a “designer washbasin for a summer residence” :)