In the case of installing a cast iron bathtub, you do not have to worry about it moving out of place. But when installing a steel bath, some difficulties arise.
The main challenge is to position the steel tub, which is a lighter and more flexible container, as stable as possible. In our selection, we will consider how to steadily fix (strengthen) a steel bath with our own hands.
How is a steel bathtub
Before considering the methods of installing the bath, it is worth considering its design. Usually on such a bath there are no special mounts on which the legs can be fixed. Because of this, there are no devices in the steel tub that can rigidly fix the bowl. If, nevertheless, there are devices for attaching the legs on the bathroom, under the significant weight of a person, the steel bathtub can bend, and in this case, the mount can damage the enamel.
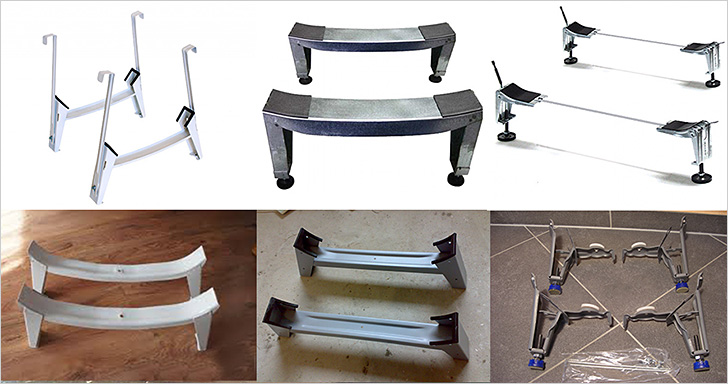
The manufacturer usually provides legs with the bath, but their quality and design does not allow the steel bath to be stably fixed. In this case, you can additionally purchase self-adhesive feet that are suitable for all types of bathtubs. This measure will add some stability to the bath.
This method is suitable if the bathtub will be secured only with the help of legs, without additional devices. Naturally, when installing such a steel bath on brick supports, legs are not needed.
Methods for attaching a steel bath
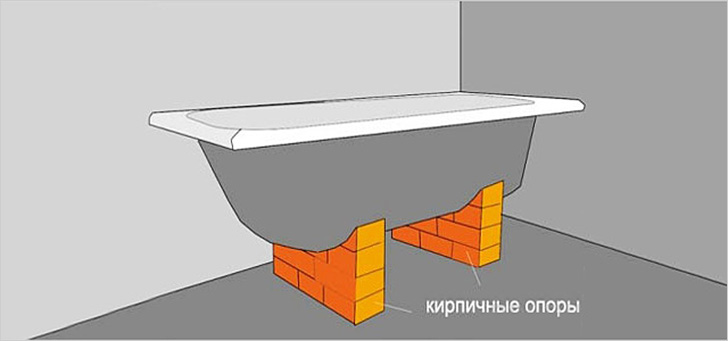
If you plan to install the bathroom separately, you can install a metal frame or make a frame of bricks to secure it firmly. Then all sides of the bath are additionally sheathed in order to hide the installed frame. This option will not work when an original design is planned for the bathroom.
The most common location for the bathtub is when the bathtub is located in a niche between three walls. In this case, the bath bowl can be additionally attached to the floor or in the wall.
Consider the main methods of fastening for a stable position of a steel bath:
- The base for the bowl is made of bricks;
- The frame under the bowl is assembled from a metal profile;
- A podium made of bricks or blocks is erected under the bowl;
- The bowl is attached to the walls.
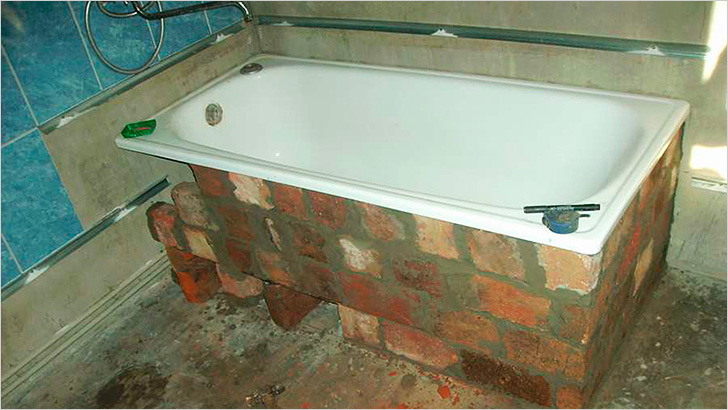
Brick base for steel bath
It is advisable to use a special moisture-resistant and durable brick for the base under the bath, since the bathroom usually has a high level of humidity.
In addition, the weight of the bowl itself and plus the filled water requires a solid foundation. To do this work, you will need some tools: a bowl for grout and a trowel for masonry.
Consider the procedure for performing work on the construction of the foundation
Before starting the installation, it is required to determine the height of the future base in advance. The height of the bathtub should not be higher than 70 cm, otherwise steps will need to be installed.
When installing the base at a standard height, you will need about 20 standard bricks, cement grade M400 - 0.5 buckets, about 2 buckets of sand.
Before starting the masonry, it is worthwhile to pre-install the bathroom on the legs in the place and position where you plan to install it. In advance, it is necessary to check the correct installation of the siphon, adjust the required inclination of the bowl to the drain hole. The place where the bathtub touches the wall should be marked in advance with a pencil in order to have the correct reference point. At the place where the base is installed, we measure the distance from the bottom of the bowl to the floor and write down the numbers in order to adhere to the desired dimensions.
After completing these preparatory work, the bath should be taken out.
We begin to carry out work on laying the base with the preparation of a cement mortar. We mix cement and sand, add water little by little. So much water will be required so that the resulting working solution is sufficiently soft. To make it more plastic, you can replace half of the required amount of cement with tile adhesive. For work, such a solution is more convenient and the strength after drying will be higher.
Now you can proceed directly to laying bricks. Suppose that the distance from the bottom of the bowl to the floor in the back of the bath is 17 cm, and in the front - 16 cm.The width of a standard bath is 70 cm.The length of the brick legs should be less than the width of the bath, the top brick in the masonry should not reach the bottom of the bath where something by 8-10 mm. The height of a standard brick is 7 cm, then two rows will be enough for the desired masonry height: 7 + 7 = 14 cm.The length of the brick is 24 cm, then for one row of masonry 2.5 pieces will be required: 24 + 24 + 12 = 60 cm. Since the distance to the bottom of the bowl is 17-16 cm, then on the top of the second row you will need to put another half or a quarter of a brick (directly depends on the shape of the bowl.
Important! You can proceed directly to the installation of the bath after two days, which are necessary for the solution to fully set.
Now we have to prepare a pillow under the bath bowl, a layer of cement mortar is additionally settled under the finished brick base, so that it repeats the shape of the bottom of the bowl as accurately as possible. The cement layer in the center should be more than 2 cm, since the solution will sag under the influence of gravity.
In the places where the edge of the bath adjoins the walls, it is advisable to add tile glue, laying it along the edge of the bath in the form of a mound.
Place the bath bowl without legs on the prepared platform and press it against the walls as tightly as possible. If excess tile adhesive has come out onto the bathtub, it must be quickly removed, as it sets very quickly. Check the correct installation of the bath with a level (there should be a slight slope towards the drain). To do this, align the bowl in the required direction. Excess mortar may also appear under the bathtub, which will fall off the surface of the base. The mortar should be returned to the original surface, and the excess should be thrown away and do not forget to wipe the floor from the cement residues.
Note! If the bathtub is long, you can additionally put another brick support in the middle of the bowl.
Installation of a steel bath on brick props
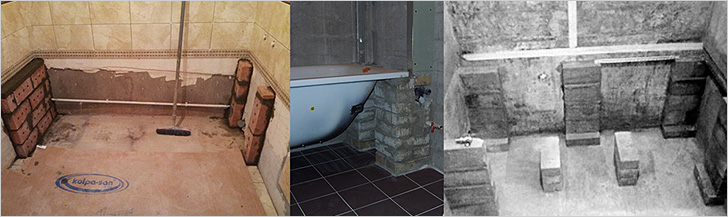
It is advisable to lay brick supports under the bathtub if its width matches the width of the bathroom. First, brick supports are laid out, on which the bath bowl is then laid. If possible, you can use a combined method: lay out the supports of bricks and make a bed for the bowl.
Attaching a steel bath to metal corners
This method can be used if the bathroom wall is made of durable material (brick, etc.). Two or three corners are fixed on the wall, on which the bathtub is then installed.
Fixing the bath to the wall

Even if the bathtub stands firmly enough on its legs, it will not be superfluous to fix it additionally to the wall. To fix the bath bowl, you can use any fastener that the construction market offers in a large assortment.
If you still want to leave the legs under the bathtub, you can simply additionally cover the bathtub bowl with brickwork. At the same time, do not forget that to access the plumbing equipment, you must leave the window. Where the steel bowl expands, the whole brick must be cut to size. The brick should not protrude beyond the edges of the bowl, so that it does not interfere with the further tiling of the frame.
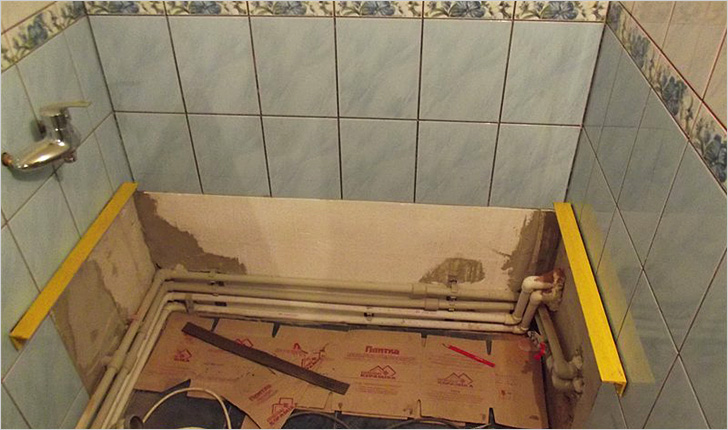
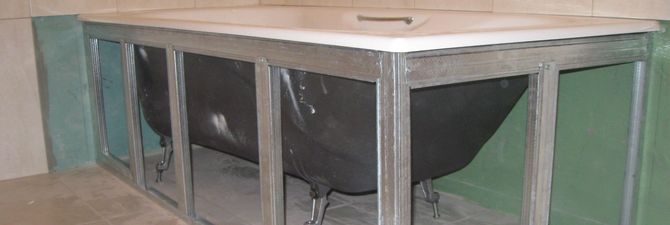
Installation on an additional frame made of a wall profile
A frame made of a wall profile for securing a steel bath can be made in a few hours. This frame will help to further anchor the bathtub and can then be sheathed. To complete the work on the manufacture of the frame, it is required to outline the floor along the edge of the bowl.
If the subsequent cladding will be performed with PVC panels, then the marking must be shifted to the thickness of the panel, if tiles are also used, then add 2-3 mm to the layer of tile adhesive.
The UD-profile cut to the required dimensions is fixed to the floor with dowels, and the CD-profile is used to make the frame. To fix the bowl well, the profile must rest against the walls of the bowl. The wall profile will not firmly fix the bathtub, but it will be sufficient as an additional support.
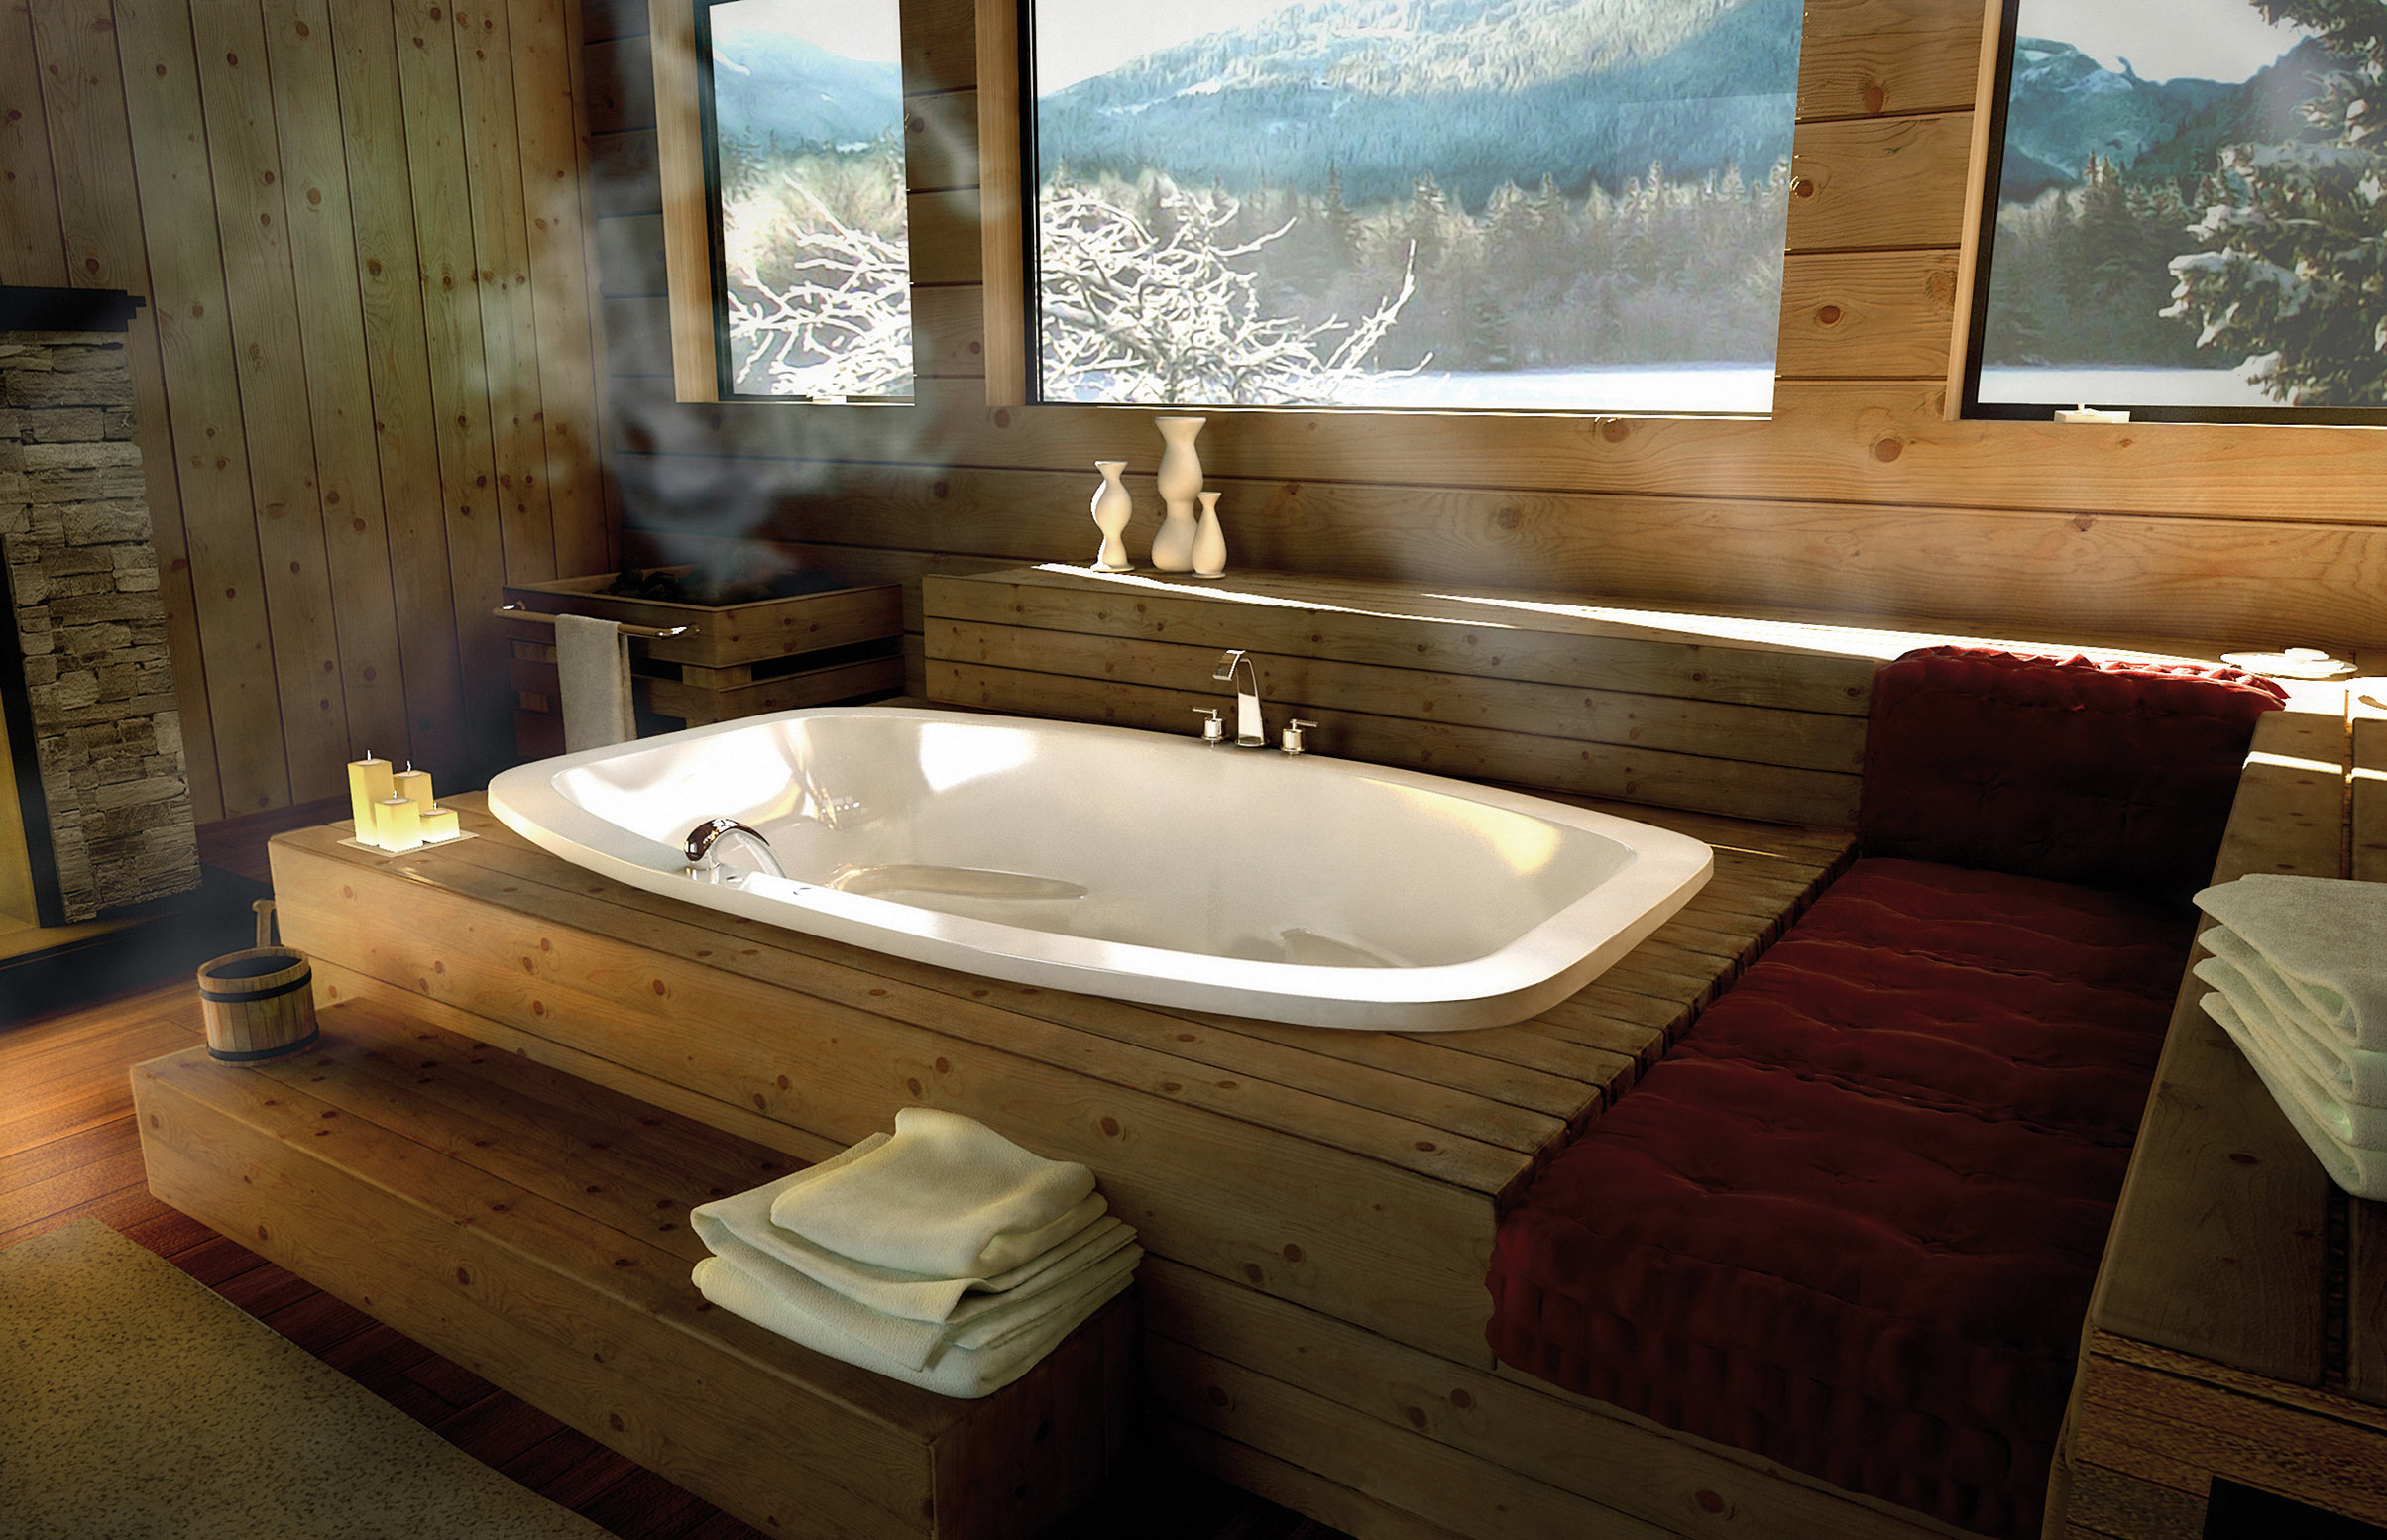
Manufacturing for steel bath podium
For more reliable strengthening of the steel bathtub, you can use a specially constructed podium. For its manufacture, you can use a variety of materials: brick, foam blocks, wooden beams, metal corner, profile pipe and other similar materials.
Note! For a small bathroom, such a podium will look inappropriate and inconvenient. In a large room, such a podium will perform several functions: reliably strengthen the steel bowl and serve as an additional decoration in the interior.
The most durable material for the podium is brick, but it is not always possible to use it in houses with unreliable floors. For the same reason, concrete is not suitable for the podium. Although wood or foam blocks are lighter than brick, these materials are easily destroyed when they interact with moisture. Subject to some recommendations, you can safely use the above materials in the manufacture of the podium.
Making a podium from foam blocks
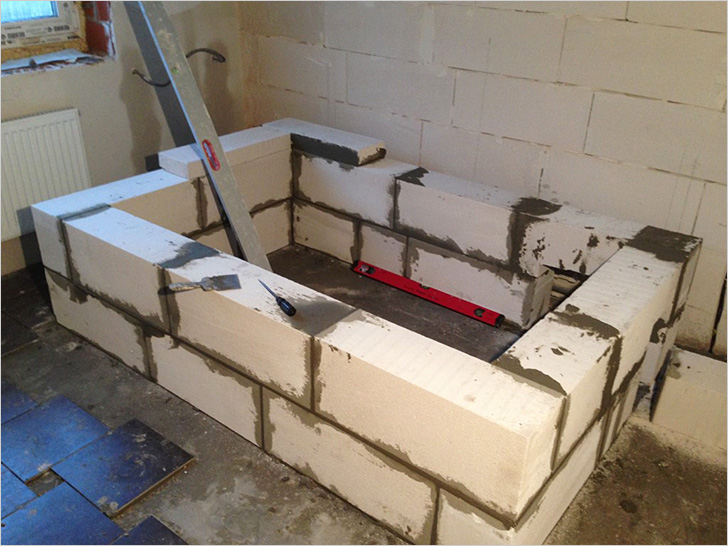
A podium made of foam blocks should be made in such a way that the edges of the bath rest on the walls. The height of the podium is selected taking into account that it is convenient to use the installed bathroom. Before use, foam blocks must be treated with special moisture-resistant impregnations, which will protect the material from destruction and prevent the appearance of mold and mildew.
Making a podium from a wooden bar
Before use, the timber will definitely need to be treated with a special protective impregnation several times. Additionally, it will be necessary to process the saw cut of the timber. If the structure protrudes beyond the edges of the bowl, then a moisture-resistant plywood sheet can be laid on a wooden beam.
For fastening the frame, you need to use only special stainless self-tapping screws. Although the timber construction is strong enough, additional insurance will not be superfluous. The bathtub can be installed on additionally laid out stands or use the legs for this, on which the bathtub bowl will rest.
Making a frame from metal
The frame for the podium can be made from a metal corner or from a profile pipe. Such a frame is durable and lightweight. The main disadvantage of this design is the need to weld individual parts during assembly, since it is not always possible to use a welding machine in an apartment. And the frame welded outside the apartment, due to its size, may not pass through the doorway.
If there are no problems with such a frame, then the already completely finished product should be pre-treated with anti-corrosion impregnation, primed and painted.
To prevent displacement of the structure, it can be additionally fixed to the wall or floor. After installing the steel bowl, you can proceed to sheathing the podium with plywood or other material.
If your podium is two-level or occupies a significant area, you can provide for the placement of boxes or niches for storing toiletries.
In this article, we examined the basic methods of attaching a steel bath. Thanks to you, you now know how to strengthen a steel bathtub with your own hands.