When installing new windows, attention should be paid not only to the quality of the profiles and the reliability of the structure, but also to the appearance. Even the best window system can spoil the interior of the room if the window slopes are not installed.
As a rule, this work is carried out by professional installers. However, if you have skills with hand tools and building materials, you can give the window a noble appearance on your own.
Installing slopes of plastic windows (a video of the process is attached to the article) is an important stage of installation.
The profile of PVC profile windows is much narrower than that of a wooden frame, as a result, after replacement, there is no closed space around the entire perimeter. Slopes after installing plastic windows are just necessary in order to eliminate this drawback, as well as increase thermal insulation.
Installing slopes on PVC windows can be done in various ways. Traditionally, plaster is used for this, but with the help of plastic, this can be done faster and easier. This is a material with a structure that is homogeneous in relation to the profile of the windows, and therefore it is suitable for the aesthetic design of window opening elements. You can get a perfectly flat and smooth surface, which will be easy to care for: just wipe it with a damp cloth from time to time.
Tools and materials for slope installation
The technology for installing the slopes of plastic windows provides for the implementation of this work the next day after the installation of the window unit. By that time, the mounting foam has already completely hardened and its excess along the edges can be cut off with a sharp knife. In addition to this tool, you will need:
- - plastic lining 8 mm thick - 6 m is needed for one window;
- - plastic U-shaped starting strip and F-ka - a special profile strip for edge decoration;
- - wooden lath 10-15 mm thick;
- - insulation (sheet of extruded polystyrene foam, mineral wool slab or other material);
- - building level, tape measure;
- - a hammer drill with a drill function and a screwdriver;
- - self-tapping screws of various lengths (usually - 4.5 and 95 mm);
- - construction stapler, metal scissors;
- - white silicone
Step by step work

Installation of slopes on wooden windows
Making a window opening after installing wooden windows requires a different approach. Plastic is not recommended: it is not combined with the natural texture of wood. Eliminate all surface imperfections with plaster or use slopes made of wood. But this method is quite expensive, and in addition, wood processing should include drying with strict adherence to technology (the material should not “lead” due to dampness and temperature changes) and treatment with an antiseptic composition.
It is rational to use moisture resistant drywall.

The technology for installing slopes on windows using this material is simple (the video "Installing slopes on windows" clearly displays the process).
First, the side surface of the window opening is cleaned of dust, carefully treated with a primer. Measurements are taken and the necessary details are cut out of drywall. Cutting this material is simple: an incision is made along the drawn line with a sharp knife, and then the sheet is sharply bent, leaning on the edge of the table.
Installation of plasterboard slopes
Drywall is fastened to the surfaces to be finished with a special adhesive, for the preparation of which a dry mixture is mixed with water in a volumetric container. Next - point by point.

Not all companies involved in the installation of plastic windows include the installation of slopes in the list of services provided. For the arrangement of slopes sometimes require unreasonably high fees. With the appropriate equipment, materials and basic knowledge, this task can be done with your own hands.
Slopes protect the seams from moisture and provide thermal insulation. There are several ways to install slopes: plastering, installation of drywall or PVC sheets.
Installation of plaster slopes (plaster slopes)
Do-it-yourself installation of plaster slopes will require a lot of time to complete. This method is usually chosen for the restoration of existing slopes during a major overhaul. To create slopes in the process of in-line redecoration, it is better to choose other materials. Indeed, when performing plaster and putty, the wallpaper coating around the window opening will inevitably deteriorate. If, during the dismantling of the old surface, the slope edge crumbled, then it is necessary to install a metal corner.
Installation of beacons

Professionals carry out plastering on lighthouses - wooden or metal fixtures. If you need to “build up” a small layer, then you can get by with marks from a mixture with the addition of gypsum. For beginners, it is better to purchase ready-made plaster beacons. The first lighthouse is placed at the very window or door block so that the plaster layer lies on the frame by at least 50 mm. During the installation of beacons, all distances are verified with a building level or a laser level. The second beacon is placed at the corners of the box. The distances between the first and second beacons should be the same along the entire perimeter of the window opening.
Slope plastering
Gypsum dry plaster can be used for plastering slopes indoors. Such a solution is quick-drying, it is better to knead it using a construction mixer. This type of plaster can be applied in a thicker layer than cement-sand, which is important if you have to cover up deep potholes in old slopes.
Sand is added to the cement mixture at the rate of ½, if you need to apply a layer of plaster more than 3 centimeters. So the layer will harden faster. Before adding sand to the solution, it is better to sift it. The outer slopes on the windows are treated with a cement mixture or facade starting putty in combination with water-repellent additives. If the house has plastic windows, then before plastering, you will also need to carry out thermal insulation. Otherwise, in the cold season, the glasses will sweat a lot.

The plaster is applied in several layers, each of which requires drying. First, spraying is carried out, then soil is made in 1-2 layers. The last layer is done. The next layer of the mixture is applied only after the previous one has completely dried. After that, the surface is puttied, thus getting rid of smaller irregularities. It is impossible to apply putty in a thick layer. If you need to apply another layer of putty, then the previous one must be primed. The very last layer is the finishing, fine putty. As it dries, it becomes lighter. The next step is grinding, which is performed by a grinder.
Small gaps at the junction of the putty and the window or door block are covered with a sealant that can be painted. The junction is cut by 2-3 mm with a clerical knife at an angle of 450. The resulting recess is primed. Using a gun, the surface is covered with sealant so that the groove is completely filled. The bead of sealant should be as even as possible. To do this, apply masking tape. The sealant is leveled with a small rubber spatula, after which the masking tape is removed.

The slope surface must be primed with a wide brush in order to prevent cracking and prepare for subsequent painting. Can be painted with solvent-based enamel. But recently, acrylic paint has been increasingly used. Finishing slopes takes place in two layers. The second layer is applied after the first has completely dried. So the base will not show through the paint layer. It will take about a week to complete all the steps.
Drywall slopes
One of the advantages of drywall slopes over plastic ones is their practicality. In the case of minor damage or contamination of the top layer, drywall, unlike plastic, must be repaired. To return the slope to its original aesthetic properties, it is enough to putty it again, sand it and paint it. To perform drywall slopes, special skills are not required, but it will take a lot of time to make them. Installation takes place in several stages: creating a frame (with a frame method), laying drywall, puttying, priming, and painting. Such slopes are durable and practical. However, they have a significant disadvantage - they absorb moisture. Therefore, they are not suitable for rooms with high humidity and outdoor decoration.
Laying slopes of plasterboard on the frame

The package of high-quality metal-plastic windows always includes a profile for mounting plasterboard slopes. The availability of the profile must be checked directly with the manufacturer or supplier. In case of its absence, a galvanized profile can be used. For laying drywall on the slopes of doorways, a metal profile is also used. Before installing the window block, the profile is mounted in the groove provided for this purpose.
Typically, the installation of slopes is carried out the next day after the installation of windows. Then the surface is treated with mounting foam.

Now the window block should stand. After a day, plastic or wooden spacers are removed, and the excess foam is cut off.

They put it in the groove along the perimeter of the opening, and then, along the line of joining the drywall with the window block, screw the guide profile with self-tapping screws. The frame is installed before the slope is insulated with mineral wool. Insulation is laid in the voids between the profiles. The slope angle is set to 950. Drywall is mounted to the frame.
Regardless of the method of installation of slopes, drywall is polished. The gaps between the sheets are puttied. Only after that proceed to the priming and painting. So that the corners do not delaminate, a galvanized metal corner is mounted around the perimeter.
As with plastering slopes, at the junction of the window frame and the slope (in this case drywall), a recess is made at an angle of 450, pasted over with masking tape and treated with acrylic-based putty. Acrylic will completely harden in 12 hours. After that, the slopes are painted.
Frameless slope mounting method

It is rational to use frameless technology when you need to lay drywall on old slopes. To do this, the surface is cleaned of previous finishing and building materials and a primer is produced.
When performing slopes along existing ones, a drywall sheet is attached to the guide profile with self-tapping screws and glued pointwise to the base with the Perfilix mixture. The glue prepared from this mixture sets very quickly. Therefore, drywall must be cut in advance.
For better fixation, drywall is pressed with a wooden bar, which is beaten with a rubber hammer. To maintain the upper horizontal slope in the desired position for the time of gluing, use spacers from the window sill. The minimum time during which it is necessary to fix the surface is an hour. The slopes are left for 2-3 days until completely dry. At this time, the outer edge of the slope (the place where the drywall and wall join) is left open. This will make the glue dry much faster. After the glue has dried, the edges of the slopes are covered with acrylic. Next, the surface must be finished with a finishing putty.
Plastic slopes
The easiest way to complete the installation of a window block is plastic slopes. They are easy to install, do not require special care, durable and moisture resistant. Depending on the style of the room and the color scheme of the windows, you can choose the desired tone. For heat and sound insulation, you will need mineral wool or penoizol. Plastic slopes can be installed both from scratch and on an old wooden or plastered surface.

Types of plastic slopes
Plastic slopes are suitable for exterior and interior decoration. They can be installed on the day of installation of the double-glazed window. There are several types of PVC slopes: foamed plastic, plastic-coated drywall and sandwich slopes.
Plastic sandwich panels
Recently, slopes from sandwich panels are often installed. Their cost is low, they are not at all afraid of moisture, they can be matte, glossy or with wood imitation. The structure of this material resembles a sponge, thanks to which the slopes retain heat better. After installing such slopes, the appearance of condensate on the glass is a rare phenomenon. The reason for the “fogging” of windows in this case lies in an improperly equipped ventilation system. In the production of sandwich slopes, panels with a thickness of 1 cm are used.
Along the perimeter of the outer edge of the window opening, we strengthen the wood rail with self-tapping screws, determining its location with a level. The rail will take on the load of the slope. Therefore, it must be securely fastened.
The starting profile is installed in the grooves. The slope itself is attached to the profile, after which insulation is made (the insulation is laid behind the plastic). The outer edge of the slopes is mounted to the wall using self-tapping screws, dowels or brackets. The first way is the easiest. Do not worry that the caps of the screws will be visible. Self-tapping screws are screwed as deep as possible into the panel and hidden with plugs.
Installation of slopes using brackets is carried out as follows: the first bracket is attached to the wall with a double-sided mounting tape, and the second bracket is attached to the slope. Brackets are attached to each other with self-tapping screws. The side slopes are fixed to the window sill with glue, then glued to the neighboring ones. Slots are treated with sealant.
PVC foam slopes

Integral PVC slopes have a fairly smooth top layer and can be easily cut with a grinder. In order to bend PVC at an angle, small cuts are made at the folds. If you need to make a slope in the shape of a semicircle, then there is no better material than foamed polyvinyl chloride. To form the necessary arc, frequent incisions are made. However, it should be remembered that the furrows should not exceed one third of the slope thickness. The cuts must be treated with glue.
We apply glue into the previously prepared grooves in the mounting foam and put the panel. As with the installation by the previously described methods, we attach a metal profile to the box and fix the plastic into it. We blow out the space between the PVC and the wall with a strip of foam, leaving a small space for it to swell. Next, proceed to fasten the profile to the outer corner. Docking points are treated with silicone, smoothing its surface with a rubber spatula or a damp cloth. Installation of PVC-coated drywall slopes is carried out in the same way as from plastic.
Do-it-yourself slope installation is a great way to learn new skills and save money at the same time. A properly executed finish will help to hide some of the shortcomings of construction and repair work and minor mistakes made during the installation of PVC windows.
Many are accustomed to the fact that the window slope needs to be puttied or plastered. This was done until plastic panels appeared, since then the installation of window slopes with their own hands has become much easier.
Do-it-yourself installation of window slopes - choose panels
After windows have been installed in your house, slopes remain the main and main problem. And no matter how neatly and efficiently the team of installers works, there will always be chips and cracks on the slopes. In addition, a plastic window is much thinner in size than an old, wooden one. For this reason, after installation, a strip of unplastered wall remains, which in any case must be sealed. For these purposes, it is best to arrange plastic slopes.
It should be noted right away that the installation of panels is a very laborious process. If you have very weak ideas about this, it is best to turn to professionals for help. But if you have made a firm decision to do everything yourself, we will tell you about it in detail.
It is important to know that high-quality PVC slopes are thick enough. 8-10 millimeters of thickness is enough so that the slope does not bend and has a rigid fixation near the window frames. In addition, PVC slopes of this thickness have high thermal insulation properties, and if you use mineral wool during installation, then your home will not be afraid of the most severe frosts.
Plastic slopes are easy to wipe, for this reason they are recommended to be mounted in rooms with high humidity, for example, in kitchens, loggias, balconies, etc. Plastic products “do not collect” on themselves either mold or dampness. This is their undeniable advantage.
Plastic panels have other advantages:
- Perfect look. Plastic slopes have a flat, uniform surface.
- When using these products, there are no streaks or stains. And you can clean them with water and any detergent.
- Plastic panels have a long service life.
- Installation is carried out quickly, after installation there is a minimum of dust and debris, they do not need puttying and painting.
- Excellent moisture resistance of the material used.
- High vapor permeability.
How to install slopes - preparation for installation
Before starting to mount the window slope, it is necessary to check the evenness of the installation of the inserted window. This is necessary in order to immediately correct all inaccuracies (if any). If the window is installed incorrectly, then the plastic panels will clearly show all the flaws in the installation of the window block. Before you start installing window slopes with your own hands, you need to carry out a whole range of preparatory work:
- cut off excess foam;
- if necessary, knock down the remains of the plastered slopes;
- check the strength of the brickwork in the area of \u200b\u200bthe window slope for integrity;
- drill a hole for the window sill;
- paste over the foam with vapor barrier material;
- seal through holes (if any) with foam or cement mortar;
- remove the protective film from the plastic windows.
The installation of plastic slopes must be approached with full responsibility and knowledge of the matter, otherwise the installation of window slopes will be done incorrectly, which will affect the heat transfer of the room and visual perception. Plastic panels are mounted only after the window sill is installed. It is important to understand that the installation of slopes and window sills are two interrelated processes.
Plastic slopes, as a rule, are installed using a U-shaped profile (starting profile). It is screwed to the edge of the window block with metal screws, the pitch of which is 1 cm. This operation is recommended to be performed along the marked line on the window profile. There is a variety of starting profiles that snap into place before the window is installed on the plastic frame. If you decide to use this type of profile, then when buying it is recommended to clarify whether the start and window profiles are compatible.
How to mount slopes on windows - practical ways
There are several options that are most often found in the practice of builders. One of them is foaming. This method is good because the foam, which is in the body of the slope, significantly increases the strength of the plastic product for deflection. Also, mounting foam is both an adhesive and heat-insulating material. Installation is quite simple - foam is applied to the wrong side of the panels, and they are installed in their place. If you do the installation of slopes with your own hands, you must remember that the main task is to correctly set the slope along the plumb line.
There is one caveat - so that the expanding foam does not deform the panels, they must be pressed against the wall for a while with something heavy.
Another method of fastening plastic panels, which is strongly recommended by the manufacturers of this product, is screwing to the profile on the outer edge of the slope. By choosing this option, you should understand that you will need to close the corner of the butt. To do this, it is necessary to cut strips of the desired width from PVC panels. With the help of a specialized rail, which has a snap-in corner, the plastic panel must be well fixed in the desired position. If you decide to use a conventional mounting rail, then in this case the panel is attached to the rail with a stapler.
After you have fixed all the panels, the top and sides of the ends between the wall and the slope must be closed with special ones. These corners will "extend the life" of your wallpaper in the window area.
The method of simple plastering slopes
Initially, the surface is primed, then a layer of plaster is applied, the corners are leveled. Rules are used to level the surface. Each new layer can be applied only after the previous one has dried. This, by the way, is the main drawback of the method - time is spent not so much on work as on waiting.
A special flat rail is installed to the top of the panel. It serves as a beacon to make the slope perfectly flat. On the sides of the slopes, the slats are installed vertically. To achieve the utmost accuracy during installation, a plumb line is used. The applied solution is best leveled with a special fine. After using the plaster mixture, the final step is the application of fine putty and its rubbing after drying.
I would like to note the fact that the installation of slopes is not the type of service for which the price is so high as to save. Therefore, many prefer to hire specialists who, in exchange for your money, will save you time. You will only have to enjoy the beautiful view and cleanliness at a minimum cost. However, even the masters need control, so this knowledge will certainly come in handy.
A modern metal-plastic version of the balcony door and window creates a beautiful view and comfortable conditions. The installation of a balcony block consists of a number of simple operations, it requires attention to detail, but in general the process is simple. If desired, a person who does not have professional skills in this area can perform this work.
Balcony PVC block consists of a balcony door and a window. There are different variations of this combination. For example, a window is located to the right or left of a door. Possible option: a balcony door between two windows.
Each of the elements of the block can, in addition to the swing opening mechanism, also have a folding one. There are also blind windows that do not open.
The kit includes:
- slopes,
- low tide,
- threshold,
- windowsill,
- accessories.
If we consider what a balcony door consists of, this is a box and a door leaf. The window has a frame and sashes.
Preparatory work
You should free up space from unnecessary things and furniture so that you can install a new design, cover with a film what cannot be taken out of the room to avoid construction debris and dust.
To carry out the installation of a balcony block, you should prepare a place for it by dismantling the old structure.
- Remove window sashes and door panels.
- To remove the wooden frame, it should be sawn at the bottom with a hacksaw. After that, remove it in parts from the opening, prying it with a crowbar.
- Remove the plaster from the slopes, if any, using a perforator.
- Clean off the remains of seals, insulation, mounting foam from the surface of the opening using a brush.
If the previous design was also a metal-plastic balcony block, then its dismantling begins with the removal of all fasteners, screws, linings from the frame after removing the inside of the doors and windows.
The opening should be freed from finishing to the main wall.
Step-by-step installation of a balcony block
To work on installing a balcony door and window, you will need tools:
- Bulgarian,
- foam gun,
- jigsaw,
- roulette,
- screwdriver,
- level,
- perforator,
- rubber mallet.
- drill,
- stationery knife,
- hammer,
- square,
- marker,
- metal scissors,
- mount.
Assembling the balcony block
Before installing a plastic balcony block, you should connect the door structure and the window structure into one. To do this, it is necessary to put the window unit with the balcony door on the upper sides, dock the side parts. Between them should be placed connection bar. It is necessary to check well that the upper sides of the frames that are on the floor are in line. For this operation, you must select a flat surface.
Tip: If the window has a movable sash, it must be removed for convenience during installation. In the door balcony block, you need to remove the door from the hinges.
Two sets are connected with screws. For them, holes are made in advance at a distance of thirty centimeters from each other in the frame of the door block and the structures begin to twist from its inside. After that, a single balcony block is obtained.
Choosing fasteners

The balcony block can be attached using:
- pins,
- anchor plates,
- anchor bolts.
Each type of fastening has its own advantages and disadvantages and can be chosen for work.
Tip: Choose anchor plates for fastening. In this case, installation can be carried out without separating the frames and double-glazed windows.
Preparing the balcony block for installation
Mounting plates are fixed on the two side and upper horizontal surfaces of the frame. They are attached with screws. Fifteen centimeters recede from the corners of the structures and install the plates so that they are turned towards the inside of the block. Between the extreme plates it is necessary to attach the intermediate ones at a distance of 50 ÷ 70 cm from each other. Skip the screw in the middle of the block width into the profile recess.
A PSUL tape is glued around the perimeter of the block from the outer edge. This is a sealing element prescribed by the regulations in order to protect the mounting foam from moisture and ultraviolet rays.
If provided, at this stage brackets are screwed onto the window for its fastening. They try on the mesh so that it evenly covers the opening, mark the installation locations for the brackets and attach them with screws.
Mounting sequence
Consider how to install a balcony block with your own hands:
- If the kit includes a threshold, then you can immediately begin the installation of the unit. If it is missing, you should start the installation with it.
 It is recommended to use plastic mounting wedges rather than wooden ones.
 - The block is placed on stands (mounting wedges), which remain in place after completion of work, are not removed. They are provided for each vertical element of the block. In order to orient the structure in space strictly vertically and horizontally (transverse elements), stands of different heights are used.
- Temporary fixation in the opening is also done using mounting wedges.
- Check the level of the correct location in the planes: horizontal and vertical. Wedges make error correction. They are convenient to use as a pair of elements. The building level is placed on the horizontal element of the block. If necessary, correct - wedges are knocked in the right direction with a hammer. After that, a level is applied to the vertical component of the block and its location is adjusted with wedges that are installed on the left and right between the block and the wall.
- Now fix the block by fastening pre-prepared plates. They are carefully unbent and pulled up to the wall so as not to move the block adjusted in space. To fix the plate through the hole in one of them, a hole is drilled in the wall with a perforated drill, eight centimeters deep.

Screw a screw into this hole with a screwdriver, attaching the plate to the wall. And so all the prepared mounting plates are sequentially fixed.

Installing a low tide for an open balcony
- From the ebb blank, a part is cut with scissors for metal along the intended line, which corresponds to the width of the window.
- From the side of the balcony, a drain pattern is installed, screwed to the profile from the installation kit with screws.
- On the outside of the window opening, you can optionally install decorative corners. The gaps in the connection between the drain and the wall are filled with sealant on both sides.
Filling gaps with mounting foam

In accordance with the regulations, the upper horizontal seam should not exceed twenty millimeters in width, and the side seams between the block and the wall can be up to fifty-five millimeters, depending on the size of the structure. From the side of the room it is necessary fill the gaps with mounting foam, leaving one third of the space free. This will be the technological gap that the foam will occupy after solidification and expansion.
In order for the foam to pass all the necessary technological stages, the seams are left alone for a day. After that, the excess of hardened foam is cut off with a special knife. A high-quality seam should not have voids in its structure.
Installing additional parts
Do-it-yourself installation of a balcony block is almost complete. It remains to refine the details.
Window sill device
The window sill is adjusted in size so that it fits well under the window. Its width should allow it to be pushed two centimeters behind the window frame when installed.
Pieces of wood should be made into bars, which are placed under the part to be installed in order to avoid its deflection. The bars are sized to provide a window sill angle of two degrees.
A load is placed on the element, and then the joints are filled with mounting foam. The load is needed so that the hardening foam does not lift the structure.
Filling the joints of the window sill:
- first at the junction with the window,
- sides,
- under the windowsill at the junction with the wall, but not to the very edge.
After a daily technological break, you can remove the load.

Internal slopes
The slopes on the balcony block can be plastered or a decorative detail can be installed - special internal slopes. Often the kit includes sandwich panels. They will make the appearance of the slopes modern and aesthetic, in addition, they will insulate the opening .. You will find the answer to it in our article.
Tips for organizing lighting on the loggia. You will learn how to conduct electricity to choose the right fixtures.
Sequence of work:
- The sections of the starting profile are prepared according to the size of the length of the upper frame and side surfaces.
- The blanks are fixed with screws around the perimeter of the block from three sides.
- Measure the required dimensions for the top panel and side parts.
- Cut out the panels to the desired size.
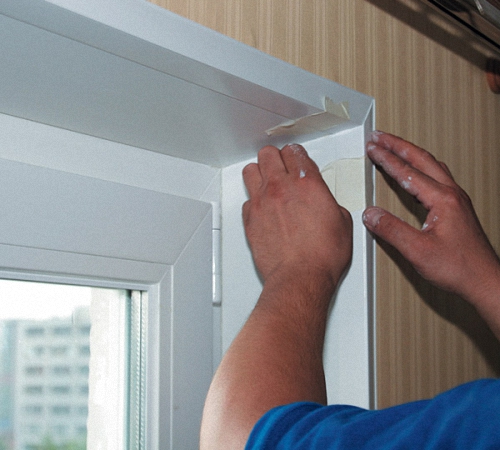
- The panels are inserted into the screwed starting profile, first the top part, and then the side elements.
- One edge of the panel is fixed in the profile, and under the part of the panel protruding into the room, a small amount of foam is sprayed into the gap between the element and the wall, slightly bending the structure and then pressing it into place against the wall. Until the foam hardens, the slopes at the design positions are held with masking tape. After a daily break, the adhesive tape is removed, the excess foam is cut off.
Decorative architraves
- Prepare platbands (F-profiles) of the required size.
- The parts are put on the ends of the decorative panels; in the corners, a connection should be made at forty-five degrees.
- The joints of the side and top panels, as well as the bottom of the side decorative elements with the window sill, are sealed with silicone sealant.

Installation of a balcony block video
Here is a video on the topic of our article on how to install a balcony block yourself. In it you will find useful tips from professionals.
The durability, reliability and stability of windows depend on the quality of installation of slopes. Slopes provide tightness, heat and sound insulation. If they are installed incorrectly, the window will not last long and functionally, and will soon have to be replaced. Therefore, it is very important to choose the right type of slopes that is suitable for your windows, and install it correctly.
Types of window slopes, their advantages and disadvantages
Depending on the location of the slopes, they are divided into internal and external or external.
Internal slopes are located directly in the room and do not have a special functional role, except for tightness, and also act as a design for the joints between the window and the wall. Unlike them, external slopes provide sound and heat insulation, protect the room from moisture, heat and temperature changes.

Depending on the material from which the slopes are made, there are:
- plaster,
- wooden,
- plasterboard,
- plastic,
- Sandwich panels.
1. Plaster slopes are a classic option. It will take at least two days to install such slopes. Since the plaster must dry after application. And then it needs to be sanded to make it smooth. After grinding, internal slope, it is treated with a primer and painted with water-based paint.
2. Wooden slopes for windows. For windows made of natural wood, wooden slopes are ideal. At the same time, the design of the room will become more aristocratic and refined. For the manufacture of such slopes, the best wood is chosen, carefully dried and processed. Therefore, wooden slopes will last as long as, for example, plastic ones. One of the significant advantages of wooden slopes is their environmental friendliness. After all, wood is a natural material that does not emit toxic substances, unlike plastic.
3. Slopes for plasterboard windows. Drywall slopes are used for significant damage to window openings. They close up only internal openings. Plasterboard slopes allow you to get rid of additional moisture on the windows. First you need to beat all the plaster and cover it with a primer. Then sheets of moisture-resistant drywall are installed, and a heater is placed between them: polystyrene foam, polyurethane foam or mineral wool. Further, this slope is primed, painted or finished according to the interior design. And at the junction between the wall and the slope, a corner is glued. The disadvantage of such slopes is that when wet for a long time, drywall slopes swell.

4. Plastic window slopes. Plastic slopes are more expensive than drywall. Such slopes are ideal for plastic windows, as they have the same coefficient of thermal expansion during temperature changes. This eliminates the possibility of gaps between the window and slopes. Plastic slopes are suitable for finishing both internal and external slopes.
5. Sandwich panels - as a kind of plastic slopes. Sandwich panels are a type of plastic slopes. Unlike plastic, sandwich panels consist of three layers, two sheets of plastic and insulation between them. Sandwich panels can withstand temperatures up to 45 ° C, thereby providing protection from moisture and cold. Of all the window slopes, they are the most expensive.
Installation of slopes on metal-plastic windows
There are three types of slopes suitable for PVC windows:
- plastic,
- plaster,
- Plasterboard.
Slopes made of plastic or sandwich panels are best suited for finishing plastic windows. Plastic slopes are applied after the installation of plastic windows. To better understand the technology of their installation, let's get acquainted with the tools that will be needed in the process of work:
- plastic panels,
- start lane,
- corner,
- Profile,
- self-tapping screws,
- Insulation: polystyrene foam, mineral wool or polyurethane foam,
- silicone gun,
- Screwdriver,
- Scotch,
- bubble level,
- Putty.

The technology for installing slopes of plastic windows is not too complicated, if you carefully understand everything:
- To begin with, from the outside, remove all excess mounting foam. This can be done with a construction knife. Next, you need to putty all the cracks, using any mixture for exterior and interior work, depending on the type of slope.
- Using a level, measure the dimensions of the internal slopes. Install a wooden frame, on which our plastic slope will subsequently be attached. The starting strip is installed at the bottom of the window frame.
- Attach the profile to the wooden frame. Insulate the slope using polystyrene, mineral wool or mounting foam.
- Now install the plastic base. To do this, simply fix it on the profile, and process the joints with silicone. This technology for installing slopes on PVC windows for external and internal slopes is absolutely the same.
Watch the installation of slopes of plastic windows - video:
Advantages of installing plastic slopes:
- No serious room pollution.
- Since plastic does an excellent job with thermal insulation, energy savings are guaranteed.
- Replacing a window does not require repairing the entire room.
- Plastic slopes are easy to clean and do not collect dust.
- The slope performs the function of absorbing moisture, thus eliminating the appearance of mold.
- The plastic slope is made of the same material as the window, which means it will last the same lines.

Plaster slopes for metal-plastic windows
Plaster slopes are also installed on plastic windows, but they have more disadvantages than advantages. Firstly, they do not keep heat well, which means that fogging of windows is guaranteed. Secondly, plaster slopes will not last as long as plastic ones, because they crack over time. Thirdly, it will take a lot of time to install plaster slopes. Since such slopes are laid in layers, and each layer needs at least two days to dry. The advantages of these slopes are low cost of operation and versatility.

To install plaster slopes, we need:
- plaster mix,
- Perforator,
- Hammer,
- dowel,
- self-tapping screws,
- Screwdriver,
- Level,
- Putty knife,
- square,
- Primer.
Installation steps:
- Before starting work, stick a protective film on the window sill, do the same with the window if there is no special branded film on it.
- We clean the excess foam with a paint knife. Next, we prime and insulate future slopes. Styrofoam is glued around the perimeter of the slope location.
- Next, you should install beacons and dilute the plaster solution. It is recommended to use ready-made cement mortars based on gypsum or cement.
Tip: Before applying the mortar, attach the plaster mesh over the foam.
- The plaster should be applied first with a wide spatula at a right angle, and then level the surface at an angle of 45-50 degrees.
- Sanding, primer and paint
- Primer, putty and paint
Plasterboard slopes for metal-plastic windows
Plasterboard slopes are installed only indoors, the use of external plasterboard slopes is unacceptable.

To install plasterboard slopes on plastic windows, we need:
- Moisture resistant drywall
- profiles and guides,
- metal screws,
- assembly knife,
- dowel,
- Level,
- insulation,
- screwdriver,
- Perforated corner.
For the correct installation of slopes on the windows, a number of such actions should be performed:
- We measure the distance from the window to the place of the future slope. Consider the width of the drywall as well, 12mm thick drywall works best.
- After you have measured the distance, put marks on the wall.
- Install the guide profile. Its outer side should go along the line, and the profile itself should be behind the line.
- Next, draw lines on the floor and ceiling and nail the next profile.
- When the frame is ready, we insulate the slope. As well as when installing a plastic slope, using mounting foam, polystyrene or mineral wool.
- According to the exposed profiles, we measure the slope, and cut out the required dimensions with a mounting knife.
- The next step is the assembly of drywall slope. Using self-tapping screws, we fasten the drywall.
- Using a perforated corner, check the corners.
- Glue fiberglass or interlining at the joints of drywall.
- Next, we carry out finishing work: putty and paint.
Tip: To install a drywall slope, choose moisture-resistant drywall, as moisture collects in the corners and mold forms.

There is another option for installing drywall slopes. This is gluing them to the surface of the slope. To do this, first remove the excess mounting foam with a knife and prime the surface. Then we level the slope with putty. We measure and cut sheets of drywall of the desired size. We glue them with a special glue for drywall.
Tip: When gluing drywall sheets, they also use a finishing putty, which does not set as quickly as glue, so it is ideal for those who make such slopes for the first time.
Installation of slopes on wooden windows
For wooden windows, a wooden slope, made of the same wood as the window itself, is best suited. It is advisable to install a wooden slope on the second day after installing the window, so that the mounting foam has time to dry.
To install a wooden slope, we need:
- assembly knife,
- Primer,
- screwdriver,
- self-tapping screws,
- Wooden casing.
It is necessary to measure the future slope in advance, to prepare the casing of the desired size. Next, cut off the excess foam and prime the surface. Then we install and attach the slope, connecting the slopes to each other using self-tapping screws.
Another type of slope suitable for wooden windows is cork slopes, made of drywall covered with cork oak bark.

Advantages:
- Installation of such a slope does not take much time,
- environmental friendliness,
- Excellent sound and heat insulators.
Disadvantages:
- Price.
- Very soft, easy to damage.
To install a cork slope, you need to install a profile, and attach sheets of the required size to it. Next, insulate the space between the sheet and the window with mounting foam. Then treat the joints with silicone.
Plaster and plasterboard and plastic slopes are also suitable for wooden windows. The technology for installing slopes on windows, both plastic and wooden, is the same in this case.