The bizarre outlines of the branches involuntarily attract attention, and I want to capture this sophisticated beauty not only in memory or in a photograph, but also in real life. If desired, you can add an unusual decorative touch to the interior, making interesting compositions or creative products with utilitarian features. Crafts from tree branches is a great hobby that allows you to create beautiful decorative elements with your own hands without investing any financial costs. The interior of the house, decorated with this natural material, acquires a special sophistication, where everything is aimed at emphasizing its individuality. Before starting work, the blank for future crafts should be carefully prepared, taking into account the individual characteristics of the wood.
Crafts from branches - procurement of material
For creative activities to decorate the selected room (this may be, as well as and even), well-dried branches will be required. They are easy to pick up during forest walks, as well as pick up in a square or park. You can independently dry the branches that remain after sanitary pruning.
Before work, dry the material thoroughly for further use:
Inspected for cracks;
Cleaned from dust and dirt;
Exfoliating places on the bark are polished.
To exclude the appearance of unwanted larvae in the house, it is necessary to carry out disinfection using a weak concentration of potassium permanganate solution known to many. Depending on the idea, the branches can be painted in the desired tone, covered with stain or varnish.


Decoration of various items
Having brought home a bouquet, you can quickly make a creative vase using branches. For this, any suitable jar is taken - tin, glass, and pieces of branches are cut into pieces with a length slightly exceeding the height of the container.
They are placed close to each other in a vertical direction on the outer surface of the jar and secured by tying it with a beautiful braid or ribbon. You can plant branches with glue. Flower pots are decorated in the same way.


To make this wonderful vase, in addition to the glass base, you will need: a glue gun, dry willow or birch sticks, wire cutters.
- Harvested branches must be cleaned of bark. It is better to do this when the wood has not yet dried up, so it will be much easier to remove the bark;
- Next, using wire cutters, cut the bare branches into small pieces. Their size should be calculated based on the height of your workpiece;
- After the material dries, we glue each stick to the base in such a way that a kind of crate is obtained;
- It remains to give time for the glue to dry for 10-15 minutes. Congratulations, the branch vase is ready!
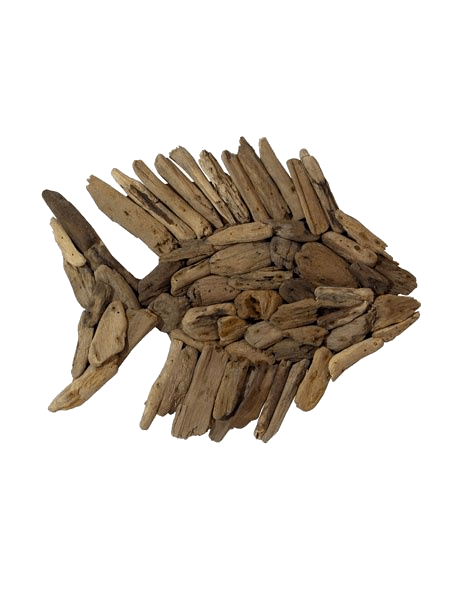
Crafts from branches will always find their worthy application in interior design of a house or apartment. Their shape and size can be completely different, because different materials can be used for their manufacture. Products made from bark, chips, snags, cut logs or large branches, etc. will look good. It all depends on your imagination and personal preferences.

The branches installed inside the glass jar in a continuous layer along the entire side plane will look no less original. So that they do not crumble in an impromptu vase, the bouquet should be quite voluminous.
For the products described above, you will need fairly even trimmings from the lower ends of the branches. The upper thin stems will help create a delightful evening with flickering candles. To do this, they are simply placed in a glass container so that they rise above it, pour no more than half the volume of water and lower the floating candles.


Charming compositions from branches
Trunks crowned with a web of thin twigs, placed at the head of the bed in a niche cut through one side of the coffee table top, will help to bring an unusual accent to a room, for example, a bedroom. In the dining area or study, a high floor vase will look elegant, in which, along with the branches, there will be dried cereals.
Bizarrely curved branched thin tree trunks are placed in a vase and decorated with decorative elements matching the color of the interior. It can be sparkling stars or snowflakes on the eve of the New Year, bright valentines on the eve of the corresponding holiday of lovers, or just butterflies with fancy ornaments on the wings, birds, flowers, fruits, leaves from any material at hand.


Having strengthened graceful branches on a velvet fabric, in color harmonizing with the general situation, and placing, after pasting on cardboard, the resulting composition in a wooden frame, you can get an elegant decoration of the interior.
A beautiful branch can be supplemented with golden bows, Christmas balls or forest cones. Such decoration will contribute to a good mood and cause only positive emotions. In addition, New Year's decorations will create a festive atmosphere on the eve of the main winter celebration.


Branches in the interior: a step-by-step master class
Tall shrub trunks (willow is most often taken) will allow in an unusual way. For example, to separate the sofa corner from the rest of the space in the living room. Such a partition is made very simply:
- To do this, a wooden beam of the desired length is taken as a stand. You can use absolutely any type of wood.
- In the beam, two rows of non-through holes are drilled in a checkerboard pattern, in which prepared branches are fixed vertically to the glue. In length, they should be about a meter less than the height of the room. The step depends on how openwork the resulting screen should be.
- To make the product look stylish, it is varnished.


The current bedroom design ideas are endless - birch trunks in the interior are proof of this.

Trimmings of trunks with a diameter of 8-10 cm with strong branches extending upwards from the side at an acute angle easily turn into hangers dear to the heart. They can be mounted on the wall in the hallway, creating a natural corner with a specific purpose. Among the designer finds, you can find birch trunks that play the role of cornices and even racks near the bed for attaching a canopy.
The picture will be complemented by a coffee table, the base of which is a bundle of branches fastened vertically into a stable cylinder, and the tabletop is durable glass of round or oval shape.
You can make an option that is unexpected in effect by fastening the branches in the shape of a cube and laying it on the floor on the side face. A plastic or glass square tabletop is placed on top.


Wall mirrors are often decorated with branches. They can be glued around the entire perimeter perpendicular to the frame or along it. There may be many options. Craftsmen easily make frames for photographs, children's drawings, reproductions of their favorite paintings from scraps of thin trunks.
A gracefully curved thick branch can become the basis of a table lamp. A branch with many branches, mounted on the wall near the mirror on the dressing table, will allow you to easily place all the jewelry.


Such work requires delicate female hands and special attention.

Creative inspiration is the main stimulus for a person who wants to create beautiful crafts from branches with your own hands.
In spacious hallways, one wall can be turned into a fairytale forest by installing trunks reaching the ceiling behind a high plinth with LED lighting installed near the floor. This is one of the best ways to give your interior a scenic look. Both thin and thick branches of trees can be used as material.
Small products made from dried snags will look original. For a change, you can use tree bark and wood chips, combining everything later into a single composition.
We make decor from branches with our own hands
Crafts from branches are always distinguished by their originality and unique design. With the help of these uncomplicated sticks and twigs, you can create a beautiful author's decor on absolutely any subject. , paintings, wreaths, flower pots, bizarre animal figurines - this is just a small part of what can be created from this wonderful natural material.
- Making a wreath from branches is probably one of the easiest tasks that even a child can handle. Take thin willow rods and twist them together into a tight ring, then carefully tie them with copper wire. As an additional decoration for a wreath, you can use tree leaves, flowers, forest cones.
- You can revive an inconspicuous tree branch using ordinary snowflakes. Cut them out of paper, foil, or colored felt and hang them on each branch. Such compositions will look great in the house against the backdrop of a wall with beautiful wallpaper.
- If you still have broken light bulbs, they can also be used as decoration. From a soft wire, make a special mount with which you can hang them on a branch so that the light bulb base is at the top. Further, through a hole specially made in the base, the light bulb is half filled with water. It remains only to give our miniature an elegant look. To do this, the branch can be decorated with decorative braid, ribbons and bows.
Despite the fact that the process of creating some crafts is quite long and laborious, the result of the work done will be amazing.


Even the most ordinary painted twigs can be a great material for making fun crafts. For example, in interior design, unique products made of branches in the shape of a star will look very beautiful and fun. You can make them with your own hands on a regular table.
- Material preparation. For each craft, we need 5 sticks. It can be branches of any tree, as long as they are even and have the same length. The material should be dried and varnished in advance, so your products will last longer. We also need a thread, rope or thin ribbon. With their help, we will tie the ends of our sticks.
- Making a star Lay the sticks on the table so that they form a closed figure of a pentagonal star. Tie each formed corner with a thread or rope and decorate with satin ribbons. The resulting star can be hung on a Christmas tree or given to friends.

To create something unique for your interior, do not copy someone else's ideas, but try to do everything yourself. Feel the mood of your home, think about what exactly it lacks, what things and objects could highlight its own style. Write down everything that comes to your mind in a notebook - when creating an interior design, these thoughts may come in handy for you.
Pay attention to the little things. It is they who, in a creative union with non-standard design solutions, create an unsurpassed atmosphere and focus on a specific element of the interior.


The original floor lamp is a creative interior decoration


Crafts from branches are not only beautiful, but also profitable. The main advantage is that no funds are required for their manufacture, because the material itself is literally lying around under our feet. Moreover, all compositions can be created with your own hands, involving your children in this entertaining process.
Crafts from branches can be easily and quickly sold, because this is a unique decor, which is always in high demand. You can also earn extra money by teaching paid workshops on creating designer jewelry for beginners.


We really hope that this article was useful to you. Create, create, experiment and perhaps this interesting hobby will grow into your professional field of activity.
Good day) For those who like to decorate the interior of their home in a very popular eco-style, I want to offer a few ideas using snags. I already collected these snags on the beach last summer, after the storm. There was laughter))) My husband did not get tired of repeating: do not disgrace me! I walk along the beach, collect firewood and people observe with such surprise and curiosity that it’s embarrassing))) Leaving the beach, I often heard from my beloved - bring it yourself, I won’t carry this garbage) What kind of garbage is this? Look, what beauty can be made from these very sticks. By the way, I glued the jar with my snags, varnished them, it turned out to be a very pretty vase, stylish and environmentally friendly), then I’ll show
A stylish frame for eco-style in the interior using pieces of tree bark, by the way, the bark can be replaced with the same snags
Christmas tree from snags

Vintage wreath of snags. An unexpectedly beautiful combination with butterflies and roses from musical pages


So, let's look at ideas and get inspired for creativity in decorating the interior in an ecological style. By the way, about the environment and its safety. I want to introduce you to the training center NP MAEB, is the International Association for Environmental Safety in St. Petersburg. The training center specializes in labor protection, industrial safety and training of professionals in this field. On the site http://www.maeb.ru/ you can get acquainted with the provision of services of the center, one of which is the system of labor protection and industrial safety in Russia. If you want to acquire the specialty of a work cradle, slinger, elevator operator, lift operator, you can take a course in this center. Read the details on the website.
To create a Christmas tree, you will need snags and a hot glue gun, you can also use Moment - Crystal glue, as well as cones and jute. If you have burlap, then it can also be used in this option)

The base for the Christmas tree can be made from cardboard, or you can use a small plastic bottle.


Now let's see how to decorate a mirror frame with pieces of tree bark.


The bark is also glued with hot glue.


Looks stylish, right?

Today we want to talk about how, using the bark from our trees, you can create (wall still lifes and panels, first of all, we want you to remember well - you should never use the bark of living, growing trees.
You can work only with the bark of fallen, dried or cut down trees. There are species of trees and shrubs that from time to time shed the outer part of their bark. For example, birch in winter or hawthorn linoleus.
Bark from a fallen perennial birch is also a good material. Both sides are used - both the front and the morning. Such a bark can be a landscape for a still life or a panel, it can be used to make a cloudy sky in a mosaic, and by combining both sides in one panel - and the whole landscape, thickened parts of the bark make excellent mountains with snow-covered peaks. In a pine forest, it is not difficult to find dead wood, near which there is fallen bark eaten by bark beetles on the ground. such pieces can easily be turned into cliffs, mountains, rocks or the ruins of an old castle.
How is a landscape made of bark!
First of all, you need to choose a base. It can be a board, plywood or sewn cardboard. The wooden base itself can serve as a background, and veneer (veneer) needs to be glued onto the cardboard. Each type of wood veneer has its own color and its own unique pattern. Therefore, veneer of lighter tones is selected for the sky, for land - darker tones, for the sea it can be with stripes resembling waves. If you want to depict winter, then make snow from white, for example, birch veneer, and the sky from veneer of darker tones.
It is very important that the joint of the pieces of veneer in the picture is not noticeable. Therefore, two pieces are folded so that one is on top of the other (see Fig. 1), and they are both cut at the same time.

When you have prepared the entire background and all the pieces are carefully fitted to each other, proceed to stick them on the base. Pick up glue: carpentry PVA or No. 83, grease the background and base with it, connect them together, cover with a flat board and put a load of 15-20 kg on it. If there is a clamp, then clamp it with a clamp and leave for a day to dry. Glue the details onto the finished background. Start with the details of the distant plan and gradually move on to the front, close-ups.
Look at the drawing (see fig. 2). In the distance you see mountains, in front of them there is a lake and in the foreground a pine tree. To get such a picture, draw a weak outline of the drawing with a pencil. Weak because the shape of the pieces of your bark itself will tell you the contours of the mountains and, perhaps, they will not look much like your drawing. For distant mountains, use the bark of trees with a light color (for example, birch or aspen), for closer ones - darker, and the darkest - for the foreground. In our example, in the very foreground you see a pine trunk. Make it from thinner teat bark, such as thin scales that the tree sheds periodically. For the image of the crown of trees, you can stick pieces of finely chopped bark without highlighting the details.

In the picture below, on the left, you see a sea with waves. This impression is created by veneer with pronounced stripes. The sailboat is made from birch bark, and the rock in the foreground is made from a piece of bark. If you want to depict birches, then first be sure to draw a birch trunk on a piece of paper (by placing a carbon paper so that the drawing is visible on the reverse side and gradually stick pieces of birch bark.
To prevent the joints from being visible, stick a thin skin of the bark on them. Then cut out the outline of the trunk with scissors and stick on the dark spots characteristic of the birch trunk: at the butt (base) almost completely, and the higher to the top, the less often. Try to keep the spots as natural as possible. To do this, try to draw a birch from nature and remember the location of these spots.
The material for them can be a dark dried leaf or a dark part of the bark. For birch branches, you can take small branches of a dried shrub. The Christmas tree is easy to cut from a dry dark sheet. So that it is not fragile, grease it in advance on the reverse side with glue. From well-cleaned, even-surfaced birch bark, you can also make flowers for a dry winter decorative bouquet or for a panel on a wooden or linen background.
For the core of such a flower, a pine cone, poppy head or any dry thorn is taken. Petals of any shape are cut out of birch bark and inserted with glue between the scales of the cone, thorns or into slots made in the dome. It is good if you leave a cone, thorn or dome on a natural stem, but there will be no big trouble if you stick a dry branch to them.
The figure (see Fig. 2) below shows a panel of scraps of veneer and bark. On a wooden board previously tinted with potassium permanganate or stain (darker below), stick flowers and leaves cut from bark scraps, for stems - dried stems of climbing plants (vines and grape leaves). In a pine forest on the ground, you can find thin scales of light brown pine bark in the most bizarre shapes. Look closely at them, and you will see the silhouettes of people, animals and fantastic animals. Picking up and sticking these pieces, it is not difficult to make interesting genre scenes out of them. The basis for these figures can be a tree or a harsh canvas.
The bark goes well with a wooden base and does not go well with paper and cardboard, so when working with bark, you should always take wood as a basis, not paper. If you want to glaze the finished work, then be sure to glue thin strips of cardboard or sticks along the edges of the picture, then the glass, resting against the protruding parts of the picture made of thick bark, will not crush.
Glue two loops on the reverse side so that the picture can be hung on them. From above, these loops should be sealed with a strip of cardboard almost as long as the width of the picture and 3-4 cm wide (Fig. 1. (2)). I would like to say a few words about the processing of the bark.
When you bring the bark from the forest, be sure to boil it in water for 15-20 minutes so that the larvae, which are always numerous in a dried tree, die. If this is not done, they will ruin your work and damage household items. Spread the boiled bark on a newspaper, and so that, when drying, the eye does not warp, cover it with a smooth board, and put a load of 18-13 kg on top.
In mock-up work, straw can be pasted over cardboard houses when it is required to depict a log house. It is pasted over various cardboard products.
This work is performed as follows: the straw is soaked, cut along the length and smoothed out with a not particularly hot iron to form even straw ribbons.
Straw is usually used to decorate things with a flat surface: frames, folders, pencil cases, etc. Drawings are made up of straight and broken lines (folk cross-stitch, ornaments from geometric shapes, stars, etc.) (Fig. 11 a-d).

Having chosen a drawing, transfer it with the help of transfer paper to a thing intended for finishing with straw.
According to the drawing, the straw is cut into pieces with scissors, then the thing is smeared with glue and the prepared pieces of straw are laid according to the drawing. The finished product is pressed with a piece of board and dried.
Hats, handbags and other things are sewn from straw woven into pigtails. They do it this way: they soak the straw and weave braids into 4 and 5 straws from raw straw (Fig. 11, A). The pigtail should be long, therefore, in the process of work, it is necessary to instruct the straws by folding the end with the end in half. The finished pigtail is straightened and ironed while still wet.
From the ribbons of such a pigtail, you can make a basket in the same way as they make from birch bark ribbons. You can also make a hat.
It is sewn together with threads, starting from the center of the bottom (Fig. 11, B). The finished hat is moistened and smoothed - the fields are on the table, and the head is on a round log wrapped in some clean rag or on a 3-liter jar.
Crafts from pine bark.
Pine bark has a variety of uses in handicrafts. It is easy to process, and with the help of a knife they make models, toys and games from it. On fig. 12 shows a boat and a horse chess piece.

To make a boat, a piece of bark is taken, its outer part is processed, then an oval is outlined on top, along which a recess is cut out with the tip of a penknife.
The bench can be made from a separate piece of bark and glued inside the boat.
Chess pieces are drawn on a prepared bark plate. Then, according to the drawing, the bark is cut, first giving it a general, rough shape, and only after that the details of the figure are cut out.
These crafts are far from exhausting the possible works from natural material, there can be an unlimited number of them. A variety of material will give impetus to your creative thought.
Crafts from birch bark and other natural materials will allow you to create unique author's things for yourself and at home, fridge magnets, topiary.
Crafts from birch bark
In another way, this material is called birch bark. In order not to destroy the trees, collect the bark from the fallen ones. It is necessary to clean off the lower part of the brown bark, leaving only white light birch bark. Here's how to make souvenir magnets out of it.

To create such an original bark craft, you will need:
- birch bark;
- transparent glue;
- thick sheet of cardboard;
- birch branch;
- figured hole punch;
- scissors;
- pencil sharpener;
- stationery knife;
- sponge;
- acrylic paint;
- birch cut.

Using a thin blade of a clerical knife, cut out the base of the pattern on the birch bark. You can use a template, trace it on the bark on the back with a simple pencil, and then cut along these contours.
Cut out a small circle from cardboard, glue it on the back of the bark blank, and a magnet on it. For this craft, a butterfly motif was used.

Now see how to make easy roses. To do this, you will need a pencil sharpener and a tree branch. Insert its edge into the hole of the sharpener, turn several times to form chips. Form a blank with your hands, glue three such flowers to the center of the magnet.

As you can see, the carved wings of the butterfly need to be slightly bent outward to clearly identify this insect. All you have to do is cut out leaves from birch bark and glue them around the rose.

Here's how to make a craft out of this. If you like the idea of creating a birch bark flower, then prepare:
- birch branch;
- bark;
- transparent quick-drying adhesive;
- scissors.

Also prepare the birch bark, remove the thick bark from it. Leave only the thin part, which must first be dried. Now you need to cut off a piece of a rectangular shape from it with corners rounded on one side. This bud must be rolled up, shaped into a bag.

Glue it to the tip of the branch, you can additionally fix it with a thread.

It is necessary to cut out petals of 3 types from birch bark: small, medium and large.

Glue to the bud in a circle, first small petals, then medium ones, attach large ones on the outside.

Cut out the sepals and leaves from the birch bark, glue the first ones on the back of the blossoming buds. Attach the leaves to the branch.

Here you will get such wonderful crafts from birch bark in the form of flowers. To make a bouquet, form it from three roses, put it in a vase.
Do-it-yourself decorations for yourself and for the house from birch bark
Decor items made of this material will be natural, they will convey the warmth of the tree, its beauty.

To make such a pendant, take:
- birch bark;
- awl;
- chisel;
- transparent fast drying adhesive.

Glue the small one onto the large flower, take the chisel tip with another blade, and use it to cut out another flower, but a little larger than the previous one. Also stick two smaller blanks on it. Thus, perform a few more flowers, gluing them in a pile.

Next, for this birch bark craft, you need to make a chain, it consists of several fragments. To make the first one, cut a small strip from the birch bark and wind it around the awl. Glue the end. In this way, complete the rest of the "beads".

String them on a strong thread, attach it to the pendant. Here is such a wonderful birch bark pendant you got.
Please note that the reverse side of the birch bark has become the front side of the pendant and chain links.

To make such a birch bark panel, take:
- birch bark with dark bark;
- thick cardboard frame;
- scissors;
- paper;
- wooden beads;
- brush;
- PVA glue;
- napkins;
- transparent glue "Moment".

Now draw a sketch of the future panel on paper. Draw individual elements of the exposition on a thin birch bark. Stick them on the board. You'll get a wonderful job.

Making do-it-yourself chestnut topiary
It is also a very fertile natural material, which rolls almost underfoot in autumn.

To do this, take:
- suitable container;
- newspapers;
- rope;
- wooden or plastic stick;
- gypsum mortar;
- chestnuts;
- glue;
- a ribbon;
- decoration in the form of beads, coffee beans or aromatic herbs.

Release the chestnuts from the outer prickly shell. From newspapers, roll a circle of the desired diameter. Fix them in this position with a thread.
Make a hole in this paper ball, insert the selected stick here. Pour the gypsum solution into the container, place the stick here, support it a little so that the solution “grabs”. Then you can decorate the clay pot, for example by smearing it with glue and winding the twine.
Glue chestnuts to a ball of newspapers, fill the gaps between them with dry herbs, you can use ordinary tea as them. You can also decorate chestnut topiary with coffee beans, chains. Close the plaster by placing artificial or natural moss here.

DIY decorative moss from natural
Such a natural material will also help to make many beautiful things for the home. If you want to create a topiary not only from chestnuts, then make it from moss.

For this you need to take:
- floral ball;
- glue;
- pot;
- paper;
- wooden stick;
- Styrofoam;
- burlap;
- tape.
Insert the stick into the bottom of the ball. Place a Styrofoam or polyurethane cube in the center of the clay pot. Stick the bottom edge of the wooden stick here.

Cut off a piece of burlap, put the topiary container in its center, wrap the edges up, fix it here with a ribbon. You will get a wonderful decorative tree.
If you want to have real in the apartment, then you need to make a bonsai. Plant a special tree in a pot, but it will be small, as it should be for such plants. See how moss can be used to decorate bonsai.
To do this, you will need two types of this natural material. The first is sphagnum moss, the second is moss that grows on old buildings, wet sides of sheds, arbors.

Look at the surface of the pot, if roots grow from here to the top, cut them off. Fill the container with special soil designed for bansai. Usually this includes: penza, akadama, charcoal, lava.
Attach toothpicks or each stick to the bump, secure with a glue gun.
Put the sponge in a suitable bowl, stick the cones here with wooden sticks.

Cover the top of the sponge with moss, you can also decorate it with small pebbles. If you want to create an imitation of snow, sprinkle with chopped birch bark or dried white flowers. If you wish, cover your creation with a clear glass or plastic dome.

That's how many ideas these affordable natural materials give, but this is not all possible options.
How to make birch bark jewelry, you will learn from the video. It tells how to roll a trihedral bead from a strip of birch bark.
Moss crafts are described in the following story. From it you will learn how to make hearts for a wedding from this natural material.