How to upholster a door
Despite the fact that stores delight consumers with the widest range of entrance and internal doors, the front design of which is carried out using the most modern technologies, not every apartment or house owner is in a hurry to make such a purchase. The high price of many models is not so bad.
The problem is that replacing the box requires at least repairing the slopes and / or wallpaper on the wall - and these are completely different expenses. In addition, the old door may still be quite strong, and therefore it is a pity to change it. In such a situation, padding doors with dermantine is one of the best ways to update, which can be done by hand.
Before talking about how to sheathe doors with dermantine, we will bring some clarity to one question. Since dermantin has been used as an upholstery material in our country for almost 90 years. This is what we used to call soft door upholstery, without going into too much detail.
However, there are fundamentally different materials, which in everyday life are still called dermantin out of habit.
To be fair, let's clarify what is the difference between them:
| Upholstery variety | Brief information about the material |
|
Dermatin (nitro leather), how to beat |
This material is a kind of artificial leather. It is based on cotton fabric or knitwear with a nitrocellulose coating, which is why it got its second name: nitroskin. The coating can be applied to one or both sides. This is the cheapest finishing material, the price of which starts from 200 rubles / r.m. Thus, the entire upholstery of the door with dermantine, together with fasteners and insulation, will be no more than 1,500 rubles. |
|
|
Since nitro-leather does not have high aesthetic qualities, and wears out rather quickly, more resistant polymers, PVC and polyacetate, began to be used as a coating for the knitted base. Vinyl leather has practically no shortcomings of its predecessor, and outwardly often imitates natural leather. So, the leatherette for door upholstery, which you looked after in the store, is most often not nitro leather. Be guided by the price tag: even if it says "dermantin", keep in mind that when the price per meter is 600-800 rubles. and more, it is vinyl leather. |
|
|
This option is not artificial leather. It is more close to natural leather, as it is a composite of leather and latex. This material is made from scraps of leather, crushed into a powder bound by a polymer. In terms of strength, elasticity and appearance, it is very similar to natural leather. A beautiful texture or embossing can be made on the surface of a composite leather. They even sew shoes from this material. And the upholstery of interior doors with dermantine, as well as wall panels or upholstered furniture, using recycled leather, which will look simply gorgeous. |
|
|
This photo shows a kind of artificial leather on a non-woven basis. Eco-leather has the highest characteristics in terms of strength, wear resistance, thermal conductivity, and even frost resistance. So it can be safely used for upholstery of a street door. |


Tools and consumables
In addition to the decorative material that will be used for the upholstery, you will also need a foam pad with a thickness of 10-15 mm. It will help to solve two problems at once: to insulate the door and create a beautiful relief on the upholstery.
- You can, of course, use other dermantine door insulators.: batting, felt, synthetic winterizer, but it is the foam that makes the upholstery really soft.
- When sheathing is done on both sides- especially if this is the entrance to an apartment or house, rollers are usually made around the perimeter, which decorate the ends of the canvas, and at the same time prevent the penetration of cold air through the cracks. For this, foam rubber is also used, only round - in the form of a bundle with a diameter of 2-3 cm.
- From fasteners, you will need furniture nails with a wide head. By them along the perimeter of the canvas, rollers and upholstery, and decorative nails are attached. They can have a curly metal or plastic cap.
Note! The best way to cover the door with dermantine is when nails with hats are used. They can be matched in color or in contrast. And it is even more convenient to purchase a ready-made upholstery kit, in which everything that was mentioned above is there. It costs at least 850 rubles. on one side, but it depends on the quality and design of the supplied material.

From tools, for work you will need a tape measure with a pencil, a hammer, pliers, a chisel, a knife. In the case when fastening along the perimeter is done not with nails, but with staples, you also need a stapler.
In principle, padding the door with dermantine with your own hands is a simple matter. Not only men, but also housewives can cope with it, since this does not even require removing the canvas from the hinges. Although, of course, it is more convenient to work on the removed canvas. Next, we will introduce you to the process, and offer a video in this article as a visual aid.
Important points
The maximum width of the door leaf is 100 cm, and of the upholstery material is at least 140 cm. So, the necessary margin is obtained in the width on both sides, and there are still strips from which you can form rollers. Strips 13-15 cm wide, enough for the rollers.
So:
- According to the height of the door, the leatherette is also cut with a margin of 10-15 cm on each side... The amount of overlap depends mainly on the thickness of the insulation, but do not forget that it is better to cut off the excess than not enough.
- As for the insulation, then it is cut exactly to the size of the canvas., and nailed to it with small carnations or planted on glue.
- Given the fact that the door is decorated with an old one, before starting work, it is necessary to eliminate all faults preventing her from closing normally; if necessary, strengthen the box; sand and paint the hinges.
On request: "door upholstery with dermantine video", you can find many videos that show not only the upholstery process, but also tells how to make repairs and other preparatory work. For example, it is very important to beautifully decorate the end of the door, which does not close with the cladding, and will spoil the whole picture.
And in general: if you don’t skimp on the purchase of material with an interesting texture and original fasteners, as well as do everything right, your door will look no worse than the examples presented above as a sample.
As already mentioned, door cladding with dermantine can be performed without removing them from the hinges. But if you want to create a beautiful geometric pattern, it is still better if the canvas is conveniently located in a horizontal position.
Drawings can be used as traditional, most of which are presented below, or come up with something of your own. Just do not improvise as you work - it is unlikely that something good will come of it. It is better to think over well and draw a diagram, and already use it for cladding.
Before trying on leatherette, you need to dismantle all the accessories from the canvas: handles, lock. If there is a door closer on the door at the top, you can not touch its body, but carefully bypass it by making a corresponding recess in the cladding material.
DIY sheathing, instructions
Sheathing with roller
For the formation of rollers, either a flat insulation rolled into a tube or a round foam rubber band is used. To wrap it, you need strips of upholstery material. As a rule, these are scraps of the dermantin canvas - it is with them that the work begins.
The strips are applied to the canvas with the front side, and fixed to one edge with simple studs or staples like this. Next, cut off the foam rubber band of the required length, and wrap it in a strip, fixing its other end to the canvas.

Depending on the volume of round foam rubber and the elasticity of the upholstery material, rollers with a diameter of 5-6 cm are obtained. However, the procedure for their formation may be different.
If you do this before the main door trim with dermantine is done, the roller mounts will be hidden under it. What happens as a result, we see in the picture above.

The following example shows an option in which the roller is formed after the fabric is sheathed. Then the width of the strip should be such that a fold can be made. In this case, the front fastening is done with decorative nails.
Note that the roller can only be made from the outside of the door - and even then, provided that it opens onto the street or staircase. Otherwise, the roller will get in the way. On the internal doors, there is no need for it at all, because it is made not for beauty, but to eliminate drafts.
Basic cladding
Without a roller, everything is much easier, and it looks neater. First, the insulation is attached. On the removed door, glue can also be used to fix the foam rubber. When the door leaf is in an upright position, it is much more convenient to use a stapler for this purpose.
So:
- Fasteners are made in such a way that the foam rubber bends freely around the edges - the indent size is 5-6 cm. It is needed so that the ends of the cladding material can be tucked under the insulation before starting to fasten it with decorative nails.
- In general, there are different ways to fix the soft skin on the door leaf. If it is not removed from the hinges, then it is better to first tuck the dermantin under the foam rubber, and fix the middle with a decorative nail.
- After that, the cladding material is well stretched, and is fixed first in the corners and in the area of the castle, and then along the entire perimeter. Moreover, in addition to nails, you can also use moldings matched to them in appearance, imitating a solid fastening. This simplifies the work and gives the cladding a certain originality.

- This is the simplest version of cladding, which absolutely any person can do. Complex patterns are made on the removed canvas, and the procedure depends largely on the pattern. And it, by the way, may not exist at all.
- When the outer door is upholstered, many craftsmen begin to fix the leatherette from the hinge side. The material is first laid face down and baited along the edge with a stapler, then the insulation is laid, the upholstery is wrapped in the desired position.
- When one long side is ready, the material is pulled well, and, bending along the edges, the end ones are attached. With this upholstery scheme, the roller is also formed, but only from the side of the lock. Therefore, a strip of fabric is pre-nailed here, and then, when the main upholstery is already completed, a roller is formed. Its purpose is to hide the edge of the sheathing and to decorate it beautifully.

When ready-made kits are used, in which there are decorative nails covered with vinyl-leather, suggesting the execution of a beautiful pattern, the order of work is somewhat different.
Note! Such nails are not quite common - they are not hammered into them. They are detachable and consist of two elements: a flat base with a threaded pin, and a decorative cap screwed onto it. A similar design of fasteners allows you to veneer with leatherette not only a wooden, but also a metal door.
- To complete the drawing, the appropriate markings are applied to the door leaf. For this purpose, it is better to make a pattern from the same leatherette. Holes will be made on it, corresponding in diameter to the size of the nail head. The contours of these holes are also applied to the door.
- In those places where decorative fasteners should be, the element with a pin is set on glue, which is also often present in the kit. Also, some kits provide a special profile that is glued around the perimeter. In the grooves of which the canvas should be tucked. They are more expensive, but the upholstery is much more neat.
- When the nail pins and profiles are glued, the insulation is spread and cut to size, and upholstery is laid on top of it. The cladding, together with the foam rubber, is pushed onto the pins of the nails, and then the caps are screwed onto them. They start from the center, and in accordance with the pattern move to the edges.

Lastly, the edges of the upholstery are tucked into the profile. This is done with a round spatula, which is usually used for installing fabric ceilings. Excess material is cut off after it is tucked into the baguette around the entire perimeter - and the sheathing is ready.
Finally, we note that when the doors are upholstered with dermantine with their own hands, the video watched before starting work will allow you to navigate and master the technology much better.
The final part of the installation
The last step is the installation of fittings. In the new upholstery, it is necessary to make cuts of the hole slightly smaller than the size of the holes in the canvas, this is very simple, since they are well felt through the dermantin and the backing. Reinstall the handle and lock, peephole, hinges. Then you can start installing the canvas in the opening, put it on the hinges and you can enjoy the work done.
Design options
In order for the final result to look a little more interesting, you can not just sheathe the front door from the inside, but add several curly elements to its surface. To do this, you can use the remaining furniture nails. Carefully mark the places of their installation on the surface of the dermantin, after you hammer in the nails, you can tuck a decorative lace under them. Dermantin and soft lining will be transformed: the contours will be squeezed and a peculiar pattern will appear on the door surface. Usually rhombuses are made in this way, but other schemes can be used.

Door decorative upholstery schemes
The easiest way to work with a wooden door, but with a sufficiently thick and dense layer of the substrate, you can make such a decor on an iron door. To do this, you need to fasten the nails or buttons with a strong thread from the back side before sheathing the canvas, connecting the foam rubber and dermantin.
Do-it-yourself door cladding with dermantine is quite simple and interesting, besides, it allows you not only to save money on buying a new door, but also gives you a unique opportunity to create your own author's finish. If done correctly, it will look no worse than the industrial version.
;
Door cladding is performed for various reasons. Among the main ones, they are distinguished - insulation of a wooden or metal entrance structure, as well as the creation of a new decorative coating. It should be noted that all the work can be done independently, but in order to obtain a really high-quality result, you need to make every effort and accuracy. If everything is done correctly, the result will be a coating that not only protects from the penetration of cold from the outside, but also provides an excellent visual appearance.
It all starts with the fact that you need to decide: how to sheathe the front door. The most acceptable option is the use of leatherette. Many people mistakenly believe that this material has a lot of disadvantages. Yes, they exist and lie in the fact that such a product is very difficult to restore, in addition, dermantin promotes the spread of fire. But this material has much more advantages:
- It is resistant to microorganisms that can contribute to the formation of mold and rot.
- Excellent moisture resistance. That is, water does not penetrate into the inner layer, which does not lead to undesirable consequences.
- Has good durability. With proper care, the service life is tens of years. Even now, you can find options for metal doors that were covered several decades ago. However, they still have not lost their appearance.
- It is not damaged when using household chemicals, it washes well.
- Withstands low temperatures. This makes it possible to use the material for decoration from the outside. Naturally, you should give preference to quality options.

On a note! Dermatin is a type of artificial leather. Such products are positioned as an excellent substitute for natural options.
To choose a really high-quality product, you should pay attention to a number of parameters. Namely:
- Wear resistance, which should be at least 30 - 35 thousand cycles.
- Flexibility. The artificial leather should stretch without cracks or creases.
- Imitation of natural material should be as believable as possible.
There are many low-quality fakes on the market that lose their appearance in a very short time.
 When choosing dermantine for upholstery, you should take into account many nuances that determine the quality of this material.
 Preparatory work
Do-it-yourself door trimming requires a set of preparatory measures. They are as follows:
- A schematic drawing is prepared if it is planned to give the structure a more presentable look.
- A list of materials that will be used in the work is compiled:
- Leatherette. You should select a product in special stores, where there is a large selection in texture and colors. It should be borne in mind that these products are purchased with a margin.
- Insulation, which is used for additional sound and heat insulation. To do this, you can choose felt, foam rubber or synthetic winterizer. The thickness varies within 1 - 2 cm. It will depend on the pattern (tightening) being created. In order to obtain beautiful sealing beads, it is advisable to give preference to a heater that has a round, elongated shape.
- Glue and decorative nails required for fixing. The second option is selected depending on the type of hat, which will play the role of a visual element.

It's hard to imagine: how to sheathe an entrance door without the necessary tools. Therefore, the necessary set is being prepared:
- A hammer with a small head, but a comfortable handle for hammering in nails.
- Professional or semi-professional stapler. A set of staples (8-10 mm) is purchased separately. This tool allows for preliminary and additional fixation.
- A utility knife or good scissors - for cutting out.
- A screwdriver or a set of screwdrivers that will help you to dismantle and mount handles, as well as other elements.
- Pliers to remove old sheathing or misshapen nails.
Before finishing the front door with dermantine, a number of preparatory procedures are performed:
- The doorway is freed from unnecessary parts - handles, locks, eyes, chains. It is much better to carry out work if the canvas is not removed from the hinges. In the absence of proper experience, all measurements, circumcisions are performed with great care.
- If you plan to knock off a door that already has a decorative coating, then it is first removed.
- It often happens, especially with iron parts, that they are susceptible to rust. It should be cleaned off.

On a note! All elements must be thoroughly cleaned of any damage. Wooden elements can have cracks and chips, they are covered with a special putty.
Finishing activities
Door cladding with dermantine is performed on two sides: internal and external. Technologically, these two processes have some differences. They also distinguish between the works that are carried out when upholstering wooden and metal doors.
Working with wooden structures from the inside
All work begins with the definition of a door opening scheme - to an apartment or an entrance (to the street in a private house). The correct selection of the size and location of the sealing beads depends on this.
Often, wooden canvases open inward. Therefore, this option should be considered.
The technology is as follows:

Installation of dermantin is carried out according to the following scheme:
- Fixation starts from the top. A small area is tucked under the insulation, decorative carnations make their way along the edge.
On a note! The initial fastening is very difficult. For this, a stapler is used, the staples of which are clogged in several places.
- The evenness of the installation is checked. Make sure that there are no distortions.
- Next, the carnations make their way along the left and then along the right side. All work is done carefully - by constantly stretching the canvas. Wrinkles should not be allowed.
- The bottom is nailed last.
 Fastening dermantin
 At the end, marks are made to cut holes for the handles and the eyelet.
The door trim is considered complete. But only direct coverage is obtained. To obtain a picture, the markup is performed. Points are marked on the canvas, which are located at regular intervals. Carnations are hammered on them. It is important to take into account that the process starts from the center, excluding the strong tension of the leatherette.

Working with wooden structures outside
From the side of the street or entrance, work is carried out as follows:
- The door closes. One centimeter recedes from the edge of the canvas.
On a note! If the door does not have the required sound insulation, then a sticker of one or two layers of material should be provided. It is very convenient when the first layer has a self-adhesive side, the second is attached to staples.
- An insulating roller is fixed at the bottom. For this, a piece of leatherette is used, in which a piece of foam rubber is wrapped. It should be positioned slightly higher than the bottom edge of the canvas. Displacement must be avoided, otherwise it will cling to the threshold. Many craftsmen believe that this is an unnecessary element, so it is advisable to proceed from a specific situation.
- To insulate the canvas with insulation, they begin from the top, and then go down from both sides. It is important to consider that the material should not sag. If this is allowed, then further actions will turn out to be of poor quality.
- At the last stage, the wooden door is trimmed with leatherette. It is fixed along the folded edges. If necessary, get a drawing - the entire surface is broken through.
On a note! Many craftsmen believe that it is at the final stage that the lower roller is formed. It is formed by folding the leatherette lined with cut foam rubber. That is, the roller is solid. Be sure to check that it does not cling to the threshold.
The upholstery is complete when the rollers are installed around the perimeter of the box itself.
Working with a metal door - interior decoration
The situation is a little more complicated when it comes to how to sheathe an iron door. The methods of cladding outside and inside also differ.
Currently, many manufacturers are trying to ensure that the interior decoration of the entrance door is carried out in production. For this, decorative inserts from MDF are used. But it happens that cheaper options do not have such elements, then it becomes necessary to tighten the doors with dermantine with your own hands.
The work is carried out according to a certain scheme:

The video will help you understand the intricacies of the process:
If required, a drawing is created. To make it look more beautiful, you can use leftover artificial leather. The technology consists in the fact that one edge is nailed to the right place, then the strip is stretched and fixed again in the desired area. The result is a coating that has a more pronounced texture.
Working with a metal door - exterior decoration
If it is necessary to sheathe an entrance metal door from the outside, then a lining of small thickness is used.

The order of work is as follows:
- The synthetic winterizer or foam rubber is cut in size, which should be eight to ten millimeters smaller than the door leaf. Leatherette is immediately cut off. Its canvas should be equal to the size of the insulation plus 6-7 cm.
- The insulation is attached with glue, which is evenly applied along the entire perimeter of the iron door. You need to wait some time for the material to adhere well. If this is not done, then further work may be of poor quality. The trimmed area should have an even surface.
- Now a layer of leatherette is laid. It is evenly distributed over the entire surface. The edges are folded over the edge of the door leaf panels. The bent section must be fixed; for this, glue is used, which has a fast setting.
If you do everything carefully, then the front door trim will turn out to be very respectable. At the end, carefully install all additional elements (handles, locks).

Few details
Currently, leatherette is understood as a whole complex of materials. Therefore, if it is necessary to purchase, it should be borne in mind that there are types of coatings that can successfully replace it:
- Eco leather. Fabric-backed product with polyurethane coating. This option is not applicable for rooms with high humidity.
- Vinyl leather. Its composition is very similar to natural leather. This variety has many excellent decorative solutions that are suitable for different situations.
- Amidiskin. An excellent solution to ennoble the door with your own hands, because the material has good elasticity. Purchasing cheap varieties should be avoided.

There are many options for how to sheathe the door most effectively. All of them are described in the next article. However, the upholstery with dermantine, which flaunted on the front door in almost every Soviet house, has not lost its popularity to this day. And all because this is one of the few ways to finish the door leaf, which is easy to do with your own hands. Naturally, the main parameter will be accuracy and strict adherence to all stages.
Of course, today, if the front door has lost its former attractiveness, the issue can be solved radically - just replace it. Fortunately, the days are gone when this procedure was really a problem due to the total deficit of absolutely everything. But ... Firstly, not everyone wants to part with their good-quality door, albeit already dried out and letting in all sounds and smells. Secondly, not everyone can afford installing a new one. What to do in this case? Breathe a second life into it - upholstery the door with dermantine! Do it yourself or invite a specialist. True, the first option is preferable at least because it will allow you to save a fairly significant amount. And this, you see, is a compelling argument. Therefore, arm yourself with materials, tools and knowledge on how to upholster a door with dermantine. And don't be alarmed. Even if you've only held a hammer in your hands a couple of times in your entire life, you will succeed! The process is very simple, you will not have any difficulties.
So let's get started. We offer you a master class on the topic: "How to upholster a door with dermantine." Study, and then get down to work with complete confidence in your abilities.
All about Dermantin
But first you need to say a few words about the upholstery material itself, which, by the way, have been updating doors for a very long time. It is considered a type of artificial leather, but it is a more budgetary option. The seamy side of it is and the front side is a layer of nitrocellulose.
If we talk about its operational characteristics, it should be noted that dermantin is distinguished by its strength, durability, ease of maintenance, and more than affordable cost. In addition, there is such a variety of colors and textures on sale that if you decide to upholster the door with dermantine with your own hands, you will not have any problems with the choice. On the contrary, you can pick up such an interesting version of this material that your front door will look no worse, if not better than the expensive, custom-made neighbor's door.

What is needed
With the upholstery sorted out. But since it is necessary to upholster the door with dermantine using insulation - a special lining material, then you need to stock up on them. Usually, either foam rubber or special batting is used for these purposes. As for the amount of material required, both insulation and dermantin need to be bought according to the size of your door (taking into account the seam allowances - ten to twelve centimeters on each side).
You will also need furniture nails. They are usually produced with metal hats, which can be made in various colors and stylized as silver, gold or bronze. If you wish, you can also find carnations, in which the caps are upholstered with dermantine. You also need to purchase metal corners (four pieces), PVA glue.
How to upholster a door with dermantine without a tool? No way! Therefore, stock up on a screwdriver, screwdriver, hammer, stapler and scissors. You can start.
Preparatory stage
The door, of course, will have to be removed from its hinges. Then remove - if present - all the old upholstery from it. Along the way, get rid of anything that might interfere with the update process: remove the lock, remove the peephole, the hinges. If there are any defects on the door leaf, eliminate them. When the surface is fully prepared, you can proceed to the main stage.

How to upholster a door with dermantine
Free up space in the room or hallway, put two stools, mount a door on them. Screw on the corners. They will strengthen your structure. Cut out the insulation in accordance with the glue and glue the foam rubber or batting. To avoid waiting for the glue to dry, grab the material in several places with a stapler. Then lay out a piece of dermantine on the insulation, and so that on each side there are the same allowances for the seams. And then tuck the edges inward, under the insulation, forming a kind of small roller and at the same time nailing them. Algorithm of actions: we start from the top edge, then we fix the left and right sides, the bottom - at the very end. When fixing the roller, be sure to ensure that its thickness is uniform. And be sure to drive in the studs at the same distance from each other, otherwise your door is unlikely to look neat.
That's probably all. At this, the master class "How to upholster a wooden door with dermantine" can be considered complete. But still it is necessary to mention one small detail, thanks to which the front door to your apartment will become truly exclusive.

Decorative finishing
To decorate the surface of the renovated door, you can use special braid or cords. A drawing is laid out in the center or over the entire surface of them, and then fixed with studs in the right places. And you can "depict" anything your heart desires: a grid, vignettes, rhombuses. This is as your fantasy tells you.
Now that's really all. You can not only teach everyone with a clear conscience how to properly cover the door with dermantine, but also demonstrate the result.
03.09.2016 37767
The front door not only protects the house from burglary, but also keeps it cozy and warm. Front door upholstery will help increase its functionality, and in some cases even avoid replacement (if there are only cosmetic defects).
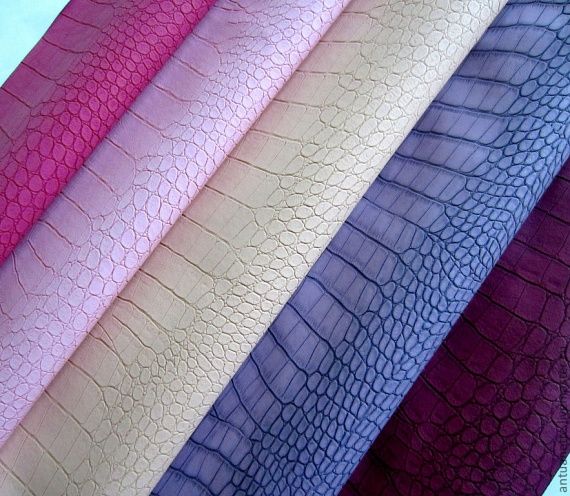
The modern construction market offers a lot of variations of upholstery materials of different prices: dermantin, vinyl leather, genuine leather, special fabric. The choice depends not only on the budget, but also on the type of door leaf, its quality, and the owner's preferences.
Advantages of front door upholstery
- Increasing the level of noise insulation, moisture resistance.
- Improves the aesthetic appearance, makes imperfections invisible.
- Retains heat in the room.
- Protects steel sheet from corrosion, and wood from the effects of temperature extremes.
But it is also important to take into account that the upholstery is sensitive to sudden temperature changes and is practically unsuitable for restoration after mechanical damage.
How to upholster a wooden door
The upholstery will extend the life of the wood and prevent it from drying out. In the process of work, they use materials such as:
- dermantin;
- vinyl leather (, beautiful appearance);
- felt;
- plastic foam;
- bologna fabric
When choosing a material, take into account which direction. The way of working with the sealing rollers and fastening the upholstery sides depends on this:
- opens outward (the rollers are fixed to the ends of the door frame);
- opens inward (rollers are attached to the door frame).
To make the upholstery process fast and convenient, the master needs to prepare in advance: material, insulation (batting, synthetic winterizer, isolon, foam rubber with a thickness of at least 2 cm), repair tools (special nails, tape measure, scissors, hammer, screwdriver, stapler). For 1 m² of area you will need 50 g of construction nails and 75 g of decorative ones.
The upholstery kit is soundproof, but also additionally insulates the room.
Upholstery: work algorithm
- Measurement of the door leaf, preparation of it and segments for masking the edges. Measurements are made with a tape measure. To create blanks from the material, cut out two strips equal to the width of the door and one equal to the length. The width in both versions is 14 cm. Then the canvas is cut out along the perimeter 10 cm larger than the measurements of the door. It must be removed from the hinges and the fittings dismantled.
- Removal of old material, surface cleaning (with special washes, spatula).
- Insulation is placed on the door leaf, the upholstery material is fixed with decorative nails, a special tape for the edges. First, the side segments are fixed with nails with the edge (inside out). The lower part is nailed at least 2 cm from the edge so that the material does not rub too quickly. Each step of sheathing the canvas is 10 cm.
- To provide additional noise and thermal insulation, in addition to the standard upholstery, it is recommended to install a sealing bead around the perimeter of the box, an additional layer of foam rubber, padding polyester on both sides. Sealing rollers are placed on the side segments of the material, wrapping the edges tightly inward. At the edge of the fold, these come with decorative nails. If the product opens inward, the rollers are attached to the ends of the door frame.
- They make holes for locks, a peephole, fold the edges and fasten them with nails.
- The product is hung on hinges.
The upholstery is pulled so that no folds or wrinkles form. To do this, the material is fixed with a nail, first from above, then from below, carefully straightening, and only then the side part is fixed.
For decorative design, use a silk cord, wire, stuff with special nails in the form of a pattern.
If plastic (fabric) is used, then a different technology is used. The main tool in the process of upholstering with this material is rectangular strips with a special slot. A decorative frame-baguette is inserted into it and its coals are sawn off at 45 °. The frame is fixed with nails (indent 7-10 cm), insulation is placed and covered with plastic, which is fastened with nails at a step of 4 mm.
Metal front door upholstery: process specifics
Upholstery is made using laminated fiberboard (for interior decoration), vinyl leather, dermantine.
For work you will need:
- upholstery;
- plywood;
- stapler, scissors;
- insulation (the thickness should be 10 cm more than that of the door leaf);
- plywood;
- liquid Nails.
Sequence of stages
- First you need to remove the fittings; for convenience, the door leaf is placed horizontally on a solid, flat surface.
- Plywood blanks are attached to the surface using epoxy glue. They wait for at least a day to dry completely.
- To prepare the fasteners for the sealing rollers, first cut out blanks (10 cm wide and length according to the door parameters) from the selected material. They are folded in half, fixed with nails or a stapler at a step of 10-15 cm.
- To upholster the door and prevent heat loss, foam rubber, 2 layers of batting (attached with liquid nails) are placed on the canvas.
- The upholstery material is cut with a margin of 3 cm on each side, fixed above the insulation, first from above, and then from below with furniture nails.
- The edges of the sealing bead filled with batting are fixed.
Upholstery without interior decoration requires additional manipulations. The workpiece is cut out of a solid fiberboard plate, holes are made up to a peephole, a lock and placed on insulation blocks. The panel is attached to the frame with self-tapping screws.
The upholstery is economically beneficial and in terms of the functionality of the door (the material will last a long period of time, save the room from noise and cold, beautifully decorate the canvas).
If the product is one-piece, and the sheets of the inner and outer sheathing are welded to the frame, then the foam rubber is fixed on the sheet of the inner sheathing. A frame made of strips is attached to it with self-tapping screws, between which foam rubber or batting is placed, covered with a fiberboard panel. It should be borne in mind that with this upholstery method, the thickness of the fabric will increase significantly.
Dermantin is recommended primarily for those who want to increase the level of heat in the house, to provide good sound insulation. It is better to use its modern counterpart - vinyl leather. It has properties that are useful in terms of functionality and maintenance: it is not afraid of frost, practically does not fade, has an elastic and at the same time durable texture, high wear resistance. There are many models and colors of this upholstery material on the market. But the owner must also remember the disadvantages: sensitivity to mechanical damage, temperature changes.
The cost of door upholstery to order
Replacing the upholstery of a metal door costs about 1,500 rubles. for one side, wooden - about the same. The material is paid for and bought separately. The cost of working with doors of non-standard size (not in the format 200 x 80 cm) must be specified individually. Finishing with laminated panels is estimated at an order of magnitude more expensive - 4500 rubles.
The price largely depends on the materials used, the range of additional work, fitting the locks, adjusting the doors). For example, the average cost of a standard set: dermantine of a dark shade, synthetic winterizer or foam rubber, decorative nails, glue is 1000 rubles, and the departure of the master is 500-800 rubles. On average, he spends 2-4 hours on work. But on sale there are ready-made kits for upholstering entrance doors with your own hands from 200 rubles. Upholstery of doors with leather will not only decorate them, but will also keep the room warm and quiet.
It is important to remember that the upholstery of the entrance doors with leatherette, for example, in most companies only provides for the fixation of the material itself. And the installation of a sealing, decorative roller, insulation with an additional layer of foam rubber, batting, isolon, vibration isolation must be paid separately (from 200 to 1500 rubles, depending on the type of work, materials used).
In addition, they require a fee for the preliminary departure of the master for measuring and selecting material, dismantling the old coating, installing and removing locks. It is much more profitable to change the upholstery of the front door on your own, especially since this process is not very complicated.
Underwater rocks
- When pulling on the material, you need to be careful to ensure that it is fixed correctly, without wrinkles and folds. If there is no experience of this kind of work, you can spoil the material or carry out this stage poorly.
- It is not necessary to insulate with popular materials (paper, felt). They do not retain heat well and contribute to the appearance of pests.
- Cutouts for the peephole, the lock should be smaller than the fittings.
- When working with the upholstery of a metal product, it is important to ensure that the material of the inner and outer upholstery does not overlap in the places of gluing. Otherwise, the fasteners will be of poor quality.
- It is better not to use rubber gaskets to seal the joints, this will interfere with the high-quality closing of the door.
Upholstering the front door is much cheaper and easier than replacing it, and the alternative in the form of installing decorative panels from MFDs is not cheap (about 3500 without a specialist leaving for measurement). Another plus of this design is insulation and positive changes in the interior.
Do-it-yourself door upholstery will save money and be confident in the quality of the work performed.
In order for the front door to always have an attractive appearance, you constantly need to take care of it: paint, putty, etc. To save yourself from unnecessary trouble, you can do differently - buy dermantin and sheathe the door leaf with it. In this case, all care for the door will be reduced to wiping its surface with a damp cloth. Do-it-yourself door upholstery with dermantine will also increase its heat and sound insulation, making your apartment more secure and comfortable.
Types of materials for upholstery of the front door.
Preparatory work
To sheathe the door yourself with dermantine, you need to prepare the following tools:
- construction stapler;
- roulette;
- hammer;
- scissors;
- screwdriver;
- pliers;
- brush.
From the materials you should prepare:

Door upholstery scheme.
- Dermantin. It is a rolled material with a width of 1.1-1.4 m. To carry out the work, you will need a piece of dermantine, the dimensions of which will exceed the dimensions of the door leaf by approximately 10-15 cm on each side for allowances.
- Lining. A synthetic winterizer, foam rubber or isolon is perfect as a substrate. The choice of this or that option will depend on your financial capabilities.
- Decorative cord for pulling dermantin.
- Decorative nails. They are made in various colors, so you can easily choose the option that suits you best.
- Glue. You need to purchase it if you plan to cover a metal structure.
- Antiseptic. It will be needed for processing a wooden canvas.
After everything you need is prepared, you can start removing the old coating from the door leaf, and also determine whether you will remove the door from the hinges or not. If this is the first time you come across such a finishing work, then it is best to remove the canvas and put it on a flat surface. After that, it is recommended to treat the wooden door with an antiseptic that can protect it from mold and mildew.
It should be noted that the door is sheathed only on one side, so you need to pay attention to which way it opens. This is due to the fact that a bead is formed along the edges of the skin. In some cases, an additional roller is used, with which the door structure can be made more airtight.
Do-it-yourself dermantine cladding of a wooden door
We nail the dermantin along the upper edge of the door in several places with nails.
After the preparation is over, you can proceed directly to the finishing work. The first step is to make rollers from the cut strips of dermantin, which are nailed along the edges of the canvas from the front side. They can be hollow or filled with cotton wool.
Then a layer of heat-insulating material is laid on the surface of the door, on top of which the dermantin itself lies. At the same time, a margin of about 8-9 cm should be left on the side of the hinges. The edges of the material are tucked in and nailed with decorative carnations along the entire edge.
Nails should be nailed in increments of no more than 10 cm, otherwise the dermantin will bulge out.
Near the hinges, the finishing material is nailed last. In this part of the door structure, a hollow roller is created, which is nailed to the jamb.
In order to prevent the insulation from sliding off during the operation of the door, the dermantin is pulled in several places with a decorative cord, which is fixed with decorative nails. To give the door a unique look, the cord can be laid in certain patterns. You can apply a grid pattern, or you can create a nice vignette in the center. There are a lot of options for laying a decorative cord. The most popular of them are shown in Fig. 1.
Sheathing of metal doors

Figure 1. Options for laying a decorative cord.
The process of finishing a metal structure with dermantin is somewhat different from the above instructions. In many ways, metal door upholstery is made even easier and faster, because there is no need to fix the finishing material with decorative nails. In the process of decorating a door with your own hands, it is this procedure that takes the most time.
First, the metal door, removed from the hinges and prepared, is placed on a flat surface and its edges are greased with glue, after which a heat-insulating material is applied, trying to make it immediately lay down as it should. Then the insulation is pressed against the base of the door and the glue is allowed to seize, after which the excess material on the sides should be cut off with scissors.
Further, the ends of the door are processed with an adhesive composition and the finishing material is laid. This is done in this order: first, the top is fixed, then they move to the side with loops, then the opposite side is glued, and at the very end the bottom is fixed. When installing the dermantine, you need to carefully monitor so that it does not warp and folds do not form on it.
After the glue is completely dry, the excess dermantin is cut off and the door is hung in its place. The door surface can also be decorated with a cord. Only in this case, instead of nails, the same glue is used to fix it.
Correctly executed door upholstery will serve you for many years, not only giving the entire structure an attractive appearance, but also protecting your apartment from outside noise and heat loss in the cold season.