Benches and benches in the country and in the garden are, first of all, a place of relaxation. But just putting a bench is not interesting. After all, you can create a beautiful corner. In order not just to relax, but to enjoy nature and the fruits of your labor. There are many interesting ideas. Moreover, often the simplest designs are played up, such that these benches with their own hands can be made by any person whose arms grow from their shoulders.
Photos of original benches (ideas for a summer residence and a garden)
Everyone knows what ordinary benches look like - they've seen it more than once. But the usual - the simplest - something you don't want. Especially if you have already begun the process of decorating the site or are just planning. Why not start with the bench? And there, and other decorations will catch up. One has only to start.
In the garden or near the house, you want to have more greenery: beautiful and different flowers. - that's good, but why not combine them with a bench.
What could be easier? Two wooden boxes in which flowers are planted and between them a couple of planed and polished boards. This bench can be placed near the wall, and a couple of long boards can be stuffed on the wall - there will be a back.
Not everyone likes wood beds: wood requires care, and without it, it quickly loses its appearance. It is especially difficult to care for a tree that is in contact with the soil. Instead of wooden boxes, there can be, for example, stone or concrete pedestals.

It is quite easy to make such a bench in the country with your own hands. You can find ready-made concrete beds or something similar. You can buy a processed board, or you can do it yourself. Instead of a board, there can be half a log - depending on the style of the site. It is easier to fix the seat with a metal corner. It is attached to concrete with dowels, to wood - with self-tapping screws from below or bolts through and through.
If someone has large plants in sturdy flowerpots, the following idea can be implemented. In this variation, the bench encloses the plants. To avoid surprises, flowerpots must be very durable….

There is a similar version of a bench made of boards and without plants: it may need to be put on or in. The supports are folded from boards of the same size, and the seat is from a bar.

A bench made of boards - a non-standard option
And more variations on the same theme: hollow building blocks are used as a support. Processed bars are inserted into the holes. This is the seat of the bench. Only round the edges of the timber, or it will be uncomfortable to sit.

For this garden bench, it is advisable to find large blocks with thick walls. If not, you need to securely fasten the blocks to one another. The whole task is to fix the blocks first (for example, with pins), and then to them - the bars (with bolts or dowels).
Log benches
If your site is decorated in a rustic or ethno style, the standard approach will not work for you. It is best to use logs in this case - with or without bark - this is your choice.
Seat for a bench made of logs - sawed along a trunk of large or medium diameter. The back is either a smaller trunk in diameter, or just a cut closer to the edge. Legs can also be made from narrow pieces of logs (see the photo below).

Log bench - quick and easy
The legs and seats are connected to each other by metal pins: a slightly smaller diameter hole is drilled under the pin in both parts. The pin is hammered into one of them, the second part is pushed in and is also hammered, but they no longer hit the pin, but the wood. So that there are no traces left, they put a piece of unnecessary board and knock on it with a hammer (or a sledgehammer). Such a connection should be quite reliable, but to be sure, you can install two or three pins, or you can cut a little log by making a flat area of the same size on both parts to be joined. By increasing the support area, increase the seat anchorage: all the same, the log weighs a lot.

Backless bench option
Another interesting option in the "ethno" style is shown in the photo above. It is realized in stone, but this bench can also be made from a log. The seat is a very thick board, the legs are most of the large diameter deck. A groove is cut in the deck for laying the seat. If you have a tool (with an ax, a grinder or a chainsaw, you can make a cutout) it is easy to do.
Often a work desk is needed at the dacha. You can make not only a bench from a log, but also a table. A variant of such an ensemble is shown in the photo. Only the table top is made of boards, all other parts are logs of different diameters or from half.

A greater degree of processing is inherent in the next bench in the same style. The back, legs, armrests are made of thick and not very branches, the seat is made of sanded and processed (peeled from bark and polished) unedged boards.

Another bench is almost also made. Only the boards and branches are located in a different direction and a different look is obtained. A do-it-yourself bench of this type does not require much skill. In this case, the more carelessly the work turns out, the more decorative the result.

Wicker back - rarely seen
A resting area and a bench can be made around the tree. The constructions are simple, it is so easy to make the flooring.

You can supplement the rest group and. And above the bench you can put it - this is the "progenitor" of an ordinary arch - one of the types of light arbor. And in order for the relaxation to be completely complete, you can do, or.
Of metal and wood
Few people will put completely metal benches at their dachas. They, of course, can be very beautiful, but in summer they heat up to incredible temperatures, and if it gets a little colder, you cannot sit on them, as they are too cold. Metal and wood benches are devoid of these shortcomings. The legs and supporting structure are made of metal, while the seat and backrest (if any) are made of wood. Moreover, there are also interesting shops in modern design.

Rectangles are welded from the profile, jumpers are welded to the side walls, on which the seat boards rest. Simple, stylish, reliable, functional.
In a more advanced form - with armrests, a backrest, soft cushions on the seat, such a design may look like in the photo. The wide seat turns the bench into a sofa, and pillows - upholstered furniture foam rubber - add comfort. The tables are made in the same style - a frame made of professional pipes and a table top made of boards.
One important point: if you are making a seat or tabletop from several adjacent elements, they do not need to be butted together. There should be a gap of 3-4 mm between adjacent boards / planks. The wood swells and dries up. To keep the surface relatively flat during these processes, a gap is required.

If you need smoother lines - for families with children - you can bend the pipes and make garden benches and a table with rounded edges. This garden furniture is completely safe. An ordinary round or professional pipe is bent, leaving on the sides in the shape of the letter "P" with a wide back. The length of this back is the length of the bench. For the table, the dimensions are made a little larger: the legs and and the back are longer.

Make two identical blanks for the table and bench. Next, the boards are cut to the same length. For a seat about 40 cm, for a table top at least 55 cm. Attached to the pipes with furniture bolts with a flat head. To prevent the hats from sticking out, a hole of a slightly larger diameter is drilled under them.
Benches from boards
The most numerous group is benches and benches made of boards. There are designs that look more like sofas, especially if you put soft pillows on them - and you can lie down.

Garden furniture in a modern style is easy to assemble: rectangles with partitions made of thinner boards, connected to each other.
Even the usual design of a summer cottage can become exclusive if you approach it with imagination: instead of legs and armrests, wooden wheels are used. The result is a designer thing.

A bench made of boards with a back and wheels instead of sides - it looks interesting
And the simplest possible - a board with legs in the form of the letter "X". Such shops were built centuries ago, you can still see them today.

From the boards you can make a bench in a modern style: in the form of the letter "P". With this design, the main task is to ensure a rigid fixation of the legs and the seat: the expanding forces are not compensated by anything. In this case, it is important to take a thick board or timber so that it does not bend. You can put the board "on the edge": this way the rigidity will be greater. To increase reliability, you can install the corners from below.

In the photo there is a version with a cut at 45 °. With a miter box or circular saw, it is not difficult to achieve an accurate cut. Precisely joining the workpieces and fastening them together, we get an angle of 90 °. If the seat does not bend, it will serve for a long time ...
An interesting and reliable version of the bench is presented in the photo below. The legs are assembled from boards of different lengths: every second is shorter by the width of the seat board. Interesting idea. It is easy to make such a bench: it is important to maintain the dimensions, and everything is connected very simply: with nails in the face of the seat.

Original benches
Here, it seems that you can still think of ... but it turns out, a lot. For example, attach the seat to a large stone.

Make a structure out of bamboo trunks.

Or a stone.

It will be unpleasant to sit in winter, but beautiful ...
How to make a bench: photo reports
We will not make benches out of stone - not everyone has equipment, but from different pieces of wood - we can. Let's talk about making simple but unusual designs. To make a do-it-yourself bench a source of pride.
Backless bench
The design is simple, but it looks interesting due to the specific material. A bar with rounded edges is used for the legs. If you have small logs, you can trim them on the sides. You will get almost the same effect. Such material is not such a rarity, the legs are unusually collected from it: the bars are laid one on top of the other flat. This gives zest and adds attractiveness.

This bench without a back has a length of about 120 cm, a width of about 45 cm, a height of 38 cm. You can round off the edges of the timber using a cutter, or you can find a similar profiled one. It costs more, but it will be easier to work with it: it is already well processed and it is easy to connect.
Depending on the found section of the timber, you will calculate the length that you need. Determine how many bars you have to stack one on top of the other to get the height you need. In this case, it took 5 bars per leg. Total 45 cm * 5 pieces - 2.25 m. 4.5 m of timber was needed for two legs. The seat used a board 40 mm thick and 90 mm wide. For the seat, you need 5 planks 1.5 meters long. It turned out 1.2 m * 5 pieces = 6 m.
First, we cut and process the boards for the seat. Their edges must be rounded. If you do not have a sander or router, you will have to work with sandpaper, but you can find such a board or arrange at the sawmill to have it processed and polished: there will be much less work. So, we cut the boards to the same length, grind and varnish (with or without tinting - your choice).

Fold the leg blocks one beside one, aligning their edges. Using a square and a pencil, draw lines where the fasteners will be placed. The distance between the lines is 7-10 cm.

You can take metal pins, or you can make pins - carved from wood. For them, holes are drilled slightly less than the diameter, the depth of the hole is half the length of the pin. Then they are hammered into one piece, a second piece is inserted into the same hole from above. The connection is reliable, but for confidence, you can add glue, although then the structure will turn out to be one-piece.
With a pin connection, the main task is to make the holes strictly one above the other, so that the parts mounted on the pin give an even edge. We did part of the work - we drew the lines where we will drill, now it is necessary to measure the same distance from the edge. For this, we will create a template. We take a piece of plank about 1.5 cm wide. At this distance from the edge of the bars, we will drill holes. Applying it exactly along the edge, mark the intersection with the drawn perpendicular lines.

We will install the pins in a checkerboard pattern, so we will drill holes through one intersection. We also make holes on one bar from different sides in a checkerboard pattern. In a similar way - on the pins - the legs are connected to the seat: two pins for each bar.
Technologically, this type of connection is correct, but it is complex and requires a certain skill. You can do it easier. Fold all the bars one on top of the other, secure with clamps, drill through in two or three sets - in the center and along the edges, connect with a long hairpin, with washers placed under the cap and nut. The legs of the seat strip assembled in this way can be nailed from above or try to make a pin connection.

The bench is made by hand. Finishing work left
If the seat has been nailed down, take some wood polish of a suitable color, add some very fine sawdust and stir. Coat the joints with this compound. When dry, smooth with a sandpaper. Sand all parts to a smooth state and cover with varnish or wood paints for outdoor use (preferably not covering, but which leave the texture of the wood visible).
How and what you can paint wood, read. It deals with the lining, but the painting techniques remain the same, and the compositions must be taken for external use.
Do-it-yourself bench from broken chairs
In any household, you can find two old chairs. They must be the same and still strong enough. We disassemble the chairs, leaving the part with the back and legs. We connect the two backs using bars of a suitable section.

For greater rigidity below, at a distance of about 20 cm from the floor, where earlier the chairs also had jumpers, we make another frame with transverse beams. It can be used as a footrest or for storing things.

After grinding, paint the resulting structure. This time the paint should be normal: different types of wood can only be painted over with covering paints. Apply with a brush or spray.
The matter is small: cut the seat from thick plywood (thickness 8-10 mm) to size and cover it with foam rubber and fabric.

Chair / bench for garden from pallets
Everything will come in handy on the farm. You can even make garden furniture from cargo pallets. Moreover, there is no need to disassemble them: we will use one for the seat, from the second we will make a back. All you need is well-finished armrests and leg blocks.

In one of the pallets, we reinforce the attachment points by inserting pieces of bars. After inserting, fasten them with self-tapping screws on one side and on the other.

From a bar with a cross section of at least 100 * 100 mm, cut four identical segments with a length of 80 cm. We fasten them in those places that have just been reinforced. We leave 20-25 cm on the legs. Fasten with four long self-adhesive screws - 150 mm and not shorter.

It is important to stay upright and keep the same distance on the legs. Then the seat will be level. If there are errors in height, you can try to file it, but then you will have to saw it from above so that the armrests are even. So try to screw it straight. Deviations from the vertical can only be fought by screwing the leg back.

We attach the second pallet to the rear uprights, and planks for the armrests on the sides.

It remains to cut a piece of furniture foam rubber and cover it with fabric. You can also make pillows for the back. If you are not going to process everything thoroughly, but to make a loft-style chair, walk with sandpaper or a sander, treating all surfaces to smoothness. You can paint it with paint, which gives the wood a dark color.

Drawings of wooden benches


Video lessons
Several videos on how to make do-it-yourself benches.
The bench is functional and allows you to complement the garden arrangement. It is usually not used for classic types of vegetable gardens as it is not needed there.
On this site, you can see only the beds and growing potatoes, tomatoes, cucumbers and other useful crops. And when it comes to a garden, albeit not particularly extensive, then it becomes clear that it is difficult to organize it efficiently without the use of benches.
Since the garden is created for other purposes, it is necessary for relaxation and merging with the natural atmosphere.

Modern designers have learned to create different versions of designs for such purposes. However, wooden benches and benches made of metal are considered the most popular.
Types of benches for use in the garden
Any chosen design of a bench or its size should serve one purpose - the formation of a place for a person to rest. Its shape assumes the possibility of comfortable placement for a long time.
The classification of such products can be based on a number of characteristics. They are usually associated with the type of material used to build the bench.

What materials are most commonly used?
In fact, there are a lot of them, however, you can stop at the most popular of them. Most often used:

Plastic, because benches based on it are resistant to environmental influences. They offer reduced weight and attractive prices. Folding structures are offered on the market, formed by these materials, they are very convenient for moments of stay in the country;
Wood is most commonly used to create homemade benches. It fits perfectly into the interior of any garden area. Designers classify this material as a classic that remains in vogue;
Important: Wood has a reduced resistance to moisture, insects, compared to plastic, stone products or metal modifications. Because of this, the life of a wooden bench will turn out to be the smallest among other options.
Metal allows you to create benches with your own hands based on the use of profile pipelines. However, forged versions based on this material are more often used.
It is virtually impossible to independently create such variations, since for this you need to have blacksmithing skills. Because of this, it is possible to use only purchased forged parts of the sidewalls for self-assembly of a bench from them;

The stone is distinguished by its level of durability. Other materials cannot match them in terms of durability. The bench can be formed from several large boulders or purchased marble and side pieces. In this case, it is necessary to build on the price of the product and its combination with the general style of the suburban area.

How to create a bench for long-term use?
For this, you can use a combination of different elements or a fundamental material. There are several options for achieving this goal:

Concrete will help to pour out durable side parts, and a slab formed on its basis can be used for the seat;
The combination of materials is considered a good option, and it is often used to create a bench in the garden. Created by combining a metal frame and wood planks respectively to create a back and a seat. And it is also permissible to combine options for benches made of stone and wooden elements.

Application of author's design to create a bench
Usually only this direction gives rise to true works of art, it is already difficult to consider them a classic place to stay. Mostly wood is used for this. There are well-known variations of works of authorship:

- The circular version of the form is created in the form of a conventional structure, however, framing a living tree;
- A bench created in the distance between two flower beds;
- A bench designed on the basis of the mouth space of a large animal;
- With the addition of stone statues on either side of the bench;
- Bench based on bamboo joint with seating cutout in the center section.
It is worth recalling that the process of creating a garden bench will allow you to go into a creative flight of imagination. Already existing structures should not interfere with this, since you can still come up with something original.

The information obtained with the help of this article helps you get acquainted with the various options and will present several non-standard approaches.

Photo of a garden bench


A garden bench is not just your ordinary piece of furniture designed for relaxation. With the help of this furniture, you can decorate your personal plot, create whole compositions that will ideally fit into the surrounding space of the garden or courtyard. It is not difficult to make a garden bench with your own hands, the main thing is to choose the design of the furniture, its location and the material from which it will be made.
Garden Bench Materials

Plastic
Lightweight plastic furniture has a lot of advantages: it is easy to carry from place to place, it is easy to care for it, it has an affordable price category. You can choose any color option that fits perfectly into the landscape design. Disadvantages of plastic furniture: scratches quickly, fades in the sun, looks cheap.


 Or even a chair. By the way, the chair cushions are foam crumbs in plastic bags. Warm, cozy, extravagant
Wood


This material is ideal for creating furniture: it absorbs heat, looks noble, and is easy to process. Any type of wood is suitable for the manufacture of a bench, the main thing is that the material is sufficiently well dried and does not have external defects.


Stone


This natural and beautiful material fits perfectly into any stylistic direction of landscape design. Stone compositions look solid, noble and unusual. But, despite its many advantages, natural stone has several disadvantages. Sitting on a stone bench is not very comfortable, and even unsafe for health. Therefore, together with the bench, it is imperative to make warm covers or pads. Stone compositions are installed permanently, they cannot be moved from place to place.
Metal

Garden benches made by hot or cold forging are a real decoration of a garden or a place to relax. The designs look beautiful, stylish, especially if additional decorative elements were used. Metal is most often combined with wood, glass or other material.
Requirements that a garden bench must meet
Convenience

First of all, you need to think over the ergonomic design of the lounge furniture. It should be comfortable, comfortable. It is best to make furniture with a back that you can sit back and relax on.
Security

A garden bench must be sturdy, carefully assembled and withstand heavy loads. For these purposes, it is best to use high-quality materials and accessories.
Resistant to changes in humidity and temperature

Since the furniture is made for a garden or yard, the material must withstand all climatic changes without defects and damage.
Garden Bench Prices
Garden benches

Bench design
The length of the seat and backrest will be 1500 mm. This furniture can comfortably accommodate three people at once. Seat height 450 mm, backrest height 900 mm. It is advisable to position the back at an angle of 18-20 degrees. The seat width is 400 mm.
Material and tools for making a garden bench made of wood
- Wooden boards 1500 x 150 mm, 35-40 mm thick. Three blanks for the seat and two for the back.
- Workpieces that function as legs and holders for the backrest - 900 x 150 mm, 35-40 mm thick.
- Blanks for the front legs of the bench - 360 x 150 mm, 35-40 mm thick.
- Beams 40 x 40 mm will be used to reinforce the bench structure.
- Self-tapping screws.
- Electric jigsaw for cutting boards.
- Electric planer for sanding the surface of boards and processing chamfers.
- Screwdriver.
- Sandpaper.
- Varnish and primer.
Manufacturing of a wooden structure

Step 1. Boards for making a bench can be purchased immediately in size, if they are not available for sale, the wood will have to be cut into blanks using a jigsaw or a miter saw.


After the wood has been cut to the desired length, it must be carefully processed. The blanks for the back and seat must be sanded. All ends of the boards also need to be processed with an electric plane, it is desirable to give them a rounded shape.

Step 2... The long back legs of the bench, which additionally serve as a frame for the backrest, must be set to the correct angle of inclination. To do this, you need to apply markings on two wooden blanks with a length of 900 mm.
The first is the height of the bench - 400 mm. This piece of board does not need processing. Starting from the segment, you need to make a cut of 20 degrees along the entire remaining length of the board, which forms the angle of inclination of the back of the bench. The cuts on the two back legs should be the same both in height and angle. Otherwise, the bench will be skewed.

Step 3. The legs are the first to be assembled in the design of the bench. The distance between the front and rear legs is 280 mm. The legs are connected with a bar, which is cut to the full width of the bench - 500 mm. It is advisable to make a double strapping - top and bottom.
Step 4. After the two sides of the bench are assembled, you can connect them together with boards designed for sitting. Boards are screwed with self-tapping screws to the upper strapping beams. It is desirable that between the wooden blanks there are gaps of equal size - 1-2 cm. These gaps promote air circulation and moisture removal.

Step 5. Strengthening the bench structure. For garden furniture to be stable and durable, it is advisable to strengthen its structure. For these purposes, you need to make the lower strapping along the legs with the help of beams. Two pieces, 1500 mm long, are screwed to the front and back legs of the bench. If there is not enough lumber, you can use one cross-member, which is attached to the lower strapping bars.
Step 6. Bench back installation. The bench is almost ready, the final touch remains - the fastening of two boards that serve as a back. It is recommended to fix the first plank at a distance of 200 mm from the seat. The second is at a distance of 380 mm from the seat.
Step 7. Top coat for garden furniture. To protect wood from environmental influences, it is advisable to use varnish. The impregnation will protect the bench from moisture, mold, and insect pests.
The varnish will give the furniture a beautiful and elegant look. To give the wood shine, you need to thoroughly polish the material, and varnish the blanks several times.

Video - Detailed instructions for making a garden bench


Video - Shop in 6 minutes
Find out some interesting options on how to do it in our new article.
DIY metal garden bench
You can decorate your personal plot not only with wooden furniture. Metal benches are another way to create a cozy and comfortable place to relax. To make a metal frame, it is not necessary to master the hot forging technique.

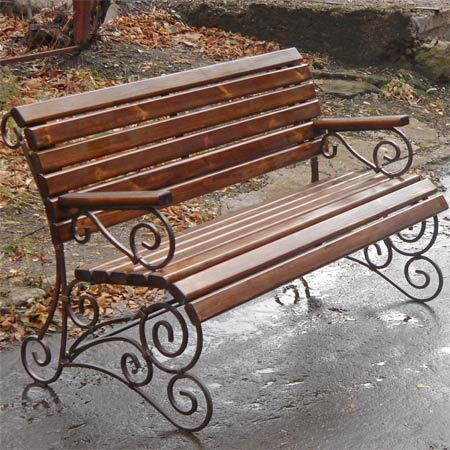
 An example of a bench made of metal and wood
 Cold forging technology can be used, in which a frame made of metal blanks is welded into a single structure. When manufacturing, you can refine it with various decorative elements, unusual inserts and additions.


Tools and materials for making a garden bench by cold forging
- Angle grinder with discs for cutting and polishing metal.
- with a set of electrodes.
- Pipe bending device. It can be a mini-machine "Snail" or a metalwork curved vice, with which you can bend metal according to a template. This device is needed if a complex shape of the back with rounded edges is planned.
- Square metal pipes (30 mm by 30 mm).
- Hot forged decorative elements for design decoration.
- Seat and back material (wood, MDF, plywood).
- Roulette.
- Level.
- Metal primer.
- Protective coating for wood.
Step-by-step instruction

It is rather difficult to make a complex and fanciful design of a bench without experience. But making a simple and durable structure can be done without difficulty.
Step 1. Develop the dimensions and dimensions of the bench. A standard-sized garden bench has a length of 1500 mm, a width of 400-500 mm, and a back height of 800-900 mm. Corner forms of furniture are the easiest to make, so for the first time it is better to try to make the model simpler with your own hands.

Step 2. Seat frame manufacturing. The metal pipe needs to be cut into 4 fragments: 2 x 1500 mm and 2 x 400 mm. All parts are in a rectangle. To make the seat more durable, 2 additional stiffeners can be welded into the rectangular frame.
Step 3. Making legs. The metal pipe needs to be cut into 4 equal lengths of 460 mm. These blanks need to be welded to the corners of the bench. It is recommended to weld additional stiffeners between the front and rear legs.

Step 4. Back manufacturing. Two workpieces with a length of 440 mm and one workpiece with a length of 1500 mm need to be welded together. Then this structure is welded to the finished part of the bench. The backrest should be fastened at an inclination of 15-20 degrees. In this case, it will be comfortable to sit on the bench.
Step 5. To make the back of the bench stronger, you can additionally strengthen its frame with stiffening ribs, transverse or longitudinal.
Step 6. The metal frame of the garden bench is ready. The final work is cleaning all welding seams, polishing the metal and coating the frame with a primer.
Step 7. Manufacturing of back and seat from wood. Wooden boards or beams are the most suitable material for finishing a metal bench. The wood for the back and seat must be carefully trimmed and polished and bevelled. The tree needs to be cut into pieces that can be fastened both along and across the back and seat. It all depends on the length of the material.

Step 8. Using an electric drill, it is required to drill holes in the metal frame of the bench for mounting the wooden trim of the bench. It is recommended to use round head bolts and nuts for joining metal and wood.

Step 9. After the back and seat are bolted to the metal frame, the wood needs to be stained or varnished. This will protect the material from environmental influences.
The garden bench is ready. Due to the fact that the metal pipe is hollow inside, the furniture is not very heavy and can be moved from place to place. Well-processed metal and wood can easily tolerate high humidity and temperature changes, thanks to which a hand-made bench will serve for many years.

 Garden bench for the prevention of spinal diseases: side support, back and front legs, armrest, rectangular frame, bent at an obtuse angle, wooden seat, wooden back, armrest section with through holes, articulated joint, side view Side support, back and front leg, armrest, rectangular frame bent at an obtuse angle, wooden seat with a width less than the width of the seat contour, and wooden backrest, spherically curved upward, section of the armrest with through holes, articulated joint, wooden seat and a backrest in the form of a bar, shifted along the grooves in end positions, side view Wooden seat or backrest attachment point, vertical hole and metal plate with hole


 Relaxing on a garden bench is a pleasure
 Video - Making a garden bench from a metal corner
Perhaps only a classic vegetable garden does without benches, except for potatoes or cucumbers in the garden there should be nothing. But even a small garden can hardly be imagined without benches. The garden is still intended for relaxation and admiring nature, but standing up is not very convenient. Currently, the choice of such structures is quite large; wooden and metal garden benches are especially popular.
Types of garden benches
Regardless of the design and size, the purpose of any bench remains the same - it should give a person the opportunity to sit down, relax and leisurely enjoy the view of a cozy garden. The benches can be classified according to several criteria, for example, by the material from which they are made and by design.
Materials for making garden benches
Several popular materials can be highlighted:
- plastic - the advantages of benches made of this material include resistance to climatic influences, low weight and a relatively low price. There are options for folding structures on sale, it is convenient to take them with you during periodic trips to the country;

- tree - do-it-yourself garden benches, as a rule, are made of this material. The tree looks great in the garden, and in general is considered a classic, and the classics are always in price;
Note!
Wood, even with protective coatings, is much less resistant to, for example, moisture and insects than plastic, stone or metal.
So the wooden ones will be the first to fail.

- metal - as for metal products, 2 options are possible: homemade benches from a profile pipeline or forged. It is impossible to make forged benches from scratch without having blacksmithing skills, the maximum that can be done is to buy ready-made forged sidewalls and then assemble the bench yourself;

- garden benches made of stone- champions in terms of durability. You can fit 1-2 large boulders under the bench, or use purchased marble and sidewalls, the whole question is in the price and in the general style of the site design;

- concrete - the sidewalls can be cast from concrete, and a concrete slab will act as a seat;
- combined options- the most common type is a combination of a metal frame and wooden slats (back and seat). There are options for combining stone and wood.
Note!
The use of wood makes the bench more comfortable.
In cold weather, it is not pleasant to sit on an icy metal or stone; wood is preferable from this point of view, because its thermal conductivity is much lower.
Garden bench design options
At first glance, there is nothing complicated in the design of the bench - 4 legs, a seat and a back.
But there are also more complex constructions:
- a bench without a back is the simplest option, a dubious option from the point of view of comfort, because you won't be able to sit back and relax;
- garden bench with backrest - adding a backrest brings rest comfort to a new level;

- bench with a table - with this option, a pair is installed on one base. This design is optimal for communication in nature;
- bench with a canopy - can be regarded as an analogue of a mini-gazebo. Nevertheless, the protection against slanting rains is weak, therefore, such a design should not be considered as a full-fledged replacement for the gazebo;

- benches created in an artistic style, the main focus in this case is on appearance. Instead of standard sidewalls, for example, figurines of fairy-tale creatures, etc. can be used.
If the bench in your garden is not planned in the form of a large stone or a felled tree trunk, then you will have to spend a little time thinking about the design and calculating the required number of building materials. A correctly drawn up drawing is the main basis of a good shop.
Drawings of garden benches made of wood, and of any other material, must necessarily contain not only a general image of the structure, but also the detailed dimensions of the main elements.

Wooden bench
There are several manufacturing options:
- use large tree trunks as basic elements. A half of such a trunk may well lie on the ground and, due to its great thickness, act as a seat at the same time;

- just dig in a couple of posts (or concrete) and use them as the basis of the structure;
- bar construction is the most common option. It makes sense to consider in more detail an example of such a construction.
As for the sizes, everyone chooses them based on their requirements for the shop, but you can focus on the following values:
- the height of the back most often does not exceed 50 cm;
- the height of the bench, that is, the distance from the surface of the earth to the surface of the seat, is also taken to be approximately equal to 50 cm;
- the angle of inclination of the back is important, it can be taken in the range of 15 - 30ᵒ.

Note!
The price of the bench will not change from this, and the level of comfort can be seriously affected.
If the back is at right angles to the seat, then the back will be constantly tense and you can forget about rest.
The design of a typical wooden bench looks like this:
- the sidewalls are assembled from wide beams (as a rule, the sidewalls are connected crosswise with a selection of grooves at the junction). The part of the cross, which will also be the basis for the back, is made longer by the height of the back;

- if the width of the bench exceeds 2.0 m, then to ensure rigidity, the same structure as on the sides must be placed in the center, otherwise the seat will bend strongly under the weight of a person;

- in one piece, the sidewalls are connected by square beams. The load on them will be small, so a small section can be used;
- after that, the garden benches and benches are sheathed with wooden planks. It is not necessary to make the sheathing solid, you can make gaps of 1-2 cm between the individual strips;
- at the final stage, it remains only to cover the tree with protective compounds.
Metal and combined benches
Purely metal structures are not so common. The fact is that the weight of such a structure turns out to be quite large, and the cost of the product rises. Therefore, the seat and back are usually made of wood.

Combined options can be made by hand, we are talking mainly about structures using a profile pipeline.
All work comes down to the implementation of several points:
- the side parts of the frame are made of pipes. The best option can be considered one in which the entire sidewall is made of one pipe. Of course, you can use a welded joint, but this complicates the work;

Note!
A homemade wood and metal garden bench will most likely require pipe bending.
For this, either a pipe bender or other methods (for example, filling the pipeline with sand) and subsequent manual bending are used.
- when sheathing the frame with wooden planks, a bolted connection is used.
In the case of forged structures, everything is much simpler - forged parts are bought, and the gardener can only choose a suitable tree and sheathe a metal frame with it.
Stone benches
When it comes to how to make a garden bench out of stone or concrete, it all depends on the general style of the future design.
Several options can be distinguished:
- a small bench can even be made of small stones. In this case, oblong boulders are used for the supports and flat stones for the seat. Most often, such designs do without a back;

Note!
It is allowed to use a little mortar in such structures so that the connection of the supports and the seat is more durable and reliable.
The solution should not be visible.
- The bench looks original in which both racks are made of masonry (using natural stone), and a heavy marble slab is simply laid on top. It is possible, even when laying the supports, to concrete the frame for the back in them, and make the back itself forged.
Unusual design
Author's benches should be singled out in a separate category, it would be more accurate to call them a work of art than a simple device for relaxation. As for the material, the use of wood gives the greatest scope for creativity, of course, in this case, detailed drawings of benches for the garden are not needed, you can only estimate the overall dimensions of the structure.
The following options deserve attention:
- a circular bench - a common design, but it is arranged around a tree, an emerald-green lawn looks unusual in the place of the usual seat;
- a bench can be arranged between 2 flower beds;
- a shop, arranged, for example, in the mouth of an animal, looks curious;
- stone articles can be decorated on both sides with graceful figurines;
- you can make a bench in the form of a huge bunch of bamboo, in the central part of which there is a cutout for a seat.

In conclusion
Garden benches are a great testing ground for creativity. Despite the abundance of standard designs, you can always stand out and come up with your own shop design. Of course, the flight of thought should not compromise comfort. The information provided will help you navigate the mass of standard benches and offers several unusual options.
The video in this article shows an example of making a garden bench.