Finishing repairs or moving to a new apartment, many inexperienced builders ask themselves: a how to hang a chandelier to the ceiling? Let's make a reservation right away that this is difficult only at first glance. But after mastering the initial skills of fixing the chandelier, the problems will disappear by themselves.
Note! Of course, you can always go to the housing office and call an electrician to your house who will do everything for you, but this option is definitely not ours (we do everything with our own hands!), Especially in such a simple matter.
The electrical aspect of the question

You most likely saw a hole in the ceiling, from which wires stick out (usually three - two phases and one zero). First, determine "xy from xy", for which take an induction screwdriver and touch the wires one by one. And if the light in the screwdriver lights up, then the cable is phase, and if not, then, accordingly, zero.
Note! Use a screwdriver to touch only the bare part of the wire, and in the absence of such, perform a stripping, having previously de-energized it (using a switch or a shield in the entrance).

Then do the same with the chandelier - determine by ringing or "by eye" all the wires. If there are several lamps in the chandelier, then put the switch on two keys and make sure that when one button is pressed, only a part of the lamps is lit, and when the second is pressed, the entire chandelier is lit. This can be done by a special connection of wires using terminal blocks, shown in more detail in the diagram.
Video - Correct connection of the chandelier
Having decided on the wires, you can hang the chandelier: zero to zero, phase to phase.
How to hang a chandelier correctly?

Now that everything is clear with the "electrical" question, you can hang the chandelier. This can be done in one of two ways - on a hook or on a decorative strip. Let's talk about each of the methods.
We hang the chandelier on the hook

Take and drill a small hole in the ceiling. If there is such a hole, simply insert a plastic dowel there and screw in the previously prepared hook. Connect the wires, wrap the joints with insulating tape, cover everything with a decorative "cup" (it should be included in the kit) and make a test switch.
We hang the chandelier on the decorative strip

To hang the chandelier in this way, you will need a hammer drill again. First, attach the strip to the place of the planned attachment and mark the places for the holes. Make holes of the appropriate diameter, insert plastic dowels there (only be sure to grooved!).

In the next step, take self-tapping screws or screws and use them to screw the decorative strip to the ceiling. As in the previous version, connect the pre-prepared wires, fix the chandelier and cover everything with a decorative "cup".
Video - Installing a chandelier
This concludes the lesson, now you know how to hang a chandelier is correct and what is needed for this. And remember about safety precautions. Happy work!
 How to choose the right chandelier
  How to choose the right gas water heater
  How to properly apply liquid wallpaper to the wall?
The choice of lighting devices for an apartment must be taken responsibly. When purchasing a lamp, first of all, you need to figure out how to properly mount the chandelier to the ceiling and correctly connect it to the mains.
In order to cope with the task and do everything correctly, you need to prepare the tools so that nothing distracts the master during the installation of the chandelier on the ceiling:
- you need a stepladder of sufficient height (you can get by with a table);
- hand electric drill or hammer drill;
- pliers and nippers or side cutters (against electric shock, handles must be insulated);
- various screwdrivers (including those with an indicator function);
- coil of electrical tape;
- several mounting blocks (with a margin) for wire clamps;
- the necessary fasteners on which the chandelier will be installed on the ceiling.


 Chic chandeliers
Before fixing the ceiling chandelier, be sure to read the instructions for connecting it to the mains. Usually it gives a detailed description of all operations, so there should not be any particular difficulties for a master who knows a little about electricity.
Types and methods of fastening
When choosing your lamp, even in the store you need to pay attention to the mounting methods.
Modern ceiling lights come with several suggested chandelier mounts:
- a loop on the fixture of the luminaire, which allows it to be mounted to the ceiling hook. This is one of the main types of ceiling chandelier mounting. In this case, the base should be as strong as possible, for example concrete floors.

Hook fixing diagram

- fastening the ceiling chandelier to a bracket or a special mounting plate. With such a fastener, the load from the weight of the luminaire is divided into several different points. The bracket is attached to the ceiling with dowels with self-tapping screws screwed into them. In this case, the weight of the chandelier should not exceed 1.5-2.0 kg.

Mounting plate mounting scheme

- a cross or double perpendicular bar allows you to suspend a luminaire that is adjacent to the ceiling, for example, a ceiling chandelier. The cross bar is not much different from the bracket, except that the fastening is carried out at a greater number of points and the lighting device can have a large mass.

Mounting on a cross-shaped bar is used, as a rule, when installing square luminaires

- reliable I-beam platform for mounting a massive heavy chandelier. Allows for fastening at several points.

The scheme of fastening a heavy chandelier to the platform
Installation work on hanging the luminaire usually does not cause much difficulty. As a rule, dowels with self-tapping screws are used to fix the chandelier to the ceiling. The diameter of the self-tapping screws must correspond to the size of the hole in the fastening strip; in length they must not be shorter than 4 cm and no longer than 6 cm.
Having considered the types and methods of fasteners, you can decide how to install the chandelier on the ceiling correctly, without unnecessary and unpleasant consequences.
Mounting with a ceiling hook
Usually, the hook for fixing the lighting fixtures is mounted even during construction work. In this case, before you hang the chandelier on the ceiling, you need to check its strength.

Mounting hook
To check, for a while, a load corresponding to the weight or slightly heavier than the chandelier is suspended from the installed hook. If the fixed load has not shifted, you can safely hang the chandelier in place. If the fastening hook has shifted, and even more so fell out, then you can carry out the installation work yourself.

Chandelier Weight Test
This requires:
- make the desired hole with a puncher (if it did not already exist);
- a correctly selected metal anchor or a folding spring dowel with a ring is inserted into it. It should fit snugly against the inner surface of the drilled hole;
- it is enough to screw a strong self-tapping hook into the wooden ceiling.
This is the simplest method to describe how to attach a chandelier to the ceiling.

Schematic fastening of the holding element
If the ceiling is finished with plasterboard or a stretch canvas is installed, the work on attaching the chandelier to the hook may become more complicated.
Plasterboard sheets are quite strong, so a small lamp can be attached directly to the material itself, but it is worth considering small nuances:
- the weight of the attached lighting device should not exceed 6 kg;
- it is worth paying attention to the fact that when replacing lamps, you can damage the sheets or accidentally touch a low-hanging lamp with your hand.
Therefore, when installing a ceiling made of plasterboard sheets, it is necessary to think over the lighting of the room in advance, and make a hole in the material under the mounted hook.
If this has not been done, then you can hang the chandelier on a spring dowel or a special butterfly installed in the drilled hole. It will be necessary to tighten the dowel with a special nut, and tighten the butterfly strut with a self-tapping screw until it clicks. All fasteners must be completed with a hairpin or hook to which the chandelier is fixed.

One of the options for attaching the chandelier, if the ceiling is made of plasterboard
When installing a stretch ceiling, you need to take care of how to fix the luminaire in advance. It must be remembered that a stretched canvas cannot serve as a fastening base for a chandelier. When installing a stretch ceiling, workers, before cutting a hole for attaching a lamp, glue the thermal ring in advance. If this is not done, then it will be impossible to hang the chandelier from the ceiling, since the stretched canvas will tear. Connecting wires are led out through the cut-out hole.
With this option, you first need to hang the chandelier on a hook, and then connect the electrical wires, after which the attachment point is covered with a decorative lamp cap.

Mounting scheme for a stretch ceiling
Video instruction for mounting a chandelier on a hook
Mounting with a fixing strip
Before you can fix the chandelier to the ceiling using a fixing strip, you must:
- try on the place where it is supposed to hang. In this case, the decorative components of the luminaire, covering the attachment point and wires, must fit snugly to the ceiling;
- if this is the center of the room where the mounted hook is located, then it must be bent, but not cut off. Perhaps in the future, with the subsequent replacement of lamps, it will still come in handy.

Trying on the bar for a future position
- marking is made for the fastening of the strip. To do this, the bar is applied to the ceiling and outlined with a pencil so that the attached elements do not interfere with the connection to the mains. Drilling locations are indicated. Plastic dowels are carefully driven into the drilled holes. The plastic should be ribbed, which will prevent it from loosening over time and starting to fall out of the nest;
- using screws or self-tapping screws, the fastening strip is attached to the ceiling.

We fasten the bar and bend the hook (it may still be useful in the future)
- after installing the connecting wires, a bowl or other decorative element is applied to the installed strip, aligning the connecting holes.

We connect the wires
- twist the entire structure with decorative nuts, after which you can screw in the bulbs and install the shades or other components of the lamp.

Completion of work - finished chandelier in the interior
It is worth noting that it can be difficult to hang a chandelier to the ceiling alone. It takes one more hands to connect the wires. Therefore, when connecting the lamp to the mains, one person holds the chandelier, the other is busy with the wires.
If stretch ceilings are installed, the base for fixing the planks must be installed in advance. It can be an ordinary wooden block of the required thickness, which, before installing the canvas, is attached to the ceiling, and then a strip is mounted on it.

Stretch ceiling bar
It is necessary to consider how to properly install the lighting fixture on a plasterboard ceiling. It has already been noted that with a low weight of the chandelier, it can be fixed directly onto the sheets. With a more massive version of the luminaire, you need to take care of an additional substrate in the form of a bar or a metal profile in advance, on which the mounting plate will be attached.
You can correctly hang the chandelier on a cross or I-beam platform in the same way as in the case of a mounting plate. It is worth considering that this option provides for heavy lamps, so you need to take dowels and screws of greater length and diameter.
You can easily mount a chandelier on the ceiling with your own hands, the main thing is to prepare the necessary material and tools, study the attached instructions for connecting and constantly have an assistant.
Video instructions for installing a chandelier on a bar
When dealing with a concrete ceiling, many people prefer to contact specialists so that they can quickly hang a chandelier for them for a fee. Such people are stopped by a large number of bolts and fasteners, as well as the need to screw in the hooks and connect all these elements to each other. But in fact, there is nothing difficult in attaching a chandelier to the ceiling, and everyone can handle it on their own!
Before starting work, you need to get all the necessary tools. There is nothing specific in this set, and all appliances can be found in every home.
List of tools required for work:
- Screwdriver;
- Drill or hammer drill;
- Key for twelve;
- Screwdriver with indicator;
- Fasteners;
- Pliers;
- Terminal block;

You will need a twelve key when assembling the chandelier itself. And with the help of an indicator screwdriver, you will determine the place where you need to connect the wires. A standard screwdriver and pliers will be needed when attaching the chandelier, and a terminal block when separating the wires.
By the way, the light bulbs blinking when the power is off is a problem of just the same incorrectly separated wires.
How to remove a chandelier from the ceiling
However, if you are making repairs, and not equipping a new apartment, then most likely the first thing you will encounter is an old chandelier that needs to be replaced.

An old chandelier can be removed from the ceiling in several steps:
- Turn off the electricity in the house;
- Prepare terminal blocks, electrical tape and an indicator screwdriver;
- If the lamp has additional elements (glass beads, shades), then try to remove them in advance.
- Unscrew the cap behind which the chandelier mount is hidden;
- Now you have a mount in front of you: either a bar or a hook.
- Disconnect the wires by spreading them to the sides;
- Wrap bare wires with electrical tape.
After that, you can already remove the chandelier itself and get ready to install a new one. As you can see, there is nothing complicated here, and you can cope with everything on your own.
If your chandelier is mounted on a bar, then you may not be able to immediately separate the wires. In this case, loosen the bolts slightly with a screwdriver.
Fixing the chandelier to the ceiling
As we mentioned above, there are different types of chandelier mounts. And if you remove the chandelier from them - the task is almost equally simple, then their installation, on the contrary, can be very different.
There are two main types of fixing chandeliers to the ceiling:
- Hook;
- Plank (bracket).
1.jpg)
The hook-shaped mount has been used since the very first chandeliers, and on the Soviet market it was generally the only mount for a chandelier. That is why the owners, when buying a new chandelier, are surprised that there is no hook and it is not clear how to fix the chandelier.
If you did not have a hook in the kit either, then check to see if there should be a mounting plate somewhere. Fastening with such a bar (also called a bracket) is modern and is considered more reliable in operation.
However, the hook has not gone out of use, and many domestic firms still produce chandeliers with hooks only.
Attaching the chandelier to the ceiling with a hook
This method of fastening is considered more difficult than fastening to the bar. And you should be careful: if you do not secure the chandelier firmly enough, then at any time it can collapse to the floor and break.
In addition, there are two types of hook attachment:
- With standard thread;
- With anchor bolt.
The first version of the hook is suitable only for small-sized chandeliers, the weight of which does not exceed three kilograms, otherwise the mount may not withstand the load and the chandelier will fall.

If your chandelier is heavy, weighs four or more kilograms, a special anchor bolt should go to it, which can withstand much more weight.
If you have a large chandelier, and anchor bolts went to it, then installation will be a little more difficult. You also need to drill a hole in the ceiling, and then screw in the anchor bolt until it stops, on which the chandelier is already hung.
Please note that the anchor bolt must be inserted all the way, only then there is a guarantee that the structure will not fall to the floor one day!
How to attach a chandelier to the ceiling without a hook
If you did not find a hook in the kit with the chandelier, then it is attached using a special mounting plate. Such a bar can be easily purchased at any hardware store. The price will not surprise you, since such devices cost very little.

If you change the chandelier to a new one, then you will have a hook in the ceiling from the old one. Be sure to remove it before installing the bar.
Fastening the chandelier strip to the ceiling
After you have removed the hook from the old chandelier, you need to move on to installing the metal strip.
You can set the bar in a few steps:
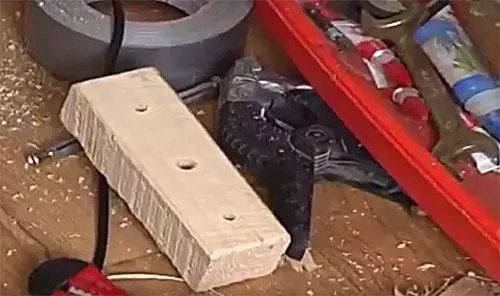
- Drill two holes in the ceiling;
- Drive dowels into the holes;
- Insert self-tapping screws into the bar and screw them into the dowels;

After that, the metal bar is completely fixed to the ceiling, but further work on the installation of the chandelier may require an assistant, since if you are installing the chandelier for the first time, you may not be able to cope alone.
Do not neglect the use of quality wall plugs. Thanks to them, the mount becomes stronger, which means higher safety in the room.
How to hang a chandelier from the ceiling
After you have secured the hook or plank to the ceiling, figured out the structure of your chandelier, perhaps even watched an instructional video, it's time to move on to installation.
As we noted above, it is best to find an assistant who, during installation, will hold the chandelier in his hands at a convenient distance for you, and then help you move it to the wiring.

While the assistant is holding the chandelier, you need to:
- Connect the chandelier wires to the wiring;
- Install a protective cap;
- Fasten the hood firmly with a screwdriver.
Before starting to connect the chandelier, once again make sure with the wall switch that the electricity is off.
This completes the installation of the chandelier.
Installing a chandelier on the ceiling with your own hands (video)
As you can see, installing a chandelier to the ceiling with your own hands is a simple process, but it may require special tools and outside help. The main thing is to observe safety precautions and install all fasteners as firmly as possible.
Laziness made a man out of a monkey. Tired of climbing a palm tree for a banana - the monkey picked up a stick. Tired of the hostess always painting and greasing the cracks on the ceiling - I ordered it. No hassle - beautiful, smooth, hygienic. There is only one small but vital question left: how to hang it on a stretch ceiling? On the one hand, it seems like you shouldn't fool yourself, for such work it is easier to invite specially trained people. But on the other hand, how do you know if they did everything right and if, God forbid, what troubles will happen after such an installation? After reading this material, you can not only control the employees, but also install the lighting device yourself.

Stretch ceiling chandelier requirements:
- the stream of light should be directed downward or to the side, but not upward;
- it is desirable that the shades have a closed shape;
- the distance from the plafond to the ceiling must be sufficient to prevent heating of the material;
- with a standard room height, the tension structure already lowers the ceiling, you should not install a bulky chandelier either;
- the luminaire should have a long suspension, sufficient to anchor to the base behind the stretched canvas.
Ceiling chandeliers for stretch ceilings can be equipped with different ones. When choosing this or that type, take into account the specifics of the contract with PVC:
| Lamp type | Description |
| Incandescent lamp | The low cost of these devices hides a high power consumption and high-temperature impact on surrounding objects. These lamps are least suitable for synthetic ceilings. The minimum distance from the lamp to the PVC surface is 40 cm, and then provided that the device is not more powerful than 60 watts. The solution may be to install reflectors between the film and the lamp, but is there any point in blocking such a structure if there are other options? |
| An excellent option for a chandelier under a stretch ceiling. These devices are distinguished by their high efficiency and long service life. Such devices heat very little and pose a danger to PVC film. Lighting can be warm or cool, depending on your preference. | |
| Halogen | Halogen lamps do not heat very well, but with prolonged use, this heat is enough to deform the stretched material. A 40 W lamp should not be closer than 40 cm to the ceiling. |
Designer advice! A chandelier in a contrasting color looks best on a stretch ceiling. On black - white or silver, on light, respectively, dark metal.

Basic requirements for fixing a chandelier
Fastening a chandelier to a stretch ceiling should be not only durable, but also aesthetically pleasing. Suspended devices fixed on a hook or mounting plate are suitable for stretch ceilings. Overhead chandeliers, which are attached tightly to the ceiling on an overhead panel, are not suitable.
Important! The hanging height of the chandelier must be sufficient, taking into account the distance between the base and the stretched material.
Alternatively, you can consider the issue of taking out the hook for fastening below the level of the PVC film, but then this moment must be provided in advance, even before the pulling procedure.

A little about the correct location of the chandelier for stretch ceilings
The height of the chandelier placement depends on several factors:
- ceiling height;
- ceiling covering;
- the purpose of the premises.
How to hang a chandelier on a stretch ceiling in living rooms? There must be at least two meters from the floor to the bottom of the appliance. This will eliminate the risk of accidentally hitting it when moving around the room. But it is better if this distance is greater, especially when the ceilings in the room are low.

The devices, which are compact in height, are also suitable for halls. This design will not interfere with opening doors. In addition, keep in mind that in the hallway, people often raise their hands to take off their hats or fix their hair, or close their umbrellas. So the higher the light is, the better.
Compact placement is relevant and. Here there is a risk not only of touching the structure with your hands, but also accidentally hitting it with a stream of water from the shower.

If the ceilings in the room are higher than 3 meters, you're in luck: you can choose any shape and place it anywhere, even above. For example, it is logical to hang a lamp not in the center of the room, but above the dining group. In this case, it is organized for the working area.

Advice! Classic ceiling luminaires have a chain suspension. You can adjust its length by removing and adding links.
The most difficult question is how to fix the chandelier to the stretch ceiling at the location of the "second light". The peculiarity of the location requires a powerful luminous flux that can spread over two, or even three floors. In this case, take a closer look at structures from several tiers or a falling cascade of lamps.

For your information! Electrical installation rules recommend that you select hooks for lighting fixtures that can withstand five times the weight of the chandelier for at least 10 minutes. After removing the excessive load, no damage should remain on the mount.
Thus, the choice of a chandelier must meet not only the design requirements, but also the rules of safety and ease of use.
Tools for the job
The main tool in this matter is your confidence in your own capabilities. Self-installation of a chandelier on a stretch ceiling is not so much difficult as it is troublesome and requires utmost care. And there are tools for work in almost every home:
Basis for fixing the chandelier
There is a distance between the concrete or wood ceiling and the PVC stretch material. It can be different, depending on the characteristics of the room. If initially the ceilings have a defect, but with the help of a tension structure, it is easy to fix it. It turns out that to fix the chandelier, the empty space needs to be filled with something, to create a rigid base.

If the distance is large, a thick bar is indispensable, you will have to make a frame. In this case, the place of perforation of the film must be reinforced with a gasket, it will additionally protect the PVC from the temperature effects of the lamp. Such gaskets are made in the form of rings, inner and outer. They are hidden behind the decorative frame of the wiring and are completely invisible.

Do-it-yourself options for installing a chandelier on a stretch ceiling
If you have already decided to take up the installation of the lamp, take care in advance to prepare the base. After the ceiling is stretched, you will not have the opportunity to mount the stand, you will not have to do the wiring. Usually, the master asks in advance where you plan to hang the chandelier. You can prepare the base yourself and bring the wires to the right place in advance.
There are several ways to fix the chandelier. Let's briefly consider the main ones.
With a hook
The hook is the most common and common way to hang a chandelier. The only thing you have to do is adjust the length of the hook to the height of the tensioning fabric. If the hook was installed earlier, most likely, it will have to be replaced, since the stretch ceiling will "steal" at least 3 ÷ 5 centimeters.

For fastening, a hole is drilled in the concrete ceiling, a dowel is inserted and a threaded hook on the leg is screwed into it. If the distance between the canvas and the ceiling is too large, a bar is attached to the ceiling and a hook is screwed into this base.
Advice! After installing the stretch ceiling, all wiring will be hidden from your eyes. For your own peace of mind, place it in a protective casing.
When attaching the chandelier to the hook, make sure that the decorative cup fits snugly against the ceiling

With a mounting plate
Plank fastening is found on modern luminaire models. The strip itself is a metal plate with holes for fasteners. This strip is attached to the prepared base directly through the ceiling sheet. You only need to cut a small hole for the wiring.

Important! Be careful not to damage the wiring cord when screwing the bar to the bar.
To facilitate the work and not damage the lighting device, it is disassembled before installation. It is necessary to remove shades, lamps and hinged decorative elements.
With a cross bar
Mounting on a cruciform bar is not much different from hanging on a regular bar. Cruciform fasteners are commonly used for heavy chandeliers. The only caveat is in preparing the foundation. For obvious reasons, the bar is not suitable in this case.

Drill a hole in this platform for electrical wiring. Metal "legs" are used to bring the platform to the height of the canvas.
How to choose a dowel for attaching a chandelier
For interior work, use plastic dowels. Considering the possible external temperature effect of the lighting fixture, it is preferable to use nylon-polyamide inserts.
If the ceiling in the room is concrete, spacers will be required. In the case where the ceilings are multi-layer structures with voids, it is better to use dowels.
The thickness of the element depends on the expected load. The suspended structure tends to pull the dowel out of the wall, so it is important that it has spacer antennae and notches that additionally hold the material in the skin.

To more reliably fix the element in the hole, you can use construction glue, they lubricate the dowel with it before driving. Do not try to screw the self-tapping screw thicker, it can split the liner. The use of spacer screws is considered correct.
Advice! A chandelier weighing 5 ÷ 10 kilograms is attached with an impact dowel with a diameter of 8 mm and a length of 80 mm. To complete the task, you will need at least 4 dowels.
Master class for DIY: how to fix a lamp on a stretch ceiling
And now directly about how to fix the chandelier to the stretch ceiling. As already mentioned, it is necessary to follow a clear algorithm of actions and be puzzled in advance by the location of the lighting device and the preparation of the base.
We offer you a small master class on how to attach a chandelier to a stretch ceiling:
| Photo | Description of work |
 | The first step will be to mark the location of the lamp and pull on the cord to indicate the height of the canvas. The cord is pulled from the frame through the entire room. |
 | A bar is attached to the main ceiling at the location of the chandelier. To do this, holes are drilled in the ceiling, dowels are inserted and the base is screwed in with self-tapping screws. |
 | There can be several bars - depending on the height to which you need to bring the fasteners, or you can use metal "legs", which are easily adjustable in height. It is important to sand well the surface of the bar, which will be in contact with the canvas. |
 | The wiring is passed under a bar or between two elements. So it will not stretch in case of an unforeseen situation. |
 | To accurately bring the surface of the base to the level of dense, underlay elements are used. After stretching the PVC material. |
 | A special adhesive for PVC is applied to the thermal ring for the hole. |
 | Next, you should feel the base with your hands and glue the ring in the center directly onto the canvas. It takes time for the glue to dry. |
 | A web is cut in the inner part of the ring. Be extremely careful not to damage the wiring. After that, the wire for connection is released into the hole. |
 | Feel the position of the block and position the mounting plate correctly. |
 | Screw on the mounting plate with self-tapping screws. Remember to insert the studs first. |
 | Place the chandelier so that the studs enter the designated holes. Fasten the luminaire with decorative bolts. |
How to decorate the fixing point of the lamp
If you have not forgotten to use a thermal ring, the fixing point of the chandelier will look neat anyway. A small hole will hide behind the base of the fixture. But if the interior design requires the creation of some additional element, use lightweight polyurethane sockets. They imitate
A chandelier is both a lighting fixture and an important decorative element, so many of them are quite heavy and complex in structure. The installation of the lamp becomes an important stage in the repair, because even the safety of the inhabitants of the room will depend on the reliability of its fastening. To understand how to attach a chandelier to the ceiling correctly and with minimal cost, you need to know what kind of lamps for rooms are and how the methods of their installation differ.
Omitting the details of the decorative differences between chandeliers, let us dwell on what is important for the installation process: classification by type of fasteners. On this basis, two main types of devices are distinguished:
- ceiling mounted with hook;
- cantilever, which are attached to brackets or special strips.
Fastening the chandelier to the hook and to the bar (bracket)
Heavier models belong precisely to the first category, since only a hook can hold massive structures reliably enough. The same models, which are lighter, can be conveniently mounted on different types of strips that can be attached to false ceiling profiles.
Types of fasteners
How are the different mounts structurally arranged? The hook is most often already installed in the ceiling, however, if it is not there or it is not reliable, you can make it yourself. There are several types of designs that are used for this purpose, one of which is the collet pin. It is a collet, which is practically used as a dowel, and a stud, replacing the self-tapping screw, on which the hook clings.

Types of collet pins
You can use another option: a metal anchor or a self-tapping hook. When the chandelier is fastened to a drywall ceiling in this way, a chain can also be included in the structure. There is also a variety of hooks that are used to suspend light fixtures from plasterboard ceilings and are called "butterfly" for the drop-down structure, which prevents the fasteners from falling out of the hole in the profile.

Chandelier ceiling hook
As for the mounting strips, they are fixed with dowels and screws. Long screws can also be used. Console chandelier models are often mounted using a butterfly dowel, which opens when fastened with a self-tapping screw and can be either metal or plastic.

Dowel "butterfly"
Stages of mounting a chandelier on a hook
When thinking about how to attach a chandelier to the ceiling with a hook already installed, first of all check its strength: hang a load of the same weight as the lamp you have chosen, or pull it hard. An unreliable hook that falls out or wobbles must be replaced. It is important to remember that fasteners for heavy chandeliers are only mounted on the main ceiling, since no type of suspended drywall can withstand such a load. To mount the collet, a hole is drilled with a perforator, into which the fasteners are inserted. A pin is screwed into the collet, on which the anchor hook is hung, or it is screwed directly into the collet.

Installing the collet to the ceiling
A hole in the drywall is also needed for driving a metal anchor into a concrete base or screwing a self-tapping hook into a wooden base. To overcome the distance separating the base ceiling from the hinged one, a chain is used: it is hung on a hook and the chandelier itself is attached to it.
With regard to light fixtures that are mounted on plasterboard ceiling profiles, the fastening is carried out as follows: a butterfly hook is inserted into the hole in the plasterboard, which corresponds to the hole in the ceiling frame profile, which automatically opens and locks in place.
The principle of "opening" and adopting a T-shape also applies to the "butterfly" dowels, on which the console lamps are mounted. At least two such dowels are required. They are inserted into the holes in the ceiling and profile and fixed with a self-tapping screw, after which they are automatically fixed.

Butterfly hook mounting
Installing the mounting plate
Such fasteners are mounted on a plasterboard ceiling, which is not designed for heavy loads. Therefore, in order not to damage it, you need to strengthen the part of the coating where the lamp will hang. Even at the stage of installing the frame, you should decide how to attach the chandelier to the ceiling, and use one of the reinforcement options. For example, you can install two parallel profiles (at the same distance from each other as the holes in the plank) or build a square or rectangle from them (again, in accordance with the dimensions of the chandelier fixture).
First, you need to correctly mark the places for the holes in the ceiling: they must coincide with the places for the screws on the strip. Dowels are inserted into the ceiling holes, to which the strip is screwed. In addition, there may be a hook in the ceiling that you do not need, but you should not dismantle it: if you change the chandelier, it may still be useful to you. The lamp itself is attached to the bar with screws.

Fixing a strip for a chandelier
There is also a very simple option that can be used for light, small chandeliers. It consists in fixing the strip to the profiles with long self-tapping screws. For heavier structures, as already mentioned, it is possible to mount only on the main ceiling, concrete or wood.
So how do you hang a chandelier from the ceiling? First, you need to evaluate the lamp itself: its weight, type of attachment, size. Moreover, this must be done even before the installation of the suspended ceiling, so that it is possible, if necessary, to install the necessary reinforcing structures.
Then the necessary preparatory work is carried out, the type of fastening material is determined and the installation is sequentially performed. When the mounts are installed, you can connect the luminaire to the mains.
