Decoupage - Popular decoration technique designed to decorate absolutely any items.
Using the decoupage it is possible to transform even old furniture so that she continues to decorate the interior. In the very beginning you need to think about all the details so that they harmoniously looked at each other.

How to change the old furniture items with decoupage
The main idea of \u200b\u200bdecoupage is to make decorations and drawings on various surfaces, accounted for one harmonious composition.

The decoration with this method can be the Savior for the old furniture, which for many years decorated the house.

Soviet furniture is especially interested in this regard. She is a find for the designer.
After all, with the help of a decouphage, Soviet furniture can be transformed beyond recognition. It will be perfectly fit into modern life.
This technique can use many materials:
- Stencils;
- Napkins;
- Various stickers;
- Pictures and images;
- Textured paper.

The composition of the image for outdated furniture needs to be chosen based on the style of the room's interior, where this furniture will be.

Decoupage of furniture does not take a lot of time and effort. The main thing is to include fantasy and perform all actions in order. Special paper for decoupage is very fragile, it can be easily damaged or tortured.
Normal office paper will also be combined for decor. You can pre-print your favorite pictures.

Multilayer paper napkins that are available to everyone can also become suitable for decorating.

The drawings should be applied very carefully. It is better to smooth out them with a sponge or cloth so that the air falling into the folds of the paper came out.

Decoupage of furniture with tissue with your own hands
The fabric is a beautiful material for decorating decoupage technique. Especially wooden furniture, decorated with cloth looks very unusual. Such directions in decorating is very popular.

In order to decorate the desired subject in this way the following materials will be needed:
- Sponge;
- Acrylic varnish;
- Cloth with flaps;
- Brushes;
- Glue.

A solvent will be needed to remove the solar paint from the furniture item. The grinding skirt is treated with the entire area. After the furniture is covered with paint from acrylic or ground coating.

Glue for fabric and furniture should be different. Fabric flaps can be both multi-colored and monophonic. The main criterion is the idea and fantasy of the author.

For a while it is better not to touch the fabric to give her the opportunity tightly attached to the surface.


If we cover the cloth with glue, it is better to stick. When all the tissue dry, a transparent varnish is applied. Varnish must dry completely.

Decoupage for beginners
There are many different information for people who have recently decided to decapage.

To redo its furniture just started their way in design is not difficult, as it may seem at first glance. Start better with the most elementary equipment - decoration with paper napkins.

In the search for inspiration for decoupage it is worth viewing the beds, cabinets, bedside tables, on the garden benches and many other things.

In order for the decoupage to bring the desired result, the preparatory procedure should be done.


In the old furniture often there are many cracks and clicks. To get rid of them and make the surface with absolutely smooth, you will need to put the grout, which is filled with all the cutters in the furniture.

Sanding paper will help polish irregularities. Another layer of primer will be the final phase of preparation.

Images are glued on the furniture and coated acrylic after complete drying.

Very original fits in the surrounding space furniture for the garden, decorated with decoupage technique.

Decoupage is able to transform furniture beyond recognition
Possessing decorating skills with the help of decoupage, you can no longer throw out your inappropriate for the use of furniture. After all, outdated models will be suitable for decoupage, and the newest.


Decoupage will help make your furniture:
- Original;
- New;
- Remove cracked on furniture.

If you follow all instructions, you can make sure the effectiveness of the equipment. Many masters using this technique create excellent interior items, updating already familiar furniture.

There are several options for decoupage techniques:

The simplest decoration

Its meaning is that the image is cut out of the napkins and paste on the finished area.

After that, the image is covered with acrylic varnish.

Reverse decoupage

Reverse decoupage is needed for decorating glass items.

The drawing is glued face side to the surface of glass furniture.
Art Decoupage

This is a whole composition. After all, some components have to be applied by the designer manually.

Here can be used both fabric and many beautiful items.

Volumetny decoupage

Application on the bulk surface differs from the usual application.

You need to draw every element on the previously glued napkin.

Photo of examples of decoupage of furniture


Original decoupage furniture with napkins do it yourself: 9 steps
Thanks to a wide variety of napkins, they are great for the execution of decoupage on the furnitureThis branch in decorative work makes it possible to make interior items with their own hands much more interesting and more spectacular, and also refresh the room, without spending a lot of money. To try yourself in a similar decor, you do not need to spend the fabulous amounts for the purchase of necessary materials, everything is on hand, you only need to create and learn.
Simple decoupage of furniture napkins: master class
So:
- First of all, it is necessary to come up with the design of the subject with which experiments will be conducted.
- Then you need to prepare the necessary materials - carved drawings from napkins, special glue and varnish.
- Getting Started, first you need to carefully sand the desired surface, this will allow the drawing to lie correctly, without leaving air bubbles and extra lacquer on the product.
- Then you need to cut the desired fragments from the napkins, removing the extra layers of paper, and leaving only the top, with the image itself.
- The next step is to cover furniture with a putty, allowing to achieve a smooth and monophonic surface, on which the selected drawing will look great.
- Then it is necessary to put the picture on the file, and thoroughly wrap it with glue.
- Next, you need to gently shift the drawing using the file to the prepared surface, carefully smoothing it and kicking the fine air bubbles.
- Only after its complete drying, it is necessary to cover water-based varnish. The prerequisite is to apply at least 5-7 layers, waiting for the complete drying of each.
 Topics of napkins should be harmoniously combined with the style of the interior, in which the furniture decorated in the decoupage technique will be placed
After the final stage, you can use the product to be destined, admiring your creation.
The doors decorated in the decoupage technique will look interesting.
For this masterpiece will be required:
- Prepare a work surface, previously cleaned the product from paint or varnish, as well as thoroughly sanding it with sandpaper of different stiffness, to achieve an ideally smooth surface.
- Those parts that should not succumb to processing must be sealed with a protective tape or film so that paint or varnish can be hit.
- The next step is the primer with paraffin.
- After this processing, white acrylic paint is applied, which makes further color treatment more saturated.
- Then the product is covered with acrylic paint the color desired color.
- If napkins are used for work, they are pre-soaked for a few seconds, and only then placed on the furniture. With a cloth or wallpaper come differently - they need to immediately stick to the surface.
- Then the product is covered with a layer of glue and remains until complete drying.
The final step is to apply a certain number of lacquer layers, allowing to keep the drawing during operation and creating the effect of a lacquered surface.
Decoupage furniture with napkins do it yourself: photo and necessary materials
The choice of equipment for decoupage with napkins depends on some factors.
Namely:
- Skill of novice designers;
- The main idea of \u200b\u200ba specialist or hosts;
- Overall style of the room;
- The presence of the necessary materials.
 For decoupage it is recommended to choose multi-layer napkins
The key to success in this technique is the constant accumulation of a variety of napkins, wall segments, pictures. If there is no needed materials at hand, they can be purchased in specialized stores, there are cards for decoupage, which show pictures for different topics, so everyone can find material to their taste and color. Also, a plus of professional materials is their strength during wetting and coating, they are not amenable to deformation and do not lose their color, still experts argue that specialized maps are significantly resistant to friction than ordinary billets.
An interesting material for creativity is rice, banana and luxury paper, having easy roughness. Experts recommend not cutting out fragments of drawings, but to pull out with their hands.
Additionally, pigments, acrylic or oil paint, paste having a metallic gleam, bitumen, potital, metallized foil are used for the decor. Also for the real master and an amateur of their affairs there are no framework and restrictions, it is a kind of artist and a specialist, so the circle of its materials is much wider, ranging from cropping and ending with specialized cards.
The most popular motifs and decoupage ideas on the furniture from the napkin
In the nursery, you can use the image of your favorite cartoon characters that deliver joy to the baby.
 Very often for decoupage use napkins, which depict the world map
Favorite motives that are highly popular, both among newcomers and professionals are:
- Folk motives that include patterns of different peoples and nationalities;
- Small and large images of field and decorative colors;
- Grape vine with dark fruits;
- Fruits, vegetables, berries;
- Lilac and other blooming trees, depending on the wishes and taste of the owner;
- Small angels - amurids with arrows;
- Birds of different sizes;
- Multicolored mosaic.
It will be interesting to look like a kitchen, where the leaders will be old chairs that have received a new life. It is better to start with small piece of furniture, then it will be possible to practice, get the necessary skills, and try your strength on larger products. They differ in originality and drawers in the cabinets, decorated with bright floral motifs, they will delight eyes and will win look at bright kitchen furniture. The shelfs or coffee tables located in the living room will create a feeling of comfort and warmth, saturating the atmosphere with love and care.
For today, there are 5 most popular decoupage techniques.
 After decoupage of furniture, professionals recommend covering her surface with a thin layer of acrylic varnish
- Straight - for its use, the image is located on the outer side of the furniture;
- Reverse - when used, the image is placed on the back of the subject, this technique is used for glass products;
- Volumenaya - Here the image is done significantly above all the others to obtain a similar result, you need a multi-layer imposition of the same pictures one by one;
- Smoky - using similar technique, resulting in the effect of hasshers and blur, between the image itself and the surface of the subject;
- Technique Deopatch - Here the basis is the formation of the paper, they are covered with the surface of the product.
Additionally, the technique, use and interesting effects that give the image a specific charm and elegance.
Decoupage of furniture is again at the peak of popularity. Finished design projects demonstrate an incredible charm that bring reanimated objects.
Using low-cost materials, you can also give the uniqueness to the standard facade of the table top, the cabinet, chest or other surface of the furniture. You will only need fantasy and several free hours.
What is a decoupage and how to perform it
Decoupage is a decoration method by gluing cut-out paper or textile images to the processed basis. Finished work is fixed with varnish. The origins of this type of applied art will go up to the times of the Middle Ages, and the high recognition of the technique found at the court of Louis XVI and Maria Antoinette. The real popularity among the wider segments of the population, such applications received in England in the Victorian era. Throughout the history of the existence, decoupage became a pleasant hobby of representatives of royal families and artists.Today, thanks to a wide range of materials, the methods of executing such a decor there is a great set. We will look at the classic option that is suitable for decorating furnishing items.
Before you start, you need to pick up the image that you want to apply on the surface of the furniture. Suitable napkins, drawings on paper or various prints on wallpaper and fabric. You can purchase ready-made pictures, but there is a more rational path - print the most successful options on the printer. This approach is good because you are given really extensive selection of beautiful prints on the Internet, as well as the ability to duplicate the ornament. The most convenient to use printouts made on the laser printer. Such inks are not spread from glue or varnish.
Arm yourself with adhesive materials (special adhesive for decoupage or ordinary PVA), as well as acrylic varnishes, tassels and ordinary sponge.
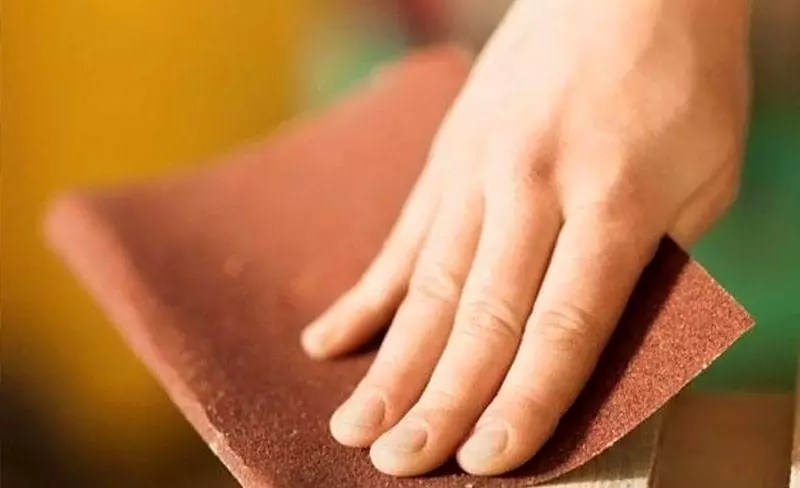
The next step is to prepare the surface of the furniture. If it is lacquered or painted, then process it with shallow or medium emery paper. Depending on the state of the basis, it may be necessary to put a putty or furniture wax to eliminate cracks, chips or deep scuffs. Prepare a smooth coating, cover it with colorless acrylic varnish. If the furniture is dark, it is better to repaint it in brighter tones.
Apply the glue and place the cut images in the required locations. When glue throughout the area will dry out completely, reap the entire composition with a transparent acrylic varnish. If a napkin was selected as a material, then use its top layer. Again, so that it does not lose contrast, the base surface is better made light.
To obtain the most bright drawings, tonside it with multi-colored paints. If you wish to give an artificial rubbing for the effect of ancient, then it should be covered with wax, paint and handle emery paper. Variating the grit of grinding paper, you can get the scuffs of different depths.


Decoupage Chairs
The reasons for the transformation of obsolete or new chairs can be a lot. You may need to adapt them to a single design or correct some moments of the design of the furniture itself. It may also be that you want to renovate chairs from the grandmother's collection or acquired used articles. In any case, give the product a new sound and you can, and sometimes even just necessary. In which direction it is worth moving:- The win-win option is to impose a floral print. Such decorative elements will be appropriate as a stand for flowers and in the romantic interior of the room;
- For eating outdoors or relaxing with a cup of tea on a warm day, make a decoupage with drawings of fruits and vegetables - will be very cute and natural;
- To chairs in the classic, colonial design with an upholstery, add decoration into tone to textiles. It is best to take a picture in the Victorian style;
- In addition to napkins, use newspapers and magazines. Bright man-made collage will complement Pop Art style.
If the four-legged object is located near the other wooden element, try to convert it. So you will create a small composition.
Realized chairs will surely look just great in the garden or indoors decorated in country style, Shebbi-Chic, pop art and even in traditional design.


Decoupage Doma
Small dressers are an indispensable thing for storing various trifles. In addition to its direct functional purpose, they can be a beautiful decor for any part of the house, fitting into a variety of thematic concepts.For the modern interior, the usual rectangular dresser, supplemented with black and white images of succulents or newspaper clippings, seals, which will give an ease of antique flare.
Refresh the setting of the hall and the hallway will help plant motifs on a white background. Pick pictures with herbarium, plants in pots with names or draw yourself branches, and on them, the method of decoupage, "plant" birds.
In the children's room, girls can make design with cute flowers, ladybugs, butterflies in pastel colors of pink, blue, green, yellow. By the way, a cheerful print with dancers on a restrained color canvas can decorate not only the children's, but also any other room.
If the school is left behind, and geographical maps remained in the hands, do not hurry to throw them out! Cover the chest of bright paint, and the boxes themselves are covered with cards. The same can be checked with music records.


Decoupage table
A little faded table, which rightly served you for several years or even decades, should not be thrown away. Better give him a new life, reagging in the style of Shebbi-Chic or Provence.To begin with, cover furniture with light paint, and then apply the appropriate images of colors. Alternatively, make a small set of chair and a table in the garden in Provence theme: Put a bunch of lavender sprigs, surrounded by a lilac-colored cell. A white table with cheerful sunflowers will be wonderful in the yard.
Shabby chic is performed in the elevated colors, using the plots of cute roses, birds, angels. The outlines of the drawings are better blurred, but for an interesting texture, use varnish cracker.
Coffee table decorate notes, colors, letters withdrawn by calligraphic handwriting. If you strive for conciseness, perform the decor with one or two colors. For example, take the geometric ornament of wallpaper and place it under glass or apply a shared pattern of dark gray on a white background.
In the nursery, you can put a small table and a high-blue chairs with pictures of bears, balloons and beach houses.
By the way, very interesting patterns come out from the served tulle, lace napkins. Such a composition will decorate the kitchen in the country theme.


Decoupage bed
The bed is the main element of the bedroom, it is she asks a rhythm and a common vector for the whole room. Therefore, making a bed, it is worth remembering that the appearance of the rest of the parts will directly depend on the style you have chosen.The best solution will decorate the head of the bed - it is precisely the first to be thrown into the eye at the entrance to the bedroom. It can be decorate with various drawings or inscriptions. Flowers or animals are perfect for baby cots. Great idea - decorate the headboard with pieces of fabric. Perfect if they are selected for the main colors of your interior.
The back can be decorated completely or partially. In general, images can be any, most importantly, so that they are rhymed with the overall concept of the dwelling. If the completed view of the head of the head is sharply different from the image of the whole bed, simply decorate the legs.
Please note that often beds are covered with polishing. In this case, before starting work, treat the surface with emery paper.


Decoupage of the cabinet, servant
Thanks to simple and simple ideas, you can transform your wardrobe, a servant or a kitchen cabinets, a bathroom is unrecognizable in just a few steps. Use the wallpaper remnants - cover them on the sides or doors and enjoy fresh and bright way. There is another way to decorate wallpaper. Its difference consists only that the plane is needed inside the product. Such decor will expand the inner space and will delight with its own species at each opening of the door.If you have a tendency to painting, then be sure to apply these skills - add appliques with painting acrylic paints. Even the most dull and a slim cabinet will be able to become a highlight of the interior.
To create a decor in the style of Provence you will need only a few cards or beautiful napkins. Apply the final strokes with acrylic paints, and unique furniture is ready.
By the way, the ornaments do not have to be small. Overall objects are just superbly suitable for decorating with large images. Black and white decoration on the walls along with wallpaper on the closet in the same color scheme - a great composition!


Decoupage of furniture - Beautiful photo ideas
In the selection below, you can see even more interesting ideas for decoupage furniture with your own hands. The gallery includes a decorated product for the garden, hallway, kitchen, bedroom, living room and children. Happy viewing!


Decoupage is a fascinating and simple occupation, having many techniques and affordable even to the youngest masters. With it, you can make exclusive interior items that will decorate not only your home, but also the exhibition halls of Art Gallery. As part of this review, we will look at how to perform do it yourselfdecoupage for beginners step from photo. Do not worry that something will not work, in fact everything is very simple. With the help of this technique in your home will find a new life old furniture, dishes, from shoes and many other things.
Products with decoupage - works of art
First of all, let's figure it out with definitions. Decoupage is the gluing pattern to the surface. The picture can be placed on the tree, skin, fabric, glass and almost any other product.
Reverse decoupage is the same process that has only one feature - the picture is glued under the material. Such can be done only on transparent surfaces: glass and plastic. Of course, the picture in this case is glued face up.

For your information! If a plate is used for direct decoupage, then in the future it will only perform a decorative function. And when using reverse engineering, dishes can be used as usual.
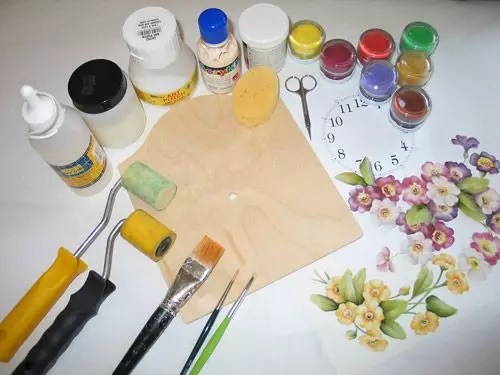
Tools and Materials for Work
| Materials and tools | Note |
| With this technique, you can decorate a book, dishes, floral porridge, bottles, furniture ,. In general, literally all that is in your home. |
| Pictures can be used from special decoupapable cards, napkins. In addition, for this purpose, masters use drawings on fabrics, old newspapers, clippings from magazines. |
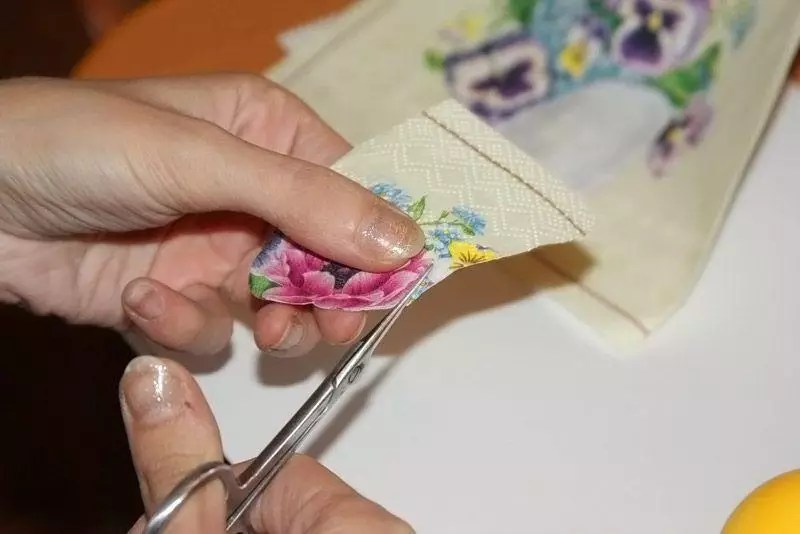
| You can use conventional manicure scissors or a special tool that is sold in stores for needlework, the main thing is that the edges of the blades are very sharp. Only it will be possible to carefully cut the desired image on a thin napkin. |
| Completed flat soft brushes. The pile in them should be tightly fixed. "Lost" Vorki can become a serious problem. It is better to have several brushes of different widths for smoothing and applying glue and varnish. |
| It is best to use the usual household PVA. You can buy a specialized composition, but it will cost more. From varnishes it is better to give preference to acrylic. It does not secrete toxic substances and easy to work. |
| In order to arrange work, paints on an acrylic basis, sponge, primer, skin, crackering can be useful. |


Sets for decoupage
Basic techniques
Secure the pattern on the surface in different ways, let's look at:
Fashion first
The simple decoupage technique from the napkin is in, overlapping on the subject and fixing with glue. After drying, the surface is covered with varnish.

Method of the second
For reverse decoupling, use a transparent foundation. The image is glued face to the glass. After drying, they are fixed with varnish.

Method Third
Art composition. For its manufacture, a variety of images are used, which when gluing are connected to one unit. In order for the picture to look in one whole, painting, shadows and accents are added.

Four fashion
This technique is called "Deopatch". For her, pictures from magazines, drawings on the fabric. To get rid of clear boundaries, the edges of paper drawings are broken. The surface is completely filled with images.
Fifth method
Creating a surround image. This is a technique requiring the talent of the artist. First passes the image from the paper napkin. And then it makes painting with a thorough drawing of all the smallest details.

Decoupage Bottles for beginners: step by step with photos and recommendations
- The easiest and most affordable material from which you can make an original gift. You can buy a bottle with wine or fill the capacity of your own cooking. Luxurious design in any case will impress.

We have already listed the necessary materials and tools for work, so we will not stop in detail. The only thing to add to the list is a wiper. They pre-process the bottle cleaned from the labels.
Important! Work with a glass vessel is better in gloves. Your fingerprints are unlikely to have artistic value, so it's better not to leave them.
Sequence of decoupage bottles for beginners, step by step with photo:
| Illustration | Stage description |
Apply primer 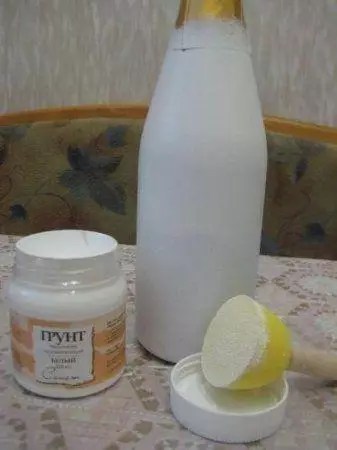 | For priming, you can use acrylic varnish or PVA. The soil must dry well. |
Making background  | As a background you need to take a white or light acrylic paint. It may have to apply the composition in two or even three layers so that the surface becomes completely opaque. |
Apply images 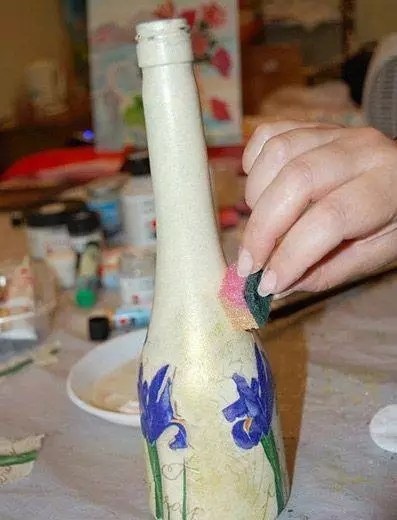 | The drawing on the napkin is neatly cut with scissors. If the pattern of the pattern and the bottle coincides, boil without scissors, gently convert the muffin. To make the drawing on the printout, it is easier, it should be twisted in a water plate. |
Figure Figure  | On the surface of the figure you need to apply varnish. This can be made a soft flat brush or sprayer. It should be followed so that the picture is not covered with folds. It needs it if necessary, gently straighten with a brush. |
Finish finish  | After complete drying, you can gently open small shortcomings in your work. To emphasize the details, use a brush and dark paint. At the end of the finish, apply the finishing layer of the lacquer coating. |
Another option of the original design is the decoupage of the bottle of tights. Master class on video:
Some tricks decoupage for beginners: Step-by-step recommendations from the photo of the drawing of napkins
The first experience of gluing a napkin may be unsuccessful: wrinkles and folds that spoil the whole result appear inevitably. Several tips, how to avoid this:
- To apply a drawing on a convex surface, you can make "Outts" on it. The edges of the drawing cut scissors or even cut triangular pieces. With the last option, it is better to be careful, there is a risk of spoiling an image if the cutting angle is incorrectly calculated.
- You can apply glue to the surface, and then apply the drawing and straighten it with a brush. It will also be worse than another method - to apply glue over the picture, while simultaneously paint it.
- If the image is applied to an almost flat surface, you can pour glue into the center, apply the napkin and gently accelerate the composition, sprawling the material on the surface.
- On the perfectly flat sheet, you can stick the image with an adhesive pencil.
- You can apply a picture using a polyethylene piece (pack or stationery). The drawing is placed face down on polyethylene and wetted with water. Then the package with a wet napkin is applied to the surface of the surface. The package is removed, the napkin remains.
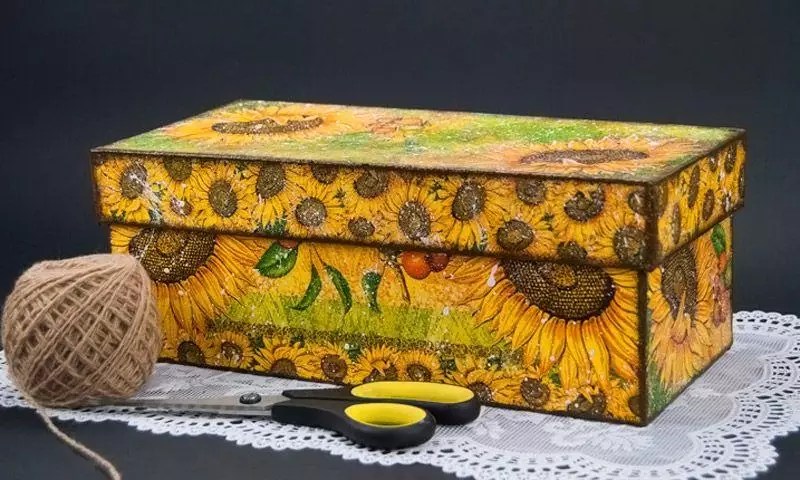
Simple master class decoupage boxes from under shoes
Smooth surface of the cardboard box from shoes is a great base for decorating. Such an interior box will be a favorite place for homemade little things.
| Illustration | Stage description |
Surface preparation 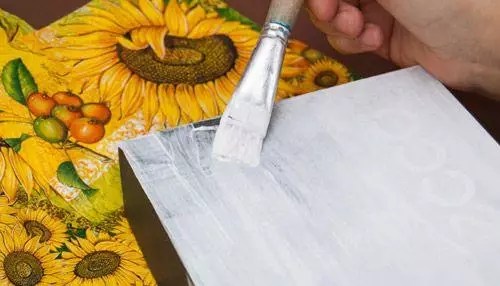  | The corners of the box should be strengthened by pieces of paint adhesive tape, after rebounding the surface of acrylic primer or paint. After drying, the primer needs to be slightly treated with fine skins. Perhaps you need to repeat the procedure if the layer is not completely smooth. After you need to paint the box selected for the background color. |
Application of drawing 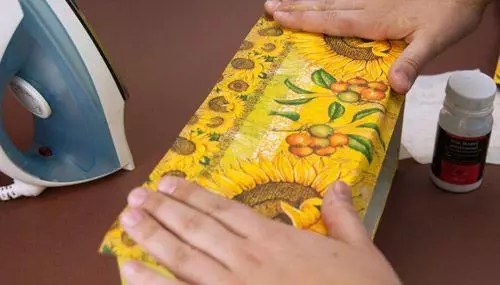  | Place for the pattern is covered with decaptentive glue. After complete drying of the layer, the drawing is superimposed on top and smoothes a hot iron through a sheet of paper. After the napkin is covered with a thin layer of varnish. Too thick layer will lead to the fact that the drawing will be covered with bubbles. This procedure is repeated over the entire surface of the box. |
Decoration and refinement 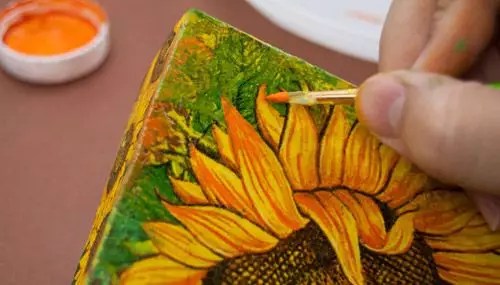  | The porporal sponge is applied background paint and other shades to the edge of the image. Brush draws small details. To add some negligence, you can splash on top of white paint with a bristle toothbrush. After the final varnish coating is applied. |
Decoupage Furniture in the style of Provence: master class update class
Having tried your strength on simple things, you can safely begin to decoupage with your own napkins. In addition to the usual list of working materials, a woodcut will be required. It is pre-align all the slots, cracks and other irregularities on the surface of the chest, purified from old paint.
Sequence of decoupage of kitchen furniture with their own hands, photo and description:
| Picture | Operation description |
Preparation  | Furniture must be carefully cleansed from all layers, align the defects with putty. After drying and grinding, all the surfaces are covered with primer and rub the silence sandpaper. |
Preparation of pictures  | The drawing on the napkins is neatly cut out or cut down with hands, the bottom layer is removed. The picture is laughing with glue and applied to furniture. Applique Careful paint brush. |
Finish coating 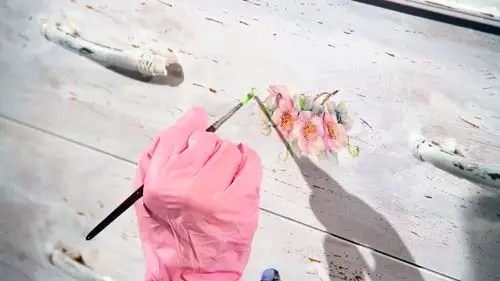 | No need to hurry. All drawings should dry. Laco need to cover all the furniture, not only the place of registration. On large areas it is convenient to do from the sprayer or canister. So lacquer will fall a thin layer. For a better effect, it is necessary to apply a series of 3-4 layers, waiting for a complete drying between processing. |
 | Result. |
Helpful advice! If you need to apply a drawing on a polished surface, the polishing is pre-treated with a skin, until the shine is disappeared.
When decorating furniture, the process is practically no cloth from the described.

Master classes decoupage on video
As they say, it is better to see once than a hundred - to hear. That is why we offer a selection of video decoupage lessons for beginners.