High demands are now being made on the appearance of the interior. The owners of Khrushchev houses, who have repeatedly glued paper tapestries in their apartments, now do not dare to start repairs with their own hands. They don't know how to glue wallpaper in the corners to make the room look up to par. Vinyl and non-woven canvases are more difficult to work with. They are heavy and require certain skills. If you properly cover the corners with wallpaper, then the next repair will not be soon.
Uneven corners scare novice craftsmen, and even ones are a rarity.
It is difficult to bring two planes together perfectly. Therefore, even with flat walls, the corners have a lot of deviations. I had a lot of work and Vadik had to decorate his aunts' apartments on his own. He hesitated to start, because he did not know how to properly glue the wallpaper in the corners.

I decided to show my friend in practice the wallpapering of the rooms of old houses. One of my teams was doing apartment renovations in a historic building. Vadik could see:
- preparation;
- alignment methods;
- how to use perforated corners;
- decoration of the room.
The technology of finishing the corners with wallpaper of all types is the same. Only thin paper trellises and fiberglass cobwebs can differ. Work must begin from the front door of the room when gluing end-to-end. When overlapping the edges of strips of thin tapestries - from the window.
Preparation and alignment simplifies subsequent finishing

When doing repairs in old apartments, I always putty the walls and install perforated corners. They simultaneously serve as beacons and protect the ledges from destruction. I choose cardboard if the inner corners have slight irregularities. In all other cases, I use a PVC profile.
- I check the verticality of the walls with a laser level. You can use a plumb line. I choose a smoother base surface.
- I putty and sink the profile in the solution, setting it to a level.
- After drying, I smooth it with another layer of putty. For paper and non-woven wallpaper, I use an additional finishing compound.
If customers do not want to spend money on alignment and corners, then I simply close up large depressions. I glue the corner with wallpaper, cut off a strip 10 - 12 cm wide. I place it evenly on both walls, make cuts for a snug fit. After that, it is easier to glue the wallpaper in the corners. If the upper canvas has to be cut or the paper trellises burst, then thanks to the background made of the same material, this will be invisible.

Advice! It is better to align the corners well once than to fool your head every time you wallpaper a room.
We paste over the protrusions
The last strip in front of the corner is cut off with the calculation of its approach to another wall by about 2 - 5 cm, depending on the curvature. The larger the differences, the wider the approach. It must completely overlap the most convex point by at least 8 mm.
For a better fit, I make cuts with a sharp knife or just cuts with scissors. It is desirable that they are inclined in relation to the edge. I cover the corners with wallpaper and smooth out the main part first, then the strip around the corner.

How to glue wallpaper in the corners of an apartment?
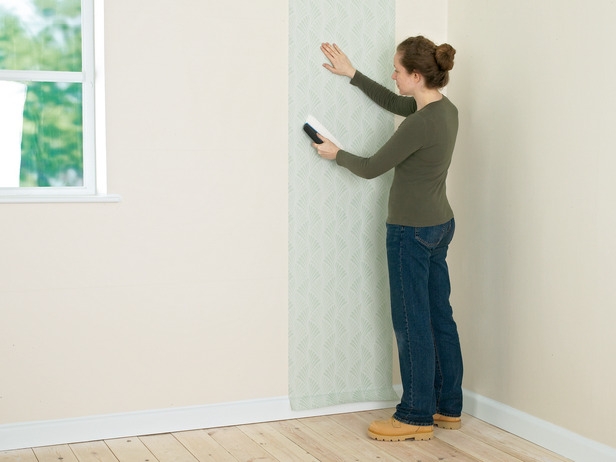
Before starting to glue the wall from the corner, measure the width of the trellis and draw a line vertically along the level. I additionally check the condition of the corner. The side surface of the strip should run over the deepest indentation. I stick it strictly vertically, according to the markings. Near the corner, the edge falls flat. The protrusions are hidden under the wallpaper pasted earlier.
Wallpaper with a large pattern is best trimmed so that the lines match. A slight offset will not be noticeable.
I cut off thick vinyl wallpaper with a ruler at a distance of 2 mm from the edge of the top sheet. With a sharp knife, I cut both pieces strictly vertically along the entire height. I remove the excess and the canvases fall back to back. For strength, I put a masking net.

Advice! Use clear glue.
We start to glue from the door
My friend was able to see everything and now gluing wallpaper in the corners did not scare him. Before you start finishing the room, you should draw vertical lines and check the condition of the corners. If there is no professional level, you can use the weight on the thread.
- We glue with an approach of up to 5 cm on the adjacent wall.
- We smooth out the main canvas to the corner, glue it.
- We make cuts and densely fill all the irregularities with wallpaper.
- We mark the vertical and, taking into account the picture, we glue the next strip end-to-end to the corner.
- We cut both canvases along a ruler at a distance of 1 - 2 cm.
- We remove unnecessary pieces of wallpaper.
- Bending back both edges, glue the masking net. Coats it with additional glue.
- We connect the strips end-to-end along the cutting line and press.
Before gluing the wallpaper in the corners, make an approximate marking of the location of the stripes on all walls. If a piece of wallpaper ends close to the corner, then immediately move the first strip. You can start with one cut along the strip.
Simple tricks to hide unevenness by combining

I told Vadik earlier that a combination with different patterns and tones is used to create an original interior. After a tour of the old building, he expressed the opinion that the designers had come up with such a technique to hide defects.
Before starting the renovation, consider the options for decorating the interior with companion wallpaper. First, you paste over the walls with tapestries with a pattern with an approach to the next wall. Then make out the transition with plain stripes. The cutting lines will visually look like flat corners. Irregularities will be invisible.

For inexperienced amateurs, combination is more affordable than wallpapering with a pattern. At the same time, you adjust the shape of the room and enlarge it.
 How to choose the right wallpaper depending on the shape and purpose of the room
Wallpapering has always been considered one of the simplest types of construction work that can be done independently without expensive construction equipment, without careful alignment of the walls, and even without experience. However, not all household masters know where to start and why from there, and also not everyone has a clear idea of how to properly paste over the inner and outer corners.
Even if you are not constrained in funds and can afford to hire a team of workers, knowledge of the technology of some repair work will not be superfluous. You can get an idea of the real qualifications of the hired workers by asking them a couple of tricky questions. For example, ask the masters how they will glue the wallpaper in frankly curved corners. Real professionals will give you a clear answer.
With the naked eye, the curvature of the corners in the apartment is not always noticeable, but when you have to glue wallpaper in these curved corners, unpleasant surprises begin. Perhaps gluing in the corners is the hardest part of working with wallpaper. But if you adhere to a number of simple rules, the work will be quite doable.
Main and simple rules
 First of all, let's figure out where to start gluing wallpaper. Until now, many are sure that it is exclusively from the window. This has its own reason, which was relevant in the era of paper wallpapers, when they were glued "overlapping". Such joints were less noticeable precisely when moving away from the window.
Modern wallpaper, for the most part, is glued end-to-end. However, the window continues to be one of the main points of reference for the start. The fact is that during construction, it is the windows and doors that are most carefully aligned vertically. And for high-quality performance of work, we need an exact vertical, so that there are no distortions with subsequent stripes. That is, both the window and the doorway can serve as a starting point for work.
It also doesn't matter in which direction - clockwise or counterclockwise - you will glue the wallpaper, it is advisable just not to change the direction in the process.
Docking in corners
Now directly about the algorithm of work. Before starting work, coat the corner with glue, because this is where the wallpaper most often peels off. Use a brush instead of a roller if necessary.
You cannot glue a whole canvas into a corner. The strip will have to be cut in such a way that the edge goes on the next wall by 2-3 cm, otherwise you will get distortions and folds that will prevent the smooth joining of the next canvas.
Even if the corner is perfectly straight, it is difficult to paste over it with a single piece of wallpaper. Most modern wallpaper shrinks when the glue dries, and then a piece of the corner strip will lag behind the corner. It is pointless to press the wallpaper very diligently in the corner, especially since the pressure can lead to the rupture of the strip still wet from the glue.
The next canvas needs to be glued close to the corner, overlapping with the previous one. In a corner, this edge will not be visible, unlike a wall.
Measure the corners with a level or plumb line. If the corners are very crooked, you will have to use the trimming method. This is also the case with thick wallpaper.
"Cutting-in"
 This technique allows you to get a very precisely fitted wallpaper joint. The cutting algorithm is as follows. The canvas is glued to the corner, but the edge is left wider - 8-10 cm. The next piece of wallpaper is glued strictly vertically (using a plumb line), and so that the overlap along the entire length is at least 5-6 cm wide.
Then, when the wallpaper is slightly dry, with a sharp wallpaper knife, the overlap is cut approximately in the center. You need to cut both strips - both the left and right. For a strictly vertical cut, a plumb line or a metal ruler is again used. After that, the top layer is carefully peeled off at the cut, both cut strips are removed, and the top layer is glued back. Everything. The perfect joint of the left and right stripes is ready.
Important! The main principle: no matter how wide the roll of wallpaper is, and no matter how even the corner is, the wallpaper in the corner still needs to be cut.
Pasting outside corners
The edge of the outer corner must be free of chips and irregularities, so it must be putty beforehand. If the corner is even, the canvas wraps well behind it. After checking the verticality, the remaining strips are glued.
When dry, the wallpaper wraps around the outer corner well. Sometimes it is necessary to make transverse cuts in order for the canvas to fit perfectly. If the canvas does not lay down correctly, you need to draw a strictly vertical line and cut off the excess with a wallpaper knife. It is always best to use a metal ruler as it is harder than plastic and does not move.
Premises with perfectly flat corners practically do not exist. Compliance with the above technology will allow you to competently "bypass" the inner and outer corners. In this way, you can effortlessly wallpaper the slopes, outer corners of windows and niches in rooms.
Gluing modern wallpaper is not difficult. Even a renovation novice can handle this. But, if it is easy and simple to mount canvases on smooth walls, then you will have to tinker with the corners. It is the corners that become the stumbling block that slows down the whole process and requires a lot of effort. More often than others, non-woven wallpaper or vinyl canvases on a non-woven base are used in the repair.
Material features
Fully non-woven wallpaper is easy to install and durable. They are made of non-woven cellulose with the addition of synthetic components. The cellulose component gives the wallpaper elasticity and breathability, while the synthetics add strength. These wallpapers are much harder to tear than paper based vinyl, for example. In addition, they do not wrinkle at all, no bends remain on the surface.
The same properties are possessed by vinyl wallpaper on a non-woven base. The only difference is that the canvases do not "breathe", since vinyl does not allow air to pass through. Therefore, before gluing them to the walls, it is necessary to treat the surfaces with an antibacterial primer or use glue with fungicidal additives. These measures will prevent mold and mildew from growing.
Non-woven wallpaper has a number of advantages over other coatings:
- Their feature is good adhesion to glue and to any wall material. Such canvases do not need to be treated with an adhesive, it is applied only to the walls. The same goes for non-woven vinyl.
- A useful quality of non-woven fabric is its tensile strength. The material does not shrink after the glue dries, the dimensions of the canvas do not change. Thanks to this, the joints do not diverge, and the seams between the stripes remain invisible. This feature is especially useful for wallpaper intended for painting, since painting makes all wall defects even more noticeable.
- Non-woven fabric cannot be washed, but can be dyed. But vinyl based on cellulose can even be cleaned with detergents, it also lends itself well to staining.
- Due to the bulkiness of cellulose fibers, such wallpaper evens out the walls, hiding small irregularities. Durable synthetic components resist tearing, which allows non-woven wallpaper to reinforce walls. They prevent cracking by holding the plaster in place.
- Wallpaper on a non-woven base can be easily removed, their two-layer nature allows you to leave the substrate on the surface and use it as a base for new coatings.
Installation of wallpaper on the walls
There are several ways to glue the wallpaper (you can easily familiarize yourself with it from a photo or video). One of them involves the initial pasting of all smooth walls, and then the corners. Other masters advise starting from the most prominent corner in the room. There is no consensus on this issue - everyone can glue at their own discretion.
Preparing the walls is a must for any method. The old coating must be carefully removed, the cracks must be putty. Then the walls are covered with a special primer or wallpaper glue. Only after the primer has completely dried do they proceed to pasting the walls.


At the point of reference, a vertical line is drawn, this must be done with a plumb line or a building level. The first strip is cut from the roll, the length of which is equal to the height of the wall plus 5-7 cm. The wall is carefully coated with glue and wallpaper is applied. The canvas is leveled with a plastic spatula or wallpaper roller, focusing on the vertical.
Advice! It is better to use a special glue with a colored indicator - in liquid form, such a composition has a pink tint, and after drying it becomes colorless. This allows the adhesive to be evenly applied to the wall without leaving any gaps.

At the baseboard and under the ceiling, the wallpaper is trimmed with sharp scissors or a construction knife. Move on to the next lane.
How to glue wallpaper in corners
In order to properly paste over the corners, you first need to deal with their types. Angles are:
- Internal - each room has at least several of these corners (there are four in the standard layout). The correctness of these sections is a very important factor. If the corner is uneven, has drops, "sinks", the method of wallpapering will differ from the standard one.
- External corners in apartments began to occur more often with the appearance of drywall - these are various niches, arches, columns and other decorative elements. This also includes door and window slopes, if, of course, wallpaper is provided on these areas.
The easy way
The easiest way is to paste over an absolutely even corner. Unfortunately, these are quite rare. These are either drywall structures, or walls prepared for painting (plastered perfectly smoothly and evenly).

In this case, both in the inner and outer corners, the wallpaper is glued in the same way - it is simply wrapped in a single piece of wallpaper. The main thing is not to stretch the coating, after drying it can return to its original size and shape. If there are small wrinkles on the wallpaper, it is allowed to make several horizontal cuts in the corner. This will help to level the finish, and the cuts will not be noticeable after drying.
Important! No matter how even the corner is, it is better not to use the method of pasting it with a solid canvas if it joins the outer wall. Condensation occurs more often in the corners near the outer walls - the wallpaper can come off and deform.
Standard method for gluing corners
It is safer to glue the wallpaper in the corners using the "overlap" method. Its essence is as follows:
- After gluing the adjacent wall at three points, measure the distance to the corner.
- For the largest of the three values obtained, the strip is cut off - its width is equal to the largest figure plus 2-3 cm for overlap.
- The wall is well coated with glue, especially paying attention to the corner (it is better to use a brush).
- The prepared piece of wallpaper is applied to the corner, aligning the joint with the previous canvas.
- The overlap formed on the adjacent wall is carefully pressed, tucking the wallpaper into the corner with a plastic spatula.
- For a tighter fit, the edge of the wallpaper can be trimmed - short horizontal cuts are made every 5 cm.
- Trim the bottom and top edges of the wallpaper using a metal trowel and a sharp knife.
- From the narrowest overlap point, they retreat about one centimeter towards the corner, make a mark.
- Focusing on the mark, draw a vertical line in this place using a plumb line or level.
- Prepare the next strip (if necessary, select a picture).
- A strip is applied to the wall greased with glue, aligning its edge with the previously drawn line in the corner.
- Level the strip, expelling air and excess glue. Pruned at the ceiling and at the floor.

Corner processed! They proceed to pasting a flat wall to the next corner - the procedure is repeated. In this way, you can glue the outer corners with a variety of wallpapers.
Advice! Considering the considerable thickness of the non-woven wallpaper, the overlap may be too noticeable.
In this way, you can paste over those corners that the furniture or curtains will hide, and choose a different method to finish the rest. You can also try cutting off only the top layer of the wallpaper.

The slopes do not have to be glued with wallpaper, the video shows how they can be beautifully trimmed at the corners:

Corner trimming method
If the walls are supposed to be painted, there should be no overlaps on them. The paint will make the thickening of the wallpaper too noticeable, here you need a different method. This method is suitable for both internal and external corners.

The work is performed in the following sequence:
- The first seven points from the previous instructions are repeated - the strip is glued with an overlap on the next wall. Only in this case, the overlap is made more - 5-7 cm.
- A distance equal to the width of the roll minus one centimeter recedes from the corner.
- Using a plumb line or level, draw a vertical line at this point.
- Cut a strip from the roll and apply it to the wall greased with glue, aligning the edge with the drawn strip.
- The second edge is applied to the previous strip with an overlap, the wallpaper is pressed down and smoothed.
- Carefully push the wallpaper into the corner with a spatula, leveling everything again.
- In the middle of the overlap, a metal ruler is vertically applied, a very sharp knife is taken and a line is drawn along the edge of the ruler without tearing off. It is very important that the line is drawn in one motion.
- Remove the trim of the upper fabric, fold back the edge of the lower one and also remove the excess.
- Both edges are greased with glue and folded end-to-end. You can slightly pull the canvas in the right direction so that there is no gap or overlap.
- Rolled with a roller for joints.

This method helps to make the connection of the canvases invisible. It works well on outside corners, in niches and on slopes.
Advice! It is better to use a small metal spatula 10-15 cm instead of a ruler.
Due to the unevenness of the corners, the ruler may not fit snugly against the wall, the cut will turn out to be crooked. The spatula must be moved along with the knife, avoiding breaks in the cutting line. How to properly crop the wallpaper in the corners can be seen in the video:
Non-woven wallpaper is a wallpaper in the manufacture of which non-woven cellulose non-woven material is used. Unlike paper counterparts, such wallpapers are excellently washed, allow you to hide even quite noticeable irregularities in the walls and retain an attractive appearance for a long time. And the process of gluing non-woven wallpaper is quite simple - the material is quite obedient, it does not "shrink" either horizontally or vertically, and practically does not give "bubbles". And even in such "problematic" places. as external and internal corners, non-woven wallpaper is glued without any problems - for this, when gluing, it is enough to follow a few simple rules.
How to glue non-woven wallpaper to inner corners
The first thing to say about gluing non-woven wallpaper in the corners (both external and internal) is you must not try to paste over the corner with a solid sheet of wallpaper... In other words, do not try to cover both walls adjacent to the corner with one canvas. Otherwise, there is a high probability that the wallpaper will "lead" in the corner, and the resulting folds will be almost impossible to smooth out without trimming, which will surely ruin the appearance of the wallpaper. But even if this does not happen, the curvature of the corner (and unfortunately most of the corners in our apartments are curved) will affect the location of the canvas, and since the non-woven wallpaper is glued "end-to-end", all the following canvases will also have to be glued off-level.
The correct technology for gluing non-woven wallpaper to the inner corners is as follows:
- We measure the distance from the edge of the last glued sheet to the corner and add 5 centimeters to it. A cloth of exactly this width will need to be prepared for sticking to the corner.
We measure the distance from the edge of the last glued canvas to the corner
Since the angle can be a curve, it is better to measure the distance at three points: at the bottom, in the middle and at the top of the wall. For calculations, of course, you need to take the largest of the resulting values.
- When the panel of the required width is ready, carefully coat the wall and corner with glue for non-woven wallpaper. Please note that when gluing non-woven wallpaper, the glue is applied only to the walls.
- After the canvas is glued, it is necessary to smooth out the wallpaper in the corner and on the next wall very carefully using a rubber roller or dry rag.
Smooth the wallpaper in the corner and on the next wall with a rubber roller or dry cloth
If the wallpaper "wrinkles" in some places, you can make several horizontal cuts at a distance of 5-10 centimeters from each other.

Please note that it is necessary to glue this canvas with an "overlap" on the previous canvas.
- When both canvases are glued, it remains with the help of a wallpaper knife and a metal ruler of a paint spatula to make a "seam cut". You can learn more about the "corner trimming" technology by watching the following video.
Video about corner trimming of wallpaper
In this case, it is very important to cut through both wallpaper cloths "in one go", otherwise discrepancies in the cutting line may appear.
In order for the cut to be smooth and the wallpaper under the knife "does not stretch"? it is necessary to periodically break off the dull tip of a wallpaper knife using marks specially applied to the blade.
- After trimming, it remains to remove the excess wallpaper. The top layer can be removed without any problems, and the bottom layer can be removed by slightly unscrewing a small part of the top panel.
If you did everything correctly, then the panels form an almost imperceptible joint between themselves, which will remain to be carefully smoothed with a rubber roller.
We glue to the outer corners
External or external corners are not found in all rooms, but, nevertheless, they can be found quite often. The technology of gluing non-woven wallpaper on such corners practically does not differ from the method of pasting the inner corners.
The technology of pasting the outer corner is almost the same as the method of pasting the inner corners
First of all, we measure the distance to the corner from the extreme panel and prepare a new sheet of wallpaper in such a way that after the sticker they “wrap” around the corner by no more than 5 centimeters. From the closest to the corner of the twist point, we measure the distance for gluing the next canvas (roll width minus 1 centimeter). We glue the fabric "overlapping" on the resulting curl, after which we trim the seam with a wallpaper knife and remove unnecessary parts of the wallpaper.
If the outer corner is fairly even (you can determine this using a plumb line), you can try to paste over it with "one sheet". But keep in mind that the level difference in this case should not exceed 0.2-0.4 centimeters. Otherwise, it is better to glue non-woven wallpaper using the technology described above.
As you can see, there is nothing difficult in pasting the corners with non-woven wallpaper, so after a little practice you can perfectly do this job. Successful renovation!
The technology of pasting corners with wallpaper is difficult only at first glance. Wallpapering the walls will help create a cozy home atmosphere in the kitchen. Thanks to modern developments, this finishing material, and in particular non-woven wallpaper, can compete with plastic in terms of strength and durability. At the same time, they are more environmentally friendly, allow air to circulate and are easier to work with. The only thing you have to tinker with is to figure out how to glue wallpaper in the corners.
Choosing wallpaper suitable for the kitchen
Correctly selected wallpaper is already half the success. Having saved on quality, you can lose a lot in durability, and you will have to make repairs again in a year or two.

Non-woven wallpaper is one of the best options for the kitchen
Non-woven bases are more convenient when it becomes necessary to change the wallpaper. To do this, you just need to remove the vinyl layer, and it is permissible to glue the new canvas onto the old finish.
Consider what types of wallpaper are, and whether it is possible to glue the kitchen with them:
- Paper wallpaper- unsuitable option for the kitchen. In conditions of temperature extremes, high humidity or dryness, the paper deteriorates, and the drawing fades. Having decorated the kitchen with paper wallpaper, in such a microclimate one does not have to rely on their long service life.
- Paper backed vinyl- more durable material. They can be washed and glued for painting. Such wallpapers do not fade under the rays of the sun and are resistant to moisture. The gluing technology is the same as for paper. But since vinyl makes the canvas heavier, glue is chosen for heavy wallpaper. Also keep in mind that not all vinyl flooring is breathable.
- Non-woven vinyl- are highly durable thanks to the non-woven lining. There is no need to be afraid that they will tear or shrink. Such wallpapers are glued end-to-end. Due to the fact that the glue is applied only to the wall, during the repair process, forces are saved and time is saved.
- Non-woven wallpaper- due to its dense structure, they perfectly mask irregularities and cracks. They allow air to pass through well, without turning the kitchen into a "greenhouse". Perfect as a base for painting. In the process of gluing, they do not stretch or tear. Easy to care for, they can be washed and vacuumed.
Required materials and tools
In order to properly glue the wallpaper and not be caught off guard by the lack of the necessary tools in the process, check that you have everything you need before repairing.
You will need:
- wallpaper,
- glue,
- assembly knife,
- scissors,
- putty knife,
- plaster,
- building level,
- plumb line
- sponge,
- rubber roller,
- ruler,
- pencil,
- brush.

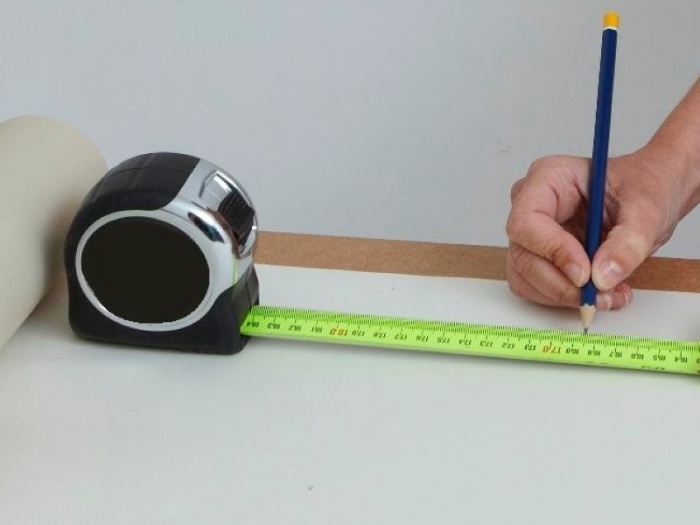
Pencil is a necessary auxiliary tool for gluing wallpaper in the corners
The subtleties of wallpapering corners
Pasting wallpaper is an ingenuous business, but it also has its own subtleties. As a rule, difficulties arise if you do not know how to glue wallpaper in the corners. When at least one corner turns out to be curved, as it is glued along the wall, an ever greater skew of the canvas will be observed relative to the surface of the floor and kitchen windows or the ceiling.
Do not rely on the doorway as the starting point for wallpapering the walls. Check with a plumb line to see if it is actually perpendicular to the floor. It is highly likely that the frames are also installed with an error, which will lead to distortion, and the corner will be swollen.
The tradition to start decorating walls with wallpaper from door and window openings originates from the need to overlap paper wallpaper so that the latter is less noticeable. With the advent of vinyl and non-woven materials, this need has disappeared, since the canvas is glued end-to-end.

Smooth corners are much easier to glue over than curved corners.

For large irregularities, some tricks will help.
Before starting to work with wallpaper, it would be correct to level each corner with plaster with a building level. Minor irregularities can be dealt with with a slight overlap or by cutting off an extra piece of the canvas.
Wallpaper trimming in corners (video)
Wallpapering inner corners
Correctly pasted over with wallpaper, the corner does not wrinkle, the edges of the canvases do not diverge, forming a gap. To achieve such an accurate repair, they resort to some tricks.
For this:
- A layer of glue is applied to the wall. If the wallpaper is non-woven, no glue is required on the back side.
- The edge of the canvas is brought to the adjacent wall with an allowance of 1-2 cm.
- The sides are firmly pressed against the wall with a sponge. If the canvas wrinkles, scissors make notches towards the bulges and straighten the material.
- After that, they start cutting the canvas, which will lie in the corner from above. With the help of a ruler and a pencil on the back, they lay aside in a mirror image the overlap that has entered the adjacent wall, and cut off this excess.
- The cut canvas is glued so that the cut edge is exactly in the corner.

Detailed instructions for wallpapering inner corners
Wallpapering outside corners
Often, the design of the kitchen is made in such a way that it is necessary to paste over the protruding outer corner in the doorways.

Pasting corners with wallpaper is not an easy task with large curvature of walls
For this:
- Measure from the top and bottom reference points for the wallpaper to the corner plus 3 cm to wrap.
- The wallpaper is cut to the required size.
- Apply glue to the walls with a brush.
- The edges are pressed tightly against the wall, making cuts where wrinkles form.
- If the pasting is done with a non-woven backing material, the top layer is cut along the corner and the narrow strip is carefully peeled off.
- A new sheet on the adjacent wall on the other side of the corner is glued over the non-woven edge.
- The joints are passed with a rubber roller.
That's all the tricks on how to glue wallpaper in the corners. Knowing these subtleties, there should be no difficulties with the design of the kitchen. These simple solutions will help create a cozy kitchen interior.
How to glue wallpaper in the corners (video)