Today it is not a problem to buy seeds already glued on special tapes. True, they are expensive, but the process of sowing seeds is significantly accelerated. You just need to put the ribbons in the grooves and cover them with earth.
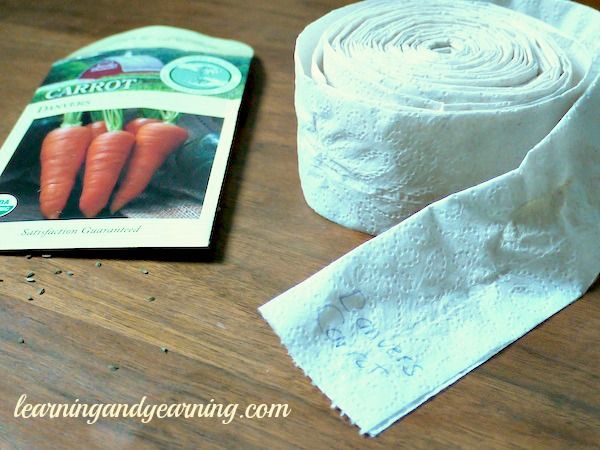
We took a roll of toilet paper, carrot seeds, and Agricola for fertilization.
How quickly you sow the seeds in the spring also determines your well-being. After all, sowing has to be done when the weather is cold or inclement and you don't want to spend extra time in the garden. And tapes will help you speed up this process.

Unrolled the roll on the table
If you don't want to buy, you can make ribbons yourself. For this you need seeds, paste and ... toilet paper. Just glue the seeds onto toilet paper with paste.
The distance between the drops of paste was measured with a match
Paste recipe
A paste made of flour and starch adheres perfectly both to paper and drying oil with paint, and only moisture quickly destroys it. What we need when sowing seeds in the ground.
Correctly welded and filtered paste is not inferior in adhesion strength to modern adhesives. You can use any flour to cook it. But best of all is wheat or coarsely ground rye. For its preparation, it is better to use enamel or stainless steel dishes.

Apply paste to the length of the paper
Flour will be needed for about 1/3 of the volume, and 2/3 of water. First, water is poured and brought to a boil, then flour is added evenly, constantly stirring. The solution is brought to a consistency of very thin dough. Then they are removed from the heat and allowed to cool to about 30-40 C. After that, the paste is filtered through cheesecloth and used as directed.

For each drop of paste, one carrot seed was applied
How to improve paste
To increase the beneficial effect of taking a paste, add a little ash or nitrophosphate. Only fertilizers must first be properly crushed. Then they are diluted in a paste, stirring until the fertilizers are evenly dissolved. For 1 liter of solution, no more than 5 g of nitrophoska or 50 g of ash will go away. You can (as we do) add Agricola.

We drowned the seed deeper into the paste with a match
How to store tapes
Straps with evenly sown seeds can be prepared in winter and rolled into rolls and left until spring sowing. You can sow seeds both with grains up and down: the paper will very quickly collapse under the influence of moisture and there will be no trace of it.

After the paste has dried, the paper is rolled up and placed in a dry place until spring
Every gardener on his site necessarily grows such a tasty and healthy root vegetable like carrots. However, not everyone grows well or does not even emerge at all, despite good care and timely planting. It's no secret that how you prepare for, you will get such a harvest. Carrot seeds on toilet paper Is a new way of planting root crops. Moreover, it is used today not only for carrots.
Carrot sowing technology
Often gardeners and gardeners are offended by a poor harvest or poor quality carrots - ugly roots, cracks, and they do not last long. By the way, it is useful to read about this:.
To get a good harvest, you just need to follow simple agrotechnical rules in combination with new ways of planting root crops:
- check seed germination;
- prepare seeds for planting;
- prepare beds for sowing;
- sowing carrot seeds;
- care of seedlings and adult plants.
The yield of carrots, like any root crop, is laid even at the stage of preparing seeds for sowing. First of all, you need to check the germination of seeds, it does not matter if they were purchased in a store or obtained from your site. At 60 - 70% germination, this variety can be planted. For best results and shorten planting times next season, it is best to try to prepare the seeds well in advance.
Pour the seeds of the selected variety of carrots into one container, pour warm, room temperature water into the other. You will also need a starch paste, quite liquid, toilet paper cut into ribbons, a newspaper, a match. It is best to cut the ribbons along the length of the newspaper, make them about 2 - 2.5 cm wide.
Carrots on paper are a fun planting method
The strips of toilet paper should be greased with paste using a not very wide brush. Then, with a damp match head, transfer the seed from the container onto a strip of paper, and all the rest are also moved. The distance between the seeds should be made equal to 2 - 3 cm. Having transferred the seeds to these ribbons, you need to leave them to dry for a while.
Dried strips with carrot seeds glued to them should be placed across the newspaper. After all the paper strips with seeds are laid on a newspaper sheet, it should be rolled up, the name of the variety should be written, tied with braid and put in a dry place. In this form, the seeds will be perfectly preserved until the onset of the summer season.
With the establishment of positive temperatures and the readiness of the soil for agricultural work, you can begin to put in order the beds prepared in the fall for sowing carrot seeds. Carrots can be planted in the place where cabbage and legumes grew last season. On a prepared bed, cleaned and loosened, grooves are made with a width of 2 - 3 cm.The distance between the grooves is approximately 8 - 10 cm, and their depth is 1.5 - 2 cm.
Sowing prepared seeds
The finished grooves need to be watered with warm water and a paper tape with seeds prepared last year should be laid in them so that the seeds are located down. Then these tapes should be poured with the same warm water until the paper is completely wet. Now the grooves should be covered with earth and slightly compacted.
The planted beds can be covered with thin black polyethylene, pressing it along the edges of the ridge with stones or heavy objects, in order to avoid the material being blown off by the wind. Here you need to be careful: about 15 - 17 days after sowing carrot seeds, polyethylene must be removed from the ridges. If the site is located on the south side, then the polyethylene is removed earlier, about 10 - 12 days. It is best to harvest it in sunny weather, in the first half of the day - so weak weeds will burn themselves under the sun.
Advantages of the "paper" method of sowing carrots
This method of planting root crops, in this case, carrots, has its advantages:
- seed preparation is carried out in a room where everything necessary for work is conveniently located, in contrast to a summer cottage, when work is carried out in the field;
- the seeds are located in the soil at the same distance from each other, since they are evenly applied to the paper strips;
- all seeds lie at the same depth, as they are applied to one tape, which is evenly placed in the soil along its entire length;
- the consumption of seeds is about 20 - 30 times less than with the usual method of sowing, and the yield is several times higher "
- for some time you do not need to weed and water the seedlings - after spontaneous burnout of weeds, carrot sprouts will not have competition with weeds for some time;
- carrot fly - one of the main pests of sprouts, feeding on their roots - will not be able to lay eggs in the garden bed, since it will be covered with covering material.
Plants should be fed with mineral fertilizers - phosphorus, potash, if the soil is acidic, lime can be added at the rate of 300 g per 1 m 2. When planting carrot seeds in the traditional way, it will be necessary to thin out the seedlings twice. By using this method of sowing carrots, you can get a good harvest of tasty root vegetables without much effort with proper care.
(by card, from cell phone, Yandex money - select the one you need)
Thanks!
I invite you to the Subscribe.ru group for summer residents, gardeners: "Country hobbies" Everything about country life: cottage, garden, vegetable garden, flowers, rest, fishing, hunting, tourism, natureAnd I really love this way
I have carrot seeds and something else small Dutch, there are not many of them in the package and this method saves seeds (no need to pull), but it also saves time.
I pour the seeds into a glass with a saline solution (1 teaspoon per glass), stir, after 15 minutes I splash everything that has surfaced, the rest into a gauze, rinse and dry on a saucer by the battery. Everything, the seeds are ready
I put an incomplete roll of toilet paper in a bowl with Azofoski solution, soak it quickly, then dry it by the battery and cut it into strips (the skill appears with experience!). The strips are not long, up to 1.5 m.
I scatter the seeds on the table, next to a saucer with paste (there is a bit of Kemira-Lux) and a cotton swab (girls know!). That's all ...
The tip of the stick is put into glue, onto tape, then the same stick into a seed and a drop.
Everything goes with a bang, a conveyor belt. I dry the ribbons on a rope, twist them into rolls and sign them, tie them with thread.
The garden is quite simple. I make a groove with the edge of the board, spill it and lay out the tape. I fall asleep, I thicken it with the same board ... voila
By the way, you can glue parsley, dill and other herbs on paper without cutting it into strips. Ribbon.
PS: And how in this way, it is convenient to sow flower trifles ❗ M-mm-mm
How to properly glue carrot seeds to tape
|
Better to take a cheap two-layer toilet paper and separate one layer from the other slightly on the edge. In the resulting pocket, drip pre-cooled glue, cooked like a paste of starch, but add an additional tablespoon of complete mineral fertilizer with microelements to a liter of water and put a seed. The paper sticks well, it soaks well in the spring in the ground after watering, the seeds do not fall off during storage, as if glued onto single-layer paper from above. But it is better if you see pelleted seeds on sale. Especially carrots. Seeds in a dragee made from dry gel with microelements, they swell well by dissolving the shell, and the supply of food and water in a soggy and swollen gel for seeds is paradise. Alexey |
|
About the tape: Toilet paper is the most common, I cut off two rounds from the roll with a sharp knife, one with glue, and cover with the other. Kleister - flour with boiling water. You can bang fertilizers, but why? Nutrition is needed when the plant is vegetating. The fact that in the paste, once in the ground, will not play any role for the germinated seeds. It is better to water it after germination, for example, with humate. So, with an ordinary toothpick I apply drops-pieces of paste at a distance of 2-2.5 cm and I apply seeds with this same toothpick. The seeds are scattered on the saucer and easily cling, because the toothpick is sticky from the paste. There is time to do this on winter evenings. But in the spring it is easy to sow by laying out the ribbon in a row. By the way, I advise you to put such a tape, like a one bought in a store, with an edge, and not put it flat! Summer is a miracle! No need to crawl between the rows and tug. I pull it once, when I just got up - through one carrot. That is, 5 cm remains between the plants. Why did I switch to this method: in addition to saving time and effort in the spring-summer period, there is also saving seeds. Not even in terms of money. I write out good seeds of hybrids. Naturally, they are more expensive and there are fewer of them in a bag. And somehow I don’t want to “throw in the wind”. But two bags of seeds, 1 g each, are enough for me to get a wonderful harvest of excellent carrots for my entire large family! Be successful! Vitaly |
Back to the table of contents
Based on the materials replies @ mail. ru and the answers of our readers.
Planting carrots on tape (toilet paper)
Stick carrot seeds on toilet paper simply. A couple of nights of working in front of the TV - and the planting material is ready. It is better to take soft, white paper (it will get wet faster in the soil).
Before gluing the seeds, we calibrate:
Prepare a saline solution in a glass (dosage of salt - by eye) and dip the seeds into it, stir. Those that surfaced are bad, we merge them. Those that went to the bottom are good, we leave them and rinse them in water at room temperature. Now Carrot seeds need to dry so that it is convenient to take them with your hands and Glue on paper.
Meanwhile, we cut the toilet paper to the size of the width of the ridge - usually it is 80 or 90 cm.Then we cut it into ribbons 2-3 cm wide.
You will need paste to glue carrot seeds onto paper. It can be cooked from flour (rye, wheat) or potato starch.
Carrot paste: recipe
Starch. We will cook 500 ml of paste. We put a container with 400 ml of water on the fire and bring to a boil. Turn off the fire. In a separate bowl in 100 ml of warm water, dissolve 1.5 - 2 tbsp. l. dry starch, stirring well. Then pour this starch solution into boiling water in a thin stream. Stir thoroughly. The paste should not be too thick.
Flour. Fill an enamel pot with water and bring it to a boil over the fire. Pour flour in a thin stream in small portions, stirring regularly. Flour paste is cooked at the rate of 1 tablespoon per 100 ml of water. As soon as the mixture acquires the consistency of a batter, remove from heat. Let the solution cool and use it as a glue for seeds.
So, You can glue:


Hello. I subscribed to your newspaper and its supplement "Garden Garden Flower Garden" for the first time and I regret that I did not know anything about them before. Very useful and useful newspapers. They have everything we need as gardeners. My neighbor in the country regularly glues seeds to ribbons and plants like that. But he does not want to share the secret of what he is gluing them to. Tell us how you can start sowing seeds on belts? What is the composition of the glue that is beneficial to plants and harmful to insects? How long can these tapes be stored, which seeds can be glued and which cannot?
Shemeneva Valentina Ivanovna,
Voronezh region
On sale, seeds glued to ribbons are no longer a rarity. Many are captivated by their ease of use. This is an option for the especially lazy: I dug a bed, put a ribbon with seeds there, sprinkled it with earth on top with the addition of sand, and there would be no need to burrow seedlings.
If the seeds are not pressed inside the belt, but are one-sided, then place them with the seeds down. The only prerequisite for sowing success is sufficient moisture during seed germination. Therefore, immediately upon planting, it is necessary to thoroughly water the garden bed, and not let it dry out for at least the first 3-4 days. This is necessary so that the paper disintegrates and does not create problems for seedlings. Sowing this way saves seeds.

Assorted ribbons
Assorted ribbons are also interesting - where seeds of different crops are on one ribbon. You can make a mixed bed in one row. For example, onion + carrot, or radish + sorrel ...
But such a tape comes out much more expensive than loose seeds. So this "saving" of seeds is beneficial only to the manufacturer. Of course, the work is easier: you can sow quickly enough, which is very important. Especially in early spring, when the weather is far from May. Here, as they say, you can't stand the price.
But such seeds should only be bought fresh. Why? I explain.
If the seeds are stale, they lose the percentage of germination and need to be sown thicker. And how to sow them thicker, if the interval is already clogged on the tape. It turns out bald spots, which then need to be added to, and it turns out not a bed of a lazy person, but a bed of a workaholic.
Therefore, having really weighed all the pros and cons, it is more profitable and more reliable to make the tapes ourselves.
Sticking on paper
It is better to "sow" the seeds on toilet paper. You can also go to the newspaper. But when the paste dries up, it becomes too hard, it can tear, "plays", and the seeds "shoot" from it.
It makes sense to sow only small-seeded crops on the tape (radishes, spinach, parsley, carrots, dill, lettuce, tomatoes, onions, sorrel) - large (peas, cucumbers, beans) paste will not hold and there is no need to tinker - you will sow them faster than glue on the paper.
Paste additives
Cut paper strips as long as your garden bed and 1-2 cm wide. Attach the seeds to the ribbon using a regular paste. It can be made with flour. Then the tape is marked and the seeds are glued, the distance between the seeds for carrots is 3-4 cm, for onions - 5-8 cm.
For a greater effect, 4-6 g of Actara are added to 1 liter of paste (it will protect seedlings and seedlings from pests for 2-4 weeks - this is especially important for cabbage and radish), and microelements. To increase disease resistance: 1 g of manganese, 1 g of boric and 1-3 g of copper sulfate. To increase germination, add 1/3 sachet of Kornevin there. Such tapes, unlike pure paste, cannot be stored for a long time. They must be planted within 1.5-2 months.
Before laying the tape with seeds, add compost to the soil, carefully level the bed, then draw grooves 2-4 cm deep at a distance of 20-30 cm from each other and place the tapes in them.
Bountiful harvest to you!
Most popular on the site

01/18/2017 / Veterinarian

I constantly observe how roses do not cover in our city, but just a spud ...
29.10.2019 / People's Reporter

If You Can't Find A Suitable Laundry Basket That Will ...
29.10.2019 / Starry living room

BUSINESS PLAN for breeding chinchillas from Pl ...
In modern conditions of the economy and the market as a whole, for starting a business ...
01.12.2015 / Veterinarian

Casanova and Carnival - grape novelties ...
An interesting novelty came to us from Ukraine. Casanova - grapes ...
10/29/2019 / Grapes

If you compare people who sleep completely naked under the covers and those ...
11/19/2016 / Health

The lunar-sowing calendar of the gardener-ogoro ...
11.11.2015 / Vegetable garden

Moles "drank" the blood of many gardeners. Do you know why? NS...
29.10.2019 / People's Reporter

In the fall, night frosts can suddenly appear, and even before ...
29.10.2019 / People's Reporter

It is best to prepare not only the holes for cucumbers, but also the whole garden ...
Planting carrots on paper involves the implementation of standard preparatory measures with soaking the seeds and preparing the substrate. The main distinguishing characteristic in this case is the placement of the planting material not immediately into the open ground, but first on a tape or piece of toilet paper, while maintaining the uniform distribution of the planting material. There are many advantages of such a solution, but at the same time, one should not forget about the possible disadvantages of such a landing.
pros
- A large number of advantages of "paper" planting of carrots made this method very popular among summer residents, and here are the main reasons for this phenomenon:
- long-term preservation of the optimum moisture content of the sown seeds;
- saving space in the garden for sowing crops;
- the possibility of better rejection of seed (suitable seeds and damaged material are visible to the naked eye);
- ease of caring for seedlings in the first weeks after sowing;
- the possibility of even distribution of carrots in the soil;
- resistance to washing out of seeds and young shoots with significant precipitation;
- the same occurrence of individual seeds in the ground, which will ensure the friendly emergence of seedlings;
- saving seed material, since in most cases it is no longer necessary to sow the carrots;
- higher resistance of carrots to low temperatures and sudden weather changes.
Some gardeners argue that carrots planted on paper are less affected by the carrot fly, since this planting method involves covering the garden, and the pest cannot lay eggs in the area with the crop. Of course, it is impossible to guarantee the complete absence of an insect, but the likelihood of its appearance is still minimal.
Did you know? Carrot fresh provides the body with a charge of vivacity no worse than coffee, therefore, to stimulate protein production and improve oxygen delivery to muscle tissues, it is better to replace a cup of coffee drink with a glass of freshly squeezed carrot juice drunk in the morning.
Minuses
There were no significant drawbacks in planting carrots using paper, and the minimum disadvantages of this method can be considered a long wait for seedlings (on average, 1–2 weeks longer in comparison with plants sown directly into the ground). In addition, preparatory measures will also take more time, since the rejection and fixation of seeds on a piece of paper requires more attention.
How to stick carrot seeds on toilet paper or napkins yourself
Modern gardening stores can offer their customers ready-made paper tapes for planting crops, but using ordinary toilet paper will cost much less, which explains its relevance when planting carrots in this way. If there is a suitable adhesive composition, there will be nothing difficult in fixing the planting material. The main thing is to adhere to the requirements of the technology for preparing the paste itself and choose only high-quality crop seeds.
Seed selection rules
When rejecting purchased planting material, the first task is to select suitable seeds by their weight. To carry out the procedure, you need to prepare a standard saline solution (1 tablespoon per 1 liter of water) and, after thoroughly mixing the components, lower the seeds into the liquid. Floating specimens that have not drowned in 5-10 minutes should be thrown away immediately, and heavy ones should be rinsed from salt and dried to a free-flowing state. If desired, you can additionally disinfect the carrots in a weak solution of potassium permanganate, keeping the seeds for at least half an hour. After the allotted time has elapsed, the seed is dried again and only then laid out on a prepared paper belt.
Preparation of glue for sowing carrots
Without a glue base, seeds will not stick to toilet paper, so when preparing carrot seeds for planting, you should think about a suitable glue. Standard options for an adhesive base (like PVA glue) will not work in this case, so you have to cook the paste yourself: for 1 cup of boiling water, you need to take 1 tsp. flour or starch and, after stirring, allow the composition to brew a little.
To increase the nutritional properties of the finished mixture, some gardeners prefer to add a little mineral fertilizers to it, at the rate of 1 tbsp. l. for 1 liter of the finished composition.
Important! Before use, it is necessary to cool the paste and only then apply it to the prepared strip of paper with the further immediate spreading of the seeds (the glue is already with them until it dries completely).
Video: How to make flour paste
Seed arrangement
For the convenience of gluing the seeds, you should use tweezers with thin edges or an ordinary cotton swab. You can apply the paste with a syringe or dropper, squeezing out a small drop of the substance in the right place. The distance between adjacent seeds should be at least 4 cm and about the same should be left between adjacent rows of future seedlings. The filled paper cuts should be left unfolded for a day, and after complete drying, rewound into a not very tight roll.
When the time comes for planting, the roll is unrolled and, carefully laid out on the garden bed, sprinkled with soil mixture, watering abundantly after the completion of the process.
How carrot seeds germinate on toilet paper
Pre-germination of planting material in this case is not a prerequisite before planting, but some gardeners use it to accelerate the emergence of crop seedlings or for experimental purposes to assess the level of seed germination on paper.
In any case, you can germinate the decomposed seeds in the following way:
- Lay out the ready-made tapes with future carrots on polyethylene strips 5-6 cm wide each.
- Spray the planting material well with water from a spray bottle and roll everything up again (along with plastic wrap).
- Place the roll in any container, pouring in a small amount of clean water, just so as not to overwhelm the seeds.
- Cover the blanks with a plastic bag and leave that way for at least a week.
It will be possible to check the condition of the seeds in 7-10 days, and if they hatch, it is time to think about transplanting the planting material to the garden bed or to the seedling box. Important! Germination of carrots should only take place in a warm room with a temperature of at least + 25 ° C.
Preparing the soil for planting carrots on toilet paper
The preparation of the beds for planting carrots on paper is carried out according to generally accepted standards for this culture. Since autumn, the soil is dug up on a full bayonet of a shovel, all weeds and residues are removed after collecting other crops. It is imperative to lime the acidic substrate (300 g of lime per 1 m²), and add a little sand to the clay soil (1 bucket per 1 m²).
In this case, manure is an extremely undesirable fertilizer, therefore, when preparing soil for carrots, it is better to use complex mineral compositions or dig up the ground along with peat. Of the mineral compounds, it would be appropriate to use azofoska in the doses prescribed on the package. With the arrival of spring, after the soil layer dries up, it can be embedded in the soil and wood ash, spending at least 0.5 liters of the substance per 1 m² of the plot (it is good after that to walk along the bed with a cultivator for better distribution of the mixture in the soil). In whatever form the carrots are sown on the site, this culture always prefers a loose and nutritious substrate, therefore, before directly placing the tapes on the garden bed, it is worth again fluffing and leveling the ground with a rake.
Planting carrots
Planting carrots with ribbons is one of the easiest ways to complete the procedure, which does not take much time. All actions are performed in the following order:
- To begin with, every 15–17 cm you need to make grooves 1–2 cm wide using any convenient tool (for example, a hoe).
- Then the soil in the prepared place should be well moistened from a watering can (without a grid) and wait until the liquid is completely absorbed.
- As soon as the soil dries slightly, it is necessary to carefully unwind the prepared roll, placing it clearly in the center of the organized groove (placing the seeds up or down is not so important, since the paper material will still quickly get wet and the seeds will fall into the soil).
- The spread strips must be carefully sprinkled with soil and watered well, this time using the sprinkler method, so as not to wash out the planted seeds.
If it is too hot outside and the soil may dry out quickly, it is worth installing a temporary shelter over the carrot beds in the form of a spunbond or not a thick layer of hay that protects the ground from drying out.
Did you know? With regular use of carrots (if you chew them), the root vegetable can replace the usual toothbrush, since carrot juice, combined with the mechanical effect of the vegetable on the teeth, contributes to their high-quality cleaning.
Why is it better to stick carrot seeds on paper
Gluing carrot seeds to paper is convenient first of all because there is no need to thin out the crops later, because thinning is done in two stages and is a hard painstaking work.
There are other advantages to sticking seeds to toilet paper:
- Before gluing the achenes, they are checked for germination, which means that almost all glued seeds will sprout.
- The uniformity of application allows the seedlings to be obtained at approximately the same distance and depth, which ensures their harmonious development.
- The seeds hatch at the same time and give amicable shoots: you do not have to buy additional bags of seed, as it happens because of bad shoots when planting with a pinch.
- Sowing carrots on paper protects the seedlings from the carrot fly: it will not be able to lay eggs because of the covering material that covers the plantings.
- Plants sprout quickly regardless of climatic conditions.
- Gardeners do not have to water and weed crops for a long time: moisture remains under the covering material and weeds burn out.
Before sticking carrot seeds on toilet paper for planting, you just need to cook the paste and spend a couple of evenings gluing.
How to stick carrot seeds on toilet paper for planting
How to stick carrot seeds on paper
Before gluing carrot seeds onto toilet paper, put the seeds in a container of water and throw away those that have surfaced - they are not suitable for planting. We dry the rest of the achenes and proceed to gluing:
- We buy white soft paper (it will quickly dissolve in the ground).
- Cut lengths along the width of the beds (80-90 cm). The width of the segment is 2-3 cm.
- We prepare a paste from starch or white flour.
- We dip the brush (match) into the paste, touch the achene and glue it to the piece of paper, observe the distance between the seeds of 4 cm.
Dry the paper strips for 24 hours and put them in breathable bags (not polyethylene!) For storage until sowing.

How to sow carrots on toilet paper
Sowing carrots on paper strips is much easier than using a pinch or other methods:
- We choose the way of cutting grooves - across the ridge or along it.
- On a calm day, we cut grooves in the prepared beds no deeper than 2 cm.
- We lay out toilet paper with seeds in grooves: it is still more convenient to make blanks along the width of the ridges.
Some sources indicate that paper strips must be laid with seeds down, in others - with seeds up, but there is no significant difference: the paper will get wet in a matter of days in both cases.
- Sprinkle the strips with a thin layer of soil.
- Water the plantings abundantly with a watering can with a fine nozzle so as not to blur them. The paper will get wet faster and the seed pecking will accelerate.
Attention: carrots will grow even faster if you put some compost on the bottom of the grooves.
Now it is clear how to stick carrot seeds on toilet paper for planting using starch or flour paste. Experienced gardeners call this planting method one of the best: carrots emerge quickly, especially if it is warm, and it does not have to thin out for a long time and tediously.
They also received an answer to this question. Not everyone has a machine on which it would be possible to take out household waste, and you don't always want to carry it into far-away containers by hand. To reduce the amount of such waste, summer residents rightly turn some of them into the necessary things. This also applies to egg trays.
Not everyone knows how to plant radishes correctly, if the seeds are placed too close to each other, the vegetables will go to the arrow and there will be no harvest. With the help of waste material, the seeds will be located at an optimal distance. To set up a seedbed, you will need:
- egg trays;
- scissors or knife;
- radish seeds;
- a garden bed with fertile land.
- Use a knife or scissors to cut the holes in the cells. Dig up the bed, loosen it with a rake, spill it with water. Place the egg trays on top and press lightly on them. Now you need to plant one seed in each cell.
- If you want to later leave only the strongest plants, then plant two seeds. When the second true leaf appears on the seedlings, you will remove the weak plant.
- After sowing radishes, sprinkle soil on top of the cells so that it covers the seeds of this culture by 1 cm. If you want the seedlings to appear as soon as possible, cover the bed with foil or non-woven material. When the seedlings appear, then remove the shelter.
On which bed the weeds will not grow, it can be watered less often, since the cardboard packaging will not allow moisture to evaporate much.
Even if you only have one egg tray at your dacha, it will certainly come in handy for planting. Gardeners know how troublesome it is to thin out carrots in large areas. To avoid this, you need to put a tray on the garden bed, press on it. You will get a lot of groove cells at once at the same distance from each other. In this way, mark out the entire bed. Planting, aftercare of carrots will be much easier.
There are other dacha tricks involving the use of this waste material. To make a mini greenhouse, you will need:
- egg tray;
- light soil;
- water;
- seeds.
It's time to grow seedlings very soon. Put soil in an egg tray, water it, sow seeds. Cover the top with a lid from the tray or a second one of the same so that the moisture does not evaporate. After three days, twice a day, you need to check if small loops of seedlings have appeared on the surface? As soon as such a picture appears in front of your eyes, immediately place the trays under the egg on the windowsill towards the light.
If you want to make a taller seedling greenhouse, then take:
- lockable egg tray;
- knife;
- soil;
- seeds;
- water.
Close the tray, cut the top cover on three sides with a knife, lift it up, pour soil into the container, slightly moisten it.
Now you can sow seeds, sprinkle them with soil, close the lid.
Place such a device near the battery so that the seedlings appear as soon as possible. But do not miss this moment, otherwise they will stretch out.
As soon as you see a small part of them above the ground, immediately place the containers closer to the light, where the temperature is + 16– + 18 degrees. Boost it up a little after 5 days.
You can use the following tool to make individual containers for each seed. Do not throw away the used shell, pour soil into it, drop 1 seed. One egg cell will hold 1 container with a plant.
Watch a detailed master class that demonstrates all the intricacies of this process. So, to implement it you will need:
- packing tray;
- eggs;
- soil;
- awl;
- water;
- seeds.
If you boiled a soft-boiled egg, remove only the upper part of the shell from it, remove the contents with a small teaspoon. If you decide to make scrambled eggs, scrambled eggs, pie or other dishes where raw eggs are needed, then gently knock with a knife or spoon on the top of the egg, remove the shell from this place, pour out the contents. The remaining shell must be washed, placed in a container with water, and boiled for 5 minutes.
Boiling will help get rid of harmful bacteria, an unpleasant odor, such a shell will not grow moldy over time.
Drain the water, and after the eggshell has cooled, make a small hole at the bottom with an awl to drain the water.
Pour soil into the container, moisten it with water, plant a seed, sprinkle with a small amount of soil.
If it is cool on the windowsill, then you can cover the shells with the upper cut off part of the plastic bottle. To avoid evaporation, remove the plastic cover.
When it gets warmer enough, it will be possible to plant the seedlings in a permanent place, for each specimen, dig a hole in the soil, place its lower part there along with the shell. Do not worry about the roots of the plants, they will break through a thin obstacle, this container will become their top dressing. But it is better to be sure before planting by gently pressing on the shell in several places, then lower it into the hole with soil.
An egg tray in the country will help not only get an excellent harvest, but also decorate the room.
To make such a garland, take:
- cardboard egg trays;
- scissors;
- LED garland;
- paints;
- Scotch;
- brush.
The photo shows how to turn a tray into such a garland. It is necessary to cut off the protruding parts of this device for eggs, with the help of scissors, round off on one side to get four petals. On the other side, small holes are made to insert an LED into each. Secure them with tape.
Previously, you can paint such flowers so that the garland is multi-colored or you can take LEDs of different colors.
After gluing several trays, apply a drawing to them, hang an unusual picture in the country. Plots can be very diverse.
Even if you just put these trays on the surface, they will certainly appeal to cats who like to sleep in warm cardboard beds.
Country crafts from disposable spoons, plates
Take note of some more dacha tricks. With your own hands from plastic spoons, you can create excellent containers for germinating seeds or wonderful flowers for the garden. Let's start with the first one.
This is not a three-dimensional picture of some famous abstractionist, but a home-made device to increase seed germination. To do the same, take:
- trays;
- disposable plastic spoons;
- a bowl of water;
- paper napkins;
- transparent cellophane.
Place the spoons on trays. Place in a bowl one napkin at a time, shake off excess water, place on the curved working part of the spoon. Handkerchiefs work well for this. For one spoon you need half of such a napkin. If they are large, then cut them into smaller pieces first.
When the pallet is fully completed, cover it with cellophane, secure it at the bottom. Arrange the rest of the containers in the same way.
Once the seeds have germinated, they can be planted in the soil. If you put a small amount of seeds in each spoon, then later they can be planted directly on a napkin, the roots will make their way, this will not be an obstacle for them.
You can use such a device to increase seed germination. To do this, take:
- disposable plates;
- toilet paper;
- scissors;
- seeds;
- water.
Cut a tape from the toilet paper so long to fold it 3 times, put it on a plate. Moisten well, sprinkle seeds on top. For better germination, cover with foil, but make sure that the seeds underneath do not begin to rot. If you are not using film, then make sure that the paper is always damp.
When still small roots appear, you need to transplant the seeds into the ground. This method helps to increase their germination. Many people know that petunia seeds are quite capricious, but they are not soaked before planting, since they are very small, then it is difficult to take them with your hand or tweezers and sow them one by one into the soil. The next method is also dacha tricks, which is quite simple to repeat with your own hands.
To implement it, you will need:
- plates;
- toilet paper or paper napkins;
- water;
- small seeds.
Proceed in the same way as in the previous case. When the roots appear, place the seeds directly with a paper base on the dug-up damp bed.
They will take root well. But if these are larger seeds, then you should carefully sprinkle them with soil on top. Just like petunias, you can start growing strawberries. strawberries from seeds.
Beautiful daisies are made from disposable spoons to decorate a summer cottage with them.
For this creative work you will need:
- plastic spoons;
- lids from a milk, plastic water bottle;
- pliers;
- Super glue.
Cut the spoons with pliers as shown in the photo.
Place them evenly on the work surface, smearing with glue in the cut edges together, attach the spoons to the lid. You can do one or two rows of petals. If you won't make stems on these plastic flowers, then turn them into lilies. In this case, you will need to take green plastic bottles, cut the petals out of them.
If you want, make the stems of wire, which you want to wrap with a strip cut from a plastic bottle. Attach a receptacle to the upper end of the wire, which is also cut from this container.
By the way, plastic bottles are also garden tricks or useful tips that will make gardening easier.
Country tricks: self-watering of the garden, seedlings
This summer resident's dream will come true if you use plastic bottles.
For such a device, you will need:
- plastic bottles;
- dropper;
- drill;
Cut the bottom of the bottle with a knife, make a hole in the cap using a drill, place the top of the dropper here, screw the cap. Stick the second part into the pot with the plant, into the soil. Tie a strong rope to the bottle, hang it from the support. Pour water through the top of the bottle, adjust the dropper so that very little liquid enters the pot.
These adaptations are great for climbing plants that, over time, will begin to trail through plastic tubes. But other representatives of the suburban flora will grow well in moist soil.
As you know, when watering, you need to soak the ground deeply, but this does not always work. In addition, such wet soil becomes too dense, it is often necessary to loosen it, spending time and energy on it. Before planting peppers, cucumbers, eggplants, make the hole wider and deeper than planned. Place a plastic bottle on the side of it, in which you first make holes with a nail. Plant a plant nearby.
When it's time to water, pour the water into the bottle, filling it to the brim. The neck should remain above the ground when backfilling with soil, so that you can see if the plant needs water and poured it right here. At the same time, the roots will receive the necessary moisture, and you will be able to water less often, using the free time for a summer cottage.
Such watering from a plastic bottle is very useful for hanging plants, or planted in flower pots in the country. Place in each similar bottle, but you can place it with the neck down. Hanging plants will not dry out as much as they used to.
If you put special sharp-nosed nozzles on the necks of cut plastic bottles that need to be thrust into the soil, then you will also solve the problem of frequent watering.
By the way, when you grow seedlings, a similar method will also help you.
Take:
- two-liter bottles;
- yarn or cotton rope;
- Phillips screwdriver
- hammer;
- soil;
- water.
Follow the instructions:
- Cut the bottle in half with a knife, pour water into the lower part. Place a Phillips screwdriver in the center of the plug, hammer into a groove.
- Pass the rope into this hole, tie it on the back side with a knot to fix it.
- Screw on the plug. Flip the top of the bottle over, place it on the bottom, cover with soil and plant the seeds.
- Now you can moisten the soil in moderation, excess water will flow out. When the soil is dry, moisture from the pots will rise up the rope and moisten the ground. At the same time, the window sill will remain clean, and such an irrigation system is completely free.
Plastic containers at the cottage for storage
But what exactly, you will find out right now and be surprised.
To pick mushrooms at home, you will need:
- oyster mushroom mycelium;
- substrate for oyster mushrooms;
- plastic laundry basket.
Place the mycelium and substrate in the laundry basket, you can also use a plastic box for this.
Maintain temperature, humidity, following the instructions for growing oyster mushrooms. Then you can harvest these mushrooms.
Plastic storage boxes in the country can be turned into beautiful comfortable tall beds. For this, it is better to use colored containers. If the height of the box is enough for you, then they need to be placed next to each other in one row. Pour earth on top, plant a plant. Now you will not forget where what is planted, as you can group the boxes as you like.
If you want to get higher beds, then proceed a little differently. The bottom of the upper boxes needs to be cut off, Connect them with the lower ones with a wire.
You can plant flowers in the same plastic boxes for vegetables. They will look great in the next composition.
You can place plants in flower pots here or put plastic in boxes, make holes for water drainage, pour soil. But it is better to plant flowers in wooden boxes and put them in plastic containers. Such an original flower bed in the country looks just amazing.
In this case, the locomotive can be made from cylindrical plastic bottles or canisters, by decorating it.
Even if you have used plastic boxes, they will make wonderful furniture for a summer residence. To make an ottoman with a storage section, take:
- plastic box;
- plywood;
- jigsaw;
- the cloth;
- sheet filler;
- furniture stapler.
Measure the plywood according to the size of the box, but so that it is 5 cm larger than it on all sides. Saw it off.
Lay the plywood on the fabric, the canvas should be 4-6 cm larger than this wooden base on all sides. Cut the fabric. Place a sheet of filler the same size as the plywood on top of the plywood. Place the fabric on top, wrap the edges, fix them with a stapler. Now you can put the necessary little things in the box, cover it with a seat on top, sit comfortably, relax on it.
On such poufs, which plastic boxes helped to make, it is convenient to sit near the preparing barbecue. If you wish, you can quickly turn them into low tables by replacing the fabric seat with a wooden one.
If you are tired of the old stools, update them. Place such an ottoman on top, secure with corners or brackets.
If you have a large drawer, the country furniture will be replenished with another item, just cut a hole in the side to fold books here.
Such containers make excellent racks. Place the boxes under the bed, then you can put the necessary items in them.
If you want to arrange a refectory in the country, place several old wooden stools next to it. Attach the boxes to them. Moreover, at the extreme ones, you need to cut off one lateral side, and at the central ones, two. Place the chipped boards on top, which must first be sanded and painted. Fasten them to the drawers, after which the wide bench is ready for use.
Using such dacha tricks or useful tips, you will save a lot on suburban costs, you will be able to run the house, spending less effort. Use your free time for a pleasant rest, for example, to watch interesting and informative stories. The following life hacks will make it easier for you to stay in nature, help improve the taste of kebabs, teach you how to extend the life of your tools.
And the next plot shows what high beds can be, which not only decorate the site, but also protect the back of their owners. They do not have to bend too far to work the plantation. In addition, the soil warms up better here, does not block, therefore, the yields are high.
Veronica Tsvetkova
Using egg trays
Egg trays can again come to the rescue with mulching, if you take care of this method of mulching at the seed sowing stage. This planting of carrots in egg cells (video) requires a little preparation.
- It is necessary to cut off the bottom in each cell so that the root system can grow unhindered.
- The tray is placed on the prepared soil area and pressed down.
- Seeds are placed in each cell.
- The seed tray is covered with earth, and the area is watered.
Further development of root crops does not differ from conventional planting methods. In this case, the cardboard base of the tray will prevent the development of weeds, as well as the rapid evaporation of moisture from the soil.
It is also possible to grow carrots in egg cells without cutting the bottom. This is applicable if the cardboard is loose and thin enough so as not to become an obstacle to the development of root crops.
In this case, you can prepare egg trays and fill them with seeds in a convenient place, and then transfer them to an area where they will grow. You just need to bury the trays in the chosen place and water them.

Preparing the tray
Important! The cardboard will initially absorb moisture well from the soil. Some gardeners advise soaking them thoroughly with moisture before using egg trays. This will speed up the softening, and the cardboard itself will not take moisture from the fertile layer.
The opinion of gardeners
Will help to understand how effective planting carrots in egg cells, reviews of people who have already used this method of growing root crops.
- Alexandra. I plant both carrots and radishes using egg trays. It is very convenient when you need to plant at the same distance from each other. And you don't need to thin out. There is a lot of trouble only with seeds.
- Svetlana. Used peat tablets before. Very convenient but a little expensive. And with cells from under the eggs exactly the same result, only such material is much easier and cheaper to get.
- Basil. I saw on the internet that you can use egg cartons as mulch. You just need to cut off the bottom so as not to interfere with growth. I checked it in my garden and is completely satisfied. The crop grows evenly, and there are no weeds.
- Tamara. I decided to check and buried one batch of carrots right in the trays, without cutting anything. The cardboard decomposed easily, the carrots rose and grew without any problems. I was glad that there were no weeds at all. No need to weed.
- Valentine. It is very convenient to plant in trays, but the seeds should be granular. Otherwise. If you plant ordinary seeds, then germination will not be very good, and there are a lot of troubles with them.
Depending on how carrots are planted in egg cells (video), the benefits and harms of plants may be different. By following the simple rules of carrot care, and making the right preparation, you can significantly increase the yield and aesthetic qualities of root crops.
Plant onions in egg trays
In winter, less aromatic herbs and fresh vegetables appear on our table. At the same time, the human body needs a daily portion of vitamins. An excellent way out of this situation can be a small vegetable garden on the windowsill.
One way to grow green onions is to plant them in plastic egg trays.
First of all, we divide the egg packaging into a couple of parts: a lid and a box with cells. We cut out the bottoms in each cell.
We put 2 splinters or pencils across the lid: one from the left, the other from the right edge. They serve as support for the honeycomb box of bulbs: the lid acts as a tray of water.
Pour water into the lid at such a level that it covers the roots, and not the onions themselves, otherwise they will rot.
Remove the top layer of scales from the onion and cut off the top of the onions by 1-1.5 cm (leave the onion that has begun to germinate as it is). Pierce the root zone with a toothpick.
We insert the onions into the recesses of the dry egg packaging so that the roots go through the cut holes and touch the water after being installed on the lid.
We change the water periodically.
This way you can grow greens to add to salads, omelets, soups and other dishes.
If you don't like messing with the ground, but respect fresh greens, there is good news! There is a tricky way to grow young onions.
Here's how to grow onions on a windowsill in winter indoors. A minimum of materials and effort are required. Grab the bulbs and go! However, the method is suitable not only for winter agronomic experiments: both in spring and summer, it is relevant and gives a brilliant result.

How to grow onions on a windowsill
You need
- baking sheet
- egg cartons
- warm water
- bulbs
Progress

This short video is a visual instruction for arranging a home garden. Revised 2 times, such a pleasant female voice, like my grandmother! Feels like I'm going to do sill-scale gardening tonight.
Recently I learned that green onions are rich in zinc, not only vitamins! When the body lacks zinc, skin, hair and nails deteriorate, reproductive function is impaired, and hormonal disruptions begin. Green onions will help fill the lack of an important micronutrient! How many mouth-watering dishes can be prepared with fresh herbs ...


Tell your friends how to grow green onions on the windowsill. Of course, not everyone will be on fire with this idea. Only those who are ready to make a little trouble for the sake of health will appreciate our offer!
Alexandra Kilimchuk Has been interested in medicine since childhood, grew up in a family of doctors. She knows how to cook a gorgeous breakfast from literally nothing, she is not afraid to experiment in the kitchen: she prepares pies without flour, low-calorie mayonnaise, healthy sweets. He never gives up and believes that people are created to help each other! In all her household chores, her son Sasha acts as an assistant. Alexandra's favorite book is "The Art of Love" by E. Fromm.
Method advantages
The standard way of germinating seeds in a box with soil is malfunctioning - planting in the future does not guarantee germination. And you have to regularly monitor the level of humidity in the container. It is much faster to master the method of germinating seeds on toilet paper. Also, this method has a number of other advantages.
- Saves space. For a summer resident, at the end of winter, all square meters can be filled with seedlings, so it is important to save valuable space where possible. Even if you have several bags of seeds, you can compactly place them on one belt.
- Moisture control. In this case, it just won't be needed, since the degree of moisture of the seeds is clearly visible on the paper.
- The clarity of the method. The quick accessibility of seeds with this method of germination allows the farmer to personally verify that they have really sprouted and can be transferred to open ground.
- Lack of seedling care. All that is required of you is to periodically look at which of the varieties gave the required number of sprouts in the selected period of time. This will make it possible in the future to compose your own "portfolio" of the fastest growing seeds.
- Resistant to weather conditions. The seeds are at a sufficient depth of the ground and are tightly held by the paste.
- Saving the family budget. You can germinate seeds using improvised means.
- Easy care after disembarkation. In the first weeks after planting germinated seeds, they do not need to be weeded or watered. Even a garden pest like the carrot fly loses the ability to lay its eggs.
- Security. A natural way to germinate seeds without the need for chemicals.
Seed germination technology on toilet paper
This manual method is easy to master, and you can prepare all the necessary tools yourself.
How to collect inventory:
- toilet paper (ordinary cheap one will not work, you need a thick two or three-layer paper for good retention of the seed on the glue);
- spray gun;
- small container;
- polyethylene of good quality and quite dense.
To glue the seeds, take a roll of polyethylene and cut into strips about 70-80 mm wide. The length can be left as it is convenient for you. On each such strip, you must indicate the type of carrot (if you have purchased several types). On top of each of the strips, lay the corresponding length of toilet paper tape, which then moisten well with a spray bottle. To increase germination, special mineral fertilizers can be added to the water. On the prepared damp tape, glue the carrot seeds at a distance of 20 mm from each other, having previously stepped back from the edge about 10 mm.
The second option for making a structure is simply to arrange the seeds between the layers of paper in the desired order. Here you can do without using homemade paste, and replace toilet paper, for example, with thick paper napkins. In this case, you will have to place the seeds not in a line, but along the width of the napkin.
The third way is for lazy people. You are not cutting the polyethylene into strips, but simply bending the material lengthwise. Seeds are glued to one side, covered with the other and rolled into a tape.
Of course, the last 2 options may not yield the same good yield as the first method with tape, paper and glue.
If the germination went well, then it is advisable to leave the seeds in this form until the end of the process so that they do not get confused with each other. Observe the distance!
The tape with the spread seeds must be carefully rolled up and put into the prepared container so that its lower edge is at the bottom. Add a little water to the container, and form a mini-awning from the film on top. Such a homemade greenhouse must be placed in a warm place, where after a while it will be possible to check the seedlings.
Wait for the paste to dry before rolling the tape into a roll, otherwise it will be difficult to separate the seeds later.
Seed glue and its application
You can make a paste for carrot seeds yourself. But we are not talking about the usual sticky mass like PVA, since the chemical components will destroy the nutrients in the grains. To prepare the glue, you need to prepare the ingredients:
- 200 ml of water;
- flour or starch - 1 tsp;
- mineral fertilizer.
Pre-boil the water and gradually add the dry mixture, remembering to stir. Add mineral fertilizer and mix into a homogeneous mass. After cooking, be sure to cool it to room temperature, but do not thicken it too much.
Lubricate the paper with the resulting paste evenly on the tape and place the seeds at equal intervals. Many people ask how to glue the seeds so that they do not stick to their hands. It's very simple - take tweezers or a slightly moistened cotton swab.
Recently, seeds already in a nutritious shell have been on sale. Outwardly, they resemble dragees and are larger than usual. It is more convenient and easier to glue them onto the prepared tape.
How to plant carrot seeds
Often, carrots are planted in open ground and face a number of problems. For example, it is initially difficult to plant small grains at the same distance, therefore, after the first shoots, it becomes necessary to dive - not the most useful procedure for seedlings. And in the rainy season, all planting material can be washed out of the ground or transferred to other beds, then rising in inappropriate places.
Sprouted seeds on toilet paper help get rid of these troubles and get the planned harvest at the planned location.
Prepare the soil before planting germinated seeds. It is better to take care of this even in the fall, having previously dug up the ground for its looseness and ventilation. In the spring, a couple of weeks before seasonal sowing, rake the dug beds again with a rake. Seeds of carrots on toilet paper germinate for about 3 weeks, which must be taken into account when planning the summer season.
When the sprouts are germinated to the required level, and the beds are processed, it is possible to sow in open ground. Armed with a rake, you need to walk well through the beds, making deep grooves. Next, they should be soaked in a little warm water. Unfolded rolls with tapes and glued seeds are laid out in the prepared niches so that the sprouts are facing the ground. After spreading the ribbons, sprinkle them with loose earth. On top, you need to form black polyethylene awnings and leave them for one and a half to two weeks.
Water for the first time 2 weeks after sowing. And the first fertilizer can be applied one month after the appearance of the first shoots (the second approach after another 40-50 days).
Seeds germinated on paper are evenly distributed over the surface and planted at the same depth, which ensures maximum and simultaneous crop germination.
Seeds planted in this way germinate through the paper and release roots, while remaining in the same place and also at the same distance from each other. You can prepare tapes for planting even in winter.
Conclusion
As you can see, you can use improvised means to plant carrots in open ground. The method has been tested over the years and gives good shoots, and also provides a certain garden "aesthetics", because carrots germinate at the same distance and depth. By using the proven method of growing seeds on toilet paper, you can ensure good germination of your crop without the need for careful monitoring.
How to stick carrot seeds on paper?
Sticking carrot seeds onto toilet paper is easy. A couple of nights of working in front of the TV - and the planting material is ready. It is better to take soft, white paper (it will get wet faster in the soil).
Before gluing the seeds, we calibrate:
Prepare a saline solution in a glass (dosage of salt - by eye) and dip the seeds into it, stir. Those that surfaced are bad, we merge them. Those that went to the bottom are good, we leave them and rinse them in water at room temperature. Now the carrot seeds need to be dried so that it is convenient to take them with your hands and stick them on the paper.
Meanwhile, we cut the toilet paper to the size of the width of the ridge - usually it is 80 or 90 cm.Then we cut it into ribbons 2-3 cm wide.
You will need paste to glue carrot seeds onto paper. It can be cooked from flour (rye, wheat) or potato starch.
Carrot paste: recipe
Starch. We will cook 500 ml of paste. We put a container with 400 ml of water on the fire and bring to a boil. Turn off the fire. In a separate bowl in 100 ml of warm water, dissolve 1.5 - 2 tbsp. l. dry starch, stirring well. Then pour this starch solution into boiling water in a thin stream. Stir thoroughly. The paste should not be too thick.
Flour. Fill an enamel pot with water and bring it to a boil over the fire. Pour flour in a thin stream in small portions, stirring regularly. Flour paste is cooked at the rate of 1 tablespoon per 100 ml of water. As soon as the mixture acquires the consistency of a batter, remove from heat. Let the solution cool and use it as a glue for seeds.
So, you can glue:
- We lower the match into the cooled paste, touch the seed with it, glue it on the paper. The distance between the seeds is 4 cm. Another way: first, drop them onto the paper, and then use a match to transfer the seeds to these droplets of paste. The seeds are taken and glued one at a time.
- After gluing the tape, dry it for a day and put it in paper bags before sowing.


Correct seeding of carrots on tape and planting on toilet paper

This year, in order to make it easier for ourselves, we decided to sow carrots using a sowing belt. I loved this idea because planting carrots on paper makes gardening very easy!
There is no need to do thinning under the scorching sun, but in summer it is very tiring and takes a lot of time, which can be spent on rest ...
Background
Last year I was so unhappy with the germination of carrots, I even told myself that this year I don’t want to plant them at all, but spring came and I wanted to have my own young carrots in July - after all, it’s sweeter from my garden once every 100 🙂

And one more point in favor of the sowing tape - if after planting the carrots there is a good downpour, then the carrots sown just like that may "leak" - most likely this is what happened with me last year (after planting it rained for several days).
I think that many gardeners are now trying to sow carrots on tape, and I decided to deepen this issue not only for myself, but also for you, dear readers. So how do you use the seed band correctly for the best germination result? And are there any alternatives to tape? We'll figure out…
Preliminary soil preparation
Properly prepared soil is very important for the germination of carrots. And our beds will have to be prepared two weeks before planting, and not according to the principle - I came to the dacha, dug up, loosened up, planted, and all this in two days off.
A week before planting, or preferably two, it is necessary to loosen the soil to a depth of 10 cm, after which we must immediately take a rake and level the bed. Of course, this means the earth dug up in the fall on the bayonet of a shovel.
Laying the tape with seeds
Immediately before sowing, we loosen the bed again, make shallow grooves - two centimeters, and put the sowing tape in the furrow. Then gently pour a small amount of water and cover it with earth. It is very easy to level the ground and water it again - carefully so as not to wash the soil off the tape.
Gardener's secret: with the help of ripe compost, laid in a layer of half a centimeter, you can significantly increase germination!
We glue carrot seeds on paper ourselves
Another find recipe is that you can make your own seeding tape with carrot seeds! To do this, we take paper with a loose texture (toilet paper or newspaper is well suited), cut it lengthwise into strips 2 cm wide.

From each half we make a seeding tape as follows: we brew a paste of starch or flour, drip onto paper and put carrot seeds in 2.5 cm increments.
The paste is made like this - for 1 glass of water 1 tsp. starch or flour.
There is also a tricky way - take two-layer toilet paper, peel it a little from the edge and put seeds between the layers.
Planting carrots on toilet paper
There was also an interesting proposal from one summer resident on the forum - do not cut the roll of toilet paper lengthwise, but simply fold the paper in half, sticking the seeds, gradually winding the roll, see the photo below ... It saves time and making the tape itself, and planting!
You can additionally fertilize our sowing tape - add mineral fertilizers to the water for making the paste. The ratio is - based on 1 liter of water, a tablespoon of mineral fertilizer.
You can glue the seeds in winter, before the start of the summer season. You must admit that in winter there is usually nothing much to do, so there is more than enough free time.
Planting carrots on napkins
I found another interesting option for planting carrots - on napkins. The principle is similar to ribbons, with the only difference that you immediately form a bed by gluing the seeds in the way your roots will grow.

At home, prepare napkins by sticking carrot seeds in 5 cm increments in a row and between rows.

Well, you are already laying out your napkins on the garden bed and sprinkle it with a layer of soil. It turns out an immediately formed bed that does not need to be thinned out.
What carrot seeds to take
For gluing, it is better to take high-quality, varietal seeds, their germination will be better, and the result will please in the fall. And this method of gluing seeds to paper will save them from disappearing, so to speak, in vain 🙂
Dragee carrot seeds are also on sale, they are easier to stick, but they require more watering at first, since the seed is, as it were, inside a pea made of fertilizers and filler.They need some time to swell and give moisture to the seed inside. But on the other hand, the plus is that the sprout will immediately have nutrition and the growth of the seedling will be optimal.
conclusions
In the same way, you can make a sowing tape with seeds of other vegetables and herbs with small seeds, for example, lettuce, dill, celery. Than in the summer in a kneeling position to engage in thinning, it is better to make a paper tape with seeds in advance and not know grief 🙂 Winter is long, what else to do if not prepare for the sowing season.
These are the tricks I learned about planting carrots on toilet paper. As you can see, there are more expensive options - and more economical, with more labor costs (which, of course, will pay off later) and with less! We approach the garden creatively, comrades! We enjoy, so to speak, the process! 🙂
Video instructions - planting carrots on toilet paper
In this video, an experienced summer resident Yulia Menyaeva shows how to glue carrots onto toilet paper tapes using a flour talker.
In conclusion, watch the video that shows how to plant carrot seeds on a tape in the ground.