In this material, we will talk about this method of hiding pipes in the bathroom, such as installing a plasterboard or plastic box, and also consider the main points for its installation.
As a rule, pipes for cold and hot water laid in the bathroom in plain sight look at least unattractive. Naturally, the owners of the apartments make every effort to hide them. Currently, there are several simple ways to solve this problem, the most common of which is to install a pipe box in the bathroom.
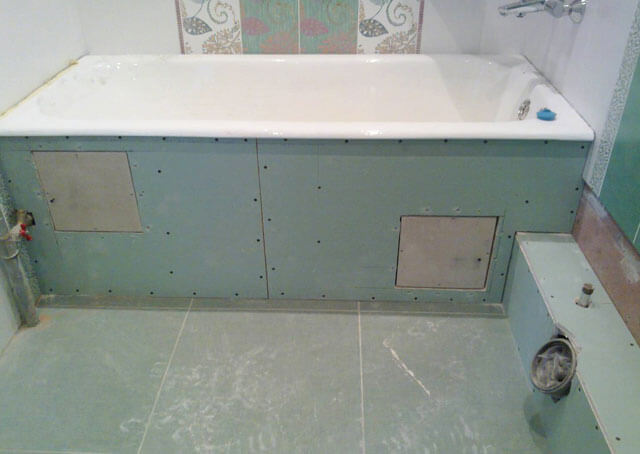
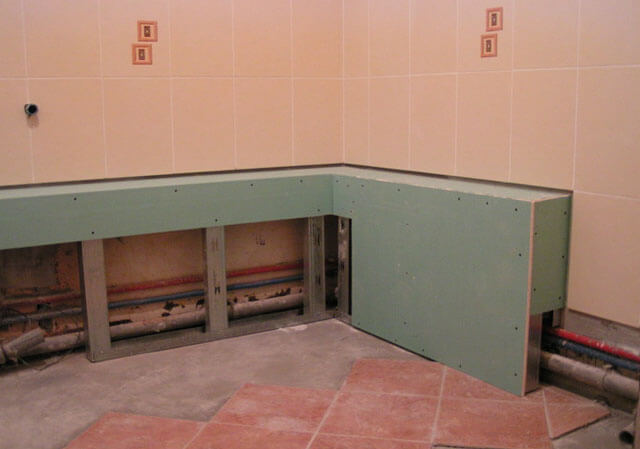
Before making a pipe box, you need to organize the ability to access the laid pipes after installing the finished structure. This will make it possible to greatly simplify the implementation of possible future work for preventive or repair purposes.
Manufacturing the frame of the box
There can be several designs of boxes for plumbing pipes, but the stages of their installation in any case will be the same.
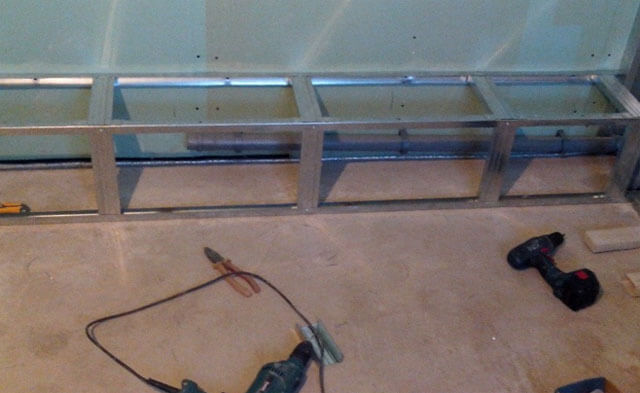
First you need to decide on the material for the frame and cladding. The frame can be made from an aluminum profile or a wooden lath. Next, the dimensions of the space occupied by the pipes are measured, after which they proceed to the assembly of the frame from sections. The structure is fastened to the wall and floor with self-tapping screws.
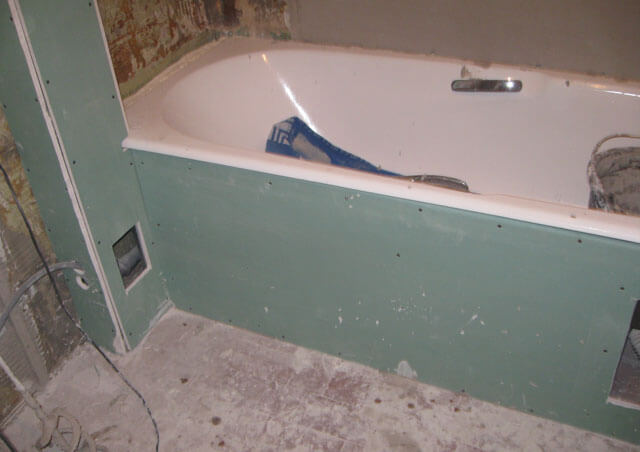
It is worth noting that in order to facilitate the work, wooden blocks can be pre-installed at the attachment points of the frame.
After collecting and positioning the frame, proceed to facing operations.
Varieties of boxes
Plasterboard box
Most often, the box for closing pipes in the bathroom is made of drywall.
This method consists in performing the following work:
- First of all, reference lines are drawn on the wall, retreating from the pipes by 3-5 cm on both sides. To keep the lines straight, you can use the building level.
- Next, a profile of a certain size is set along the drawn lines, and a cut piece of drywall with a thickness of 9.5 mm is fixed to it.
- Now another piece of the profile is cut off and attached to the outer ends of the blanks. The front part is mounted on the base, which is fastened with self-tapping screws every 25 cm.
- The docking places are well putty, and then the surface is either painted or revetted with any material that the owner liked the most.
It is worth noting that the place where the drywall adheres to the wall can be hidden by installing a decorative plinth, for example, a corner intended for a bathroom.
Using polystyrene panels as a box
Polystyrene panels are also quite popular material for finishing bathrooms and toilets. It can be installed without constructing a frame. That is, a plastic polystyrene pipe box is also perfect for solving our problem. These panels have special legs that can be adjusted in height, which is also a big plus when used in rooms with a slightly curved floor. The legs will make it possible to take into account all irregularities, up to 10 cm.
Installation of a plastic pipe box is carried out in the following sequence:
- An end support is attached to the wall.
- The edges of the panels, located on the sides and on top, are greased with glue, then they are installed and adjusted.
- Use a wrench to adjust the legs of the panels to obtain the desired height. After that, we can assume that the installation of the box is over.
The finished box made of plastic material is very high quality and durable.
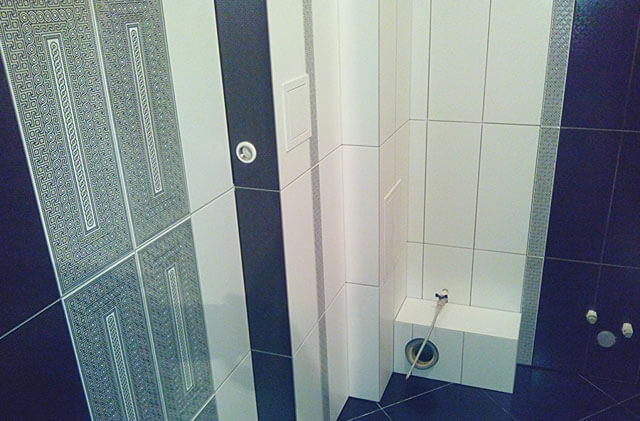
Covering the box with tiles
Ceramic tiles are suitable as a facing for a box made of fiberboard, moisture-repellent plywood or drywall. The tile is most suitable for use in the bathroom, because it is very durable, not afraid of moisture.
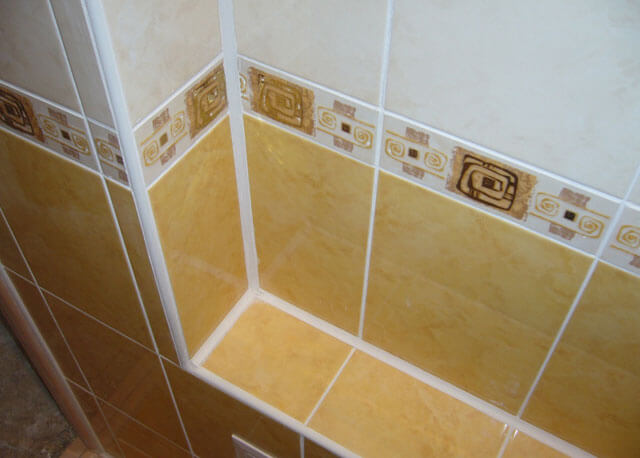
In addition, it comes in many shades and textures. The cladding, as a rule, starts from the front side, and only after that they move on to the sidewalls.
Please note that the tiles are attached with special glue.
Marking, creation of a work plan, installation
A pipe box in the room can be mounted anywhere it is required. The main thing is to make the entire list of calculations on time, even before installation, so that, thanks to a correctly selected place for placing the box, you can use the available space as efficiently as possible.
Even before purchasing all the materials, you need to make an estimate and make a markup. To make the calculations as accurate as possible, you need to take into account not only the dimensions of the box, but also the furniture and plumbing that will be installed in the bathroom.
There is nothing difficult in the installation of the box, since this structure is nothing more than a typical frame assembled from profiles for arches, partitions and other similar structures. It is noteworthy that it is even easier to use it in the bathroom, because there is no need to give the frame a complex shape - you only need to make an even rectangle.

In addition, the frame is most often installed in the corner, which makes its installation even easier and slightly cheaper. To mount the box in the corner, you need to buy only three profiles in height from floor to ceiling, and a fourth profile for cutting jumpers. To install the box, you need to fix the profile to the walls, ceiling and floor, and then fasten it together with jumpers to get a strong structure.
It is important to know that, in order to make the fastening of finishing materials easier after installing the box, you can install pieces of wood in the middle of the box.
The last stage: sheathing and cladding of the box
The final stage, which consists in sheathing the box, also cannot be called difficult, because all the markings have already been made, you just need to precisely cut the material and start sheathing the frame with it.
The cladding material must be moisture-repellent, since the bathroom belongs to rooms with excessive humidity. In such conditions, the service life of a large amount of materials is greatly reduced.
It is best to use a variety of fiberboard, plywood or drywall as a cladding material that are not afraid of moisture. Such materials are easy to install, and ordinary self-tapping screws are suitable as fasteners for them.
It is worth noting that the box must be additionally insulated and sealed so that condensation does not collect on the pipes inside. To do this, you can use polyurethane foam, sealants and other heat-insulating materials.
In the article above, we looked at how to make a pipe box in a bath. We can conclude that it is quite simple to complete all the work, the main thing is to acquire high-quality and correct materials, and to make accurate markings.