Often, the layout of standard living quarters does not allow all residents to be accommodated with decent comfort, especially if there are many children in the family. A multi-level sleeping place will come to the rescue, allowing you to save space and ensure a normal sleep for users. In order for the structure to serve for a long time, we will study how to assemble a bunk bed correctly. It is worth noting that the installation principle of factory and home-made models is almost identical, although there are some nuances.
General assembly principle
Wooden elements used in the structure must be sized and have a smooth surface. To fix the cross bars, side stops (drawers) are used. When assembling, special glue is applied to them, the boards are fixed after laying with clamps. After the adhesive has dried, the clamps are dismantled, and in their place the self-tapping screws are screwed in flush. If desired, the head of the screw can be masked with furniture plugs or putty. Particular attention is paid to the stability of the device. It should be designed in such a way as to withstand not only the child's weight, but also his possible pranks or outdoor games. In addition, if a sleeping place is being prepared for a preschooler, it should be built taking into account that the child will grow.
Special requirements in the arrangement of a bunk bed made of wood are imposed on the legs on which the side panels are attached. These elements are best made from hardwood blocks. Additional stops are attached to the parts or grooves are cut out. To give the appearance of the structure aesthetics, patterns made of thick cardboard are used. It is advisable to make grooves with a jigsaw, which provides the most accurate cut line. All roughness and places of cuts are processed with sandpaper.
After the preparation of the component elements, control measurements are carried out, after which the markings are applied. If all the parts match the drawing, you can start assembling. Special dowels are used as connectors. The sockets for their installation are marked with a pencil, then holes of the required diameter are drilled. After trying on the protrusions, joiner's glue is applied and the final assembly is carried out.
The bunk bed, the drawing of which is shown below, is assembled in several stages. The glued base is fixed with clamps. After drying, it finally sets on the screws. It is worth noting that the correct fitting of parts is the key to the success of the construction of the entire structure, therefore, disassembly and assembly in the process can alternate many times. It is somewhat easier with factory elements, since they are adjusted in advance at the factory.

Classic model
Building a traditional wood bunk bed starts with making a base. Drawers are made, to which two boards are fixed at right angles. The current task is to make a rectangular box. Support bars are screwed to the ends with self-tapping screws. Planks are placed in the resulting box, on which the mattress will subsequently lie.
At the next stage, they begin to install the back. They take three boards, the width of which is identical to the dimensions of the bed, complete them with racks in one block. For this purpose, dowels are also used. These parts can be made by yourself or purchased from a specialized store. In the details, holes are drilled for the dowels, the boards are tried on to the bed racks, the corresponding marks are made with a pencil. The elements sit on the glue only after re-fitting.
Having made the back, they begin to manufacture the legs and the parts associated with them. The construction of these elements is not much different from the creation of a headboard. The main difference is the number of beams. It is important that the top boards of the back and legs are level as they will support the top floor. How to assemble a bunk bed further? The second level is made according to the same principle, only it is mounted on horizontal beams and fixed with dowels. After installing the upper floor, the bed is reinforced with end posts made of boards.
Final stage
After assembling the entire structure, a ladder is installed. The simplest option is to attach horizontal crossbars to a pair of vertical posts. At the very end of the operation, decoration is performed. A water-based paintwork is suitable for this. It is harmless to health, which is the key factor in favor of its choice. If the bed is made of natural wood, a colorless varnish that preserves the natural beauty of the wood patterns is quite suitable.

Bunk bed with drawers
For work, you will need plywood boards, wooden blocks, wood glue, a drill, bolts, self-tapping screws, a hacksaw or a jigsaw.
The beginning of the assembly is traditional: two mattresses are prepared with wooden boxes, support boards, a ladder and a masking sidewall.
The erection of the supporting walls is carried out from plywood panels, which are poured with nitro lacquer. If the height of the partition is 1.5 meters, then its thickness should be at least 20 mm. The width is selected depending on the size of the boxes. Marks are placed on the support walls at the places where the mattresses are fixed, after which holes are drilled. The wooden frames are screwed in with chrome-headed bolts.
Peculiarities
If there are no boxes or a wooden frame under the mattresses, a crate is made between the sidewalls. Bars of wood are screwed to the walls with self-tapping screws, on which the boards are laid. The sidewalls are fixed to the finished crate by means of connecting pins and sidewalls that cover the mattress.
If the bunk bed, the drawing of which is shown below, has solid backs, it is advisable to install a removable ladder. To assemble it, a shield is attached to the box, connected to sticks in the form of steps. For a model whose supports are made of a pair of planks, it is better to mount a ladder between them. In the boards, holes are drilled 40 mm deep at a distance of 100 mm from each other. Glue is poured into the nests, after which wooden pegs with a diameter of 18 mm are inserted into them, which serve to connect the parts of the back. are made after measuring the space under the bed. They can be made of plywood, pulled together with self-tapping screws, and equipped with wheels at the corners.

"Attic" option
Instructions for assembling a bunk bed with the simplest type of drawers are given above. Next, we will consider another popular option, which can be performed with different levels of difficulty, depending on the materials and carpentry skills available.
A typical model of this type is a structure that is fixed to a wall or ceiling. The device consists of four supports 1500-2000 mm and a berth. First, you need to create a drawing, carefully calculating the working dimensions.
Assembly
How to assemble a loft type bunk bed? Stages of work:
- Wooden elements are being prepared (polished, treated with an antiseptic).
- According to the drawings, the sockets for the fasteners are drilled.
- The lounger is made according to the standard scheme described above.
- Sleeping place and support legs are assembled into one block. The top edges of the uprights should rise 300 mm above the sunbed.
- The strapping is made from above and below by screwing on the support racks of the board and sidewalls, which provide additional rigidity and serve as sides.
- A staircase is being mounted.
After assembly, the structure is covered with transparent varnish.
Model with sofa
The assembly scheme for a bunk bed with a sofa saves even more space than the classic counterpart. An ordinary lounger on the ground floor does not allow you to just sit comfortably, read a book or watch TV, since there is no comfortable backrest. To ensure comfortable living conditions, you will have to additionally install an armchair or a small sofa.

A way out of this situation will be a bunk bed with sides and a sofa. At night, the lower part will serve as a comfortable lounger, and during the day - a comfortable sofa for relaxing sitting or lying down. When folded, the structure does not take up extra space, when unfolded it turns into a full-fledged sleeping place. For self-production of such a kit, you will need to purchase a sofa, on the basis of which to build the rest of the structure, which is stable, thanks to the massive lower part.
Modifications for large families
How to put together a bunk bed, in which the lower floor is a double bed? This design is suitable for a one-room apartment, in which the first tier is assigned to the parents, and the upper floor to the child. The bed is made in the form of a trapezoid, its production is no more difficult than the traditional version. Not so much materials are required, and stability will be more reliable due to the massive and expanded lower tier in the expanded form.

Another option is a bunk bed with boxes of four loungers. This design is perfect for large families. In manufacturing, this option is more difficult than all the others. Despite the laboriousness and material costs, it will be possible to maximize the usable space in the room. In fact, these are two or three classic bunk beds, assembled into one set. You can modify the fixture by creating drawers.
Manufacturing material
Children's bunk bed is furniture that has strict environmental and fire safety requirements. The quality of the product largely depends on the material used. Most often, chipboard, MDF or wood massifs are used to create the structures under consideration. The last option is the safest and most reliable, since the wood breathes and meets all environmental standards. It is necessary to choose a dried material without defects from ash, birch, beech.

However, wood has a rather high cost, so pressed boards are often used to make beds. Furniture of various directions is made of chipboard. However, for a child's sleeping place, this is not the best option in terms of environmental safety. Alternative - MDF, boards, which are made from dried compressed wood pulp. Natural, harmless resin obtained from trees is used as a binding base.
High-quality and original furniture not only emphasizes the uniqueness of the home, but also allows you to diversify your life.
It is possible to make a bunk bed from several types of material: quite popular chipboard, timber and edged board, furniture board, as well as solid wood.
A wooden bunk bed with your own hands is made quite quickly, but you will have to invest a lot of effort in it due to a number of features.
A selection of materials before the workflow
There are a number of materials from which a bunk bed can be made with your own hands, but in fact only a few are used:

- Particleboard, among others, is especially popular due to its low price and the possibility of extremely fast production. With skillful work with a jigsaw, problems will not arise, but you cannot make an internal drawing, because to close it requires sophisticated equipment that is installed only in factories. The downside is the color scheme (it is impossible to create a high-quality imitation), as well as small emissions of chemicals into the air in places not covered with edging.
- Edged boards and beams are also very popular, but more and more often as load-bearing elements, while they are rarely used as the main ones. It is quite difficult to work with them, besides, it can be quite difficult to evaluate the material without preliminary experience, and only an experienced person can distinguish 17% moisture from 30%. In the presence of a lathe, the timber becomes especially popular, because a very interesting support structure can be formed.
- Furniture panel is the most expensive among all, and you can find it not in every city in the world. To make a bunk bed with your own hands, this material is ideal, and the strength and environmental friendliness are almost equivalent to the array. It lends itself well enough to processing, and you can form a pattern even without through holes, which is highly appreciated by lovers of wood cutting.
- The array is rarely used, because prices are almost always astronomical, although you can get it anywhere. The convenience of this approach lies in the minimum number of parts, as well as their complete homogeneity. Working with the material is quite complicated (you need to properly dry, select and process), so without good preliminary experience it is better not to get to work.
The fittings are standard, but it is advisable to resort to galvanized steel instead of aluminum, which often does not look so impressive, but it is much more reliable, and this is especially important for the upper tier.
Preparation and main activities
Tools and materials:

- roulette;
- edged board;
- timber;
- bar;
- jigsaw;
- protective composition;
- the brush is flat;
- screwdriver;
- steel furniture corners;
- furniture screws.
At the very beginning, you need to prepare a drawing of the future workflow. It is desirable to use the minimum number of parts in the drawing; moreover, it is often simplified during work, because not all elements can be machined. The dimensions of the bed may vary depending on the physical characteristics of the resting person, i.e. with a height of 190 cm, it makes no sense to make the bed shorter than 210, while at 160 cm, 180 will be optimal.
In this case, the most inconvenient option will be considered - working with an edged board and a bar, because, having learned from a complex, it will be much easier to go to a simple one. First you need to make a complete sawing of the elements, which will then be used:
- timber 60 * 60 mm - 4 pcs. 1800 mm each;
- edged board 25 * 150 mm - 6 pcs. 1900 mm each, 12 pcs. 750 mm each and 2 pcs. 1550 mm each;
- bar 25 * 80 mm - 2 pcs. 1800 mm each and 6 pcs. 300 mm each.
After that, they should be sanded as carefully as possible with sandpaper. Particularly close attention is paid to the places of the cuts, so that no burr remains on them, and after the end of sanding, you need to collect all the dust from the wood with a damp sponge (not wet), but do not particularly moisten it.
Then, without fail, all elements are covered with a protective layer against moisture and insects. Drying usually takes up to 12 hours, after which you can start working again.
Now we have to collect many sawn elements into 1 general construction of a bunk bed with our own hands:

- At a height of 30 cm from the bottom of the beams, a perimeter is formed from an edged board.
- One more perimeter is formed mirrored from above.
- The foot and headboards are covered with 2 short boards.
- The upper tier along the perimeter is closed with boards, and you only need to leave the area for the stairs.
- A staircase is being formed.
In order to organize the joint between the board and the timber, you will need a furniture steel corner, 2 screws for each joint. It is this design that will ensure maximum reliability of the entire system during operation, regardless of the weight of the resting person.
If you wish, you can use long-length furniture screws, but for them you initially need to drill small-diameter holes, after which you can finally tighten them. Mounting on self-tapping screws is more reliable, but the joints will be visible (it is better to use 2 options in pairs so that the quality is extremely high).
Important aspects in work
Tools and materials for further work:

- PVA and sawdust;
- furniture plugs;
- stain and varnish;
- the brush is flat;
- rubber heels;
- hammer and glazing beads.
After the bunk bed is made with your own hands, you need to make reclining places in it. This will require 8 cuts of a 25 * 40 mm bar along the entire internal length by 2 levels - these will be drawers.
Ordinary screws are used to fix them, but you still need to drill holes so as not to split the wood. The fastening step is only 25 cm with the obligatory joints in the corners.
On them mattress toppers are formed from edged boards. To do this, the board is cut into the entire inner width of the bed and fixed in increments of 10-13 cm. If the step is reduced, then the bed will be too hard, and when increasing, the mattress will fall through the cracks. All fixing is done on self-tapping screws with a flat head, and the hat must be inserted into the board (a groove is cut out with a chisel). Otherwise, the mattress may be damaged, which should not be allowed.

All screws visible to the eye must be closed with special furniture plugs that allow the metal to merge with the wood. If you want to achieve a better result, you can mix PVA with sawdust (you get an impromptu putty) and carefully tighten the metal with this gruel. In any of the 2 options, the result will be quite good, but upon closer inspection, you can still see the screws.
And now the bed is completely ready, but you cannot rest on it yet. Now you need to cover it with stain and varnish, and then give 36 hours to dry completely in a ventilated area. You should not be guided by the fact that after 4-5 hours after varnishing with your fingers nothing is felt, because harmful chemical compounds will be released into the surrounding atmosphere for a very long time.
Before starting operation, rubber heels are nailed to the legs on glazing nails, which will allow leveling the unevenness of the floor. Instead of rubber, you can use plastic counterparts, but they will not provide such softness.
As time goes on, children grow up, cribs become cramped for them. The time comes to think about sleeping places with full dimensions, because the children will very soon turn into lanky teenagers. Putting two large beds is not an option, they will take up almost the entire space of the child's room. However, there is always a way out. For those who know how to hold a hammer and a screwdriver in their hands, we offer detailed instructions on how to make a bunk bed yourself.
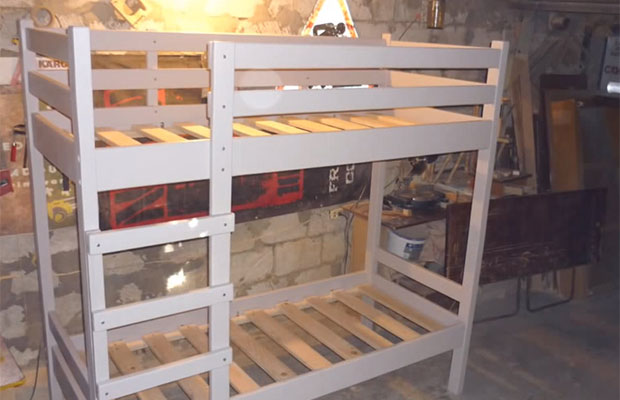
General view of a bunk bed
Preparatory stage
First, we select mattresses of the required dimensions. Their standard sizes are 180x70 cm. The mattress should be comfortable, best of all orthopedic, spring. But if you wish, you can make it yourself. You will need foam rubber and thick fabric for the cover (teak, coarse calico). It is better to take two layers of foam rubber, the first 10 cm thick, the second 15 cm. The density coefficient of the lower layer should not exceed 35 kg / m3 for the mattress to be softer.
We will make a bunk bed with our own hands simple and comfortable. The product will consist of the following parts:
- Four racks,
- Two shelves with edging and railings,
- Vertical staircase.
Now you need to decide where to put the bed. However, keep in mind that the width of the bed will be 5 cm wider when adding a ladder. So, the estimated dimensions of the finished product will be:
- Length - 1904 mm,
- Width - 744 mm,
- The total height of the bed is 1800 mm,
- Height to the bottom tier - 200 mm,
- Height from floor to second tier - 1220 mm. Before making a bunk bed, check in practice if you can get up without hitting the second tier with your head.
We carry out a drawing with full detailing and indication of dimensions. Now you can go to the construction base for lumber.
Tools and materials
To make a bunk bed with our own hands, we need lightweight and durable softwood. The boards and beams must be flat and well dried. If it is possible to cut the material at home, then it is better to do so. Otherwise, wood cutting can be ordered at the base. Here are the dimensions of the required parts:
| Material | Dimensions, mm | Qty |
|---|---|---|
| Bed racks | ||
| Board section 90x22 | 1800x90x22 | 2 |
| 1680x90x22 | 2 | |
| Board with a section of 70x22 | 1800x70x22 | 2 |
| 1680x70x22 | 2 | |
| Top and bottom shelves | ||
| Beam 50x40 mm | 1860x50x40 | 6 |
| 700x50x40 | 8 | |
| Plywood 8 mm | 1240x700x8 | 2 |
| 620x700x8 | 2 | |
| Plywood 4 mm ("ceiling" on the top shelf) | 1240x700x4 | 2 |
| 620x700x4 | 2 | |
| Shelf edging | ||
| Board section 120x22 | 1724x120x22 | 4 |
| 560x120x22 | 4 | |
| Fencing | ||
| Board with a section of 70x22 | 1764x70x22 | 3 |
| 600x70x22 | 5 | |
| Ladder | ||
| Beam 70x40 | 1360x70x40 | 2 |
| Round timber 30 | 500x∅30 | 6 |
To work, we need the following tools:
- A hacksaw, simple or electric.
- Drill with bits.
- Electric planer.
- Clamps.
- Chisel, screwdriver.
- Hammer.
- Electric jigsaw.
- Level, tape measure, ruler, pencil.
- Lots of sandpaper.
Preparation of parts
Racks
The bedpost consists of two planks held together by four screws at right angles. To do this, we tighten both boards with a clamp. We drill the marked holes with a drill, screw in the screws, remove the clamp. In the same way, we prepare three more racks, and those that go to the headboard should be longer. When considering how to make the most modern bunk bed, we round off the top of the racks. To do this, we cut them along the radius with a jigsaw, remove the chamfer from the corners of the radius, grind the surface with sandpaper.

Bed shelves
Saw them out of 8mm plywood. To make the material less deformed, we make two blanks for each berth. One sheet should measure 124x70 cm, the other 62x70 cm, so that their joint falls on the transverse beam.
Ladder
For the rungs, you can take 3 ready-made gymnastic sticks and cut each into 2 pieces of 50 cm each. The ladder racks are made of 70x40 mm timber. The tops of the racks are rounded in the same way as the bed racks.
Beam for installing shelves
We cut the timber for the installation of the lower shelf:
- Longitudinal parts 1860x50x40 mm - 6 pcs. (3 for each shelf),
- Transverse parts 700x50x40 mm - 8 pcs. (4 beams per shelf).
We saw the boards for the edging and the railing in fact, when the base of the bed is assembled. In the manufacture of bunk beds, it is not always possible to follow the exact dimensions, so it is better to adjust the decorative details to the finished frame.
Assembling the bed
Step 1. Assembling the frame of the bed shelves. To do this, we select nests in the bar, about half the thickness of the tree, to connect the longitudinal and transverse bars. We assemble the frame and check its perpendicularity. We attach plywood panels to the frame, having coated them with carpentry glue. We reinforce the connection with screws with a pitch of 200 mm. Dry the finished shelves, then sand the front surface.

Step 2. Putting the ladder together. We mark the racks and drill the holes for the crossbeams using a feather drill. Hole diameter 30 mm, depth 15 mm. We insert the halves of the gymnastic sticks into the holes and fix them with screws. You can pre-coat the walls of the grooves with wood glue.

Ladder
Step 3. Connecting the bed racks to the shelves. How to make a bunk bed with sturdy sun loungers? Safety comes first. Our solution is simple and reliable. First, we mark the height of the attachment of both shelves. This is done from the inside of the racks at the level of the lower surfaces of the shelf frame. We tighten the shelves with racks with clamps, check the perpendicularity and make marks for the fasteners. We drill holes for screws in both boards of the rack. We fix the shelves by tightening the screws.

Fastening shelves with racks
Step 4. Hanging decorative edging. We measure the distance between the posts, saw off and adjust the longitudinal and transverse edging boards. We install them 5 cm below the frames to hide the bar structure. We fasten the edging to the shelves with screws.

Fastening the edging to the shelves
Step 5. Installation of the ladder. The left ladder post is attached to the bed post with three screws. The right pillar is screwed to the upper edging with two screws, and one to the lower edging. The screws are screwed in from the inside of the bed.

Attaching the ladder and edging
Step 6. Installation of the fence. A do-it-yourself bunk bed should be not only durable, but also aesthetic. Therefore, we will make a beautiful fence. We cut longitudinal and transverse boards with dimensions of 70x22 mm into the bed racks, having previously selected the nests in the wood with a chisel. A railing is not required on the bottom shelf of the front side of the bed. We fix the rails with screws, screwing them to the racks. Sew up the openings between the edging and the fence with a beautiful fabric. The assembled product can be painted or varnished.
Step 7. Setting up the bed. To keep the bed stable, it must be attached to the wall with brackets.

Installing the bed
After finishing the work, we will free up a lot of space in our living space. Made to strict dimensions, this neatly assembled bunk bed will become a real decoration of your bedroom.
Sometimes the furnishings of typical premises require non-standard solutions. This is especially true for children's rooms in large families. After all, there you need to organize a place for games and sleep. Bunk beds come to the rescue, which save precious square meters.
What should be a children's bed - MDF, chipboard or solid wood?
Despite the variety of factory cribs in two tiers, it is not always advisable to buy them. The purchased model may not fit into the interior of the room, and the cost can be unreasonably high. However, there is a way out -. Even if it is not easy: you will have to study specialized literature, select materials and assemble a set of tools.
You can draw a lot of sketches of children's beds, at least one, at least two floors. But there are conditions common to all models:
- Comfort. Children should be comfortable. Their health depends on it - physical and psychological.
- The beauty. This is important in shaping the character of a child, regardless of gender.
- Security. It is not only about the reliability of the structure, but also about the correct selection of materials.
In fact, there are more requirements for children's furniture, but these are the main ones. And in many ways, the quality of the crib depends on the materials. Traditionally, in the manufacture of MDF boards, chipboard, wood massif are used. Furniture is considered an excellent option. It is an environmentally friendly, breathable material. When buying, choose high-quality, dried wood without external defects (knots and cracks). Wooden beds have high thermal conductivity and remain warm even in a cool room. Hardwoods such as birch, beech, ash are considered optimal when making a bed with your own hands. The main disadvantage of this material is its high price.
Not so long ago, chipboard was the most popular material in our country. It was used to assemble kitchen and bedroom sets, furniture for residential and industrial premises. However, furnishings made of chipboard are not always safe for the child's health. Often this material contains the toxic substance formaldehyde. Its presence can be determined by smell. In addition, chipboard furniture does not differ in durability and aesthetic appearance. By and large, the advantage of this material lies only in its low price.
An alternative to chipboard is MDF boards. This material is made from dried fine wood pulp and pressed into plates. Lignin, a natural resin obtained from trees, is used as a binder. In furniture production, as a rule, laminated MDF boards are used. This is a relatively inexpensive material, but at the same time it is free from the disadvantages of chipboard.
Children's options - 2 popular models
Self-production of a baby bed begins with sketches. We will consider drawings and methods of creating comfortable furniture below. By the way, a two-tier baby bed is not always installed in a room where two or more children live. The reason may be saving space or creating an original interior in the room. There are many options, but we are going to make a bunk bed for the first time, which means that complex structures are best avoided. Our task is to create a reliable and comfortable design without any special frills. Consider two models that are popular when decorating a children's room.

Classic bunk bed - there are sleeping places on the first and second floors. This design is simple and reliable. For its manufacture, a minimum of materials are required. This model is stable and can be used for games and room zoning. For reliability, it can be attached to the wall.
Bed in two tiers attic type. It is designed to save square meters in the room. On the second floor of the structure, a sleeping place is created, and on the platform of the lower tier, the child can work or play. This design is suitable for both preschoolers and adolescents.
Of the tools for assembling a bunk bed, we need a tape measure, a pencil, a screwdriver, a hacksaw (electric jigsaw), a hammer, pliers, an electric drill with a set of drills, a square, a sander. Such a set is required when creating any model. You shouldn't save on materials. We are making a bed for children. Therefore, the design will be based on natural wood, MDF boards or their combinations. We will leave the chipboard for production facilities. With the right approach, our crib will be as good as factory made models.
General principles when assembling - first about the main thing
Despite the variety of wooden beds, they are assembled according to general principles. The boards and blocks from which the bed is assembled must be smooth and of the correct size. When attaching the transverse boards for laying the mattress, drawers are used - side stops. And it is better to make them from beams. Transverse boards for laying the mattress, drawers are used - side stops. And it is better to make them from beams.
When assembling, apply wood glue to the sidebars, and fix the laid boards with clamps. After the glue has dried, remove the clamps, and screw in the self-tapping screws in their place. Almost all self-tapping screws or screws are screwed "into the pot". That is, their caps should be flush with the surface. To do this, first we drill a recess with a large-diameter drill. In the future, the head of the self-tapping screw can be masked with a special decorative plug or putty.
Special requirements are imposed on the legs - the side end panels of the structure are attached to them. Therefore, preference is given to hardwood blocks. We fix additional stops on them or cut out grooves. Giving the design attractive smoothed forms for novice craftsmen often causes difficulties. Patterns made of cardboard or thick paper prepared in advance will help to cope with this problem. It is advisable to cut grooves in the board with an electric jigsaw - the cut line will be more accurate. And the resulting cut is processed with a milling cutter (or sandpaper). This applies to all structural elements.

After preparing the details of the bed, we carry out a preliminary fitting and apply the markings. After making sure that all the parts correspond to the drawing, we proceed to the assembly. For this we use connecting dowels. We mark the holes for their installation with a pencil and then drill them out. Initially, we leave the grooves and dowels dry, but we use them during the final assembly.
We collect the bed in stages, starting from the first tier. The assembled and glued base is tightened with clamps until completely dry. And after removing them, the elements are fixed with self-tapping screws. In fact, the bed can be assembled and disassembled more than once before final assembly.
Assembling a Classic Bunk Bed - Step-by-Step Guide
So, let's try to assemble a classic bunk bed. Its production will allow you to "fill your hand".
The assembly of such a bed begins with the manufacture of the base. We make drawers and attach two boards to them at an angle of 90 °, our task is to create a rectangular box. We fasten the bars - supports to the end boards with self-tapping screws. And in the created box (base) we mount the crossbars, on which the mattress will later lie.

The next step is to create the back. Take three boards (their width should correspond to the size of the bed) and assemble them with the bed racks into a single whole. As a rule, for this we will use dowels. You can trim them yourself or buy them in the store. We drill holes in the boards and racks, into which we insert the dowels. Attach the boards to the bed posts and make the appropriate pencil marks. Do not forget that a preliminary fitting is initially carried out, and only then the fasteners sit on the carpentry glue.
Having finished working with the back (headboard), we proceed to the manufacture of the foot. In fact, making it is not much different from making a headboard. The only difference is in the number of crossbeams. But at the same time it is important that the upper boards of the back and foot are on the same level - the base of the second tier will stand on them. The second tier is made in the same way as the first. But it is placed on horizontal bars and fixed with dowels. After fixing the second tier, we will strengthen the structure with end boards - racks. Having finished assembling the bed itself, we install the stairs. There are many options for the manufacture of this structural element. Let's dwell on a simple one - we attach horizontal crossbars to two vertical posts.
The final stage is decorating. For these purposes, we will use paints and varnishes. When choosing paint or varnish, give preference to water-based coatings. They are safe for health. And for us, this is a key parameter.
This instruction is not a reference. On its basis, you can develop a sketch of a bunk bed of your own design. There are options where the first tier is replaced by a sofa or work table. However, the latter case concerns the loft-type bed.
Making a two-story variation of the "attic type"
This type of bed saves space in the room. But an interesting design makes it popular not only in small apartments. Loft beds are common on campus campuses. By the way, on the second tier, as a rule, one berth is made, but other options are also possible. When creating a bed, a lot depends on the skill. Perhaps you are ready to tackle a complex project with many decorative or functional elements. However, if this is the first experience of this kind, it is better to stick with simple models.

There are loft-type beds that are attached to the wall or directly to the ceiling. We will focus on the usual model, where the bed is an attic, this is a structure of four supports of 1.5-2 meters and a berth. The work on the bed will begin with the creation of blueprints. In this case, special attention should be paid to the sizes. Indeed, the comfort of the workplace located on the first floor depends on the height of the structure. A bunk bed for a preschooler should be designed taking into account that he will grow up.
Step-by-step instructions for its manufacture are not difficult:
- 1. we prepare the tree - we grind it with sandpaper, cover it with an antiseptic;
- 2. in accordance with the drawings on the racks, we prepare places for fastenings (we drill holes for dowels);
- 3. make a lounger - the assembly scheme is the same as in the manufacture of a standard bed;
- 4. we collect the sleeping place and support racks into a single whole. In this case, the upper edges of the racks should be 30 cm higher than the lounger;
- 5. we want the top and bottom strapping. That is, we fasten the boards at the bottom of the support posts (the number and dimensions depend on the load). They will give the structure additional rigidity. At the top, the same boards will serve as bumpers for the bed;
- 6. install the ladder.
When you finish assembling the structure, cover it with transparent varnish. A rare material can match the beauty of the wood pattern.