For the successful start of work related to electricity and definitions of phase and zero in conductors, prepare the necessary devices and devices for this:
- digital or its switching analogue;
- tester (can be replaced by indicator scolding);
- flomaster;
- pliers, booths;
- insulating stripper (tool for removing insulation from wires);
In addition, the location of the protective equipment should be determined: automatic de-energization devices or traffic jams ,. Standard place of their location on the site, near the apartment and inside. In order to comply with safety, manipulation with electrical appliances and bare wires carry out, having turned off the machine.
Phase measurements and zero multimeter

In everyday life, electric networks are used in 3 phases, bringing to the consumer panel of a current voltage in 380 V. in homes, mainly diluted wires with a voltage of 220 V, because they are connected to zero and one of the phases. Wiring mounted in compliance with the rules has a ground.
The measurement of the voltage between the conductors is carried out by a multimeter. Before starting the measurement, the device is set to the maximum possible variable current with the "~ V" or "ACV" icon and the value greater than 250 V (as a rule, digital devices are set to 650-900 V).
By measuring contacts, up to 2 conductors are simultaneously touched and the voltage is measured. The voltage fluctuation in household networks is +/- 10% of 220 V.
It should be extremely carefully taken to the settings of the device, since when contacting the phase and zero, when settings issued for measuring the resistance indicator, the wiring is closed and injuries and burns will be obtained.
Definition of outdoor inspection

Mounted with fulfilling all requirements wiring, it is possible to distinguish between the colors of the wires per phase and zero. It just learned that having a yellow-green color of grounding wire, a blue or blue shell is a zero conductor. Black, white or brown - a phase wire shell is performed in such insulation. Thus, it is checked on the correctness of the connected connections.
After checking in the instrument panel, matching the wires of their color marking, you can proceed to the inspection of all junction boxes. Pay attention to twist. Zero and ground wires are not twisted together, we look at the color, is it so.
If switches are attached to the phase in the junction box, then mainly their installation is made by a two-core wire having an insulation color, for example, white and white. It is not something out of a series of outgoing and often occurs.
In the case of installation in the appropriate color combinations of the conductors, then check the phase wire by applying the indicator scope for this.
Application of screwdriver with indication

Often, in the houses of the old building, the wiring is performed without a grounding wire. In this case, it remains to determine only the phase. Disposher with display it can be easily done. This measurement is based on the fact that inside the device contains a light bulb and resistor (resistance).
In the event of a closure of the electrical circuit, the signal flashes. The resistance provided for in dump truck with an indication is designed to carry out measurements safe for humans, lowering the current to non-critical values.
Preparation Before using the indicator: A plug-machine on the power meter is turned off, then we clean the conductors with a knife for a length of 10-15 mm. The ends of the wires are bred for some distance to prevent them from random contact.
Switch the machine to the operating position and apply scolding to the indication to the stripped conductors you need sequentially. Once on the phase wire, unlike the zero, the signal diode will light. The detected phase must be tagged with a tape or felt-tip pen, to perform further connections to start when the machine is turned off.
When the lighting installation is carried out and the switch has a contact with the phase conductor, then turn off the machine to replace the burned lamp, do not.
Indicator pumping when testing the wiring is held in the hand in a certain way: the dummy is clamped between the middle and thumb, not in contact with the bare parts of the metal. At the end of the handle there is a metal washer, we put the index finger on it. Next, test.
Application of incandescent lamp
 This is a method of using incandescent lamp to determine the conductors of the corresponding color in the network of 3 conductors. This method provides compliance with elevated security measures.
An ordinary incandescent lamp is screwed into the cartridge to apply this method. The cartridges screw the wires that do not have at the ends of the insulation.
If there is no set of parts for this method, you can use the standard desktop lamp. In this case, to get the result alternately, the colors of attaching the conductors to the fork.
The disadvantage of this method is that applying it, it will be impossible for sure to know which of the two wires phase. That is, by this method, we rather check the system for performance.
And the advantage is that with a lot of probability, we know the following: 1 wire zero, another phase wire. If when testing the light does not burn, it indicates the absence of a phase in the conducted conductors.
Measurement of the resistance of the "Ring phase-zero"
 For planned monitoring and timely detection and elimination of security violations in the maintenance of its normal operation, systematic measurements of the resistance of the ring of the phase-zero ring are carried out, since the causes of the breakdown of the lighting devices are network overload and short circuit.
The fastest and most effective way to identify and prevent such cases is the measurement of resistance.
Not everyone knows what the concept of "Ring Phase-Zero" means. It means the contour created by the connection of the zero conductor located in the grounded neutral. The closure of this electrical network forms a ring-zero ring.
Resistance in the circuit is measured:
- Tension drop In the circuit turned off.
- Tension drop Due to the resistance of the growing load.
- Inspection On the subject of mechanical damage to the wire should be carried out, starting from the place of exit from the walls, it is, as a rule, it is translated.
- All codes of conductors Must have reliable insulation, and the contacts are mounted in the housing so that there is no possibility of a random touch by open parts of the body.
- For home use It is enough to get a control lamp and a screwdriver with an indication, their cost is not significant. For a person sophisticated in electricity, a more expensive device is a multimeter, as it has a wide range of measured values.
Electrical networks are two types. AC networks and a direct current network. Electric current, as you know, is an ordered electron movement. In the case of DC, they move in one direction and. As it is customary to speak, have permanent polarization. In the case of alternating current, the direction of movement of the electrons changes all the time, that is, the current has a variable polarization.
AC network is divided into two components: the labor phase and an empty phase. Labor phase Sometimes they simply call the phase. Empty called zero phase or easy - zero. It serves to create a continuous electrical network when connecting devices, as well as to ground the network. And the phase is served working voltage.
When the electrical appliance is turned on, it does not matter which phase is working, and what is empty. But when installing electrical wiring and connecting it to a general-friendly network, you need to know and take into account. The fact is that the installation of electrical wiring is made or using a two-core cable, or three-core. In a two-room one lived - the working phase, the second - zero. In a three-core operating voltage is divided into two veins. Two operating phases are obtained. The third lived - empty, zero. The general network is performed from a three-core cable. General or apartment, mostly done from a three-core wire. Therefore, before connecting the apartment wiring, you need to determine the working and zero phases.
Methods for determining phase and zero wires
 Find out what kind of core the voltage is served, and which is not, easy. There are several ways to determine the phase and zero.
The first way. Phases are determined in color shell lived. Usually working phases have colors black, brown or gray, and zero - light blue. If an additional ground is installed, it lived - green.
In this case, additional devices are not used to determine the phases. Consequently, this method is not very reliable, because by mounting the wiring, electricians may not observe the color marking lived.
Reliable to identify phases with electrocycator screwdriver. It is a non-conductive current housing, which is built in the indicator and. An indicator use a neon light bulb. When you touch the stuffing screwdriver of bare, under voltage, the wire indicator, if working works, lights up. If zero, it does not work. Using such a screwdriver, you can determine the maintenance of the network. If when touching the staining alternately live wires, the light bulb does not light up, the network is faulty.
It happens that the indicator lights up when the wires are touching both veins, that is, the phase and to zero. This means that in the empty phase somewhere there is a break. It needs to be found and eliminated.Phase determination can be determined. multimeter. First, set the measurement mode - alternating voltage. Then the end of one probe clamp in hand. The second probe touch the veins. If the phase is working, then the magnitude of the voltage will be shown on the instrument screen.
You can determine the working phase and using the usual light bulb. We take into the cartridge with two segments of the wire. One end ground. You can ground it, screwing it to the heating battery. The ends of the wires, of course, should be bare. The second end touch the veins. If the light lights up, the phase is working.
One of the methods showing what is phase and zero in electrics, on video
Thus, the conductor providing current to the consumer is called phase. Inside the winding transformer is connected to a star with a common point (neutral) ,. To the load, it is supplied with a separate wire. The zero, which is a common conductor, is intended for reverse current to the source of electricity. In addition, the zero wire lines the phase voltage, i.e. The value between zero and phase.
Grounding, which is often referred to as the ground, does not connect to voltage. His appointment is to protect a person from exposure to electric current at the time of problems with the consumer, i.e. With a breakdown on the body. This can occur when the insulation of the conductors and the touch of the damaged area of \u200b\u200bthe instrument housing is damaged. But since consumers are grounded, in the occurrence of a hazardous voltage on the case, the grounding attracts the dangerous potential to the safe potential of the Earth.
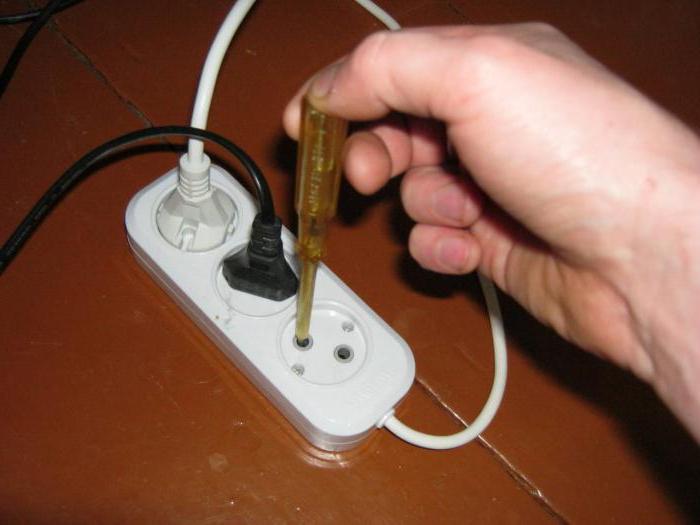
How to determine the phase and zero indicator screwdriver
One of the ways to identify where the phase and zero in the outlet or in the power cable is to use. The tool externally resembles a screwdriver, but inside it has a special filling with the LED. Before proceeding with the measurements, you need to turn off the switch through which the voltage is fed into the room. After that, it is necessary to clean the ends of the conducted wires, for which 1.5 cm of insulating material is removed.

In order to avoid short circuit between the wires, after turning on the machine, they should be sent to different directions. When all preparatory activities are completed, it is necessary to turn on the voltage automatic. To understand how to find a phase and zero, you must perform the following actions:
- Screwdriver clamp between two fingers - Middle and big, avoiding touching the bare part of the tool sting.
- The index finger relates to a metal tip from the opposite side of the screwdriver.
- The flat end of the indicator is alternately touched up to stripped conductors.
- When touched by the phase tester, the LED will light up. The second wire will correspond to zero. In the absence of an indication, the initially conductor will be zero.
How to determine the phase and zero multimeter
The device to be measured voltage, current and resistance is called. To reveal the phase and zero wire with it, first need to configure the device, for which you select the desired measurement limit. In the case of digital devices set 600, 750 or 1000 " ~ V." or " ACV.».

The phase determination is made as follows: one of the apparatuses of the device is connected to the contact of the socket or cable, and the second probe is touched by hand. When displayed on the display, about 200 to this will indicate the presence of a phase. Indications may differ, which depends on the floor finishing, shoes, etc. If the device displays zeros or voltage in the range of 5-20 V, it means that the contact corresponds to the knau.
How to determine the phase and zero without instruments
Sometimes there are situations where there are no screwdrivers to determine the phase or at hand, but it is necessary to find out which wire what matches. Therefore, it is necessary to navigate the color labeling of the power cable wires. There is a standard regarding wire marking IEC 60446-2004which cable manufacturers must adhere to, as well as electrical installations that connect one or another electric machine.
To determine what conductor it corresponds, you need to follow next labeling:
- blue or blue - zero;
- brown - phase;
- ground - Green-yellow.
However, the phase wire is not only brown. There are often other colors, such as white or black, but it will be different from the ground and zero. You can visually determine the wires in the junction box, chandelier and other woven points.
There is one more option, how to determine where the phase and zero in the absence of instruments. This requires an incandescent lamp with a cartridge and two small segments of wires. After connecting the conductors to the cartridge you can start work. The edge of one wire concerns the pipe of the heating system, other - the conducted conductors. If at the time of contact lamp ignites, this indicates the presence of a phase. The pipe for carrying out such an event should be metallic, since plastic does not conduct a current.
It should be borne in mind that this method although it allows you to identify the phase and zero, but it is dangerous, since it is likely to get a blow to an electric shock. Therefore, it is safer for the purposes under consideration to use neon light bulbs.
Each house has electrical appliances and wiring, in which some difficulties arise. A challenge of a professional electrician for each slightest occasion will cost a penny, it is much easier to solve the problem yourself. For these purposes, you may need a multimeter that measures the network parameters. However, the tool is expensive, and it is not always appropriate for use at home. Its functions can replace the indicator screwdriver. What is it and how to use it? How to determine where the phase, and where zero?
Principle of operation
How does the indicator screwdriver work? The appearance of the device is similar to an ordinary screwdriver, but it has an indicator-built knob built into the cavity. The metal part of the screwdriver acts as a probe, while it is able to reduce the power of the supplied electricity so that the use of the device is as secure as safe as possible. The device also has a LED, which is located in the top of the handle. In addition, the screwdriver has a metal plate of the contact type.
The principle of operation is quite simple - the screwdriver's probe concerns the conductor of electricity, then passing through it, the current of the current is significantly reduced, after which the person touches his finger to the contact plate. There is a closure of the chain, the light bulb lights up. The screwdriver is necessary in order to show the presence of a constant or alternating current.
Varieties of screwdrivers
To date, in the assortment of any construction store, the following types of indicator screwdrivers are presented:
- Multifunction screwdriver Safeline.
- MS 18.
- LEK OP 1.
- LEK OP 2E.
- VM 1141 220 250V.
- Indicator screwdriver with battery.
The presented device modifications have some difference in functionality.
Options screwdriver
The standard device is designed for the following purposes:
- Indicator screwdriver shows phase or zero.
- Defining hidden wiring by contactless way.
- Determination of the location of the cable break.
- Definition of polarity of batteries.
- Check the integrity of the electrical circuit.
Depending on the modification of the screwdriver, it can have other additional functions.
Nallet and phase determination
Many novice electricians and people who decided to independently do the repair of electrical appliances, are interested in how to find a phase and zero indicator screwdriver. To do this, follow the following algorithm of work:
- first, the wiring is de-energized;
- wires that need to be tested, must be cleared of the insulating winding;
- after which it is necessary to turn on electricity;
- the probe alternately needs to touch the wires, while it should be remembered that the chain should be closed with a finger on the contact plate;
- that wire, when touched to which the light lights up is the phase of the electrical circuit.
How to find a phase and zero indicator screwdriver in the outlet? To do this, alternately put the dipstick in the opening of the socket. When the phase is detected, the light will light up. The glow will not be if the screwdriver shows zero. If when touched to both holes, the light bulb does not light up, this indicates a zero break.
In addition to using an indicator screwdriver, you can define the valve color phase:
- yellow-green wire is ground;
- phase wire color - black;
- noise has blue wires.
If the color distribution is not met, you will need an indicator screwdriver to determine.

Checking the health of incandescent lamps
When buying another incandescent bulb, it is important to check its performance right in the store. If there is no appropriate stand, it can be done using an ordinary indicator screwdriver. To do this, take a lamp with one hand for a metal base, and the probe indicator screwdriver in the other hand to touch the central contact on the light bulb. If it is working, the LED on the device will light up.

Despite the fact that the method is effective, as a result there may be a failure, if the light bulb is unloaded. In this case, the electrical circuit is saved, but the lamp will not light up anyway. However, this happens quite rarely.
Checking heating tan
Check the performance of the heating element of the washing machine, can not even take it out. It is enough to provide access to contacts, the remaining wires need to be disconnected. To check, you need to touch the hand to one of the contacts of the Tan, the probe screwdriver is to another. In this case, the chain is closed with touching the metal plate on the device. If the lamp lights up, then the heating element is correct.

Voltage check in insulated wire
How does the indicator screwdriver work? Its functionality allows not only to determine the phase and zero, but also check the voltage in the wires with insulation. It is not recommended to snack an unknown wire, as it is often unclear, it is under the voltage or not. In this case, the following manipulations are carried out:
- take an indicator screwdriver it is necessary to directly for the probe;
- metal plate need to be attached to the wire;
- if the cable is voltage, then the indicator on the screwdriver will show it.
This method of determination is suitable even for wires that are under the plaster, however, the glow can be less bright.
Search for cliff wire
Instructions for an indicator screwdriver notes the multifunctionality of the device. It is very important and convenient for home use. Having understood how to find a phase and zero indicator screwdriver, it can also find the wire break. If the carrying suddenly stopped working, then the first thing you need to check the integrity of the electrical circuit:
Similarly, the search for breaking the wires and in the wiring of the house is performed.
Electronic indicator screwdriver
You can find a phase and zero as an indicator screwdriver with the LED and electronic. Differences only in their design. An electronic indicator screwdriver can be both with a liquid crystal screen and without it.

Instead of a light signal, such a device obsesses the presence of voltage by the beep. In addition, the big advantage of such a device is the output of voltage information on the liquid crystal screen, if any. The principle of operation of the electronic device is the same as the conventional indicator screwdriver.
Checking performance
Before determining where the phase, and where zero, you need to check the working capacity of the screwdriver itself, as it, like any other device, can be faulty. To do this, pay attention to such nuances:
- The device body must maintain its integrity. Work with electricity requires good insulation without damage.
- To accurate readings, check the screwdriver. To do this, the probe should touch the conductor, which is 100% under voltage.
- If the product is used on batteries, then you need to replace them on time.
Safety When using a screwdriver is extremely important, so when a malfunction is detected, it is recommended to purchase a new device. The cost varies from 50 to 1000 p. Depending on the modification.

Security measures
When working with the device, the following security measures must be observed:
- You should not disassemble a screwdriver, only batteries are subject to replacement, if any.
- The use of damaged screwdriver is strictly prohibited.
- Do not use the device without screw.
- Upon contact of the probe with electricity, it is forbidden to take their hands behind the bare part of the instrument.
- Do not use the device at stresses higher than that specified in the specifications.
In order to find out, a phase or zero on an indicator screwdriver is lit, you need to fulfill all the recommendations set out above. At the same time, it is important to monitor the serviceability of the device and not neglect the rules for the safe use of the indicator screwdriver.
Very often, when performing in an apartment, a house, a garage or in the country of repair or installation work related to electricity, there is a need to find zero and phase. It is necessary for the correct connection of sockets, switches, lighting devices. Most people, even if they do not have special technical education, imagine that there are special indicators for this. We will briefly consider this method, as well as tell you about another device, without any professional electrician. Talk about how to determine the phase and zero multimeter.
The concepts of zero and phase
Before determining the zero phase, it would be nice to remember the smallest of physics and figure out what it is for the concepts and why they are found in the outlet.
All electrical stars (and domestic, and industrial) are divided into two types - with constant and alternating current. I remember from school that the current is the movement of electrons in a certain order. With constant current, electrons move in some one direction. With alternating current, this direction is constantly changing.

We are more interested in a variable network that consists of two parts:
- The working phase (as a rule, it is called simply "phase"). It serves the operating voltage.
- Empty phase, referred to as "Zero" electricity. It is necessary to create a closed network for connecting and operating electrical appliances, also serves to ground the network.
When we include appliances into a single-phase network, there are no particular importance, where it is the empty or working phase. But when I mount the electrical wiring in the apartment and connect it to the shared house network, it is necessary to know.
The difference between zero and phase on video:
Simplest ways
There are several ways to find a phase and zero. Consider them in brief.
In color vehicle lived
The simplest, but at the same time, and the most unreliable way, is the determination of the phase and zero on the colors of the insulating shells of the conductors. As a rule, the phase vein has a black, brown, gray or white color execution, and zero make blue or blue. In order for you to know, there are also green or yellow-green residential veins, so the protective grounding conductors are denoted.
In this case, no devices needed, looked at the color of the wire and determined - the phase is or zero.

But why is this method the most unreliable? But there is no guarantee that during the installation of electricians observed the color marking lived and did not confuse anything.
Wiring color marking on the following video:
Indicator scolder
The more truthful method is the use of indicator pumping. It consists of a non-conductive housing and a resistor built into it with an indicator, which is an ordinary neon light bulb.
For example, when the switch is connected, the main thing is not to confuse zero with a phase, since this switching device works only on the phase break. The test indicator is as follows:
- Disconnect the overall introductory machine to the apartment.
- Clean the conducted veins from the insulating layer for 1 cm with a knife. Distribute them to a safe distance to completely eliminate the possibility of contacting.
- Submit voltage by turning on the introductory machine.
- Shutter sting to bare wiring. If the indicator window lights up, it means that the wire corresponds to the phase. The absence of glow suggests that the found wire is zero.
- You need to make a marker or a piece of tape by a marker or a piece of tape, after which turn off the overall automatic and connect the switching machine.

More complex and accurate checks are performed using a multimeter.
Search phase indicator screwdriver and multimeter on video:
Multimeter. What is this device?
Multimeter (electricians are also called the tester) is a combined device for electrical measurements, which combined a variety of functions, the main of which is a mesmer, ammeter, voltmeter.
These devices are different:
- analog;
- digital;
- portable lights for some basic measurements;
- complex stationary with a large number of opportunities.
With the help of a multimeter, you can not only determine the land, zero or phase, but also measure the circuit section, voltage, resistance, check the electrical circuit for integrity.
The device is a display (or screen) and a switch that can be installed in different positions (there are eight sectors around it). At the very top (in the center) there is a "OFF" sector when the switch is set to this position, it means that the device is turned off. To perform voltage measurements, you will need to set the switch to the "ACV" sector (for alternating voltage) and "DCV" (for constant voltage).

The multimeter kit includes two more measuring probe - black and red. Black dipstick is connected to the lower socket with the marking "Som", such a connection is constant and used when conducting any measurements. Red probe, depending on measurements is inserted into the middle or upper socket.
How to use the device?
Above, we looked at how to find a phase wire with an indicator pumping wire, but it will not work with such a tool to distinguish zero and land. Then let's get together how to check the veins by a multimeter.
The preparatory stage looks exactly the same as to work with the indicator scolding. When the voltage is disconnected, the ends lived and be sure to distribute them so as not to provoke a random touch and the occurrence of short circuit. Submit voltage, now all further work will be with a multimeter:
- Select the measuring limit of the AC voltage on the device above 220 V. As a rule, there is a mark with the value of 750 V in "ACV" mode, set the switch to this position.
- The device has three sockets where the measuring probes are inserted. We will find among them the one that is indicated by the letter "V" (that is, to measure the voltage). Insert the probe into it.

- Touch the probe to the stripped veins and look at the instrument screen. If you see a small voltage value (up to 20 V), it means that you touch the phase wire. In the case when there is no testimony on the screen, you found a zero multimeter.
To determine the "Earth", clean the small area on any metallic home communications element (it can be tap or heating pipes, batteries).
In this case, we will involve two sockets "Som" and "V", insert the measuring probes in them. Install the device in the "ACV" mode, to 200 V.
We have three wires, among them you need to find the phase, zero and land. One dipstick tap the stripped place on the pipe or the battery, the second touch the conductor. If the screen is displayed on the screen of about 150-220 B, it means that you found a phase wire. For zero wire, with similar measurements, the reading ranges in the range of 5-10 V, when touched to the "Earth", nothing will be displayed on the screen.
Note each living marker or tape, and to make sure the correctness of the measurements are correct, do now measure the measurements relative to each other.

Touch in two papers to phase and zero conductors, the figure should appear on the screen within 220 V. Phase from the earth will give a slightly smaller reading. And if you touch zero and earth, then the screen will be a value from 1 to 10 V.
Multiple rules for the use of multimeter
Before determining the phase and zero multimeter, read the multiple rules that must be followed when working with the instrument:
- Never use a multimeter in a wet environment.
- Do not use defective measuring probes.
- At the time of measurements, do not change the measuring limits and do not rearrange the position of the switch.
- Do not measure the parameters whose value is higher than the upper measuring limit of the device.
How to measure the voltage by a multimeter - on the following video:
Pay attention to an important nuance in the use of the multimeter. The swivel switch initially always needs to be installed to the maximum position to avoid damage to the electronic device. And already in the future, if the readings are lower, the switch is rearranged to low marks to obtain the most accurate measurements.