Today there are a huge number of options for how and how to decorate the wall outside and inside. One of the most popular and demanded methods is wall decoration with decorative stone. Using decorative stone, you can create a beautiful facade that will complement the overall exterior of the building, harmoniously combine with the landscape design. You can also use decorative stone for interior wall decoration. In order for the decorative stone to hold securely, a certain technology should be adhered to when gluing it. We will take a closer look at how to glue decorative stone on the wall, from preparation to finishing work.
What do you need to work?
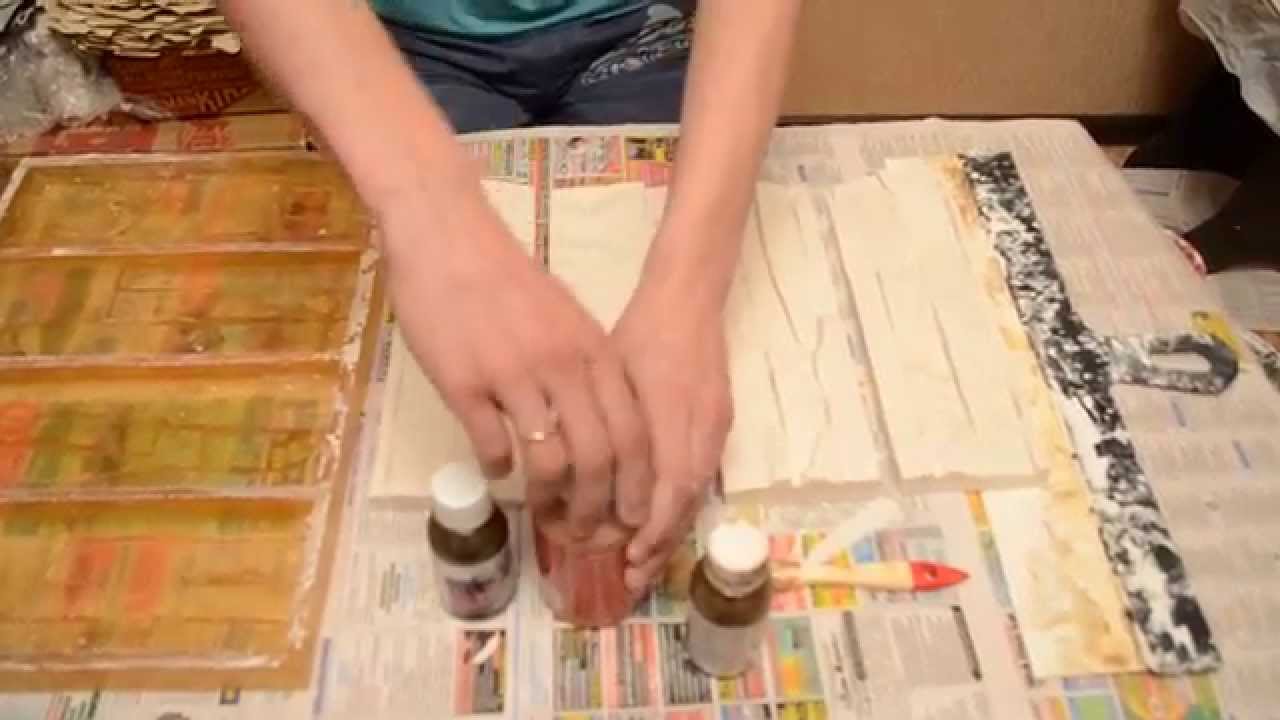
So that your work goes as quickly as possible, and you do not have to be distracted, it is recommended to prepare all building materials and tools in advance. To glue a decorative stone with your own hands, you will need:
- square,
- drill / mixer for making adhesive mixture,
- grinder with a stone cutting disc,
- spatula, trowel or trowel,
- level,
- rubber hammer,
- paint brush,
- metal brush,
- wooden block,
- roulette,
- container for grout and glue,
- medium-hardness brush for smoothing seams,
- syringe pistol,
- spray for water repellent,
- adhesive mixtures.
You need to have everything you need at hand, then the work will not seem tedious, although this process is quite painstaking! So, the first step is to complete all the preparatory work.
Good preparation is the key to success!
In most cases, indoors, the walls are plastered, concrete or brick. If you have such a wall, then there will be little preparatory work. It is much more difficult if there are remnants of old wallpaper or paint on the surface of the wall. Before gluing the decorative stone, all remnants of the previous finish should be carefully removed. To do this, you can use a wire brush or putty knife. The surface should be cleaned to ensure that the adhesive has good contact with the wall base. A metal brush will scratch the surface, and a putty knife will cleanly remove any dirt. After that, you need to properly prime the wall with a primer, preferably water-based acrylic. For this, a roller or brush is used.

If the surface of the walls is wooden or plasterboard, then similar work should be done with these surfaces. However, if the decorative tile will be glued to an adhesive containing cement, then you will first need to fill in a special painting net, for example, based on fiberglass, then treat the surface by applying a layer of plaster.

When the walls are ready, it is necessary to prepare the decorative stone itself. If the stone you have chosen is made on the basis of gypsum, then it is advisable to also treat the back surface of the tile with an acrylic primer. All these preparatory, seemingly simple work, can speed up and facilitate the process of work several times. Now you need to choose the right adhesive for the decorative stone.
Choosing the right adhesive
There are two types of glue today, namely:
- Cement based.
- On a plaster base.

One of the most popular and demanded is Ceresit CM11 glue. However, if the decorative stone will be glued from the outside, CM17 or 117 is required. As a rule, the packaging of the glue indicates for what kind of work it is intended: for external or internal. Expect outdoor glue to be more expensive.
There are two more brands that are in great demand due to their quality, namely Perlfix and Knauf. These types of adhesives are great for plaster-based decorative tiles. There are other less well-known brands, but you should not take too cheap ones, because there is a risk of purchasing low-quality glue.
Installation of decorative tiles. Stages!

All work on the installation of decorative tiles can be divided into several stages, namely:
- Application of an adhesive layer.
- Laying decorative stone.
- Applying a protective coating.
Each of these stages must be performed with the highest quality, in accordance with all technological requirements and regulations. We will now go over the basics by going step by step.
Adhesive application

If you purchased a decorative stone based on gypsum, then it can be glued to almost any adhesive, for example, PVA or even gypsum. Some people practice using liquid nails, water-acrylic mounting glue, and the like. The weight of such a tile is small, in contrast to sand concrete artificial stone. Accordingly, there is every chance that it will adhere to the wall surface for a long time and firmly. In some cases, it makes no sense to apply a layer of plaster, as we indicated above, talking about drywall and wood surfaces. But only in cases where the stone is mounted without a seam. In all other cases, the surface should be treated with glue. The adhesive is applied to the wall with a spatula. It is important to ensure that the application layer is uniform.

Note! It is not recommended to apply the adhesive composition immediately to the entire wall where the decorative stone will be mounted. It is best to cover a wall area of \u200b\u200bup to 1 m2. Otherwise, the glue may dry out before the stone sticks.
Laying decorative stone

So, this process is divided into four consecutive steps, the observance of which will lead to a positive result.
At this stage, it is important to carry out the correct mixing of the adhesive composition. It should be sufficiently elastic and thick, but never crumbly. When gluing an artificial stone, it should be pressed well. This is especially important when the stone is placed on a cement mortar. Press down moderately, so that the remaining glue comes out along the entire perimeter of the tile. This will avoid voids and will also provide an excellent seal. At the next stage, all connections and joints will be rusticated.

If the stone needs to be cut, you can use a hacksaw or grinder. If the stone is gypsum-based, then it is better not to use a grinder, as there is a risk of splitting the stone. At the same time, try to lay the cut edge in places that are out of sight. In this case, the appearance of the finished wall will be more aesthetic.
If the stone you bought must have seams, then strive to ensure that they are uniform. Pay attention to the width and parallelism of the rows. However, you should not achieve the same accuracy as when laying tiles, where every millimeter is taken into account. Some carelessness can only be beneficial.

It is best to start the installation of decorative stone from the corner. This is due to the fact that this technology does not provide for corner elements. The stone should be laid sequentially, row by row. In this case, head from the bottom up. If you want to start laying from the middle of the wall, you can fill the guide rail. It can be an aluminum profile. This process will prevent the adhesive from getting on the tiles, as each row will rest against each other.


In most cases, the decorative stone is placed under the jointing. This implies a certain distance of the tiles from each other. These seams, in the process of pressing down the stone, can be filled with glue. Therefore, it should be carefully removed. After that, these seams are filled with special jointing. If the grouting mixture consists of the same adhesive, then there is no point in removing the remaining adhesive from the joints. When the mastic is completely solidified, it can be tinted in a different color, which will enhance the expressiveness of the decorative stone. As for the joint width, everything here will depend on the tile you choose. The seam can be millimeter wide or several centimeters wide. For example, when a brick is placed under the jointing, the standard joint width is 1.2 cm. In the case when there should be no joints between the stones in the masonry, it should be laid as tightly as possible to each other. If the process of gluing the tiles was carried out correctly, then there may be enough glue to form the seam, which came out into the seams. To arrange it, you should wait a little for the mixture to harden slightly. Shaping can be done using a special wooden spatula, which must have a certain shape and the appropriate thickness for the seam.

If the squeezed out glue is not enough for a beautiful seam formation, then an additional mixture should be prepared. To apply it, you need a special bag from which it will be convenient to squeeze the mixture into the seam. So, there is less risk that you will stain the tiles. When the seams are dry and the mixture has a crumbly character, the surface of the stone can be cleaned from the remnants of glue that could get on it. This can be done with a dry brush, but never with a wet and hard brush. This can cause irreparable harm to the decorative stone.

At the final stage, it remains to apply a special protective compound to the surface of the decorative stone. This step is required. It can significantly increase the life of the cladding. In addition, you can give a different shade with a protective layer. A protective coating is required:
- in places where there is a risk of moisture ingress or, conversely, the room is stably humid;
- if there are pets or children in the house;
- if the stone has a surface layer of paint;
- if the purchased plaster is of poor quality.
In all these cases, a protective layer of a special composition will reliably protect the finished surface from possible damage. With regard to the choice of protective coating, it must also meet some important characteristics. For example, it must have increased adhesion, and include gypsum in its composition. When using it, there should be no residue left after drying.
Note! If you want to purchase a water-repellent composition, then the best one will be one that is water-based. Such formulations are better than those that contain solvents. Although in some cases, coatings that are based on a solvent are more effective. This is due to the fact that they form a protective film on the surface, figuratively speaking, "concreting" the surface.

Note! The protective coating should only be applied when the cladding is ready and the joint is completely dry. It is applied with a spray gun or roller / brush.
If the walls will be finished outside, then it is advisable to carry out the work in dry weather.
As you can see, laying a decorative stone with your own hands is quite within the power of everyone. There are no intricate technological processes here. If you have already completed this work, or have had a similar experience in the past, then please share your impressions at the end of this article, leaving comments.
Video
Laying technology without filling the intermediate joints. Detailed instructions for marking and calculating masonry are given:
For those who are used to doing everything with their own hands, instructions on how to make a decorative stone yourself:
Since not everyone can afford to use natural stone, which is highly valued in decoration, products that imitate this material are becoming quite popular. Gypsum stone tiles are one such material. It has many advantages and looks great in the interior of the room. In some moments, it falls short of natural stone, and in some even surpasses it. This is how the decoration of the premises with plaster decorative stone looks like.
If you are interested in this topic, then this article is for you. We will consider in more detail not only the advantages of this material, but also learn the installation principle. And for those who are not ready to overpay, we will post detailed instructions on how to create a tile for a stone from plaster with our own hands.
Advantages and disadvantages of plaster products
First of all, I would like to consider the advantages of the material with which you will have to work. Everyone knows that the stone itself is a fairly strong and durable material. It is natural and brings a share of nobility and quality to the room. What about decorative gypsum stone? Below is a list of the distinguishing characteristics of the products:

That is why many people choose this particular material for interior decoration. At a low cost, decorative gypsum stone is difficult to distinguish from natural. It looks great and makes the room beautiful and reliable. However, it was not without the disadvantages of plaster products. There are only two of them, so many do not even pay attention to them. And even with proper installation and use, they are insignificant. So, these are the disadvantages of gypsum decorative stone:
- low level of strength. Since it is mostly gypsum, it is quite fragile. Even under light mechanical stress, it can break. But with careful use, this can be avoided;
- the material, unlike natural stone, is afraid of moisture. If the room in which the gypsum decorative stone will be laid is wet or damp, then it is not necessary to use it there. This is, for example, a kitchen, bath or toilet. And to protect against moisture, the coating is varnished.

But now you can decide whether to install plaster tiles or not. But, many make a choice in the direction of the material. Indeed, at a low cost, they get a wonderful decorative effect that decorates the room. In addition, the fact that you can create a decorative gypsum stone with your own hands makes the material even more popular. How exactly can you create it yourself? Let's find out.
Gypsum stone creation technology
Let the manufacture of materials for styling be cheaper, but still, you will have to spend money on materials and tools. You need to understand the principle of creation, which is somewhat reminiscent of baking bread. You will understand why later. So, here's what you need to work:

From this set, gypsum tiles will be created. The process itself has no difficulties. There are only a few points. For example, the pigment can be added directly to the gypsum mix. Then the color of the stone will be throughout the structure. Due to this, even if one finishing element is damaged, it will be difficult to notice this. Another option for staining is to apply color with a brush to the shape itself. What to choose, everyone decides for himself. The number of molds can also be different. It is clear that it is more convenient to use several at once. So it will be possible to quickly create the required amount of decorative stone.
To begin with, dry gypsum mixture and water are mixed in the tank. It must be remembered that the amount of the finished mixture must be identical to the number of completed forms that are available. In other words, it is unacceptable for the prepared gypsum to remain for a long time without a mold in the tank. Cook as much as will fit at a time. It is important to make a mixture similar to sour cream and adhere to a similar proportion so that the batches of gypsum stone are the same.


Note! Plaster decorative stone can be laid on a concrete base, on brickwork, on a plastered or wooden wall, and even on drywall.
That's all, it remains to wait for drying, make a new batch. When you have enough decorative elements, you can start laying them. How to do it? Let's find out.
Laying gypsum tiles with your own hands
The basic element, a gypsum decorative stone, you already have. It remains to stock up on the rest of the materials and tools that will be required for work. Here's an arsenal of what you'll need:
- gypsum or other adhesive for this purpose;
- deep penetration primer;
- ordinary spatula and notched;
- miter box, to give the stone the desired shape in the corners;
- tape measure, level, plumb;
- pencil;
- assembly gun;
- hacksaw for metal;
- acrylic lacquer;
- roller with a bath;
- sponge to remove excess glue.

When you have everything you need, you can get to work. The process itself is simple, you just need to follow the instructions. First, it's important to prepare your work surface. Ideally, if it is plastered. Then a primer is applied to the surface. The best way to apply is with a roller and tray.
Now you can start preparing the adhesive. Many people prefer to use ceramic tile adhesive. Only now it can be slightly improved by adding a little PVA glue to the composition. The ratio is from 6 to 9% of the total. Thanks to this, it will receive water-repellent properties. Everything is thoroughly mixed with a mixer to get a homogeneous mass.

Everything is ready for installation. The first row of decorative gypsum stone plays an important role. Further laying depends on it. Therefore, it is important to make it perfectly flat. To do this, markings are made on the wall using a level, a plumb line, tape measure and a pencil. The markings should be perfectly flat. Then the styling process begins. The adhesive is applied to the wall surface or to a gypsum decorative stone. For a secure hold, the mixture can be applied to both surfaces. Furrows are made using a notched trowel. It remains only to put the first stone in its place according to the markings and press it to the surface. You then have 6 to 12 seconds to adjust the position of the plaster of paris. Watch for unevenness and adhesion quality. Other plaster parts are glued in the same way.

Advice! Remove excess adhesive with a straight spatula and sponge. Otherwise, it will dry out and petrify, adhering to the surface.
A hacksaw is used to fit the elements. It happens that the decor is made curly, an arch, a column or a wall corner is processed. In this case, use a miter box, cutting products at an angle. To give the product a neat look, it is sanded with sandpaper. After the installation of the gypsum decorative stone is completed, using a mounting gun, the joint grooves between the slabs are filled. A soft sponge is needed in order to remove excess. But, many people lay the stone close to each other, without creating seams.

The final step is to varnish the coating to protect it from moisture. This is optional. And in the case when the gypsum stone has no color, the surface is painted in the desired color before varnishing.
Advice! Remember, you need to work with gypsum decorative stone tiles carefully so as not to damage it.
That's all the work. As you can see, this is not difficult, especially if there is a great video sequence in addition. In this video there is another interesting way of laying decorative plaster, which is slightly different from the one described above. You can use it as a base.
Let's sum up
With the development of building materials, the use of natural stone in decoration moves further and further. This is a practical, but unprofitable way to transform a room. After all, there are materials that are much more accessible and practical. Those who have made a choice in favor of plaster decorative stone do not regret their choice in any way. The ranks of satisfied users are growing, as evidenced by reviews. Therefore, if you do not have enough funds to get a stone finish, do not be discouraged. Gypsum stone is a worthy alternative. And the laying process can be done by hand.
A well-laid facing artificial stone is able to protect the walls of a building from the negative influence of external natural factors, at the same time giving them an impressive look, making them look like small castles. Therefore, the owners of private houses who decide to produce, very often the question arises as to whether it is possible to install an artificial stone with their own hands? To answer it, you must first get information about how this process is performed and what is needed for it, as well as about the materials from which the artificial stone is made, and what solutions can be used for laying it.
How to choose the right artificial stone?
If the artificial stone is purchased ready-made, then when choosing it, you need to pay attention to some nuances that will help determine the quality of the material and, accordingly, the aesthetics of the future finish:
- Artificial stone appearance.
For finishing the facade, different types of cladding are chosen, depending on the general style in which the house will be decorated. For usually, samples that are heavier in appearance are chosen, which even by their appearance will give the building solidity - these are boulders of different sizes, which, when masonry are made, are selected to each other.

Also perfect for this purpose are stones of the "rock" type, which imitate layers of rocks that have acquired irregular intricate, "wild" shapes under the influence of natural factors.
Artificial stone prices
Fake diamond
 Artificial stone under the weathered "wild" rock
 For facade walls, a smoother version of the stone is most often chosen, since it gives neatness to surfaces and corners.
In addition, it should be borne in mind that natural stones almost never have the same shade and standardized, regular shapes and sizes. Therefore, if you want an artificial stone to look with maximum reliability, to be almost indistinguishable from a natural one, you should not choose a material made in one even shade. The cladding, which has not only relief, but also color transitions inherent in natural minerals, will look picturesque, which means it will be more interesting, as opposed to monochrome. If artificial stones are purchased from the same collection, but from different production batches, they are usually mixed before laying.
- Artificial stone surface quality.
It is very important to inspect the surfaces of artificial stones when buying. Their front side should not have irregularities and outgrowths uncharacteristic of natural material. The back, on the other hand, should be flat and have small roughness for good adhesion to the glue and the wall.

If a stone is chosen made from a solution with a filler in the form of solid inclusions up to 5 mm in size, then they should not protrude beyond the surfaces of the stone. In addition, inclusions should not exceed the average established fraction, since this factor can directly affect the decrease in the strength of the artificial stone and can lead to premature cracking and crumbling of blocks.

Such filler elements are especially clearly visible from the back of the stone and on its cut, therefore, special attention should be paid to these areas.
- Stone painting method.
To prevent unpainted areas from appearing on the finish in case of random chips, it is recommended to choose a tile made from a completely pigmented solution. This indicator can be determined by looking at the tile cut.

If there is a desire to make color adjustments to the surface drawing of the artificial stone, then this can be done on the tiles already fixed on the wall, in this case it will be much more clearly visible where they are really needed.
- Finishing material manufacturer.
First of all, it is recommended to pay attention to the products of well-known manufacturers who have proven themselves well with the high quality and proven durability of their products. By the way, experienced finishers who have been working with artificial stone for a long time recommend giving preference to domestic products, since they are designed and adapted for installation in local climatic conditions, and often does not even require additional protective treatment.
- Finished product packaging
When choosing an artificial stone, you should immediately ask in what packaging it is sold. It would seem such an insignificant detail, but, by the way, it immediately helps to determine the manufacturer's attitude to its products. In addition, it is necessary to take into account the fact that no matter how high-quality and beautiful the tiles are, without reliable thought-out packaging during transportation, the material can lose both its integrity and decorativeness.
The best option for such products is corrugated cardboard boxes with a securely reinforced bottom.
Artificial stone wall cladding
Masonry tools
After choosing and purchasing the artificial stone you like, the next step is to take care of the preparation of tools, many of which may be found in the owner's home "arsenal". So, for work, you will need to have the following tools and accessories at your disposal:

- Spatulas - wide, 400 ÷ 500 mm, notched with a comb height of 8 ÷ 10 mm, and smooth, 100 ÷ 120 mm wide.
- Brush with metal bristles for cleaning wall surfaces.
- Rubber hammer for tapping glued tiles.
- Building level to control the horizontal rows.
- Grinder with disc for concrete or stone.
- File for processing cuts and the back of tiles.
- Ruler 1000 ÷ 1200 mm long.
- Pistol or tapered bags for filling joints.
- Grouting is a tool for leveling grout in joints.
- Gauge rods of different lengths and the same thickness to comply with the selected joint thickness.
- Brushes with soft long and hard short bristles.
- Wall primer roller.
- Electric drill with mixer attachment.
- Containers for water, for diluting glue and grout.
- Roulette.
- Protective goggles, gloves, and a respirator will be necessary when sawing and processing artificial stone tiles and when preparing the surface of the walls.
A few recommendations for outdoor wall decoration with artificial stone
In order for the artificial stone to be securely fixed on the external wall, some recommendations should be followed when performing facing work.
- Artificial stone is laid on the wall with an adhesive that is mixed in water. Therefore, it is recommended to carry out cladding work at air and surface temperatures from +5 to +25 ° C. If this condition is met, then the use of additional materials or the use of special technological approaches will not be required.
- If it is necessary to finish at low temperatures (but in any case, not lower than -5 ° C), then it is possible to build a so-called greenhouse at the masonry site, consisting of a frame and dense polyethylene, in which a heat gun is installed for heating. However, it should be remembered that in this case the work will take a very long time, since in order to seal the seams, you will have to wait for the glue to dry completely, and under such conditions this process will take a long time.
- Another way out in a situation where it is urgent to carry out finishing work at low temperatures can be a frost-resistant adhesive mixture enriched with special additives that allow work in frosty conditions. But the quality and reliability of the cladding will still cause certain concerns - it makes sense to wait for warmer days.
- Temperatures that are too high can be another serious problem if the work is done in the middle of summer. Difficulties are caused by glue that sets too quickly, since it loses moisture in a shorter time than provided by the manufacturer. Therefore, such a composition decreases adhesion, that is, adhesion to the surface, which means that the artificial stone may well not stay on the wall for a long time. Tiles laid at high daytime temperatures should never be left to dry in direct sunlight - shading must be provided for the finished areas.
Find out how, having studied several options, in a special article on our portal.
Artificial stone laying works
Having prepared the materials and tools for masonry, you can proceed directly to the installation process itself. An example of a facade cladding with an artificial stone is detailed in the table below:
| Illustration | Brief description of the performed operation |
|---|---|
 | Before starting work on wall decoration with artificial stone, the surfaces must be cleaned with a metal brush or a sander with a brush attachment. Then, if cracks or cracks are found, they must first be cut to a depth of 20 mm, primed, and then repaired with repair mortar or putty. After the repair "patches" have completely solidified, they are cleaned again. Further, the surfaces are checked by the rule for evenness, and, if necessary, they are leveled with tile glue and dried well. If the laying will be carried out on a flat concrete wall, then in order for the artificial stone to be held more reliably, and the masonry was not subject to deformation and cracking, a reinforcing mesh is fixed to the wall surface before applying the leveling layer to it with the help of anchors. |
 | If the artificial stone is laid on a brick wall that has significant irregularities, then a plaster layer is first laid on it. Plaster will help you to significantly save on the adhesive composition, which is not cheap. |
 | For finishing external surfaces, it is recommended to use professional building mixtures, which will be required for priming, fixing tiles and sealing joints. In this case, it is necessary to pay attention to the packaging, on which it must be indicated that this mixture is intended specifically for outdoor work. In addition, as mentioned above, you should select materials made on the same basis as the finishing stone itself. This is the only way to obtain reliable adhesion of surfaces. For work, it is advisable to choose products from well-known manufacturers, such as "Art Stone", "Ceresit", "Unis Plus", "Coral", "Litokol", "Akrilika", "Montelli", etc. |
 | Prepared, dried walls must be primed with high quality. The primer should be mixed well before application until it is completely homogeneous. |
 | The primer is applied in two layers, each of which must be well dried. |
 | A primed and dried wall prepared for masonry should look something like the one shown in this illustration. |
 | The primed wall must be marked, for example, if it is necessary to separate the basement part from the facade wall, if these areas will be faced with materials of different texture. For an artificial stone that will be laid in even rows, you should immediately draw horizontal reference lines, marking their location using a water or laser level. |
 | While the primed wall dries, there is time to start laying out the stone. In different batches, the color of externally very similar tiles may have a more saturated or diluted shade. Therefore, stones from different parties must be mixed together. For the convenience of selecting the corner stone elements, it is recommended to make a kind of podium (conductor) from the boards. |
 | Such a device should have such a width that not only corner tiles can be laid on it, but also those that will be next to them. |
 | The tiles are laid out so that you can first estimate how it will look on the wall. While the artificial stone is not fixed, it is still possible to correct the masonry by rearranging the tiles so that they look the most harmonious. When laying an artificial stone of a type similar to that in the illustration, the seams between adjacent blocks are not distinguished, therefore the laying itself is called seamless. |
 | Wall cladding with another version of artificial stone is carried out in a slightly different way. |
 | Initially, and with this option, tiles from different lots must also be mixed, and then "dry" laying on the floor. Individual blocks of this type of artificial stone have different sizes, and therefore the overall "mosaic" is laid out by the selection method. In this case, the elements can be interchanged by shifting individual tiles to one side or another, trying to avoid long vertical and horizontal lines. Only after the tiles have been optimally laid out on the floor for a specific section of the wall, you can start mixing the adhesive solution from the dry mixture. |
 | Adhesive mortar for artificial stone masonry is mixed as follows: - first, water is poured into a clean container; - then the dry composition of the glue is poured into it (and not vice versa, otherwise the mixture will turn out to be heterogeneous); - then, using a mixer nozzle installed on an electric drill, kneading is performed. If necessary, you can add a little water. Information about the proportions of making tile glue, mixing time and "life" of the finished composition can be found on the packaging - they may differ slightly for different compositions. |
 | The finished solution is taken from the container with an ordinary even spatula or trowel, applied to a notched trowel, and the rubbed is spread over the wall section. |
 | The laying of each row starts from the corner, and it is best for it to purchase ready-made corner elements that cover both sides of it at once. |
 | If ordinary flat tiles of artificial stone are used for facing the corner, then they are laid with a bandage - a corner lock. |
 | The glue solution is applied not only to the wall, but also to the tile itself. It is also desirable to distribute it with a notched trowel, but the direction of the stripes should be perpendicular to the grooves on the wall surface. |
 | Further, the tile is attached to the corner and tightly pressed in the place set for it. A tight fit can, if necessary, be achieved by lightly tapping the block to be installed with a rubber hammer. |
 | The rest of the laying of each row is done in the same order as it is laid out on the floor or on the conductor. |
 | Each next stone is installed close to the previous one and to the underlying one, well pressed against the wall, and, if necessary, tapped with a rubber hammer. |
 | Having laid out the first row completely, they move on to the next, and again the facing is carried out from the corner. |
 | The result should be an even masonry with evenly distributed splashes of color. |
 | Finishing the corners of the façade is often done with rusts, which can be of different sizes, depending on the style chosen for decorating the house. Such slabs of artificial stone are heavier, therefore, when laying them, a thicker layer of glue should be applied to the wall. The masonry of this artificial stone at the corners is also made with a locking bandage. |
 | Quite often, two or even three types of artificial stone are used for finishing on one facade. As mentioned above, rustic stones are almost always installed only at the corners, but sometimes they are used to decorate all walls. For the basement of the building, if you need to give it solidity, dark-colored tiles are most often used. For the rest of the wall located above the basement, a thinner version of tiles in light shades is usually used - this will make the front of the house visually larger. |
 | In this case, for finishing the upper part of the facade wall, the same “wild stone” in relief is used as for the basement, only in a lighter shade. |
 | When finishing, you cannot do without fitting some stones. They have to be marked, and then we will cut off the excess part in order to install them closely, for example, to the rustic stones that trim the corner of the facade. |
 | This photo shows the execution of a cut of an artificial stone across its pattern, and in the same way a cut occurs along it. The work is carried out using a grinder with a stone circle installed on it. After the cut has been made, its edges are well cleaned with a file and emery paper, for precise adherence of the surfaces of adjacent elements to each other |
 | This illustration well shows how a tile of artificial stone joins with a cut out excess fragment and corner rusticity. |
 | The result of this type of masonry can be seen in this illustration. |
 | And this illustration shows the laying of artificial stone of a different variety, thinner, and laid in a suture way. In order for the seams between the stones to be approximately the same, and the overall masonry to look neat, it is necessary to prepare calibration strips of several sizes in length. They are laid on top of the finished row and the next one is installed. |
 | In this masonry, there are no common horizontal and vertical seams for the entire series, therefore, the calibration strips should not be made too long. Their length can be estimated after the tiles are laid out in the desired pattern on the floor. There you can also experiment with the width of the seams, choosing the optimal one as a result. |
 | If seams are left between the blocks of artificial stone, then they must be repaired, immediately achieving both tightness and aesthetics of the surface. The mortar is made of materials that set and harden quickly, so do not over-mix it. For mixing, a bucket of one and a half liters is suitable. Water is poured into the container, into which the dry mixture is poured with a spatula, and it is also mixed with it. The solution should be homogeneous, without the slightest lumps and inclusions. The proportions of the mixture and water can be found on the packaging. |
 | Before applying the jointing or grouting solution, all seams must be cleaned of adhesive residues with a medium-hard brush. |
 | Next, the seams must be carefully filled. For this, it is very convenient to use a simple device made of ordinary dense polyethylene, called a cone. That is, in fact, this is an ordinary plastic bag made in the form of a cone - you can buy it at a hardware store or simply make it yourself. |
 | The white color of the jointing can be changed by adding a special dye to the solution. It must be said that the same type of stone with jointing in different colors will look completely different. For example, a dark colored stone with light jointing will look fresh and neat, while light tiles with seams of the same or light gray color resemble the walls of 19th century European houses. |
 | After filling the joints, the mixture is compacted and leveled with a special tool called jointing. It can give the seams a convex, depressed or even shape. |
 | Then, along the seams, they are additionally passed with a soft brush, removing excess mortar. Well, if it is necessary to create a textured pattern on the seams, then a harder brush with a short bristle is taken. |
 | With the correct cladding with artificial stone and high-quality sealing of joints, such a wall covering should last for more than a dozen years. |
 | When the grout in the joints dries, the entire surface of the stone-trimmed wall can be covered with a special water-repellent compound (this is especially true for the basement of the wall). Such processing will not only protect the surface from moisture saturation, but also add brightness to the artificial stone. It is important to select the correct composition and apply it only to well-brushed stone. |
Advantages of wall decoration with artificial stone
To summarize, we can mention all the advantages of artificial stone over natural material:
- Artificial material is much lighter than natural stone, so it is more reliably adhered to the wall surface without additional fasteners.
- A high-quality artificial stone, due to a carefully selected component composition, can be more resistant to high and low temperatures, to their sharp drops, to other negative external influences of natural or technogenic properties.
- A variety of textured patterns, colors and their shades allows you to choose an imitation of stone for any chosen style of facade design.
- Artificial stone is easy to process, and this process does not require much effort or special equipment. For example, if the material is made on the basis of gypsum, it can be cut with an ordinary hacksaw, and for an artificial stone based on cement, a sander with an appropriate wheel will suffice.
Facing the walls of a house with artificial stone can be done even by an inexperienced master, if he approaches the work with all responsibility and accuracy. The most important conditions for such a finish are precision and slowness. If you listen to all technological recommendations and already tried and tested instructions, the work will be easy and will delight you with its results.
Popular artificial stone prices
fake diamond
The interior of the hallway needs to be given no less attention than the rest of the premises, because this is the first thing that guests see. Artificial stone, which is used as the main material or as an additional accent, gives a very stylish look. You can create an original design yourself, since decorating the hallway with decorative stone has a rather simple technology.
Coating types
Before starting work, you need to choose the right finishing material. made on the basis of concrete and plaster with the addition of dyes. Both types have their own advantages and disadvantages, so it's better to study their characteristics first.

The advantages of concrete products include:

Walls finished with such a stone can be easily cleaned of any dirt, and the abraded surface can be quickly restored with paint. If you accidentally touch the finish with something hard, there will be no marks or cracks on it.
Disadvantages:
- heavy weight;
- high price;
- labor intensity of processing.
In order to cut individual fragments when laying, you will need a grinder and a diamond wheel, as well as some effort.

Advantages of gypsum coating:

Such a stone is chosen for finishing plasterboard walls, which cannot be subjected to heavy loads. If you can't find the right color, there are unpainted products on sale that you can paint at your own discretion.
Disadvantages:

If dirty, such a finish should not be wetted and rubbed strongly, so as not to damage the surface. Processing the stone with special impregnation or acrylic-based varnish will help to avoid such damage. Also on sale there is a gypsum stone with a polymer coating - it is a little more expensive than usual, but it is not at all afraid of moisture.

If desired, you can do it yourself: for this you need a plastic or silicone mold, dry gypsum mixture, coloring pigments. It is not a problem to buy all this, in every hardware store there is a large selection of mixtures and forms. Self-production of finishing material takes more time, but it saves money on repairs well.

Facing stone prices
Facing stone
Preparation for finishing
First you need to calculate the amount of material. If the stone will cover the entire area of \u200b\u200bthe walls in the hallway, subtract the area of \u200b\u200bthe openings and add 10%. If the decor will be located around openings, niches, in separate fragments on open walls, an approximate sketch of the decoration is drawn and measurements are made for each section. Then add up the area and add 10-15% for pruning. When buying material, it should be remembered that the amount of an angular stone is counted in running meters, and the amount of a regular stone is in square meters.

Additionally you will need:

You can attach an artificial stone to liquid nails, cement or gypsum-based glue. The consumption of glue is necessarily indicated on the packaging, so when buying, you should know the exact area of \u200b\u200bthe finish and take it with a small margin.

If gypsum stone is used, a special miter box with high sides is required for cutting.

When everything you need is purchased, you should start preparing the surface.
Step 1. Removing the cover

If the stone will cover the walls of the hallway solid, the old covering is removed completely to the base. If separate areas are intended for decoration, you need to dismantle the coating very carefully. On the wallpaper, the borders of the finish are marked with a pencil and carefully cut with a clerical knife, leaving a reserve for stones 1-2 cm wide. The glue from the wallpaper is soaked with water and removed with a spatula, the walls are thoroughly washed. Also remove the paint, if it is peeling or cracked, peel off the loose plaster.
Step 2. Align the walls

The stone should be laid on a flat, smooth surface - this will facilitate the work process and increase the durability of the decorative coating. Therefore, all small cracks, gaps, depressions are rubbed, and if there are differences of more than 5 mm, the entire area is better. Particular attention should be paid to doorways: deep cracks can form along the perimeter of the box, for which it is recommended to use a cement mortar for sealing.
Prices for mixtures for leveling walls and ceilings
Mixes for leveling walls and ceilings
Step 3. Priming

Dry walls should be lightly sanded to smooth out irregularities in the putty areas, and then wiped with a cloth to remove dust. After that, the surface is treated with acrylic primer 1-2 times. If there are wallpaper around the perimeter of the treated areas, the primer should be applied so as to capture the edge 1 cm wide - what will be hidden under the cladding.
Stone laying
The decorative stone has jagged edges and comes in different sizes. Laying must be done so that tiles of the same size must be interspersed with large or smaller fragments, and the seams do not coincide either horizontally or vertically. This will make the coating look the most natural and attractive. To understand how best to join the stone, you need to lay out the tiles on the floor, picking up the fragments in a specific order.
Step 1. Glue preparation
Pour dry glue into a container with water and stir well. The ratio of water and glue is indicated on the package, so mixing "by eye" is not necessary. Failure to comply with the proportions reduces the strength of the connection or increases the consumption of glue. It is best to mix with a construction mixer, then no lumps remain in the mixture. The finished glue should be homogeneous and resemble a thick paste in consistency.
Step 2. Laying the first row

You need to lay out the tiles from the corner of the wall, and this can be done both from above and below. When laid from top to bottom, the stone is less dirty with glue, and the coating is more accurate. If only the area around the opening is lined, start from the corner of the doors. For convenience, the wall can be marked by level with horizontal lines every 10-15 cm.


Now you can start styling:


Seams from 5 to 8 mm can be left between the fragments, especially if the stone is large.


After facing, the joints are filled with putty and embroidered, which makes the masonry more attractive. Small tiles can be fastened close, as long as the joints do not coincide.

Step 3. Facing corners
For facing internal and external corners, you can purchase special corner tiles that are more expensive than usual, but significantly simplify the workflow. If the budget is limited, you will have to adjust the stone yourself using a grinder or a hacksaw. There are 2 options here - overlap the stone or grind the edges at an angle of 45 degrees. When using the first option for the outer corners, the open ends must be filed and tinted, otherwise they will stand out too much. In the inner corners, both ends are closed, so processing is not necessary. The second option is more suitable for plaster products, which are conveniently cut with a miter box.

So, first, the required number of fragments is determined, they are cut from a certain side, the sections are processed with a file. Next, the stones are spread with glue and alternately attached to the walls on both sides of the corner, carefully combining the joints. When the vertical of the corner is laid out, you can expand the masonry to the walls.

Step 4. Decorating the edges of the masonry
The edges of the masonry will look more attractive if the tiles are cut nicely. The surface of the decorative stone has a clear texture, which makes it easier to trim the edge fragments. Cut with a hacksaw straight along the contour lines so that the cuts are the most natural. All cuts must be sanded with sandpaper.
Step 5. Sealing joints

Plaster putty is diluted and carefully applied to the joints, in the corners, along the perimeter of openings and switches. For convenience, you can use a tight bag, for example, from under the milk. One edge of the bag is cut completely, and a small incision is made on the other side. The package is filled with a putty mixture and squeezed into the seams with an even thin strip. If the solution is applied with a spatula, you should immediately wipe off the excess from the surface of the stone to avoid drying out. After filling the joints, the putty is rubbed with a damp foam sponge and left to dry.
Step 6. Finishing
The dried putty is white, and therefore the treated areas will stand out against the background of the stone. Paint will help to get rid of light spots: in a small container, the pigment is diluted to match the color of the main coating and the putty areas are painted with a small brush. When the paint dries, the stone is covered with acrylic varnish. In places where the walls are constantly bumped, it is better to apply the varnish in 2-3 layers.

To make the coating more voluminous, you can highlight the edges of the masonry with golden or bronze dye. There is another option: a spraying of the same color, but more saturated in tone, is applied to the artificial stone at an oblique angle. In addition, you can use lighting: light directed from above or from the side makes the masonry much more textured and clearer.
| Calculation of decorative stone | Formulas | Explanations |
|---|---|---|
| Calculate the surface area for artificial stone cladding | S (wall) \u003d AхB | A - wall length, B - wall height |
| Calculate the surface area that the corner pieces of the decorative stone will occupy | S (angles) \u003d Lx0.2 | L - angle length (running meters), 0.2 - coefficient |
| Find the total area that all corner pieces cover | S (angles total) \u003d S (angle1) + S (angle 2) | - |
| Calculate the area of \u200b\u200bwindow and door openings | S \u003d AхB | A - window / door width, B - window / door height |
| Calculate the surface area for facing decorative stone, taking into account the area that is occupied by corner elements, window and door openings | S (stone) \u003d S (walls) - S (corners) - S (windows / doors) | Increase the resulting area by 10% |
| How to calculate the required number of corner stone elements. | Measure and add up the height of the corners to be clad with decorative stone. L (total angles) \u003d L (angle 1) + L (angle 2), etc. Increase the resulting length by 10% | L - length of corners (running meters) |
Video - Decorating the hallway with decorative stone
Decorative stone is a building material of remarkable beauty, which is used for various types of decoration, external and internal. Cladding with this material is much easier than with ceramic tiles. Moreover, you can do it yourself. At the same time, the laying of decorative stone is carried out using a minimum of materials and tools. Many home craftsmen fear that nothing will come of their venture. But there is nowhere to retreat: all the materials have been purchased, the tools are waiting in the wings, and friends and relatives are impatiently (and someone with hidden gloating joy) awaiting how the renovated apartment will look like. So get to work!
Advantages and disadvantages
First of all, about the benefits:
- Decorative stone is an interior decoration giving it an unusual and non-standard look. It is simply impossible not to pay attention to him;
- It is very easy to work with artificial stone. The reasons are lightness and correct form. In addition, it is very easy to care for the stone. A regular soap solution is enough;
- Environmental friendliness, safety. The material does not corrode, does not rot, is unattractive to fungal infections and bacteria;
- Reliability, durability. The material serves for a long time without losing its performance;
- Wide range of styles, textures and shades. This allows you to create exactly the interior that you like best;
- Hypoallergenic. Artificial stone made using classical technology contains exclusively natural ingredients: water, gypsum, quartz sand, marble chips and inorganic additives;
- Low cost. Gypsum is not one of the most expensive building materials. Its price is comparable to materials such as alabaster, drywall and chalk. This makes the renovation not only effective, but also low-budget.
There are also disadvantages:
- The fragility of the material. A slight blow is enough to destroy the material;
- Insufficient moisture resistance (this applies to gypsum stone). When used in the kitchen or in the bathroom, an additional moisture resistant coating is required.
The advantages of stone wall decoration
Decorative stone looks great as a decoration for window and door openings, as well as a fireplace area. It goes well with houseplants, as well as aquariums and home fountains. If we talk about style, then this finish looks best with a classic interior, adding notes of aristocracy and chic to it.
In order for the cladding to look really beautiful, you need to take into account one of its features. You will need enough bright lighting, otherwise the room will look somewhat gloomy. This problem can be solved by laying the stone not solid, but alternating it with plain wallpaper, paint or decorative plaster of a light shade.
Types of decorative and natural stone
The most common types of artificial stone are based on cement mortar and gypsum. Gypsum finishing material is not resistant to high humidity. Therefore, it is used in living rooms, bedrooms or hallways. Facing artificial stone made of cement, on the contrary, is moisture resistant, therefore it is used in rooms with a high level of humidity, for example, in a bathroom, on a balcony, a bathroom or in a kitchen. The fashionable trends of today are facing materials with realistic imitation of brickwork and slate. A brick or clinker surface is perfect for modern loft interiors, decorating an area near a fireplace or stove, as well as decorating walls of loggias and balconies. As for the imitation of slate, this is the only type of decor that forms a single stone surface, reminiscent of natural rocks. Each element has its own individual look, and the whole composition looks very impressive and charming.
Of the natural stones used to decorate houses and apartments, the most common are granite, limestone, marble and sandstone.
- Marble is a beautiful aristocratic material that can be used to create magnificent "palace" interiors. The color scheme is the richest, but the most popular, in addition to black and white, are shades of beige, red and brown. It looks best in spacious rooms. With a limited number of square meters, the "royal" finish will look somehow ridiculous.
- Sandstone has 3 primary colors: red, chocolate brown and green. There are three names for the material according to the grain size. Sandstone stones are very easy to handle and place. The material is inexpensive, but quite effective. Used for buildings and as decoration;
- Limestone is an alloy of stones laid in horizontal rows. The shade can be pink, gray, yellowish, or white;
- Granite, in addition to its beautiful noble appearance, is distinguished by its special strength and durability. It is used for interior and facade decoration. It looks good with other finishing materials.
Installation features
The specificity of the technology for working with an artificial stone is that it does not have a smooth facial structure, like ceramic tiles, therefore, bringing the plane to zero is completely unnecessary. Do I need to keep the lane? It is desirable because the appearance of the cladding benefits from this. Now we will consider the main stages of work related to laying artificial stone.
Preparatory work
An important point before installing a decorative stone is a thorough surface preparation. The walls must be freed from the remnants of old coatings and degreased. It is not necessary to level the wall to perfect condition, since the cladding will reliably hide all the flaws. But it is imperative to check the adhesion of the surface. Sprinkle it with water and see if there are areas where water does not absorb, but hangs on the wall in drops. These areas need to be subjected to particularly careful machining and then the spray experiment repeated. Scratch the surface of the wall carefully with a metal brush, then use a paint brush to work the stones from the back and outside.
Before starting the facing work, place the trim elements on a flat surface, think over the future drawing. This will allow you to find the optimal placement of pebbles on the wall in advance and avoid confusion.
Required styling tools
The most common tool that is used when laying artificial decorative stone on the wall.
- Hacksaw for woodworking. It cuts plaster-polymer stones very well, no worse than a grinder;
- Miter box. Indispensable if you need to cut the material at an angle of 45 or 90 degrees;
- Spatulas of various sizes for applying adhesive;
- Kitchen sponges. They are convenient to use when filling seams;
- Chisel, sandpaper, file. With these tools, stones can be easily adjusted, as they are not always cast in a perfectly even shape. It is most convenient to use a chisel for work, and then clean the surfaces with sandpaper;
- Building level and a simple pencil;
- The mixer is construction. It can be replaced with a drill with an attachment. It is convenient for mixing adhesive and putty compounds.
You will also need the following materials:
- Putty. It is used for sealing joints at corners and between joints;
- Varnish on the water. It will be needed to cover places in the area of \u200b\u200bseams and chips;
- Tile adhesive (can be replaced with liquid nails).
It is necessary to dilute the tile adhesive so that the ready-made solution is used within 15, maximum 20 minutes. Longer - it is impossible, since the mass will begin to freeze. The best consistency of the adhesive is creamy, like a toothpaste. In any case, you need to read the instructions.
Laying technology
In order to properly and beautifully decorate the walls with artificial stone, it is not at all necessary to have experience in construction or design work. A little hard work, patience and a desire to do something on your own is all you need. The lack of experience compensates for the building material. The general conditions for finishing work are as follows:
- The temperature range for facing with artificial stone is from 5 to 30 degrees. If the air temperature exceeds 30 degrees, then about half an hour before starting work, the wall and the back surface of the stone are moistened with water.
- Inspect each pebble before installing. Sometimes opposite sides have a different shade. It does not hurt to ask the seller which side is better to lay the material.
- Mark the wall. Its step is up to 500 mm. This is necessary in order to know in advance how the decor elements will fit.
Laying methods
There are 2 ways of laying artificial stone: with and without joining. The first method is used to decorate a "brick" texture. You can lay out the wall without joining with artificial stones imitating slate. Seamless styling is easier and faster. Its essence is that stones must be placed one from another at a minimum distance. Excess glue must be removed in time, otherwise it will be difficult to do later. The essence of laying stones with jointing is that the facing elements are laid at a distance from one another. In this case, the jointing purchased in advance must be added to the list of tools and accessories. You will also need a dye to match the finishing stone (or, conversely, a contrasting shade) for the seams.
Now the process itself is step by step. Laying the stone starts with corner pieces, alternating between short and long stones. To create support, the cladding is led up from the floor. When the glue in the lower layer dries up, you can proceed with further installation. The polymerization time of the glue depends on the specific brand. For individual adhesives, no curing time is required at all. In each case, you need to read the instructions. If seamless installation is used, it is necessary to ensure that the glue also enters the end parts of the stones, without getting on the front part of the decor.
Features of the design of curved or complex sections:
- Complex elements are performed using a file and (or) a chisel. This skill is useful if you need to gracefully bypass an outlet or switch, as well as when decorating slopes, entrance doors and interior arched openings.
- For perfect corner cutting, use a miter box. When laying pebbles cut at an angle, make sure they fit tightly. It is convenient to use a miter box for forming right angles. If you don't have a miter box at hand, you can use an object with a precisely calibrated right angle.
- Curly cutting is performed along the contour of the texture.
Sealing with putty can be done using a plastic dairy bag. Fill the bag with putty solution and then release it through a small hole right into the seam. The excess is removed with a sponge from under the dishes.


