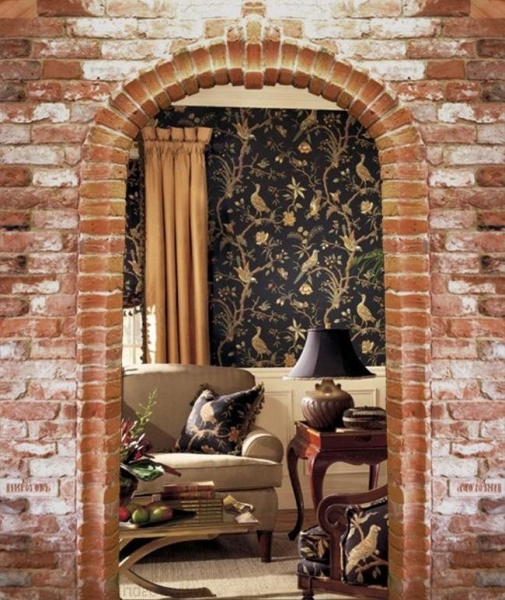
Decorative stone is today one of the most suitable materials for surface finishing both inside and outside buildings. This material is quite easy to process, it can not only be drilled, but also cut. But to get a good result, you should be guided by the technology of installation work, it will be presented below. You can use decorative stone for interior decoration, one of the elements of which is an arch.
Instrument preparation
A decorative stone begins with the preparation of tools, among which should be distinguished:
- construction mixer;
- cutting machine;
- a bucket for mixing the glue solution;
- paint brushes;
- trowel;
- grout syringe;
- wedges of the same thickness.
Among other things, you will need a building level and a spatula. It is important to worry about the presence of a metal brush and with the help of the latter you can adjust the elements on the surface after laying. To measure and cut the material, you will need a construction tape. You can't do without a household spray gun during work. Wedges can be made of wood and plastic, they will allow you to form seams. You can replace the cutting machine with a cutting machine.
Preparation of materials

A decorative stone is carried out after the preparation of all the necessary consumables, among them should be highlighted:
- glue;
- primer;
- grout;
- water repellent.
When choosing an adhesive, you need to pay attention to its purpose. For certain types of finishes, different types of adhesives are available, usually they are designed to hold the estimated weight of the material. Therefore, first you need to choose finishing materials, and only then proceed with the acquisition of glue. If the work is supposed to be carried out at low temperatures, then you should take a more serious approach to the choice of the adhesive composition, it must have the appropriate properties.
Surface preparation

Stone decoration without fail involves the preparation of the walls. To do this, you need to rid the base of old whitewash, wallpaper or paint. The master will have to level it using a putty. The surface of the arch must be primed, this composition will hold together small particles, so any finish will be held as tightly as possible.
On sale you can find primers for all surfaces. If you have to work with a concrete wall, you should treat it with "Betonkontakt" soil. When room conditions are high in humidity or temperature, the back of the decorative stone should be moistened before laying.

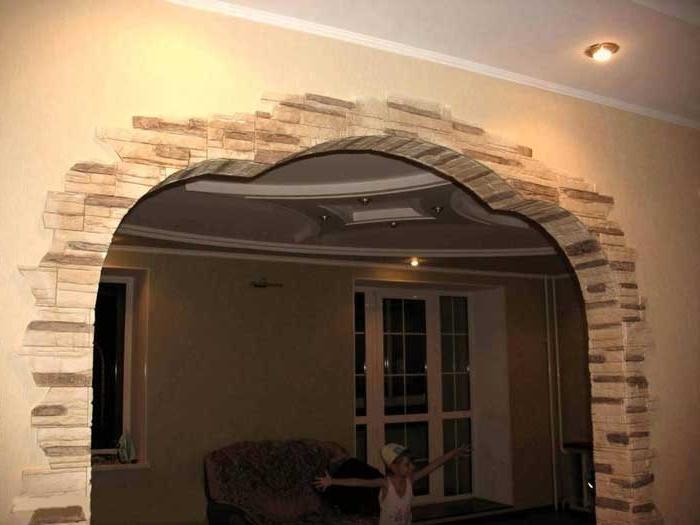
Decorating arches with decorative stone is carried out according to a slightly different technology, when it comes to plasterboard construction. A light stone must be prepared for such work. It is necessary to carry out such manipulations exclusively indoors. If the GKL arch is in the open air or under a canopy, then you cannot decorate it with a stone.
The surface of the drywall is treated with a primer, which should be left until it dries, only then can the installation of products be started. The primer is applied with a roller, and not only the outer, but also the inner surfaces are treated with the composition.
Preparing the stone for laying

If you will be finishing the arches with decorative stone (photos of design options are presented in the review for reference), it is recommended to first mix all products from different packages first. In the next step, the stone must be spread out on the floor. The position of individual elements is chosen so that the texture looks the most advantageous. For example, you can distribute elements by shade or shape, as well as sizes.
Glue application rules
Before starting work, you must read the instructions and dilute the glue in a bucket according to it.

The composition is mixed with a construction mixer until a homogeneous mass is obtained. Using a spatula, the mixture is applied to the wall only in the place where the product is supposed to be installed. On the reverse side, the stone must also be treated with glue, which is applied with a spatula. The thickness of the layer should not seem more than 1 cm. If this parameter is exceeded, the product will slide down the wall.
The glue is applied to the entire surface of the stone, while it is necessary to avoid voids that can cause condensation inside the masonry during operation. This recommendation also applies to walls, on their surface the glue must be applied in an even layer.
The method of mounting decorative stone

When finishing the arch with decorative stone in the apartment, you must follow certain instructions. The stone is applied to the place treated with glue and pressed against the surface. In this case, it is important to use the building level, and with the help of a mallet, the products are aligned vertically. The stone can be moved from side to side to achieve a snug fit to the surface.
In order to check how high-quality the masonry is, during installation it is necessary to tap the products with a screwdriver handle. This will allow you to understand whether voids have formed inside. If there are any, then the stone is removed, cleaned of glue, and the work is repeated anew. When finishing the arch with decorative stone in the apartment, you must definitely consider the photo. They will allow you to understand which material is better to prefer. As soon as the finish is on the wall, you need to gently tap on its surface, the glue that has come out is removed with a spatula. If the mixture appears at the ends, it is not necessary to remove it, it will improve the quality of adhesion of the material to the wall. You can carry out work using one of two technologies:
- without seams;
- with jointing.
Laying stone with seams
When the arch is finished with a decorative stone with your own hands, you can form seams between the products. Their grouting is carried out using a syringe filled with grout. The mortar should be applied in such a way that it penetrates 4 mm from the outer edge of the product. This will allow you to form a clearly defined relief. To obtain a smoothed texture, it is necessary to fill the seam flush with the face of the stone. 30 minutes after applying the grout, it is necessary to smooth out the joints with a special trowel or spatula. When choosing a grout, you should be aware that the compounds can mimic the color and texture of a real grout. The grout can be of different colors.

Chipping handling
When finishing the door arch with decorative stone, it may be necessary to process chips. The stone is cut to size, but if its edge stays flat at the junction, the wall will not look natural. You can perform a cleavage by marking its outlines with a knife. At the next stage, the excess part is bite off with pliers. You do not need to bite off the products along the edge of the mark, you need to start with small pieces, otherwise the product may break in the wrong place. You can correct the errors with a file, with its help you will give the chip smoothness. Additionally, the surface is processed with sandpaper. However, sometimes the chips are not smoothed out.
Final decoration
Decorating the interior arch with decorative stone can be completed by applying varnish or tinting mixture. The latter allows you to hide defects and cracks that have formed in the process. It is better to use an airbrush to apply the composition, but some masters make do with paint brushes. The airbrush allows you to apply the mixture from a long distance, while holding the tool at an angle to the surface to be painted. You should not cover the entire area completely, it will be enough to tint the main protrusions and depressions, this will help to get a deep texture.
An interesting effect can be achieved by using bronze or gold coloring pigments as a base for the mixture. In this case, only the ends of the tiles need to be tinted. Metal with this finishing technique is not striking, but with a certain lighting of the ends, the masonry begins to play with golden reflections.
Conclusion
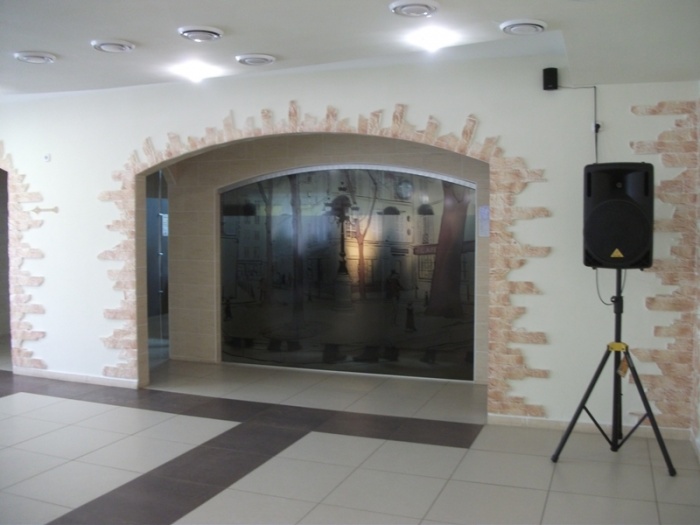
The arch is a rather small element of the interior, but its decoration sometimes takes several days. However, you should find time and energy for this work, because decorating this part of the room will decorate the house, making it more comfortable, and the interior more refined.
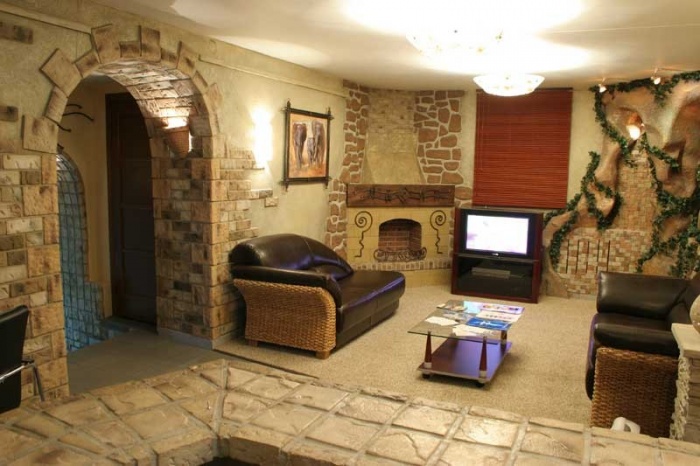
Decorating the arch with stone makes it possible to make the interior unusual and memorable. Such unusual design openings will surely attract the attention of guests of the house, help you to be proud of the decoration of your apartment in front of your friends.
The original decorative arches, decorated with artificial stone, turn the interior into a mysterious cave. By choosing unusual arched structures for decorating doors, you will get a visual expansion of the space.

As the main materials for finishing the arch, you can pick up wood, stucco, metal. Despite such a variety, professionals consider decorative stone to be an ideal option for creating an arch.

Currently, you can choose different types of this material. The arch, which is decorated with artificial stone, will be an excellent addition to the interior, will add a certain zest to it.
Advice! If your plans include creating a durable and reliable structure, then choose a stone.
Benefits
Decorative stone is practically devoid of any drawbacks. It is made from a material that does not undergo chemical or atmospheric corrosion.
In addition, it is called an environmentally friendly finishing material.
It contains cement, pumice, expanded clay. Pumice is a glassy substance with a specific origin, analogous to the lava of a volcano, since it is formed when the mass instantly solidifies. Pumice has an airy structure, so it does not release warm air from the room. Expanded clay is fired clay balls.
Due to the large assortment of artificial materials, you can choose an imitation of natural stone, similar to natural material.
Arches in the interior
How the arch is finished with decorative stone in the apartment, photos, some of the nuances of finishing work, all this can be seen in the video
Advice! In order to create an unusual entrance to an underwater cave in your home, you can arm yourself with blue-green and light beige stones.
Decorating arches with decorative stone currently allows owners of urban real estate to bring to life the most daring creative ideas and projects.
Attention! Decorating the arch with decorative stone in the apartment requires additional decoration so that it becomes a harmonious part of the overall design of the room.
For example, if an arch is chosen to enter the underwater world, it is necessary to use plants as additional decorative elements.
To give the atmosphere of the room some mystery and solemnity, you can arm yourself with additional lighting. The arch, decorated with green plants, illuminated additionally, will become a complete illusion of an aquarium.
Selection of materials for creating an arch
Before you start finishing the arch with decorative stone, it is important to choose the right finishing material. Professionals prefer to choose narrow tiles for finishing. In this case, you can simplify the process of decorating the bends of the structure.
Attention! When designing a plasterboard structure, it is important to take into account the weight of the stone selected for work.
If the material is too heavy, the drywall will not withstand it, and the structure will not have a beautiful appearance.

To carry out such work, there is no need to use the help of professional builders. If you use some algorithm of actions, in this case it is quite possible to build a beautiful arch, and even decorate it at your discretion.
Before starting the finishing work, you first need to remove all the dirt from the surface of the arch, and also carry out its high-quality primer. These actions are important, since the final result of the finishing depends on how well the surface is prepared, because the decorative stone will not stick to uncleaned surfaces.

Advice! If a smooth surface is expected, it is initially desirable to make additional notches.
Then you can proceed to the preparation of the cement mortar, choosing the proportion taking into account the type of stone, its size, shape. It is at this moment that it is important to fulfill all the requirements that are imposed by the manufacturer of this finishing material.
Only after all the preparatory work is fully completed, you can proceed to the direct laying. The stone is laid on the sections of the arch that are in contact with the wall.
Advice! To make the decorated arch beautiful and aesthetic, you need a building level, as well as plastic crosses.
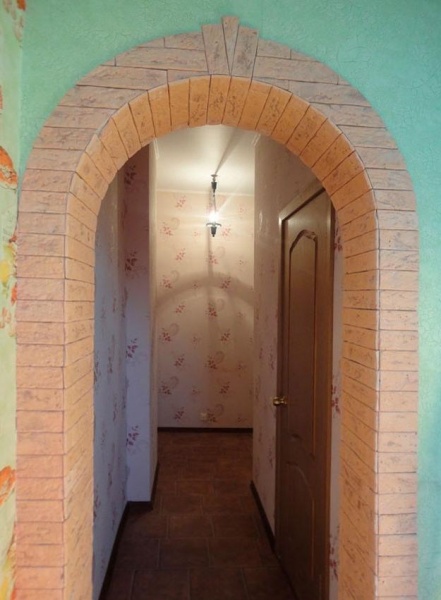
First, the stone is laid in the lower part, then it smoothly goes up.
To finish the arched part of the structure, it is first important to mark the material itself. It is applied to the wall, then cut off.
Attention! It is important to maintain the radius of the arch so that the finished arch is even and beautiful.
Places of cuts are sanded, armed with a special grinder.
To neatly cut the product, you need to walk several times with a knife along the previously prepared markings. Any excess can be removed using ordinary pliers. For the same purposes, you can use a grinder or pliers, as well as sandpaper. Fitting the rest of the elements is carried out in the same way.

After finishing the finishing work, you need to wait a while for the cement mortar to completely solidify. Professionals advise to withstand a couple of days, and only after that proceed to processing the seams, armed with a special putty.
After the initial processing of the decorated structure, you can start painting the stone.

Tools for work
Of the tools necessary for work, we single out a device for cutting off, a level or plumb line, a tape measure, a spray gun, wedges, a brush for cleaning metal, a spatula.
As a consumable for the design of the arched structure, you will also need special glue.
Advice! Try to select the glue based on the weight of the stone so that it does not fall off immediately after you complete the finishing work.
Work must be carried out at an air temperature of more than five degrees. Before starting to fix the stone, it is advisable to check it for the presence of cement milk (foamy layer). If it is found, it is important to clean the back using a metal brush.

The fact is that such a film significantly reduces adhesion, which can lead to peeling of the tiles.
In order for the adhesive mass to be homogeneous, you can use a construction mixer.
Advice! Avoid applying too thick a layer of glue, as the tiles will slide off the wall and you will not get the desired result.
Conclusion
Arched structures are suitable for those owners of urban and suburban premises who do not want to put up with the usual interior. Depending on what the individual characteristics of the room are, you can use a variety of finishing materials to create arches. Among the most common materials for work, construction drywall can be distinguished. It is this material that is often the basis for the manufacture of such unusual designs.

Observing the tile to the right place, slightly pressing it, you need to arm yourself with a building level so that the stone is laid beautifully. Only if all the recommendations given by the manufacturers of decorative stone are fulfilled can one expect to obtain the desired result.
Of course, with an unusual design of a doorway, for example, using an original decorative arch, you can make positive changes to the design of an apartment or house.
There are many options for how to make the interior original and attractive. One of the solutions is to create a beautiful arch from the doorway. But such a design by itself may not be enough. In some cases, spectacular finishes are indispensable. And for this, artificial stone is very often used.
Beautiful arch decoration
About arches
An arch is an architectural element that plays the role of an opening in the interior. It is known that there are references to the first arches from the times of the Ancient East.

Arch in the apartment
Given such a long history, it is not possible to know the reasons for creating arched structures. For a very long time, the structure was erected from stone and brick. It is already today that drywall, wood, plywood, as well as OSB, chipboard or fiberboard have been added to this list.
About decorative stone
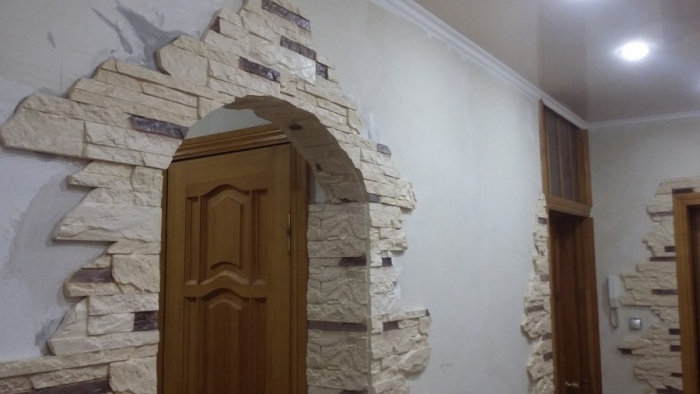
This material is not just an excellent way to decorate an interior, it has an excellent protective function. Therefore, he was so fond of designers. Of course, if an artificial stone is used indoors, then its protective functions are reduced to resisting only accidental mechanical damage. And this material is applied in the interior pointwise, the maximum that can be finished in one room is a wall. But most often the material is used as an addition to existing elements.

The advantages of a stone arch
This design option has almost no drawbacks. After all, the material does not rot, corrode and fungus. Decorative artificial stone consists of environmentally friendly components, therefore it is safe for health.

Why can't you use natural material? The fact is that, firstly, it is very expensive, and secondly, not all structures can withstand the weight of natural stone. The same granite is three times heavier than its artificial counterpart.
There are a number of other advantages of this approach:
- no special care is required - any detergent that does not contain abrasives will do;
- you can use an artificial analogue of any natural stone - manufacturers began to make a very high-quality imitation;
- decorating arches with stone with your own hands does not require special skills, so the procedure is easy.

Materials for creating a structure
The creation of a stone arch in an apartment requires the use of a certain list of materials that must be prepared in advance:
- the decorative stone itself;
- pencil;
- sandpaper;
- primer;
- solution or glue;
- grout for joints.

Instructions
Decorating the arch with decorative stone starts with the traditional stage of surface preparation. It is necessary to smooth out irregularities using sandpaper, and then putty them using a pre-primer.

Preparation of adhesive solution
You can lay a decorative stone on special glue, on a cement-sand mortar, or on liquid nails.

The quality of adhesion of the finishing material to the base depends on the roughness of the back of the tile and the quality of the adhesive mixture. If you need to prepare the solution yourself, you need to do this in small portions, since it sets quickly enough, losing its properties. You need to mix powder and water in a convenient capacious container using a mixer (this can be a drill with a special attachment). You need to mix until you get the consistency of thick sour cream.
Styling
Laying is done from bottom to top. You need to start from the corner of the wall opening. The seam should be left approximately 4-5 mm. If corner stones are used, they must be glued from below. If flat ones are used, the laying should be done with an overlap.

During the procedure, do not forget to check the horizontal laying. On the arc, elements can be trimmed to maintain the required radius. This can be done with pliers or a grinder with a special attachment.

The edges must be sanded using a file. When the finish is finished, you need to wait for the solution or glue to dry. After that, you need to do the refining of the seams. For these purposes, we use a grout of the appropriate color. It is better to use a construction syringe to complete the procedure. Otherwise, a rubber trowel can be used. You can make a tool yourself. To do this, cut off a square piece of polyethylene, roll it up in the form of a cone, and fix it with tape. The tip of this element must be cut so that the resulting size matches the size of the joints between the stones.

Next, one of these tools needs to press the grout into the joints in order to completely fill them. In this case, everything must be done carefully so that the material does not fall on the front of the products. It remains to wait for the grout to dry - the decorative stone arch is ready.

Seamless laying
In this case, the tiles fit tightly to each other, so finishing the arch with artificial stone requires painstaking work. Glue or mortar is applied to the stone. If styling is done from top to bottom, you can get an even border with clear lines.
Since the edges of the finishing material are well prepared, it does not take time to pick up during installation, so the procedure is quick. At the end, the surface can be opened with an impregnation, which will repel water and protect against chemicals.
The stone arch is inexpensive, but it looks great
Decorating the arch with stone allows you to give this element of the interior more expressiveness and style. The room takes on a more sophisticated and attractive look. This option looks especially good in corridors and living rooms. In a word, the effect of such a finish is amazing, as you can see by looking at the photo options.
To decorate the door arch beautifully and efficiently with our own hands, we need:
- pencil;
- building level;
- roller, spatula and pliers;
- cement mortar and primer;
- hacksaw and knife;
- sandpaper;
- joint putty;
- decorative rock.
How to decorate an arch with wallpaper?
The most popular way of facing a door arch in our country is wallpaper. They can be joined together with plaster-based decorative pieces, they are cheap and easy to stick. When choosing, we recommend that you pay special attention to dense types of wallpaper, since there is a peculiar specificity of their painting.
However, the wallpaper also has disadvantages: short service life, impossibility of complete restoration and exposure to moisture.
How to decorate the arch with wallpaper:
- Dilute the adhesive according to the instructions included with the package. Stir well to avoid lumps.
- Stick the first strip on the wall near the arch, and the subsequent ones so that they partially cover the opening with an indent of 4 cm.
- Cut off the indentation remaining above the passage by 2 cm, bend it under the slope and glue it to the surface. Similarly, glue the wallpaper on the other side of the arch.
- Cut out a piece of wallpaper along the width of the arched arc (inside) and glue it. Smooth it out with a dry cloth from the center in different directions, removing air bubbles.

How to decorate an arch with decorative plaster?
Decorative plaster is gaining popularity among designers and interior decorators. It allows you to create various universal reliefs and textures.

Its indisputable advantages include an affordable price and excellent quality, as well as ease and simplicity of use in repair. For finishing works using decorative plaster, you do not need to hire a specialist.
The disadvantage of the coating is the impossibility of restoration. It is almost impossible to remake it to its original appearance, the difference in layers will be visible. Also, decorative plaster is afraid of moisture and cannot be cleaned.
How to decorate an arch with decorative plaster:
- We plaster an arched arc so that the seams of the opening and drywall do not show through.
- We apply a primer that will provide adhesion properties to the plaster.
- Apply the putty. Using a sponge or grater on a fresh coating layer, we form a pattern and texture.

How to decorate an arch with decorative stone: step by step instructions
Decorative stone is used for aesthetic interior decoration, but its protective properties are also at a high level. It is usually used in conjunction with other materials. Let's take a step-by-step look at how to decorate an arch with a decorative stone with our own hands.
Step 1. Choice of stone and preparation for finishing
For finishing the arch, it is better to choose narrow layers of stone, since they are easier to stick to the frame in rounded places. We chose - we prepare the surface for laying: we make notches and prime the arch with a roller.
We prepare a cement mortar suitable for the selected stone. Typically, the solution contains classic components: glue, sand, lime, cement.

Step 2. Facing the arched wall
The arched wall is also partially covered with stone to make the whole composition look organic. We lay the first stones from below at the junction of the wall and the arch. We check the uniformity of the masonry with a building level.
We also lay the next row of cladding from the joint. It should protrude beyond the joint by a size equal to the thickness of one stone. We glue the tiles themselves back to back.

Decorative stone is an excellent material for finishing both building facades and interior interiors. This material is easy to process, cut and drill.
It's easy to work with. However, in order to obtain an aesthetically good result, it is necessary to strictly follow the facing technology.
Tools
First, let's prepare the tool.
You will need:
- Construction mixer
- Building level
- Cut-off machine or cut-off machine
- Putty knife
- Bucket
- Metal brush
- Paint brushes
- Rubber mallet
- Trowel
- Construction tape
- Grout syringe
- Household spray bottle
- Wooden or plastic wedges of the same thickness
Consumable materials - we make the right choice

You will also need consumables:
- Adhesive for decorative stone
Our advice - when purchasing glue, carefully read what is written on its packaging. The instruction should clearly indicate its properties.
There are different types of glue for gluing decorative stones of different weights. Therefore, first choose a decorative stone that suits you, then purchase glue, and not for reverse.
Price in this case plays a secondary role, the main quality.

Decorating arches with decorative stone suggests that in addition to laying the stone on a vertical surface, you will also need to cover the vault. In this case, a pull-off force will constantly act on the glued stone.
Therefore, following all the recommendations for choosing the correct adhesive is especially important.
It is important - when carrying out work on the installation of decorative stone at an ambient temperature below +5 degrees, you must use a certain brand of glue. Consider all this when choosing.
You also need:
- Grout in a suitable color
- Primer
