You can understand people who want to reduce the maintenance and actually on the flooring device on the soil. Here is one of the examples. There is a foundation. In order to save funds, the backfall is not always used. Instead, you can simply put on top of the panel. Most often it is a round-standing panel. But when they are used, there are several nuances.

The first thing that is worth paying attention is that the round-standing panel is not designed to work in such conditions. To date, all similar panels are preframed. It is understood that the panel is attached to the foundation of the foundation by anchors. And this is her weak place. Protective layer of these fasteners of thin. And first of all the steel anchors on the edges of the plate are affected. Then the reinforcement begins to collapse. And followed and concrete.
This process is because there is free space between the soil and stove. Moisture, coming from the Earth, evaporates and condenses on concrete, as its temperature is quite low.
At the moment, people rarely pay attention to the protection against freezing. As a result, a large amount of frozen condensate is formed at the junction between the stove and the foundation. Namely there is a protective layer of armature anchors.
This can be avoided enough. To do this, it is necessary to break through the through ventilation holes in the supports on which the stove is laid. They work due to the fact that the wind blows out extra moisture from under the plate. In fact, it is an eternal draft created by their own hands.
But here everything is not so simple. It should take into account the height of the base. In winter, snow drifts can overlap the outstands. Therefore, the distance from the soil to the holes should be at least 50 cm. Depending on climatic conditions, this value may vary.
Unfortunately, not all at home satisfy these conditions. The panel is located much closer to the soil and as a result, it becomes very problematic as a result, it becomes very problematic. In this situation, in the absence of a high-quality basement, it is necessary to make floors on the ground.

But their fulfillment is not forces not every builder. And the question is not in the exceptional complexity of the work. Rather, the problem is to misunderstand the importance of performing certain conditions. For example, such elements like a rubbed backstage and concrete preparation are mandatory for execution, but not every professional can be called the reasons for this. Therefore, it is so important to deal with the reasons why one or another layer is made.
So, the first thing that is performed is the foundation. It is then waterproofing and attacked. The next important stage is the backstage. Of course, it will require additional financial costs. But without it, it is impossible to perform the floors of the soil. Naturally implies the situation that for the beads is simply not enough.
When performing backstage, it is necessary to take into account that it is necessary to do this in stages in several layers. At the same time, the layers should not exceed 20-30 cm thick. The reason is very simple. The usual rambling has a mass of about 150 kg. Therefore, it can not more than 30 cm of soil.

In order for the tamper takes place more efficiently, a rubbed frustration is used. But not enough to align it with a shovel. Crushed stone should also catch up. The crushed fraction should be about 40-60 mm. With its trim, the effort will be redirected to the ground. Since it will be concentrated by small pebbles, the impact will penetrate deeper. In this, the difference between the rubble backfill and seal of the soil with rubble.

The next stage is concrete preparation. In this case, it is used as a base for stickers of hydrocariozing. Do not confuse with waterproofing. It protects only from water. And in this case, it is necessary to defend, including from steam. Since the soil has a natural humidity, and the temperature inside the building is a plus, respectively moisture will begin to evaporate. Without vapor insulation, the moisture will fall into the structure of the floor and there is condensed there.

Variazolation on a bitumen or mastic can be laid exclusively on a rigid base. Since the workers have not yet learned to fly, they will have to walk on this basis. If it is soft, an emptiness may be under steam barrier, which has occurred under the weight of a person. Or there just rolled pebbles. As a result, vaporizolation has high chances to just go away. Accordingly, it can no longer be able to perform their own. Therefore, concrete preparation or screed is performed on the rammed soil. Preparation is done using low-strength solutions, high-strength simply no need, quite concrete brand B7.5.

Next - laying insulation. To do this, you can use various materials, but best - extruded polystyrene. It has a low water protection coefficient and a rather durable. At the same time, it has a high strength to crumpled.
After it laying on hydropar insulation, both horizontally and vertically to protect against the cold of the walls, a screed is made. It is also called floating, as it does not have a tight hitch with a base. It is necessarily reinforced by a welded grid. If the floor is located in the residential room, then there are enough cells 100x100 and the diameter of 3 mm and the thickness of the screed 5-6 cm. If it is a garage, a mesh is taken with a cell 50x50 mm and a wire of 4 mm. The height of the screed is at least 10 cm. It should be done from concrete using a rubble fraction of 10-20 mm.
Further on this screed is the finish coating. And absolutely anyone. It can be a tree, since steam barrier, or ceramic coating. All this complex works are expensive, but reliable. Of course, it can be reduced. But if expensive finish materials or heating of the floor, water or electric, then the economies are better not to use.
How to save on the floors on the soil?
Mention on the possibilities to save on the floors on the ground still stands. Instead of vaporizolation, you can use the usual polyethylene film, be sure to two layers. She is so sold with a sleeve. It is necessary to lay it with the allen 15-20 cm on the compacted base. But it is not worth putting the film on crushed stone. This is quite gentle material. Therefore, under the weight of the builder, he can break. Accordingly, the moisture will fall into the floor covering. As a result - fungus and unpleasant odors.
But if the thickness of the backfill does not exceed 20 cm, then the soil can be sealed, even a little moistened. And already on this clay base can be raised polyethylene, necessarily with the allen. Also with confidence say that the polyethylene film does not give a complete guarantee that moisture does not fall into the body of the floor. But if the decision was still accepted, then the entire subsequent complex of work remains the same. Thermal insulator also stacked. Then the screed reinforced with a steel grid is performed.
Of course, such a design will also perform its functions. But professionals advise it to apply it in less responsible premises. It can be guest houses, sheds, garage. That is, those rooms in which expensive coverage will not be used. Just not to risk.
These were the basic principles of the construction of the floor on the soil.
How not to do?
Thanks to the Internet, there are now in free access lies a huge amount of incorrect information, in particular tips and recommendations regarding the floor device. One of these recommendations is the use of geotextiles. This is the Council of one of the regular visitors to building forums. He offered to put geotextiles on the ground. Then it is planned to make a frighting with rubble or clay. But it is extremely inappropriate. If you remember the above described above, then when you try to rapt the ground, geotextiles will simply do not give it. Whatever the effort of the tamper, geotextiles will hold the crushed stone and will not give to compact the soil. This material has a sufficiently high tensile strength, so the tamper will be useless.
Consequently, the soil must be seal to laying geotextiles. Logical? No. In this case, the need for geotextile completely disappears. It is not a vapor insulation nor waterproofing. To be slightly clearer, geotextiles is used in completely different conditions. For example, if you want to make drainage, filter sand or gravel. Accordingly, such a design is completely ineffective, irrational and unacceptable.
In addition, the recommendation said the use of clay. This moment also requires clarification. Ceramzite is a specific material. He very quickly picks moisture. Accordingly, as a heater for this design, it is absolutely not suitable. The reason is extremely simple. In just a week, he is completely soaked in moisture coming from the soil and stop performing functions assigned to it. That is, it will be thrown on the wind money.
After that, it was recommended to make a screed and finish coating. Without hydro-insulation and insulation. Again, it will be wipe finance. That is why it is necessary to extremely carefully treat the information read on the Internet, it is necessary to recheck it and not to go on the similar "specialists".
Also, the forums are often wondering the question: "Why is it not recommended to use ceramzite concrete for floors? He is easy and durable. " This question is worth answering more expanded. Yes, it has low weight and is quite strong material. But at the same time it is a terrible heat insulator. To date, there are many more suitable materials. This is an extruded polystalmine, and foamed glass. As for the glass, it is almost 2 times more expensive than the polysterol, but is the perfect protection against rodents. Even moles will not be able to break through. So this is an additional guarantee of calm for the inhabitants of the house.
And if you return to the ceramzite concrete, as a material, it should be borne in mind that it is very capricious. When the ceramzite concrete mixture is prepared, the ceramzite itself is gaining a lot of moisture. And he takes it from concrete. And after a day, when the cement only grabbed, the following situation occurs. Porous clamzite absorbed moisture from concrete. Passed day. As a result, a cement solution, which is a kind of glue, envelops the clay. Accordingly, all moisture is cleaned inside. Thus, the ceramzite concrete will dry no month, in contrast to the usual heavy concrete with the granite filler. This process is stretching for 2-3 months. And if such a concrete is used in the basement with weak ventilation, then no subsequent floor decoration will not even stutter for a long time.
Otherwise moisture, which will continue to evaporate from the ceramisite in the absence of vapor barrier, will spoil any finish coating. She will just undermine the wooden floor, he will just swell and rises. If a ceramic tile was used, then fungus will appear on its seams, and a stable unpleasant smell will appear indoors.
Thus, if the decision to use the ceramzitobetone was still accepted, it will take a much greater technological break to dry it. It is also necessary to measure the moisture of the base before laying the floor coating.

As mentioned earlier, there are two principal approaches to the creation of floors on the soil. This is an economy option and budget. In the first case, a polyethylene film is used, which is stacked on the ground. On top there is already a laying of insulation, screed and finishing materials. This option is preferable in rooms where an inexpensive finish is planned: a cheap ceramic tile or inexpensive floors.
But if you plan to make floors with heating or lay an expensive finish coating, then it is no longer recommended. The reason is that the likelihood that the film during the execution of work will break through the grid or they will sell a stone remains quite large. Therefore, upon subsequent laying, expensive floors should not save at the preparatory stages.
But on the forums, questions are regularly asked about the use of the film. And they require a response.
Is it possible to use a black polyethylene film in one layer not for vapor insulation, but in order not to pour concrete to the ground? It is inexpensive and, it seems that it will be better.
But do not forget that the best enemy is good. As it has already been said, the film does not allow one hundred percent tightness. Professional builders when dismantling such structures regularly observe a layer of water between the film and concrete. The moisture is always in the ground, and concrete or the solution always remain inertial materials. Consequently, it is on the border of the soil / concrete will be formed a dew point. Accordingly, the wet air will be condensed between the film and concrete. This is a natural physical process.
The following situation is obtained. There is a concrete. Under it was laid a film. Just like that - she is inexpensive. But in concrete there is always an excess of moisture, because in order to grab the cement just 5-10% of water from its mass. Naturally water in solution is much more and she needs to go somewhere. Q: Where? Top it will not be able to leave, as steam barrier will be laid there, and it will not be able to leak into the ground due to the laid polyethylene. Accordingly, the water is chemically associated in the structure of concrete, but will not go anywhere, and the excess moisture C is condensed in the layers between the concrete and the plastic film.
Wet medium at a positive temperature is an ideal environment for the development of microorganisms. And concrete will begin to be covered with a black rode. It happens not always. But often when dismantling such screeds, concrete turns out to be completely scratched in black and blue shades. Of course, there are no special hazards for the health of residents. From above there is a vapor barrier and insulation, for example, the same extruded polystyrene that does not miss any fungi upstairs. But concrete will somehow work in difficult conditions and the life of its operation will be much less.
If the film under the concrete is damaged somewhere or there are loose joints, then the moisture that will rise from the soil, will only strengthen the effect. And the film will delay moisture and interfere with it to leave. Accordingly, moisture gradually accumulates and leads to different unpleasant moments.
And what if such a film is not? If the groundwater is located deep enough, then the humidity of the soil itself will be about 15%. Cause in capillary moisture. It rises from groundwater level and increases moisture. It all depends on the type of soil. If these are sandy soils, the height of lifting capillary moisture will be not more than 30 cm. If the soil is clay, then the height will already be a meter, and a half. Accordingly, moisture in the area of \u200b\u200bthe border between the soil and the screed may be much higher.
On the other hand, the humidity of the solution is at the time of the fill 100%. Let even 90%. And even with high humidity of the soil, excess moisture will still go into it. Based on the physical laws of diffusion, it turns out that after some time the moisture of concrete and the soil over time is leveled. To the same 15%. Naturally, this value can change in various situations. But in any case, the smaller the moisture of the concrete screed is better.
And if you have a film, this humidity in 90% will be maintained throughout the life of the screed. Of course, paying money so that the concrete bought also for its own savings worked in the worst conditions - the inalienable right of the consumer. But still do not do that. This is simply no need.
The use of vapor barrier in floors
Next questions:
- Do I need to round the concrete screed when switching to the wall to not tear hydro-insulation?
- How much does it need to dry to lay on top of the welded hydro-plating?
The fact is that vapor insulation, in contrast to waterproofing, does not require mandatory gluing to the base. If there is a screed, which is closely adjacent to the wall and it is necessary to make vaporizolation, then the most important to cry all the joints. But it must be borne in mind that all the spikes of vapor barcling should be very reliable.
As a result, when the membrane heats, it becomes very elastic, wrapped on the wall and everything seems to be fine. But do not forget that after a short time she will cool. And then a layer of vaporizolation will definitely decrease in the volume and a peculiar stretch will occur.
If, when laying a screed, all the angles between the wall and the floor were not rounded, then emptiness is formed there. There is nothing terrible in this. But there is a serious danger that, upon subsequent laying of the mesh, it is very easy and easy to break vaporizoation. To do this, it will be enough to hit the edge of the mesh into the angle, hit the boot, press the crushed stone - yes anything. And it is impossible to protect against such accidents. This is the construction. That is why the device is needed. It will serve to minimize the human factor and the likelihood of such unexpected situations.
If you do a rounding, then the voids are not formed and vaporizolation turns out to be protected. And some random strike will not do anything with it. Parosolation does not break, as under it there is a rigid base.
Therefore, when the base was formed and vaporizolation solder to the walls, it simply does not make sense to glue it to the screed. Just sucking the joints. That is, ensure the integrity of the layer. And then it simply shifts from above.
Of course, if the screed is completely dried, then the vaporizolation can be selected. Pre-concrete is soothed with bitumen primer, and then a layer of vaporizolation is applied. The laboriousness will be an order of magnitude higher, but it will be soldered to the ground. There will be a reason to be proud of yourself and sleep peacefully at night.
But in general, as soon as the concrete screed is to withstand the weight of a person, then you can start laying vaporizolation. The main thing to solder it to the walls and be sure to suck all the joints. And the canvas can just lie on the concrete.

One of the frequently asked questions is: "What is the height to form waterproofing of floors on the soil?".
The insulation is usually used by EuroBeroid. It is heated on one side of the burner so that it turned out a kind of weld waterproofing. It must also be laid not only exactly to the wall, but also with the sochlet on the wall. In this case, you can protect yourself from different accidents, like a moisture supply on the wall. As a result, the entire floor patter is protected from the possible penetration of moisture.
Accordingly, after laying of waterproofing, an extruded polystyretrol thickness of 30-50 mm can be paved as a heater. Some people believe that this is not enough that it is necessary much more, but in fact it is not.
If the base is insulated, then the freezing can simply be. And the temperature of the soil is usually about + 5-10 Celsius. Therefore, with a heat engineering calculation, it is assumed even the heating floor, a temperature of 20-25 degrees, the differential will be no more than 15 degrees. In this case, the wall operates on the drops of up to 50 degrees. Therefore, 30-50 mm. Polystyrene will be quite enough to protect.
Returning to the floor laying, after waterproofing and laying the insulation, the screed is performed. Its necessary to reinforce it. The fact is that when placing concrete for not a tough basis, for example, the insulation, polystyrene foam, mineral wool or sand is desirable to reinforce it. This will help compensate for all possible nuances of irregularities.
It is before the top of the tie and you need to carry out vaporizolation. Waterproofing is carried out for several centimeters above. It stacked on a layer of insulation to protect it from wet concrete. It should be borne in mind that PSB foam is afraid of an alkaline medium. And the cement is just an alkaline medium. Accordingly, during contact, it will collapse. But if you use extruded polystyrene foam, it does not need a film completely. This material is much more reliable in quality and performed on more expensive technology. Therefore, there is nothing terrible if the film does not fit. Even with the subsequent disassembly after a long time, no signs of corrosion or incompatibility were noticed.
Accordingly, this film is absolutely not needed. Moreover, the EuroBeroid is covered by a film from two sides at the moment, so that he does not stick the layers and he could be stored longer. And after its laying, this film retains its integrity, so there is no need for an additional coating. It is enough to lay an extruded polystyrene foam in vapor barrier from the EuroBeroid, and this can be stopped.
Especially since the additional film will definitely damage fittings or pipes that will be laid in the screed.
Wall insulation polystyrene foam
The heat insulation layer is 50 mm polystyrene foaming simply laid and additionally secure it or it is not necessary to glue, and it is categorically. The fact is that when the screed will be performed on top, and about 5 cm, then its weight will be somewhere 400 kg per meter square. So nothing can happen. Lower than vaporizolation expanded polystyrene foaming. The screed is so much pressed it that any additional attachments are simply not needed.
Laying the insulation on the wall is not always required. It is usually quite enough external insulation of the base. But in some cases, the polyster can be laid not only on the floor surface, but also to the level of the screed. It will extend the path of cold air along the wall. Accordingly, he will have more time to warm up. Its use depends exclusively from the project and external insulation. If it is not provided in it, then there is no need to use polystyrene foam.
But the demfer tape is put along the edges. At the same time even before laying expanded polystyrene. It will compensate for the deformation of the screed due to the temperature difference. This is especially important when laying warm floors. They are heated to 25 degrees, respectively, the screed will increase in size. The demospheas tape compensates these changes, and the polystyrene foam is not completely. It can be shattered, but it will be no longer able to regain the former volume. The foamed polyethylene or the demospheas tape is able to restore its volume. It is important that there is no garbage between it and concrete.
Therefore, it is necessary to check the project to check whether additional insulation is required. If yes - then the polystyrene foam is better to lay, if not, then you can do without it.

Is it necessary to weld (bind) reinforced grid? When laying a concrete screed on the insulation, a grid is used with the size of the cells of 100x100 and a diameter of 3 mm. It is believed that it is necessary to weld or bind and then pour into a solution.
But the grid is not a carrier element in full understanding. It is necessary to compensate for the deformation in the screed, so that in the event of deformation of concrete and cracks, the shying shook did not resemble drifting floors. That is, the reinforce is required in order for the screed always lying exactly. And if you even go microcracks, you can not worry about anything.
Laying pipes in floors
What to do if the pipes are paired in the screed? How to fix them? Should I attach them to the reinforcement grid or maybe you need to strengthen them much better? On the Internet there are even advice to break through all the layers, including hydro, vapor barrier and fasteners in concrete training.
There is a completely logical question. And how do these layers be in this case perform their functions? The answer is also simple - no way. Therefore, you should not listen to delight tips. Even 15 years ago, when the floors on the ground only became popular, all materials were called from Germany. Then the film was laid as a vapor insulation, and on top of white foam. It had pumerals and pipes stacked between them. In the case of a smooth surface, plastic fasteners were used, but they were attached so as not to reach hydrocariolar insulation. Apparently such advice arise when someone sees the process of laying floors on the ground, but does not understand how exactly it is done. No one never creates the pipes through all the layers.
Pipe fasteners are required exclusively for fixing pipes during the fill of the screed. It is necessary that the pipes do not go away from the position of the position. There are no large loads there, therefore, it does not require much effort to fix pipes.
As for heating and water supply pipes, they must be worn in Mirilon. The fact is that these pipes are much larger than the pipes of a warm floor and they change their dimensions not only from the temperature drop, but also as a result of hydrowarders. As soon as the cranes are open, the pipe goes to microhydrogen, respectively, the pipe increases in size. Therefore, she should have such an opportunity. Otherwise, the pipe breaks in a weak place. This is especially noticeable after a long lack of tenants in the house, and as soon as hot water is turned on, the pipe will significantly expand.
But in this case, a small space remains over the pipe to the top of the screed. So that the thin layer of the screed is not collapsed from walking and other loads on the floor should lay a plaster grid over the pipes, preferably in two layers. In this case, it will take care of a concrete screed from destruction.
On top of the pipes of the warm floor, it is considered necessary to make a scial 5 cm thick. In fact, there is no consensus on this issue. If we consider the physics of the warm floors and the heat distribution vectors, then the following situation occurs. From each pipe heat covers a certain floor surface. It is good when the warming sectors overlap each other. In such a situation, the floor heats up evenly, it is very pleasant to walk on it.
But if you reduce the thickness of the screed, the so-called "zebra effect" occurs. In fact, it is alternating strip of cold and warm floor. The fact is that the pipes heat the entire floor entirely, but an exceptionally surface right above the pipes. As a result, walking on the floor turns into the game "Find a warm place". One step is warm, the other is cold.
This effect is very manifested exclusively at the first time of use of the floor. When the heating system operates for a long time, this zebra is aligned due to the horizontal heat distribution and temperature drops are much smaller.
A certain thickness of the screed is necessary just in order to minimize temperature drops. If there is a distance of 15 cm between the pipes, then the screed must be about 4 cm thick. From above, for example, another centimeter of ceramic tiles will be located and it will be quite enough. If the pitch will be larger, then the screed thickness should increase. But even if this condition was not respected, the temperature difference will disappear over time.
On the other hand, if you do too thick concrete tie, then it will require much more energy to warm it. This will increase the inertness of the floor and the time of its warm-up. But if in the house they live constantly, then with time a certain temperature is achieved, the sensors and the system is shut off. So the thickness of the screed on the floor should not exceed 7 cm.
It is believed that before the fill of the solution it is required to warm up the pipes of the warm floor to the maximum temperature. In this case, the pipes will be maximally expanded. And subsequently when the screed will freeze, the pipes will not break through the floor, expanding on temperature. But this is also a board from the category: "I heard the ring, but I don't know where he is." It is necessary that the floor is constantly under pressure. But there is no need to warm it up. The fact is that cement dust can hit anywhere. Therefore, at first, they use a temporary boiler or even wood heating. Accordingly, there cannot be a speech about running a warm floor system. It is simply not mounted. Works can still continue in the boiler room. So on the launch of equipment during the holding of general construction, it simply cannot be speech.
That is why it is incorrect to launch a heap system until all construction works are completed. Also, do not forget that too high temperatures are not at all useful for a concrete screed. It does not gain maximum strength and will lose moisture too quickly. Therefore, a sauna will be created in the room and it will not lead to anything good.
Warm water pipes must be under pressure. They really increase in size, but thanks to this, all the loops will take their places. In addition, in a situation, if someone breaks the hole in the floor, for example, trying to break through the hole in the floor to the perforator to secure something, it will become immediately clear. The pressure gauge arrow will immediately fall, signing up of low pressure in the system, and the tenant will quickly determine the breakthrough location of the water flowing from the pipe and the wet stain on the floor. Here are two reasons so that the pipes are necessarily under operating pressure. But there is no point in specially tighten the temperature when pouring the screed.
Laying ceramic tiles and porcelain stoneware
Now there has been a cooking fashion to use for laying ceramic tiles and porcelain stoneware solutions as expensive solutions, especially elastic glue. But it is absolutely meaningless. The fact is that these expensive glue are expanding on temperature in the same way as cheaper. All of them are made on the basis of cement, that is, if the cement solution from heating is expanded by 1 mm, then the adhesive is more expensive in the samples per 1 mm.
But it is still worth adding a special additive into a cement solution for screed. It is done to fulfill the functions of the claim and get at the same cost a higher brand of concrete. Here it is necessary to work on the basis of the rule - the underlying base should have a higher brand than the upper layers. This will prevent the bundle, ensuring a normal ligament. Therefore, the solution of the solution should not be lower than M-50 or M-70. It is required to normally exploit the tile and it simply did not fly away from the floor. This is the only limitation and there are no additional requirements and additional measures to strengthen cement glue. Even ordinary cement glue will last without complaints of at least 10 years.
Alternatives to the grounds on the soil

If you fulfill all these conditions and with all thoroughness to approach the creation of a floor patty on the soil, it will become a very reliable basis for the entire future decoration.
Unfortunately, a situation is possible when the soils are unstable. In this case, various unforeseen problems may occur. One of the most striking examples is a floor drawdown. It is worth only to imagine, as after the end of the repair, some time, the floor seems sharply, and the plinth remains hanging on the wall. It is unpleasant and scary. Therefore, in some cases it is worth thinking about alternative solutions.
If you return to the beginning and remember the entire scheme of the device in the soil, it turns out that most of all works are aimed at preparing to lay hydropro-insulation. And the insulation, warm floors, communications and cement screed are placed on top of it.
Thus, any seeding of the floor and any possible problems are often associated with incorrect preparation or problems with the soils. In order to avoid such situations, it is possible to use monolithic plates instead of backfilling and skinny concrete. But unlike round-standing panels, they do not fit on the base of the foundation, but are part of it. Therefore, the problems with the fact that the anchor is rusty, and its integrity will disturb, simply not. Hydroleproolation and all subsequent works are performed on top of this stove.
Unlike the ground floors, the monolithic foundation requires much less construction. Its thickness must be only about 10 cm. Moreover, it is possible to form this coating right during the styling of the foundation. Thus, instead of a plurality of split plates, a single disk is obtained. His durability and operational characteristics will in this case will be much higher.
But how to do that? In fact, quite simple. During the laying of the foundation at the formwork stage, it is necessary to make the basis for such a slab. The only thing between the soil and stove must be left a protective space. The formwork can be done in detail and leave it under the floor after the completion of all works. She can calmly contradicted. On the other hand, the role of formwork can play ground. This can be anything, the main thing is that the builders have the opportunity to walk on it and perform their work. But he does not require a special layer in a slash. The only thing is important to ensure that there is a protective layer of a minimum of 20 mm of protective space between the future stove and soil. The reinforcing mesh is placed on top and everything is concreted.
But this procedure has its drawbacks. First of all, it is a great consumption of the board on the formwork. Or you will have to fall asleep quite a large amount of soil under the monolith. Of course you can do without soil, sacrificing the board. On the other hand, sometimes fall asleep soil is much cheaper. The only question is which option will be more profitable from a financial point of view. By the way, in order to save, you can use formwork boards several times, pouring the foundation in stages. After performing one part of the foundation, you can remove the boards and go to the next step. Thus, the consumption of the board, and accordingly, the money on its purchase will be less than several times.
When pouring, the woodster can leave the reinforcement length about a meter on top of the plane plane. Subsequently, after drying the solution, it will bend and will be a link and an additional fastening element of the monolithic plate, just on the ground to which the greatest load accounts for.
But in this case, as in the floors on the ground, it is important to provide in advance to all communications. Mandatory must be checked under pressure water and sewer pipes. In the event that any error is allowed, the financial costs for repairs may be very and very large.
In general, which option of floors to choose - depends on many different factors. So if there is a free space before the floor floor and you can spend outwards, then the best option will be the use of round-standing plates. Otherwise, it is not necessary to save and better take advantage of the gender technology on the soil. If the soil is unstable, then in order to avoid problems, it is worth using other technologies. The choice always remains for the client. But consultation with a specialist will help not make a mistake and qualitatively perform work on the foundation and fields at home. This is the basis of the entire future decoration.
If the concrete floors on the soil were used only for unheated premises, then the appearance of new building materials and technologies has significantly expanded their spheres of use. Now such floors are equipped in all rooms, and the degree of protection against heat losses in concrete floors is almost not inferior to structures from traditional materials. And in the duration of operation, concrete floors are not even equal. Another advantage of such structures - can serve as a basis for all types of finishing flooring.

Floors from concrete may have several types, but all those are subject to all those. Requirements. Regulatory design guidelines and device of concrete floors are spelled out in positions SNiP 2.03.13-88. Compliance with these provisions guarantees the durability of the use of structures.

SNiP 2.03.13-88. Floors. A download file (click on the link to open the PDF file in a new window).
Table. Basic regulatory requirements for concrete floors.
| Name of the indicator | Regulatory requirements |
|---|---|
| Physical indicators of soils should prevent the possibility of deformation of the concrete floor due to the natural drawdown or seasonal expansion of a wet land. In the residential premises, it is taken into account that the temperature does not fall below zero. It is forbidden to use as a base under the floors, not compacted by SNiP 3.02.01-87. |
| Subscriptions can only be used after a thorough mechanical tamper, the underlying layer of concrete should have a concrete class ≥ at 22.5. The indicators of the underlying layer in thickness are selected taking into account the maximum possible loads. Deviations of the lower bellows from the horizontality are not ≤ 15 cm on 2 m floor lengths. The subference is made sand or gravel. |
| It is provided for under the underlying, applied in cases where the floor is located in the capillary water zone. In this case, the height of the lifting of moisture in capillaries is adopted in parameters 0.3 m in the sand of a large fraction, 0.5 m in the shallow fraction and 2.0 m for clay. The height of the groundwater is, as many amateurs are told, no effect on the height of capillary water has no effect. |
| The thickness of the thermal insulation of concrete structures is regulated by the SNiP positions and depends on the specific destination of the room. The flooring of concrete on the ground, installed in heated rooms, must have a heat insulating gasket along the perimeter of the adjuncing to the foundation or walls. This gasket additionally compensates for thermal extensions of structures. |
| It is envisaged if necessary to level the surface of the concrete layer, to cover various engineering networks, lowering the thermal conductivity and the creation of slopes (if necessary). The thickness of 15-20 mm should be more diameter of engineering pipelines. For bulk coatings with polymers, the screed is made of concrete ≥ B15, the strength of the lung (semi-dry) concrete ≥ 10 MPa. With an increase in the loads on the floor via separate sections, the thickness of the screed is calculated taking into account the exclusion of deformation and the loss of integrity. |


Taking into account the characteristics of the room and project documentation, the technical requirements are adjusted.
Step-by-step instructions for the construction of concrete floors on the soil
For example, consider the option of the flooring of the floor from concrete in the residential room. To save building materials, it is recommended to install hydraulic protection.

Step 1. Calculation of parameters and quantities of floor layers from concrete. Before starting work, you need to decide on the zero level. If the house is based on the project, this parameter is indicated in the drawings. Zero level is the level of the floor covering the floor, all that below this level, on construction drawings is indicated with a minus sign, all that is above - with a plus sign. In most cases, the floor is located at the foundation level, but there may be deviations.

If you do not have a project, which is very bad, then we recommend equipping a concrete floor with such a calculation so that the concrete surface is in the same plane with the foundation. Now you need to make cake calculations.
- Sand layer. For a private house, it is enough to make a pillow with a thickness of about 10-15 cm. Gravel can not be used, the load on the floor in the residential premises is not so high.
- The layer of primary concrete under the base. Thickness is about 10 cm. If there is a desire, you can reinforced with a metal mesh with cell sizes to 10 cm and a wire diameter of up to 3 mm.
- Insulation. It is recommended to use modern extruded polystyrene foam. It can withstand significant loads, does not absorb moisture, not afraid of rodents. The thickness of thermal insulation is within 10 cm, it is impossible to do less due to low efficiency.
- Top tie concrete floor. The parameter depends on the load, in our case the screed must be more than 7 cm.

The thickness of the waterproofing layers is not taken into account. Now summarize these sizes - this distance should be from the soil to the upper plane of the foundation tape.
Step 2. Soil alignment. Measure the level of the soil under the floor, decide how much you need to throw or plug according to previously done calculations. If there are a lot of land, it should be removed, it is necessary to dig a bayonet shovel, no technique in the perimeter of the ribbon foundation can not work. If there are little lands, then the missing amount should be added. Constantly check the ground level.

Loose soil will be trambed. It is possible to do this by a mechanical unit (frog, vibratory) or manually. The first option is much better - work is noticeably accelerated, and the quality of the tamping is improving.
Practical advice. If you do not have vibroplittes, experienced builders strongly advise abundantly to pour the strob to the ground with water and leave for several days for a natural shrinkage. The resulting deposits after shrinkage are additionally aligned and repeatedly trambed. If the ground is loose, then the uneven shrinkage of the concrete floor is not avoided, and this is an extremely unpleasant phenomenon.


You can independently make the simplest fixture for the ground of the soil. Take the timing of 100 × 100 mm with a length of about 1 m. To the bottom end, adjust the wooden platform from the cutting board of the square side of about 20-30 cm, to the upper end, fasten the handle. The platform is not worth doing a big thing: than it is more, the smaller the effort of the traam, you only fir the top layer of the Earth, and do not compact it. If the layer of the Earth exceeds 10 cm, then it is necessary to rub in several stages, after each of them, fresh befaction is made.

Step 2. On the inner perimeter of the foundation belt, apply the location of the sand layer, insulation and the finish concrete layer. During work, do not allow deviations from the labels made more than 2 cm.
Step 3. Fall asleep sand, constantly align and trambet every layer. Once again we remind that the quality of the base of concrete sex largely depends on its stability.


Step 4. When the sand pillow has a calculated thickness, you can pour the first layer of concrete. The material is prepared at the same part of the cement of the brand M 400 two parts of the sand and three pieces of gravel. Gravel and sand should not contain clay, it makes much impacts the properties of concrete. Calculate the approximate amount of material. First, determine the cube of the layer, it is easy to do it. Next use practical data. For one cubic meter of concrete brand M100, about 3 bags of cement M400 are needed, for M150 brand concrete, you will need 4 bags of cement. Accordingly, the sand will be twice as much, and gravel is three times more. Calculations are approximate, but in practice, no one measures fillers to a kilogram. Cooking concrete using concrete mixer or manually. Briefly tell the technology of both ways.

Making concrete with concrete mixer
It is not worth buying a big concrete mixer, it is enough to have an aggregate with a bowl of 0.5-0.75 m 3. Sand, gravel and cement store next to the concrete mixture, place the materials so that they can be comfortably throwing into the bowl. At first, water is always poured, for a stirrer with a volume of 0.75 m 3 you need at least three buckets. Then it is necessary to pose about 8-10 gravel shovers and pour cement. Gravel splits all the small lumps of cement to a homogeneous mass. When the cement is completely dissolved in water, you can throw sand and gravel until the concrete is obtained. Water is added as needed. Initially, the tilt of the bowl should be about 30 °, hereinafter referred to as it can be raised. But do not too much angle - than it is more, the worse the ingredients are mixed.

Prices for electric concrete mixers
electric concrete mixer
Manufacture of concrete manually
This is a hard physical work that requires certain practical skills, but for small volumes it is possible to prepare material and in this way. How to cook concrete manually?
- Prepare a smooth solid platform for about 2 × 2 m. For the base, it is better to use a steel sheet to use if it is not, then you can make a wooden box with low sides. The height of the sides is within 20 cm.
- Push one pile in the form of a pyramid of sand, gravel and cement. During the pyramid embankment, alternate all materials, the quantity must comply with the recommended proportions.
- Put the shovel pyramid with the ingredients to a new place and again back. Double cake will ensure uniform mixing of cement with sand and gravel.
- In the center of the pyramid, make a deep to the bottom of the funnel, pour water into it. In small portions of the shovel, take the prepared ingredients and mix them with water. Move in a circle, make sure that the dry material shaft does not break through. Water is also added as needed.

Concrete needs to be prepared by portions, taking into account the speed of its laying.
Step 5. Purses pour the surface of the rammed sand with concrete. Control the height of the lines made on the foundation. Concrete is first leveled with a symptoms, and then the rule. There is no chance of lighthouses, the exact horizontality must withstand only the last layer of concrete floor. Align the mass with a long rule, the coating flatness periodically check the level. When substantial deviations from horizontal is detected, problem areas should be corrected immediately.
Practical advice. Professional builders recommend the first floor layer to do from semi-dry mass. It has several advantages: significantly less thermal conductivity than the ordinary, manufacturability and simplicity of laying. By strength, the semi-dry mass is inferior to wet, but it is not critical for floors in the house. Preparing semi-dry mass in the same way as wet. The only difference is that the amount of water decreases.

Step 6. Install the waterproofing, work can be started after setting the concrete, for this you will need at least 48 hours. If the concrete layer was made in dry and hot weather, then it should be made abundantly with water at least two times a day. In this article, we have already mentioned that waterproofing for concrete floors on the soil in homes is not always considered to be a prerequisite. If the thickness of the sand pillows is sufficient to interrupt the capillary moisture pulling, then the waterproofing is not needed. In addition, all bases from gravel waterproofing is also required. Gravel does not draw water to capillars. But for reinsurance, waterproofing can be done, use an ordinary polyethylene film with a thickness of approximately 60 μm. It is worth this material inexpensively, and in efficiency is not inferior to expensive modern nonwoven materials.


Step 7. Layer of insulation. It is recommended to use extruded polystyrene foam. It has excellent performance in all respects. The only drawback is a high cost. To reduce the estimated value of concrete floors, clamzite or slag can be used as a insulation.
Important. These insulation are extremely negatively reacting to the increase in humidity. For them, the presence of waterproofing is a prerequisite. Moreover, waterproofing should be made both from above and below.

Step 8. Cover the surface of the concrete sheets of polystyrene. Do not allow gaps between sheets, insert them with a little effort. The material is excellent springs and when removing the load, it eliminates the slots. The polystyrene foam is well cut by the mounting knife. It is necessary to cut it on a flat surface for a ruler or a flat rack. If you have an electrical cutter - excellent, if not, then work manually. First, the sheet is cut on one side, then exactly along the cut line on the other. After a slight force for bending, the outbreak leaf breaks. Polystyrene foam can be cut and with a tree with small teeth.

Step 8. Regulatory acts do not provide for the need for waterproofing polystyrene, but practices are advised not to miss this stage of production of work and cover it with a polyethylene film or other type of waterproofer.
Step 9. By the internal perimeter of the foundation tape, install a soft thermal insulator. It can be a foam strips with a thickness of about one centimeter or special foam ribbons. The heat insulator performs two tasks: eliminates the possibility of heat leakage from concrete floor to the foundation belt and compensates for linear expansions of the concrete floor.

Step 10. Install lighthouses. The finishing layer of concrete should have a smooth surface. Lighthouses can be installed in various ways, but faster and easier to do from metal rods.
- Sketch a few small bunch of cement-sand mixture. In order for it faster to grab, it is necessary to increase the number of cement one and a half times. The distance between the pile of about 50-60 cm, the main criterion - the rods should not be fed under their own weight. The distance between the lighthouse lines should be 20-30 cm less than the length of the rule.
- Install two extreme lighthouses. Carefully check their position, the upper plane of beacons must coincide with the plane of the foundation tape.
Practical advice. In order to accelerate the setting of the cement-sand mixture, sprinkle it several times with a dry cement. Remove the wet cement and sprinkle the piles under the rods again. Cement is very intensively absorbing moisture, after such procedures can continue work, without waiting for the complete solidification of the solution.
- Between two extreme beacons, pull the ropes and do all the rest. Do not forget to check the position, in the future it is very difficult to correct errors.


After all lighthouses are exhibited, start doing the top layer of the concrete floor.

Step 11. Small portions throw concrete between beacons. Initially, align the material with a shovel and a trowel, and then the rule. Work carefully, do not allow recesses. To improve the operational indicators of the upper layer of concrete during cooking, add plasticizers. A specific brand does not matter, they all work perfectly. The main thing is to observe the proportions and technology recommended by manufacturers. For the top layer on one part of the cement, add four parts of the sand.

On this work is finished, let the time for the full pouring of the screed and then proceed to the finish coating of the concrete floor. As a clean floor, you can use lumber, ceramic tiles, linoleum, etc. We looked at the simplest concrete floor, but there are options with electric or water heating, it will take much more time and knowledge to arrange such structures.
Comments:
A black band screed is a mandatory element in the design of any base. The main function is in the primary alignment of the floor, bringing it to the desired mark, as well as in ensuring the strength and hardness of the structure. Works on the styling of the draft floor do not require the availability of specific knowledge and use of an expensive tool. The main thing is not to violate the technology of installation work and accurately follow the instructions.
Floor construction
In most cases, in the construction of private houses, the floors are placed directly to the soil. It is mainly due to the cheapest and simplicity of installation work. At the same time, the most popular material for the creation of draft sex on the soil is concrete, which has the following advantages compared to other building materials:
- mechanical strength;
- small cost;
- large service life;
- accessibility.
To make the concrete floor to the soil, it will be filled with high quality, it should consist of the following layers:
- prepared soil;
- mixtures of sand and gravel;
- waterproofing material;
- black screed;
- insulation;
- concrete screed;
- finish coating.

This design can contain certain changes that will depend on the properties of the soil on the construction site, such as the finishing coating used and other factors. It should be noted that when pouring the screed on the soil the second must satisfy the following conditions:
- be dry
- the level of groundwater is not less than 4.0 m;
- not moving.
Back to the category
Preparatory work
The black screed of the floor is made with their own hands using the following tools and materials:
- electrocks with a nozzle mixer for kneading a concrete mix;
- vibrating plates;
- vibrator for concrete;
- construction level;
- regulations;
- guides;
- workman;
- shovels;
- solution tanks;
- cord;
- waterproofing material;
- cement;
- sand;
- rubble or gravel;
- reinforcement.

Figure 1. Floor diagram on soil with insulation.
It can be started after the end of the construction of the walls and the floor mounting. First of all, it is necessary to mark the markup, that is, to mark the "zero" level, which should coincide with the bottom plane of the door frames (Fig. 1). To do this, make markers on all walls of the room. To simplify further work on the perimeter of the room, you can pull the cord.
Then should properly prepare the soil under the fill. First, the entire building trash is removed from the room, after which the upper layer of the soil is removed to the depth of at least 35 cm. It is such a thickness that will be the floor representing a multi-layer pie.
After removal of the upper layer of the soil, it is necessary to carefully compact the base. To facilitate work, it is recommended to use vibrating plates. If you do not have it at hand, you can use the hand-made traam. After the coupling, you must get the most compacted and even base under the fill. To improve the performance characteristics of concrete, you can lay the clay layer covered with a layer of sand. At the same time, the clay is slightly moistened and tamper. As a result, you will get good waterproofing from groundwater.
From above, the rammed soil falls asleep by gravel. The thickness of the layer must lie within 5-10 cm. Moisten it with water and wipe it well. To control the thickness of the layers in the soil, you can drive several wooden peasants with the printed marks. After the end of the work, the pegs are removed. Next is filled and the mobbing of sand. The layer thickness is about 10 cm. On the sand, the layer of rubble fraction 40-50 mm is stacked, which is also wetting with water and is carefully compacted. Then everything is sprinkled with a thin layer of sand.
Back to the category
Waterproofing, reinforcement and installation of guides

Figure 2. Reinforcement of screed: 1 - main mesh; 2 - additional strengthening of the main mesh; 3 - "P" figurative gains of the plates; 4 - "g" a figurative increase in the corners of the plate; 5 - bearing walls.
At the next stage of installation work to protect the draft floor from the ground moisture, waterproofing is performed. It is recommended to use polyethylene film, bitumen or polymer membrane. These materials are stacked by braziness, and all connecting places are sampled by assembly tape. When performing waterproofing work, it is necessary to ensure that there are no mechanical damage in the layer of waterproofing material. Insulation should go to the walls at a height of 10-20 cm. All excess material are removed after finishing screed.
Also at this stage can be placed insulation. To do this, basalt wool, ceramzite, perlite or extruded polystyrene foaming are perfect. To increase the reliability of roughing floor, it is necessary to make it reinforcement. This uses a metal or plastic mesh, wire or fittings (Fig. 2). The reinforcing frame must be laid on a stand 20-30 mm height. While in the body of concrete, the reinforcement will ensure its strength.
To comply with the horizontal black screed, you should lay guides from wooden bars or metal pipes of a square or round section, which are stacked with a step of 100-200 cm and are fixed with a thick cement solution.
Formwork is mounted between the guides. As a result of the work, you will have rectangular zones that will be poured with concrete.
From this article you will learn:
- What are the advantages of the rough floor of the soil
- Which layers should be a rough floor of the soil
- How to make a draft floor on the soil do it yourself
- What professionals are advised by draft sex on the soil
Building a house in Moscow - a long and multi-stage process, which includes the work of a completely different character and complexity: laying the foundation, the construction of walls, the roofing device, finishing and mass of other processes. Among the main stages of construction - the black finish, in particular - the fill of the screed. Its essence - in the creation of the base, which will subsequently establish a finishing material. Despite the fact that the rough floor of the soil is often subject to the builder of any qualification, it has a number of nuances and requires various types of work. This article will be discussed precisely about them.
What does the black floor of the soil mean
Such a method apply in relation to any type of soil, regardless of the degree of groundwater approximity. A high-quality and reliable black shook on the soil is provided by the M300 brand concrete and above. In particular, it is necessary to use a higher class of concrete for the floor for which a large load is assumed or if the soil properties are unsatisfactory. In this case, the reinforcing grid is also mounted.

All recommended parameters of the required materials are specified in design and estimate documents. If these are missing, it is necessary to make the appropriate calculations by itself, given all the conditions for the further operation of the floors.
Benefits of rough flooring on the ground
Among the advantages of holding a screed on the ground are the following:


Layers of black floor
To pour the black floor to the soil was high quality, it is necessary to take into account all the following layers:
- compacted base;
- a mixture of purified and sifted river sand with gravel;
- chernovaya screed from concrete;
- membrane vapor insulation or other insulating material;
- insulation of polystyrene or other similar material;
- polyethylene film;
- reinforced concrete screed;
- flooring, which, if necessary, can be put on a special substrate.
This scheme is not the final option. The steps may vary depending on the characteristics of the soil, the types of floor covering and the rest of the nuances.

Black Paul on the soil do it yourself: Step-by-step instructions
Step 1. Prepare the base.
First of all, the zero point is searched using levels (and amendment on the relief and surface level). This will provide an opportunity to objectively assess the amount of upcoming work with the soil. The surface of the Earth is thoroughly tram in order to reduce the risk of ground dressing and cracking of the finished floor.

- the first layer must be 25% higher than necessary;
- the fastened layer is moistened and trambed, due to which the thickness comes in accordance with the initial calculation;
- the rambling is carried out by means of vibrator or rink.
The sand on the sand is poured a layer of gravel or clay, which will make the sandy layer denser and will become a solid base for the following layers.
Step 2. We produce a submersion of the rough floor.
The first layer of draft floor is skinny concrete. It performs technical functions, being a database for vapor and waterproofing. For a rough screed, a skinny concrete (class B 7.5-10) is used with a filling from rubble (fraction: 5-20 mm). When using gravel intake, the screed can be poured by concrete class 50-75.
The fill of the first screed is not troublesome and does not require compliance with the exact technology. The thickness of the draft layer should vary within 40-50 mm and not exceed 4 mm horizontally according to the level.

Step 3. We carry out the waterproofing of the draft base.
To eliminate the capillary moisture supply of moisture from the soil, floor insulation of the floor should be carried out.
- The most suitable for waterproofing will be bitumen in rolls or polymer membrane. Sometimes a laying of a solid piece of thick plastic film is allowed. If the material is joined - it should be laid by the brass, followed by a construction tape seams. It is necessary to examine the surface of the materials for damage to the integrity or factory defects.
- The insulating canvas is excreted at about 15-20 cm. After laying a finishing screed, excess fragments of the material are removed.
- Sometimes it is impossible to pave waterproofing in front of a rough screed. In this case, the base from concrete is poured, on which a coating waterproofing layer is applied from bitumen or polymer.

Step 4. Warming of rough floor in the soil.
The next stage is the installation of a vapor insulating layer. The most suitable material for this is a polymer-bitumen membrane, which is based on fiberglass or polyester. Despite the high quality and strength, the price of such a material will pleasantly surprise. A more expensive analogue of such a material is a polyvinyl chloride membrane. However, in this case, the high price is not an indicator of durability. In practice, such material is subject to rotting and other damage.
The vaporizolation layer will help save considerable money on the heating of the premises, because the level of heat loss during its use is reduced by 20%. The laying of this layer serves as a key point for creating heat and comfort in the house.
Warming is made using materials such as:
- Extruded expanded polystyrene is one of the best insulation options that protects the floor from frequent deformations in compression and withstanding heavy loads.

- A variety of expanded polystyrene is a PSB50 class foam and PSB35. The first option is designed for garages, warehouse or industrial premises, the second - for housing. To avoid damage to the foam of cement mortar, on both sides, foam sheets are trimmed with a polyethylene film. Such insulation will be quite reliable.

- Another common insulation option is mineral wool. However, such material is able to quickly choose moisture from the cement layer and screed. Therefore, as in the case of a foam, mineral wool must be isolated on both sides using a polyethylene film.

Step 5. Reinforcement.
The black screed of the floor on the ground is important not to be confused with the foundation that experiences loads from the forces of the sheep. In this regard, one-layer reinforcement with a welded grid of rod with a diameter of 3-5 mm will be enough.
At the same time, it is important to take into account some nuances:
- The grid needs to be laid as close as possible to the sole of the structure (in the conchion zone of concrete).
- The thickness of the protective layer should be from 1.5 to 2 cm, so the mesh is mounted on polymer or concrete gaskets placed on polystyrene foam.

In the perimeter, the design must be protected by a similar layer. Most often, cards are used with a cell from 10x10 to 15x15 cm. At the same time, the backstage should affect at least one cell. The circuit of the warm floor is placed on the grid and is fixed with the help of nylon clamps.
Step 6. Dampfer layer and fill.
The screed is separated from the walls, woodwork, base and foundation by means of a damper layer. It is formed from the polystyrene polystyrene installed on the edge, which are placed around the perimeter of the enclosing structures. Another option is to stick a special tape on the walls also throughout the perimeter. The height of such a damper should exceed the thickness of the black floor on the soil. Excess parts will cut off at the installation phase of the plinth.

It is worth noting that the screed floor of the ground is made in one reception to ensure the greatest structure of the structure. For large areas (over 50 m2), temperature seams are created from a special profile.

In order for the layers to be more convenient to align, plaster beacons are often used, which are attached to a rapid solid solution of plaster or starting putty.
Then the mixture is applied between the beacons, which is resurrected by the rule. Lighthouses can be left mixed in the floor or removed after the mixture slits a bit. The resulting gutters can be filled with concrete and align them again. To prevent cracking, the surface during the first 3 days is to be periodically moistened.

Answers of professionals for popular questions on finishing screed
For savings in general and to ensure the best operation in particular, some builders sometimes try to replace the recommended materials for a black screed of the floor on the soil by others.
- Is it worthwhile to change the crushed stone on the grainsite for a tie begging?
Such an original solution can provide additional thermal insulation. However, professionals do not recommend using ceramzite for soil with close groundwater, which can lead to the wetting of this material.

- Is it possible to use crushed brick or other construction waste instead of gravel?
The use of such materials is categorically not recommended. Brick is not a hydraulic material, it absorbs water and quickly destroys. Consequently, such a draft floor on the soil will lose its strength and integrity. In addition, waste and broken brick have a different fraction, so they will not be tightly tumped.

- Is it possible to install waterproof only under the draft screed and in the future it is no longer applied?
The answer is negative. First, the polyethylene film is responsible for other functions: prevents the departure of the mortar of cement milk. Secondly, after some time, waterproofing loses its tightness and turns under the influence of uneven point loads to the floor.

- Is it possible to replace the black screed of the shedding of the floor on the soil?
Sprupping implies spilling on a submet for a rough screed with a special layer of liquid mortar. Its height depends on both the thickness of the sloping layers and the intensity of the traam. If the subference is very dense - the liquid solution will not be able to penetrate more than 4-6 cm. As a result, the carrier indicators of the floor base will be reduced. Thus, the answer to this question must be given, given the possible loads on the floor surface.

Black Paul on Ground Paul
The design of the warm floor on the soil will be optimal subject to the following steps:


How much is the rough floor of the soil
The detailed cost of works on the draft floor on the soil is displayed in the price list of various construction and repair organizations. They can be found on the websites of these companies. You can also find out the price and get additional advice on the phone. In addition, many firms offer free check-out consultant-measurers on your object to calculate the price as accurately as possible, taking into account all possible nuances and wishes.

Collaborate with the company "My Repair" is reliable and prestigious. Specialists working here are the highest level professionals. The company "My Repair" works throughout Moscow and the Moscow region.
There are many options for flooring in a private house. One of these is the floors on the ground - a multilayer design that serves as a universal basis for any finishing materials.
The base device in this way has its pros and cons. From positive properties, you can note the following:
- Prevent the heat loss of the design helps a wide range of insulation.
- The temperature of the soil, located under the laminated floor design, never falls below the zero mark.
- The load is distributed to the primer base - there is no need to produce complex calculations.
- Lack of dampness and mold.
- The resulting draft floor can be lined with any outdoor material.
- Excellent soundproofing properties.
- Fast and uniform heating of the room during installation inside the screed of water or electrical coolants.
There are disadvantages:
- Dismantling design for repairs, especially during damage to the pipes of the warm floor, is the process of time consuming and financially expensive.
- It is impossible to arrange such a floor with close passing to the surface of the ground of groundwater and loose by the composition of the soil.
- The construction of such a design refers to the category of costly and occupying a large amount of time and strength.
- A significant decrease in the height of the room.

Floor features on the soil
Paul in soil is a multilayer design. Its features and properties are directly related to the quality and characteristics of the soil. The basic requirement is associated with groundwater, which should be located below 5 m. From the surface of the Earth. This will eliminate the mobility and the separation of grounded masses.

The formation of a flat, rigid surface under the laying of the decorative flooring is the main task also with its help you can easily create a gender of the floor for the natural drain of water in the bathroom and the shower ground floor, a bath or sauna.
The value of the primerization of the soil and the seismic accuracy of the construction region is also important.

Construction conditions
The reinforced monolithic concrete plate, which is the floor system on the soil, is made on a sand-chincaded rambling base. Ballast benching forms the basis and coating the necessary height and transmits the load from the stove to the ground.
The cost of measures to protect the plates from moisture depends on the depth of the underground water. With a depth of 3 meters and there will be no more problems.

Protect the design from the bottom from the effects of moisture and heat loss allows the layer of heat and waterproofing laid on the carrier base. From frosty, the soil can be protected by cutting off the cold bridge, which causes moisture freezing. For this, the base of the house from the outdoor side is insulated with a sheet foam.

Requirements for the height of the location of the floor relative to the belt foundation
Special requirements for the elevation of the floor design of the floor relative to the foundation tape is not. The only parameter that needs to be taken into account is the location of the entrance door and the zero floor marker relative to it. It is important to avoid a serious height of the height of the level of the porch and the floor of the indoor premises, providing this nuance at the design stage.

With the proper manufacture of the doorway at the ribbon support stage, the manufacture of flooring on the ground is reduced to the fact that its top taking into account the finish layer should coincide with the level of the threshold.

In the process of filling the ribbon foundation, it is already necessary to have an idea of \u200b\u200bthe location of the doorway and its parameters.
Choosing materials
A black screed with a thickness of about 8 cm is poured through a layer of plastic film, and on top of it two more layers of polyethylene peaks are placed to create waterproofing. At this stage, it is necessary to ensure the tightness of the compound of polyethylene canvas among themselves.
The rough screed does not require a special qualification of the builder, but, nevertheless, implies a large number of works related to its creation. Features of the device and calculator calculating the number of ingredients of the floor screed find in
The multilayer design involves consistent laying of layers: sand, and from above crushed stone or clay. After that, form a sweeping, protective layers and a finishing screed that will serve as the basis for the finishing material. If the soil is too wet, then from the use of claying it is recommended to refrain due to the ability of the material to absorb the excess moisture and change its shape under its impact.
Sand and crushed stone in this design protect the room from moisture. At the same time, both layers thoroughly tram, and crushed stone is treated with bitumen mastic.

The thermal insulation layer is created using the following materials (to choose from):
- extruded polystyrene foam;
- mineral wool
- foam glass;
- styrofoam.

At the final stage, the reinforced reading screed is placed. It is important to perform it as smooth as possible, so the pouring of the solution is carried out by lighthouses, controlling the process using measuring instruments (level).
Foundation Requirements
The presence of a foundation does not affect the properties of sex on the ground, only the nature of its interaction with the main structural element of the building changes.

Depending on the type of foundation - the ribbon or bar, the method of adjoining the floor system depends.

The columnar supports are arranged in such a way that the floor comes into contact with the painter, if it is low or located under it.

When the grill is high, the resulting clearance between it and the floor is closed during the fill with the boards and leave them inside the design.

As for the slab basement, it represents the structure of the floor based on the ground base. The device of the floor on the soil under the condition of the existence of a belt foundation is made in such a way that the floor adjoins its inner wall.
Types of designs
Regardless of the type of floor design, it consists of several main layers.
Table 1. Floor design
| Floor design | Stacking process |
|---|---|
| 2. Pulling the sandy layer. 3. Pull the rubble layer. 6. Put the waterproofing layer from the runneroid. 7. Place a layer of insulation. 8. Pour the first screed. 9. Put the finish coating. |
| 1. The ground base is torn. 2. Pulling the sandy layer. 3. Pull the rubble layer. 4. Place the layer of polyethylene. 5. Perform pouring sweets. 6. Place a layer of insulation. 7. The solution is poured. 8. Put the finishing material. |
| 1. The ground base is torn. 2. Pulling the sandy layer. 3. Pull the rubble layer. 4. shed from above with liquid concrete solution. 5. Place a layer of insulation. 6. Pulling the solution. 7. Put the finishing material. |
| 1. The ground base is torn. 2. Place a layer of polyethylene. 3. Perform the pouring sweets. 4. Place a layer of insulation. 5. Pour the first screed. 6. Put the finish coating. |
| 1. The ground base is torn. 2. Pull and compact the sandy layer. 3. Pull and seal the crushed stone layer. 4. Perform the fill of the sublimaton. 5. Put the waterproofing layer from the runneroid. 6. Place a layer of insulation 7. Pour a picker reinforced tie (without clearance) with coolants. 8. Put the finish coating. |


Nuances that should be considered
The floor design is selected depending on the conditions of its operation. There are several leading factors:
- Level of operational loads. If they make up more than 200 kg, the reinforcing grid must have a rod diameter of 4 mm if the load is less than the specified value, then 3 mm is sufficient.
- The distance from the surface of the Earth, on which groundwater is passing. It is recommended to take the highest meaning (during a flood or seasonal melting of snow).
- Design assignment - with coolants (the "warm floor" system) or ordinary. The floor with a water or cable heat carrier involves a device around the perimeter of the gap of the gap between the first concrete coating and the wall in 2 cm. The lower layers are adjacent to the walls.
Now in the construction market there are several types of "warm floors". They are distinguished by the type of coolant and efficiency. How to choose a warm floor? Tell B.

Question answer
Table 2. Most popular questions
| Question | Answer |
|---|---|
| Is the broken brick and construction trash suitable as a replacement of rubble in a sliding layer | The chipped brick will not cope with the protection of the slab from moisture. As an aligning subtype, they are also not suitable due to the difference in the size of individual elements that are not subject to high-quality traam and do not provide the normal operation of the entire floor design. |
| Is it possible to abandon the grid for reinforcement and replace it with non-knitted rods | The reinforcement will "work" correctly only when using rigidly fixed rods that form a mesh cell 10 x 10 cm. |
| Is it possible to use clamzite in the subfocation instead of rubble | As a material that protects the floor from below from the capillary effects of moisture, the ceramzite does not like, as it itself absorbs moisture and is modified under its impact. Although this light, inexpensive material is quite suitable as an aligning layer with dry ground, and can replace rubbank. |
| Is it possible to perform a pioneer instead of the device | If the goal of laying rubble and sand is a layer device that impedes the passage of moisture, then the spray will prevent the crushes to cope with the function assigned to it. |
| Whether polyethylene is able to replace the waterproofing layer | No, since this layer is a technological, protecting the subtype from cement milk. |
| Is it possible to refuse to reinforce the screed | No. You can only refuse this process when applying a sublimaton. |
| Is it possible to abandon the execution of the sublimaton, and the waterproofing and insulating layer should be put directly on the submission. | The waterproofing layer is placed on a flat, durable base is to extend the service life. The same applies to the styling of the insulation, which should be fixed motionless and not provoke the formation of cracks on the floor surface. |
Features of heat and waterproofing
The role of the thermal insulating layer is as follows:
- In reducing or excluding heat loss.
- In the protection of the design from the moisture coming from the Earth.
- In sound insulation of the room.
- In the exclusion of the charging process.
- In creating optimal microclimatic indicators.
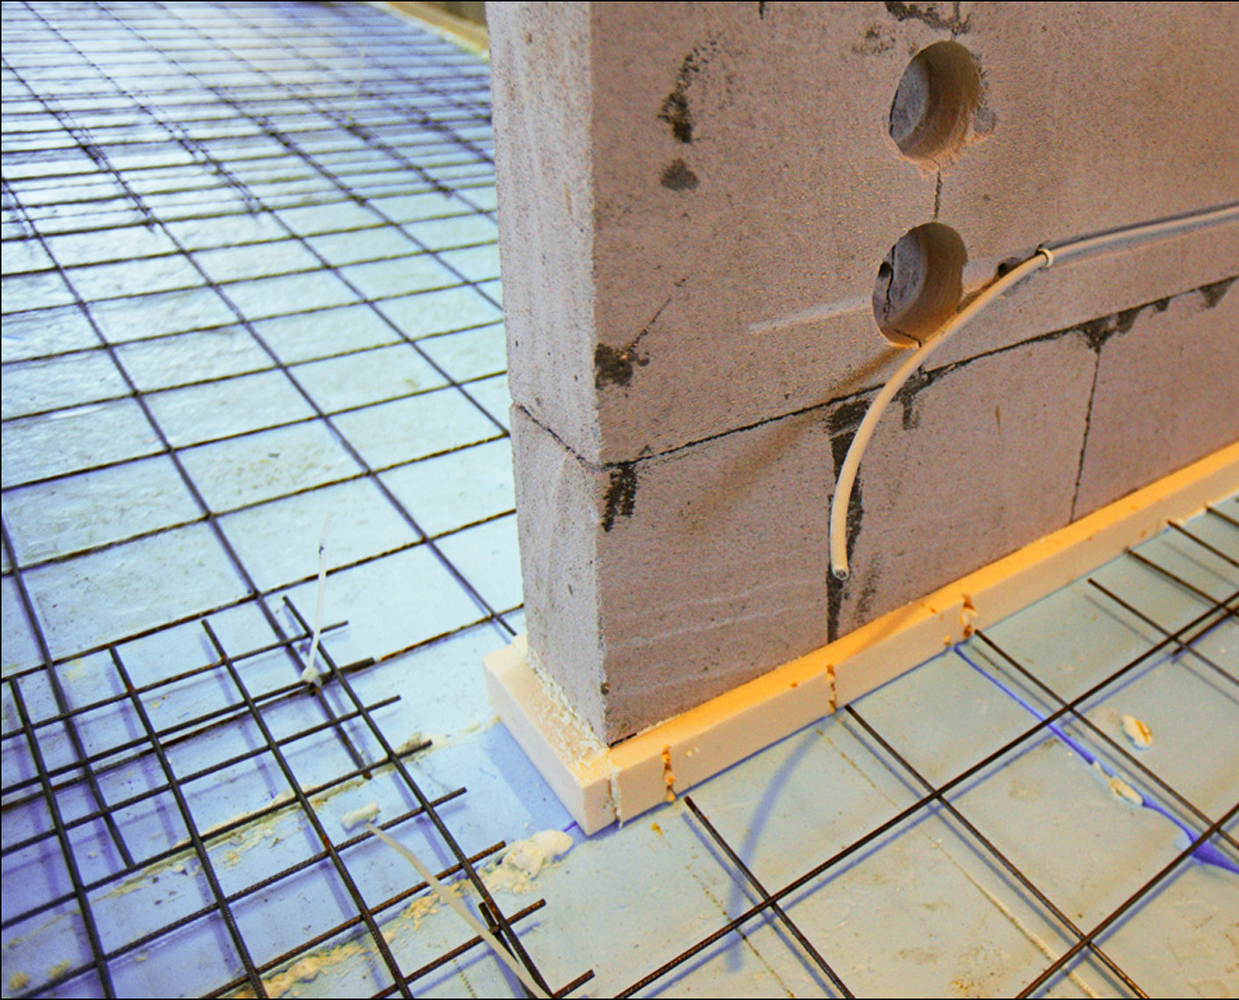
When a simple flooring is used for the soil, it is possible to use a conventional polyethylene film. The process occurs as follows:
- When laying polyethylene (150 μ0) on the finished, rammed base, the canvases of the film are put on the brand (15-20 cm) and carefully sink the joints of the joints. The edges around the perimeter of the room are at a height of 10 - 20 cm. To be confident in the reliability of the waterproofing layer, the procedure for laying the film can be made twice, each time carefully fixing the material.
- The thickness of the insulation (foam or polystyrene foam) should not be less than 10 cm. Due to the fact that the foam is afraid of the impact of moisture, it is protected from two sides, described above.
- From above on the insulation, the reinforcing mesh with cells 10 x 10 cm and a wire diameter of 3-mm.
- After that, poured a screed to a height of 5 cm.

Important!You should not neglect the outer insulation of the foundation, the breakdown and the organization of water removal from the base.
This method of the organization of the floor has its pros and cons. From positive qualities, you can note the following:
- Suitable for most primer bases.
- The quality insulation of the foundation increases its resistance to the exposure to the load during the frosty bent of the soil.
- The solution consumption is less than when a slab foundation.
- Such a floor is durable.
- There is no need to perform additional insulation of pipes and other communications passing in the floor design.
- It is suitable for laying the finishing material.
- There is no need to create high-quality ventilation of underground space.
The disadvantages include the fact that the cost of work can increase when erecting a high base.

The location of the reinforcement in the array of the screed depends on the presence of coolants in it. If it is a warm floor, then the reinforcing mesh is placed above the pipes and provide for about 3 cm layer of the tie from above. In the usual floor, the grid has approximately in the middle of the screed array (3 cm to the top).


Manufacturing technology
Before filling the floor, it is important to carefully prepare a base consisting of several layers. The main recommendations are to use the fine-flow filler in the concrete mixture and its laying on the beacons at one occasion.
Laying the underlying layer
This layer consists of a sandy rammed cushion of height and rubble submet (fraction 30-50 mm) height from 7 to 10 cm each. The purpose of this layer is to ensure the protection of the lower part of the slab from the impact on it moisture from the soil and as an aligning basis.
To the peculiarities of the soil that must be considered before entering the device the floor includes the following:
- It is important when preparing the base to remove the vegetable layer of the soil. Otherwise, due to the shrinkage, the concrete design is simply collapsed.
- Sands are used with low to the surface of groundwater occurrence, as it is able to absorb moisture.
- When using rubble on a wet soil, the capillary lift of moisture is excluded.

Important!It is possible to replace the sweeping if the layer of rubble is aligned with sand so that the waterproofing film laid on it is not damaged. Pre-for spilling the underlying layer use cement milk.

To reduce the cost of work and get a quality result still at the preparation and design stage it is necessary to take into account some nuances:
- After laying the finishing material, the clean floor level should coincide with the level of the input opening threshold.
- It is necessary to prevent support of the floor screed into fragments of the base or foundation, which protrude from the inner walls.
- In the process of tamping the sandy layer, it is irrigated, and not shedding through the water.
Application device and waterproofing
The purpose of the waterproofing material is to prevent the wetting of the insulation and the screed under the influence of moisture.
- When the bituminous rolled materials are directed, two layers create two layers. Fall is at least 15 cm with perpendicular location.
- When using the film, the direction of gluing the canvas does not play the role. The main thing to complete the launch and thoroughly take the place of the joints.
- EDMM membrane laying is carried out in one layer.

The drinking device with a height of 5 to 10 cm height allows you to make a flat and rigid base under the waterproofing layer (sticking film, bitumen). Otherwise, when using rolled bitumen materials or PVC films, their laying is significantly complicated due to the divergence of joints on the loose soil.

Important!To create a rough screed, the use of skinny concrete, in which the cement content is minimal. Reinforce this layer is optional. Under the ban, rigid fixation of a rough screed with the foundation and basement.
Laying insulation
As a damper layer, strips of insulation or tape with the same name are used. The tape is glued directly to the inside of the foundation or base around the perimeter of the room.
The thickness of the insulation (from 5 to 15 cm) is taken in accordance with the operational conditions in the construction region.
Being, in fact, overlapping, the floor is not fixed hard to the walls of the room. Therefore, it has the following insulation qualities:
- The places of contact of the floor and the base, due to the presence of a lower warmed layer, are completely protected from heat loss.
- With the help of a damper layer installed around the perimeter of the room between the screed and the wall, the room can be protected from vibration and noise.
- Works on the sealing of seams and alignment that are required when laying the plates, in this case they will not be required.
- Plus is the absence of free space (underground) under the structure of the floor.

Floating screed assumes an institution in the premises of the risers of engineering communications - heating, cold and hot water supply, sewerage.
It is important to understand that input nodes with a similar floor design have zero maintainability. Therefore, in order not to resort to the destruction of the screed, the risers are packed inside the pipes of the larger diameter, so that it is possible to perform a timely replacement or cleaning of pipes.

Options for filling concrete
Plaster beacons or metal profiles that are used when pouring the solution allow you to increase the performance of the work performed and get high-quality coverage.
The peculiarity of the work is that it is impossible to walk along the reinforcing grid in the process of filling the floor, so there are two ways to perform work.
When pouring the solution from distant corners of the room in the direction of the door, the reinforcing grid inside the concrete is given the necessary level of rigidity, so free parts of the reinforcement are not shifted. This method is called "tracks".
Movement on the plot of the fill can be carried out using the labels - mesh-mounted mesh suitable supports from brick or timber to which boards are based on.
After 3 days, it is possible to produce a finish finish of the floor.
Prices for reinforcing mesh for screed
reinforcing floor screed
Video - Floors on the ground do it yourself