Owners of city apartments often wonder how to insulate a balcony inside with their own hands. This procedure is really simple. However, it is still necessary to observe the established technologies when performing it. First of all, of course, you will need to decide on how to insulate the balcony inside with your own hands. The method of covering the parapet, walls and ceiling will largely depend on the type of material chosen.
Styrofoam or mineral wool?
These two materials for the insulation of balconies and loggias are chosen most often. Expanded polystyrene costs a little more than mineral wool. However, it is also the best answer to the question of how to insulate the balcony inside. The fact is that when trimming the loggia from the side of residential premises, the so-called is inside the insulating "pie". Therefore, it is much better to use a moisture-resistant material for insulation. Inexpensive mineral wool, unfortunately, does not differ in such properties. She picks up moisture very quickly. You can, of course, use it. However, in this case, you will have to pay maximum attention to waterproofing. So the best answer to the question of how to insulate the balcony inside with your own hands is still expanded polystyrene.
Material characteristics
When choosing sheets for balcony insulation, you should pay attention to the following factors:
density,
Expanded polystyrene sheets produced by modern manufacturers have standard sizes: 2x1, 0.5x1 or 1x1. For those who wondered how to sheathe the balcony from the inside, you should think about purchasing smaller sheets. Too large slabs to mount in the limited space of the loggia will be very inconvenient. For a balcony, the 0.5x1 option or, in extreme cases, 1x1 is best suited.
As for the thickness, you can buy absolutely any expanded polystyrene for the balcony. The only thing that should be guided in this case is such an indicator as the area of \u200b\u200bthe loggia. After assembling the insulating cake, there should be enough free space on the balcony for a comfortable pastime. Most often, the owners of loggias of typical Soviet-built houses choose polystyrene foam with a thickness of 40-50 mm.
The density of this type of insulation can be found by looking at the marking. The best answer to the question of how to sheathe the balcony from the inside is to use 15-25 grade expanded polystyrene. The higher the numbers, the lower the thermal conductivity of the material, and the more fragile it is. If the expanded polystyrene is supposed to be covered with decorative plaster or wallpaper in the future, it is worth buying thicker plates. If lining or panels will be used as a quality, you can take loose sheets that retain heat well.
Where to begin?
So, how to insulate the balcony inside with your own hands, you now know. Next, let's figure out how to do it right. Before proceeding with the installation of the insulating "pie", it is necessary to carefully prepare the loggia itself. First of all, wooden floors are dismantled. Then they begin to repair the parapet. If there are through slots in it, they must be sealed with a sealant. Chips are sealed with cement mortar or moisture-resistant putty. The walls, floor and ceiling are prepared in the same way.
Loggia waterproofing
Asking the question of how to properly insulate the balcony with their own hands inside, the owners of the apartment must first of all make sure that this small room is always dry. Waterproofing when performing this operation is considered mandatory (especially when using mineral wool as insulation). In its absence:
the service life of the balcony finish will be reduced;
all metal structures will quickly rust;
due to the high humidity, various kinds of fungi will begin to develop, as a result of which an unpleasant odor will appear on the loggia.
Sometimes on balconies uninsulated in this way, even supporting structures begin to collapse, which, of course, is very dangerous.
The easiest way is to waterproof the balcony using bitumen-polymer mastic. It is heated to a liquid state, the floor is poured over it and the parapet is coated in 2-3 layers. Sometimes roll materials are also used to waterproof the balcony.

What glue is needed
Those who wondered how to insulate a balcony inside with polystyrene or polystyrene foam should, among other things, take care of using suitable glue to fix the sheets. It is allowed to mount this material directly on the mastic (on polymer-bitumen - immediately, on bitumen - after complete drying). In this case, you should use a special glue. It's called Bitumast.
What else do you have to buy
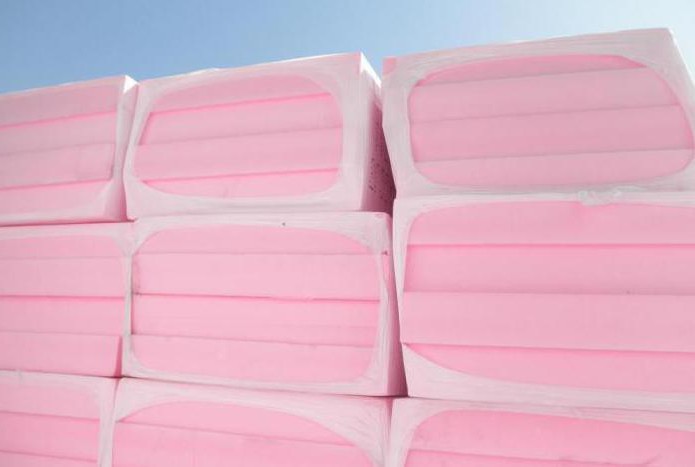
Thus, you now know how to insulate the balcony inside with your own hands. A photo of expanded polystyrene sheets - the most suitable material for this purpose - can be seen on the page. However, in addition to them and glue, to insulate the balcony, you will also need to prepare:
reinforcing mesh,
dowels-fungi,
polyurethane foam (no toluene),
decorative plaster or wallpaper.

Pasting technology
So, next, let's see how to insulate the loggia from the inside. Installation of sheets should start from the corner. This rule is true both when pasting a parapet, and walls or ceilings. Actually, the installation operation itself is performed as follows:
Expanded polystyrene sheets are roughened. To do this, they are passed with a special needle roller. Treated in this way, they will hold up much better.
A support rail is attached to the bottom of the parapet.
The adhesive solution is evenly applied to the surface of the wall, ceiling or parapet.
Press the polystyrene foam tightly to the surface.
The material for insulating the balcony from the inside should be mounted in such a way that the joints between the sheets have a T-shaped appearance (as when laying bricks). After the plate is glued, it must be additionally secured with mushroom dowels (5 per sheet). Holes for them can be drilled directly through the sheets. At the final stage, the joints are processed. In this case, construction foam is used.
Reinforcing mesh gluing
Expanded polystyrene is an excellent answer to the question of what is the best way to insulate a balcony inside. However, decorative plaster does not hold well on this material. To remedy the situation, use a special reinforcing mesh. Mount it as follows:
Previously, the expanded polystyrene surface of the ceiling, parapet and walls is completely coated with glue (for foam).
On top of it, another layer of glue is applied. Its thickness should be such that the mesh joints do not protrude above the surface plane.

Fine finishing
So, we figured out how to insulate a balcony with our own hands. A step-by-step photo of this process is presented above. As you can see, this procedure is relatively simple. At the final stage, the dried adhesive surface is passed with a special float to roughen it. Next, they start applying decorative plaster. You can also wallpaper the balcony.
Second way
The loggia insulation technique discussed above is suitable when using dense polystyrene foam. And if the owners decided to buy mineral wool as an insulator? How to insulate a balcony with your own hands? A step-by-step (photo of the process is presented below) guidance for performing work in this case will look like this:
A frame made of wooden beams is attached to the parapet, walls, floor and ceiling. The step between its elements should be equal to the width of the plates of the selected insulation. The timber can be fixed to the concrete parapet with self-tapping screws. For balconies with a metal fence, an independent paving structure is assembled.
Further, the insulation itself is inserted between the elements of the frame. The material is attached to the concrete parapet with "fungi" (expanded polystyrene can be additionally glued). If the fence is metal, it is better to use cotton wool and insert it into a spat. If expanded polystyrene is chosen for insulation, you can, for example, fix plywood on the back of the frame and glue the material to it.
It is stretched over the insulation. It is better to fasten it with thin rails (two on each side of the timber).
the balcony is trimmed with clapboard, plastic panels, drywall or plywood. Attach the material to the frame beams.

How to insulate the floor
The base of the balcony is insulated last. The floor is pre-waterproofed, and then logs are installed on it. The answer to the question of what to insulate inside is simple. Most often, expanded polystyrene or mineral wool is placed between the bars. You can also use expanded clay. A vapor barrier is attached on top of the insulation, and then a floor or edged board is stuffed. Then the floor is covered with linoleum or any other suitable material.
Heated balcony
Whatever the answer to the question of how to insulate the balcony inside, the owners of the house choose for themselves, subject to the installation technology, in the future it will be possible to have a good time here, including in winter. However, on very cold days, even on an isolated loggia, additional heating may be required. It is strictly forbidden to carry out central heating by regulations. Therefore, the best solution would be to install a conventional electric heater here. It should be placed against the wall separating the balcony and the apartment. It is not recommended to install heating devices near the parapet. The fact is that in this case, due to the rising warm air on the balcony, the glass will begin to fog up strongly.

You can also arrange on the loggia
Warm floor
This work is done as follows:
Heat-insulating material is laid on the floor.
Installed metal
The heating cable is being laid.
A thermostat is hung on the wall.
A concrete screed with a thickness of 30-40 mm is poured.
The floor covering is laid.
Well, we hope we have quite extensively answered the question of how to insulate the balcony inside with our own hands and how to do it correctly. The most important thing when assembling a "pie" is not to violate the established technology. In this case, the balcony will turn out to be cozy and warm.
The operation of the balcony all year round will increase the useful area of \u200b\u200bthe apartment. Creating a comfortable microclimate is possible if you take into account the rules and recommendations of experts on how to insulate a balcony with your own hands. In our article, we will consider repairs using the example of a loggia of the following dimensions: 7.5 m in length, 1.16 in width and 2.9 in height. Step by step instructions and photos in the process. The repair took 2 weeks, the budget was 40 thousand rubles, the year of construction was 2013.
- On the example of Moscow
- ... Most useful from youtube
Required tool
- Screwdriver and electric drill;
- Construction stapler, level;
- Scissors, knife;
- Marker, laser tape measure;
- Hammer;
- Putty knife;
- Gas-burner;
- Special gun for glue or polyurethane foam;
- Containers for mixing components;
- Scotch tape (painting and reinforced);
- Rags, sponges, etc .;
- Drill attachments for stirring construction mixtures.
Materials (what to buy)
- Structures for glazing the premises;
- Material for organizing a waterproofing layer (foamed polyethylene);
- Insulation (mineral wool 70 mm thick);
- Wooden logs for leveling the floor and creating a reliable base (50x50);
- Plywood sheets (10 mm);
- Glue, metal tape;
- Tiles for wall cladding in two shades;
- Laminate (thickness 12 mm).
Warming instructions using a live example
Consider a simple repair option that most apartment owners resort to:
1. Preparation of the balcony before renovation
On the eve of glazing, you need to carefully check the space and eliminate chips, cracks and gaps.
Depending on the size of the flaw, polyurethane mastic, polyurethane foam, and sealants are used. To organize a convenient seal, use a special gun designed for applying polyurethane foam.
The space is insulated with a PVC profile glass unit.
The glazing of the loggia, or the replacement of old windows with new double-glazed windows is an obligatory stage in the work to protect the space from heat loss.
Other materials are also used for glazing: wood, aluminum and metal-plastic. Elements of window frames should be treated with paint and antiseptic agents. The wooden structure of the windows is leaky, has a low level of thermal insulation and an inconvenient opening mechanism. Aluminum windows are a durable option, they are comfortable and reliable, but the level of heat loss is quite high.
It is better to give preference to PVC window frames, which also contain aluminum, however, the internal formwork does not consist of metal.
PVC windows are resistant to moisture and sudden changes in temperature. Such frames are convenient to use, sealed and have a low level of thermal conductivity.
Masking cables in the wall for connecting the air conditioner.

2. Raising the floor level and thermal insulation
Waterproofing the floor with penofol.

Most often, the materials at the base of the floor and walls are concrete and bricks, which strongly absorb moisture and vapors. In order for the heat insulator to retain its properties, a waterproofing layer should be organized. Instead of penofol for waterproofing, you can choose roofing material or a special impregnation. Penofol is laid with an overlap, the sheets are connected to each other using a gas burner.
Creation of a frame from slats (50x50).

Floor lathing for subsequent installation of mineral wool.


For the construction of the lathing, wooden logs are used. The frame elements are fixed to each other with self-tapping screws using a screwdriver. The step of the slats directly depends on the thermal insulation material.
Usually the distance between the slats is 50 cm, however, to lay a soft heat insulator, the pitch of the frame elements should be reduced.
In order to exclude cold bridges in the structure, you need to carefully organize the thermal insulation around the perimeter. We put the mineral wool between the elements of the mounted frame. Fill the joints with scraps of heat insulator and polyurethane foam.
Mineral wool, laid in crate cells on the floor.

During the work, a mistake was made - due to the different dimensions of the heat insulator (70 mm) and the height of the bars (50 mm), spacers had to be made.

Raising the floor to the threshold level - 20 cm.

Arrangement of plywood sheets on the crate frame.

When laying, plywood 10 mm sagged, therefore it is better to choose stronger sheets, for example 20 mm chipboard or OSB.
3. Wall insulation and installation of the window sill
We begin the construction of a frame to create a window sill from metal elements. This frame will allow you to insulate the parapet from gas blocks.

We do the laying of electricians for lamps and other devices in advance.

We fill the metal frame with insulation, after which we sheathe the GKLV structure.

Correct insulation of the parapet on the advice of experts:
- Impregnation with special hydrophobic solutions;
- Fixing penofol with a construction stapler, aluminum tape, or glue;
- Filling joints;
- Installation of the second layer of thermal insulation;
- Vapor barrier. A special membrane is suitable for organizing the layer.
Then we protect other walls of the room from body loss. To create a reliable glazing structure of the loggia, the insulation of the parapet and the floor is not enough. Basically, a balcony parapet is made of material with good strength and thermal insulation (foam blocks, gas blocks), but such a fence does not protect the insulation from moisture.
Mineral wool was also selected for thermal insulation of other walls.

In addition to mineral wool, other types of insulation will also fit in its place: extruded polystyrene foam (penoplex), foil-clad polyethylene (penofol), polystyrene or polyurethane foam (PPU). The basis of all the listed heat insulators are polymers that are treated with foamed compositions.
The insulated parapet is sheathed with gypsum plasterboard.

Facing the base of gypsum plasterboard with ceramic tiles.

We ensure the evenness of tile laying with the help of special elements - crosses.

Alternative finishes are: PVC panels, wood paneling, wallpaper, block house.
In this example, the ceiling surface was not insulated. On the one hand, the apartment is located on an intermediate floor (11 out of 19) and there is no direct threat of precipitation, however, heat loss will occur through the floor slab, even if the floor of the neighbors above is well insulated.
If we are talking about insulating the upper floor loggia, then the ceiling slab can be protected by installing a roof. The canopy is built with a slope for rainwater and snow to drain.
4. Installation and connection of sockets
We mount a socket with a dimming function.

To install the socket in the wall, a hole must be drilled.

5. Finishing the premises
We cover the floor with laminate and the walls with tiles. The flush docking failed as a result of the work.

In order to compensate for the deflection of thin plywood, choose a laminate with a thickness of 12 mm.
Repair flaws in a real example - a lack of finishing coat.
A small piece of ceramic tiles is missing. 
There was also not enough tiles.

In this corner with flawed finishes, a wardrobe is planned, which should hide most of the visible defects.
In order to avoid a shortage of material, on the eve of work, you should think about everything in maximum detail, drawing up a diagram according to the real dimensions of the room. It is better to purchase the material with some margin.
We decorate the window sill with ceramic tiles.

Installation of a plinth on a loggia.

Facing the threshold with tiles.

When raising the floor to the level of the threshold, it is better to use one material in the finish, so the surfaces will be more harmoniously combined with each other.
During the repair process, a gap formed between the window sill and the glazing structure, to eliminate which you need to use special internal corners.
The photo shows a sample of the outer corner, which was acquired by mistake.

The result of masking the gap with the outer corner.

The room after laying tiles, laminate and creating a black stretch ceiling with five spotlights.

In the future, a wardrobe will be mounted in this part of the balcony.

1. Tips from an experienced professional
A range of insulators used to form a warm space on the balcony. Features of various heaters. Practical recommendations for creating a reliable structure.
2. Workshop on the construction of a waterproofing layer
Details of the installation of waterproofing on the balcony. Laying ceramic tiles.
.Loggia is a few square meters, which can serve a variety of purposes. To use this room all year round, you need to provide a comfortable temperature there. Every home master can turn it into a cozy, useful and well-equipped space.
Are you going to start arranging these additional square meters, but do not know how to insulate the loggia with your own hands and what materials will be needed for this? We will help you deal with all the questions - our article provides recommendations on the choice of insulation and a step-by-step instruction on thermal insulation of the walls, ceiling and floor of the loggia.
You should start, of course, with planning. You should decide on the functional purpose of this small room. If it is supposed to be used as a warehouse for not too necessary things, then insulation does not make much sense. But the loggia can be turned into an office, a small gym, a winter garden, etc.
There are also limitations. For example, a loggia cannot be used as a kitchen, that is, to install a stove, a sink for washing dishes, etc. It is also prohibited to install a centralized heating system on this area.
There are a number of other restrictions that may be related to the architectural features and fire safety of the building. This can be a ban on glazing above a certain floor, on changing the appearance of the building, the height of the fence, etc.
As practice shows, many manage to somehow bypass these standards and arrange a loggia to their liking. Before starting work, it does not hurt to coordinate your plans with supervisory agencies or prepare for problems after the end of the rework.
The installation of electrical wiring, lighting and a warm floor during the insulation of the loggia must be thought out in advance so that damage to the insulating material is minimal
But under no circumstances can openings be made in the load-bearing wall, only the holes provided by the original project are permissible. Even a window-door unit removed from the loggia can be dangerous.
To keep the loggia warm, you need high-quality glazing. It is better to order it from a reliable company. Double-glazed windows will do the job perfectly.
Part of the space will be “eaten up” by a layer of insulation. These centimeters will have to be sacrificed to reliably protect the house from the cold. Loggias located on the lower floors are most often insulated from the outside. We are talking about the best materials for external wall insulation.
From the very beginning, you need to think over the options for heating this space.
There are not so many of them, because only suitable for a loggia:
- electric transformer substation;
- portable heater.
Considering that the installation area is small, you can spend money on such convenience as TP. Cable systems are easy to install, all work can be done independently. The infrared floor is more difficult to install, it requires an almost perfectly flat base, but the electricity costs during operation will be moderate.
But the simplest solution would be to use it, especially if the loggia is not used every day, but only from time to time. Installing a warm floor will require more cost and effort.
The choice of materials and options for insulating a loggia with your own hands is quite wide.
Among the most popular are:
- mineral wool;
- styrofoam;
- polyurethane foam;
- expanded polystyrene;
- penofol, etc.
Mineral wool has a low price, but this is almost its only advantage. To lay such material, you will need to first arrange the crate. Minvata is sensitive to moisture, when it gets wet it loses its beneficial properties, so it is not always suitable for a loggia.
You need to provide a place for installation in advance. Usually, a niche of a suitable size is made on the wall for these purposes. Among the turns of the cable TP, a temperature sensor is placed, laid in a corrugated tube. It will also need to be connected to the thermostat.
Conclusions and useful video on the topic
A detailed video tutorial on how to insulate a loggia with your own hands:
Insulation of the loggia floor:
Modern materials and technologies allow you to insulate the loggia really reliably and quickly. In any case, when performing installation work, the technology requirements and manufacturer's recommendations should be observed. Then the result will fully meet expectations, and the insulation will remain effective for many years.
Are you planning to do your own loggia insulation, but you still have questions after reading our material? Feel free to ask our experts for advice - write questions in the comments block.
The balcony is a part of the building that needs insulation more than others, because not all residents use it only as a warehouse. Increasingly, people begin to equip their balconies for an additional room, for example, a personal office. For these and not only reasons, it is necessary to produce competent insulation of the structure from the inside.
In this article, we will look at three ways using different materials.
Balcony insulation stages
Insulation of the balcony from the inside is performed in the following sequence:

# 1. Balcony insulation with expanded polystyrene: sequence of works
If you chose expanded polystyrene as a heater, then the sequence of work is as follows:

# 2. Thermal insulation of a balcony with penoplex (video)
Penoplex is actively used in the insulation of premises. It can be fixed to the surface using bituminous mastics, polyurethane foam or dowel mushrooms. Consider the option of mounting on polyurethane foam.

Mounting on foam
So. The waterproofing is done. Polyurethane foam is applied to the insulation plate along the perimeter. It's enough. After application, we wait a couple of seconds and fix the plate on the insulated surface. The next slab is stacked to the first end-to-end. After two days, you can fix the slabs with additional dowels. Then the whole process is repeated in the same order as described above. Do the finishing at your discretion. You can sew up the insulation plates with plastic panels, they look very original.

Additionally, we fix the plates with dowels
Council. If the balcony is intended only for storing essential things on it, then it is enough to insulate the walls in one layer. If you need to insulate more thoroughly, then it is better to lay the insulation in two layers.

The balcony insulation process is over. As you can see, it does not represent anything complicated. If you are just planning to do this work, then our article will help you. If you have already done so, share your methods with your readers in the comments.
Number 3. Thermal insulation of a balcony with mineral wool: technology features
Thermal insulation of balconies with mineral wool is carried out under the constructed crate. A lining is attached on top of the frame - wooden or plastic panels with special grooves.
A well-known fact is the building recommendation to carry out insulation from the outside of the building. However, in the insulation of balconies and loggias, it is often not possible to arrange the insulation material outside. The internal placement of the insulation layer requires certain calculations, adherence to technology and the correct selection of materials so that in the future the work performed does not lead to wetting of the walls, corners and ceiling inside the outrigger structure.

Thermal insulation of a balcony with mineral wool
What materials can be used to insulate the balcony and? What finish will allow you to reliably protect the insulation from the interior space and create an aesthetic appearance of the interior walls?

In modern technologies for the insulation of open curtain structures (balconies), four types of material are used as internal insulation: polystyrene, penoplex, penofol and mineral wool. Consider the technological features of installation and the types of wadded insulation used for thermal insulation of balconies.
Types of mineral wool
Depending on the raw materials used in the production, there are three main types of mineral wool: glass, stone and slag. All three materials are suitable for insulation work.
Mineral wool is a soft material that does not have rigid dimensions. It is supplied in the form of rolls (they are unwound into a track before laying) or soft mats. Sometimes one side of the insulation is covered with aluminum foil to enhance the thermal insulation properties. 
Photo: mineral wool with aluminum foil
Important! During installation, the foil should be located on the side of the room. The interior warmth of the room will be reflected from the foil surface back into the living space.
The thickness of the mineral wool layer determines the quality of insulation and varies in size from 20 to 200 mm.
Mineral wool installation technology
Any kind of mineral wool is mounted under the frame, located between the outer wall (ceiling, roof) and the frame supports. As supports, you can use wooden sticks or metal profiles, depending on which cladding will be used in the future.

Lathing from metal profiles
When using lining for finishing wall cladding, the lathing frame is constructed of wood. Wooden sticks with a cross section of 150 - 250 cm 2 are installed, while you can save a little the inner space of the balcony by installing sticks of rectangular rather than square section (30 × 50 cm 2, 30 × 70 cm 2).

Wooden lathing
All racks and horizontal battens are installed under the level. Anchoring of uprights to the concrete surface of the ceiling and floor is carried out with anchor bolts. Horizontal supports are attached to vertical supports. If the future cladding is made of plastic lining, the horizontal strips are attached at three levels: knee, hip, shoulder.

Insulation laying
Note: before installing the insulation, the walls are treated with an antifungal primer.
For internal insulation with mineral wool, the installation of a vapor barrier is mandatory. The cotton material itself is breathable, it easily permeates gaseous substances (air, steam).

The insulation must be protected from getting wet
Considering that with internal insulation, the point of condensation formation shifts into the insulation, it is necessary to limit the ingress of steam or air from their living quarters into the construction wool. For this purpose, a vapor barrier film is placed between the mineral wool and the finish.
Interior decoration
Purpose of interior decoration:
- Close the insulation material from the living space.
- Create an aesthetic interior wall covering for a room or a heated loggia.
There are various materials for interior decoration of balconies (drywall, wood, plastic, plaster). With a previously constructed lathing frame, finishing is carried out by hanging various types of panels: plywood, MDF, lining made of wood or plastic.

Lining made of plastic wood
Finishing with clapboard is performed by cladding the walls with wooden (or plastic) carriage panels with special grooves around the perimeter for ease of installation and tightness of fastening. At the same time, plastic lining is often a cheaper imitation of a wooden covering laid along the inner walls of a balcony (or loggia). It is characterized by less strength and stiffness.

Plastic panels are easy to assemble
Wooden carriage panels are reliable, environmentally friendly, have sufficient rigidity for the floor covering. The ceiling of the loggia can be sheathed with plastic clapboard, the floor is covered with wood, as for the walls - both types of carriage cover (plastic and wood) can be used here.

Wood clapboard decoration
After finishing the finish, the inner surface is treated with a compound that protects the wood from moisture and from destruction.
The notorious housing issue has been troubling us since the days when Adam and Eve were expelled from paradise. "What does heaven and balconies have to do with it?" - the reader will ask. Moreover, the balcony is a constructive component of our home. And the solution to the question: the better to insulate a balcony or loggia may, in the end, bring either heavenly pleasure or a headache because of the money, time and effort spent. After all, a properly selected insulation will turn your balcony (loggia) into additional cozy square meters, expand the space of the apartment and reduce the energy consumption of this area to keep heat in the winter.
First, consider what types of heaters exist for balconies and loggias. Then we will compare them, highlight the advantages and disadvantages, after which you will be able to determine which insulation is best for your case.
Common types of insulation for balconies and loggias
Mineral wool
 Mineral wool is widely used in the insulation of balconies and loggias due to the ease of installation and relative cheapness.
 Mineral wool (basalt wool, wool from natural fibers (linen) with a polyester content (up to 15%)) is a solid, modern type of noise and heat insulation used in the insulation of roofs, walls, ceilings, balconies and facades. For the roof, roll-type cotton wool with a density of 25-35 kg / m3 is often used. But for the facade, it is better to choose a heater denser up to 70-90 kg per meter, which will ensure minimal shrinkage of vertical surfaces.
The mineral wool or basalt insulator used in the insulation of loggias or balconies has shown excellent results. It can also be used as a moisture barrier by laying a hydro-barrier. The thickness is chosen according to the temperature indicators of a particular region, but usually not more than 100 mm. Fasten mineral wool under the finishing layer (plastic, drywall) using slats or counter-slats.
One of the disadvantages of this insulation is the material getting wet. Only natural linen cotton wool provides vapor permeability and stable operation when partially wet.
Brief characteristics of the mineral wool ISOVER Classic Plus 50 mm:
Cutting and technical specifications may vary depending on the manufacturer.
Extruded polystyrene foam, polystyrene foam
 Polyfoam - a universal insulation for balconies and loggias
 Extruded polystyrene foam (polystyrene) is a wide range of heat-insulating material with a homogeneous structure and closed cells. Almost does not absorb moisture (up to 0.1% per 1 cubic meter per day) and does not strongly react to the effects of ultraviolet radiation. Polyfoam has differences in density and is mainly used in the insulation of technical premises.
A heat insulator with an optimal flammability class should be chosen as a material for insulating a balcony, or better - generally with non-combustible additives. Moreover, the market offers all kinds and classes of insulators.
Scope of application and some characteristics of Extraplex 50 mm expanded polystyrene:
How to insulate a loggia or balcony? It is easy to choose a suitable brand, the main thing is to consider the criteria by which the material is selected. If you have a small balcony, materials that can be applied with a decorative layer are suitable. For example, plaster type "Bark beetle". Expanded polystyrene is perfect for this, but you should remember about the "dew point" and use only high-quality adhesive for the plates.
The disadvantage of expanded polystyrene is the release of the harmful substance styrene, when heated over 40 degrees Celsius. Therefore, it is best to insulate the balcony outside with such material.
Expanded polystyrene can also be mounted on construction foam. Recently, this method of fastening is often used. The expanding foam leaves no gaps, filling all gaps well. And when installing a warm floor, you can lay polystyrene foam under the heating element, gluing it directly to the balcony floor.
Advice: on the balcony it is better to make a coating or other waterproofing of walls, ceilings and all abutments (windows, doors), since usually balconies are most susceptible to leaks. You can also use a hydro-barrier as a moisture insulator.
Penofol
 Penofol is a modern insulation used for insulation, including balconies and loggias
 Penofol is a thin modern insulation that is also suitable for insulating balconies or loggias. More than three modifications are produced.
Saving space is the number two priority in all installation and finishing works. This is where penofol comes to the fore.
Type "A" -they are used both in the combined insulation of external walls from the inside (expanded polystyrene plus penofol), and in an independent version, using a material 10 mm thick. The product, consisting of polyethylene foam with a reflective layer on one side, will serve well for many years.
Type "B"- foil-clad material with two reflective surfaces is more used for additional floor insulation, both under the screed in rooms, and as a substrate on balconies and loggias under a warm floor. The high performance and reflective qualities of such an insulator have proven themselves well.
Type "C" - self-adhesive product, with a one-sided reflective layer, easy to install on walls and ceilings. The requirements for surfaces for such insulation are minimal: cleanliness (dust removal) and surface evenness (can be glued to concrete). Do not forget to carefully prime the places of insulation.
Type "ALP" has both a reflective layer and a protective polyethylene membrane.
If, for example, you want to bring additional pipes for floor heating in the loggia, the type "ALP" foam foam is laid as a reflective layer under the pipes and screed. The protective film of such a material does not react with the wet mortar during screed pouring. Then, having made the mesh reinforcement (usually the VR-1 brand) and placing beacons or guides, fill in the solution. Do not forget about the aluminum tape for gluing seams and joints. It is better to wrap the edges of penofol on the walls, about 80 mm.
Important:pipes that are laid as a heating element must be under a pressure of 5-7 atmospheres when pouring. Such a measure will prevent the foundation from breaking in the future and relieve stress in the thickness of the material when heated (there is room for expansion). Installing a pressure gauge in the system will make it possible to check the indicators and tell you if there are any leaks in the system.
And the screens for additional batteries on the balcony are best glued with penofol type "C", with a reflective layer inward to the battery.
Briefly about the properties of penofol:
What is the best way to insulate the balcony?
Before deciding how to insulate a balcony or loggia, you need to understand which side to use the insulation and where. At the same time, the glazing of the balcony is a mandatory step, otherwise, what's the point of insulating if everything is blown through.
The balcony can be insulated:
- bottom (floor);
- top (ceiling);
- from the inside (walls);
- outside (also walls).
Insulation of the floor of a balcony or loggia
 The better the material for the balcony insulation, the better the indoor microclimate will be maintained. In light of the latest trends, it is highly recommended to insulate the balcony floor. This will give energy-saving heat savings of 20 to 40%, depending on the type of insulation. The costs will pay off, especially if you plan to convert the balcony into an additional room.
Warming methods:
- using insulating materials;
- underfloor heating system.
Insulation materials:
Mineral wool
The advantage is low cost, ease of installation. The disadvantage is that it cakes over time and loses its insulating qualities. With an illiterate calculation of the thermal insulation layer (this is a completely separate topic of conversation), you may not achieve the desired effect.
Styrofoam
Nice, comfortable, cheap stuff. Disadvantage - mice eat it. You will need to take care of excellent tightness.
Expanded clay
Lightweight, cheap, everlasting heat insulator, but cooler.
Penofol
Moderately expensive. Combines the qualities of mineral wool and foam. It can be laid on an imperfectly flat surface. According to experts, it is one of the best thermal insulation materials for warming balconies and loggias.
Penoplex
Also moderately expensive, good heat insulator, but requires a very flat surface.
Underfloor heating system
Available in three versions:
Water floor
Connected to the central heating system. If you do not have individual heating, then this option is not suitable due to the lack of permissive legislation.
Electric
- Cable.
- Cable with a reinforcing mesh.
Electric floors are effective together with self-leveling floors and tiles.
Film (infrared)
It fits without major repairs. A technically simple solution.
Attention: the film floor cannot be used under tiles and screeds. It is possible under linoleum or laminate.
Insulation of the ceiling of a balcony or loggia
 It makes sense to insulate the ceiling on the balcony if your balcony is located on the top floor.
The following materials are used to insulate the ceiling on the balcony:
- drywall;
- styrofoam;
- penofol;
- penoplex (expanded polystyrene foam).
Do not forget that when insulating the ceiling, a decrease in the ceiling space is inevitable.
If you do not want to do a major insulation of the ceiling, then you can get by with decorated foam uritan tiles. In this case, there will be two advantages: an elegant ceiling with a small layer of insulation.
Insulation of walls of a balcony or loggia
 Before insulating the walls of the balcony, it is necessary to seal all holes and cracks. Neglect of such a trifle as a crack in cold windy weather will result in a loss of heat and a lack of comfort.
The materials for the insulation of the balcony are the same as for the insulation of the floor. It:
- expanded polystyrene;
- penoplex;
- penofol;
- mineral wool.
You can add materials like isover.It is a more modern mineral wool based on fiberglass. Available in rolls or sheets.
Another option is styrodur Is a green extruded polystyrene foam.
Wall insulation can be carried out from the inside and outside. In the event that it is necessary to preserve the useful space of the balcony, it is recommended to make insulation outside, and only finishing work inside.
As in any other case, the choice of insulation outside has its advantages and disadvantages:
It is not easy to choose which insulation is right for you, what exactly to isolate this or that room. The best insulation method is a combined one.
Example:it is better to insulate the ceiling of the loggia and all the walls with basalt wool mats, the floor with expanded polystyrene, and use foam foam as an additional noise-absorbing and heat-reflecting layer.
When choosing a material, remember that the flammability class and environmental friendliness are perhaps the most important criteria.

So, taking into account the plans hatched for the further use of the balcony or loggia, the time and financial possibilities, taking into account the recommendations received, you can now make a reasonable balanced decision on the choice of insulation for your balcony or loggia.