Finishing a bathroom with ceramic tiles is the best option in all respects. This is not only a traditional method, but also, thanks to modern production technologies, is very popular. A huge variety of types of tiles allows designers to create unique interiors, from the most expensive exclusive to the cheapest budget. Despite the big difference in the cost of materials, each consumer has the opportunity to buy beautiful and high-quality tiles at a very reasonable price.
Among the many advantages of ceramic tiles, there is one very important from the point of view of builders - there is no need to make the wall perfectly flat for it. The spread in height up to a centimeter is eliminated during the laying of tiles, you should not waste time and money on preparatory work.
Except, of course, the mosaic tiles. Under it, you will have to carefully level the surfaces, this material does not tolerate irregularities, and it is very difficult to eliminate wall problems by adjusting the thickness of the glue. Such work can only be done by real professional tilers with extensive practical experience.
We will tell you about several technologies for leveling surfaces for all types of ceramic tiles, taking into account the actual condition of the walls.
Tile leveling materials
We will not consider specific manufacturers, there are a lot of them, both domestic and foreign. Let's just talk about the types of materials.
| Material type | Brief characteristics |
|---|---|
| Traditional materials are distinguished by the highest performance indicators. Universal use, suitable for all types of wall finishes. Due to their high strength and adhesion to all building materials, they increase the stability of the load-bearing walls, protect the brick from further destruction. There are moisture-proof types; innovative additives can be used to improve physical performance. Available at cost to all consumers. | |
| An extremely unfortunate option due to the high hygroscopicity of the material. Although now there are samples with reduced hygroscopicity, builders do not recommend using them as the main material for leveling the walls in the bathroom. The main advantage is that they quickly grasp, due to which the time of work is accelerated. But this can also be considered a disadvantage - only professionals can work with them. | |
| Nowadays, these materials are very popular with construction companies. Wall alignment is done quickly, and the cost of work is estimated by them much higher than when using cement mixtures. The bottom line is that companies are significantly increasing their profits. For bathrooms, you can use only moisture-resistant OSB and gypsum plasterboards. |
bathroom cement plaster
Algorithm for aligning walls for tiles
All work should be approached thoughtfully, this also applies to leveling the walls in the bathroom. Before choosing a material for leveling, you need to carefully examine the walls.
What to look for first? How does the actual state of surfaces affect the choice of technology?
- Check the verticality of all walls. This is the main indicator, the choice of the optimal technology largely depends on it. The peculiarity of ceramic tiles is that they should be laid only on vertical surfaces, otherwise they will have to be cut under a wedge in the corners. And this is not only ugly, but also indicates a low qualification of the tiler.
The verticality of the walls is checked with an ordinary plumb line. Secure the nail at the top of the wall and look at the position of the thread at the bottom. To more clearly see the deviations, you can use a ruler or tape measure. Lean it against the wall near the ceiling and near the floor, measure the difference in readings. If the difference is more than a centimeter, then the wall will have to be leveled. Moreover, it is allowed to use only plaster or drywall on the profiles. The angle between the walls may differ from the straight angle, this is not a problem for tiles.
- Using a long rule or a rail, check the condition of the surfaces for protrusions and depressions. Lean the instrument in several places, the more often the better. If there are a lot of irregularities, but they are insignificant in size, then it is better to level the walls with OSB or gypsum plasterboards. Moreover, they can be glued directly to the wall without metal profiles.
Checking the evenness of the walls
- If the irregularities are more than two centimeters and there are a lot of them, then it is optimal to plaster the wall or level it with plasterboard plates on a metal frame.
Each case requires an individual approach. Sometimes it is enough to cut down a few large protrusions and close up critical recesses, slightly touch up the surface with putty - and the surface of the wall is prepared for facing with ceramic tiles. At this, the alignment work can be considered complete. All other irregularities are eliminated with glue during the laying of the tiles. As for shallow cracks, in most cases they can not be touched, they do not have any effect on the quality of the finish. If you plan to decorate the bathroom with mosaic tiles, then the walls must be carefully prepared. This can be done with cement-based plasters (reliable, but long and expensive) or slabs (much faster). Which option to choose is only your decision.
We will consider three options for leveling the walls, each of them has its own characteristics and requires special knowledge.
Leveling the walls in the bathroom with cement-sand mortars
This method can be applied in all cases without exception, the most traditional and demanded by responsible builders. To carry out the work, you need to purchase a dry mixture, the amount depends on the amount of work. But do not be afraid if some material remains, it will always come in handy in the future. A tightly packed and stored dry mix retains its original properties for a long time.
Prepare plaster tools, metal or wooden beacon rails, level, plumb line, rope, tape measure.
For example, we will consider the most difficult case - the walls not only have large irregularities, but also deviated vertically. In addition, the old brick in the bathroom began to crumble, it needs to be strengthened.
Step 1. Use a construction hammer or chisel to remove loose pieces of bricks. Ideally, you need to get to the whole.
Apply a primer "Betonkontakt" to the walls
Step 2. Prepare some solution according to the manufacturer's instructions. Place the beacons, the first one should be at a distance of about 20-30 cm from the corner. The distance between all beacons is slightly less than the length of the rule. Before installing the beacons, you should already know how thick the plaster needs to be applied.
How to install beacons?
- Throw the mass with a vertical tape at the height of the room, drown the lighthouse in it. Using a level, set it exactly in a vertical position, to do this, lean the plane of the tool against the metal profile and press it in the right places.
- Do the same operation at the opposite corner of the wall. If the size of the room is larger than the length of the rule, then intermediate beacons should be made. They are done in the same way, and alignment along the plane is done by the rule or by stretched ropes between the extreme beacons. Allow time for the mass to cool, further work can be carried out in 2-3 hours.
Do not forget to wet the wall surfaces before applying the mass. This should be done with an ordinary paint brush, it should be soaked in a container with water.
Important. Please note that we are constantly talking about throwing in mass, not smearing. Never smear it, this method of plastering not only looks ridiculous, but also significantly worsens the adhesion strength of the solution to the wall.
Practice throwing the mass with effort, the flip flops should lie in even rows without gaps and approximately the same height. The hand should be relaxed, the trowel should move simultaneously towards the wall and up or down. Learn to throw the mortar on the left and right, up and down, take the mass both with the side of the trowel and with the end. It will take time to get the skills, if you are not at all successful, it means that plastering is not for you. Seek professional help. But never smear the mortar on the wall, it will fall off along with the ceramic tiles.
While the lighthouses on one wall freeze, start installing them on the next, so you will significantly speed up the work.
Step 3. Install plaster thickness stops at the outer corners of the wall, they are always needed in door and window openings for finishing slopes.
How are they installed? To do this, you will need even thin boards, nails or dowels (depending on the material of the wall), any pieces of lumber for spacers, homemade metal clamps. If the plaster layer is small, then factory metal corners can be used. But we consider it more effective to use thin boards as guides - they can be used to adjust any thickness, and fixtures are installed much faster. The boards are fixed in any way in the corner (nailed, clamped with spacers, homemade clamps from metal bars, glued with glue or plaster, etc.), the position is aligned with the already installed beacons. After the plaster hardens, the boards are removed. Another plus of the method we propose is that the corner is plastered simultaneously with the wall, which not only speeds up the work, but also increases the strength of the plaster, it has no seams.
Step 4. Start plastering. Throw the mass from the bottom up, the thickness is about a centimeter or two more than the height of the beacons. After about 50–70 cm, remove excess mortar as a rule. Lift it up along the beacons with a simultaneous movement to the left / right. Throw the collected excess back into the bucket, re-seal large depressions immediately.
Step 5. In this way, continue to plaster the entire wall. Do not be afraid that the plaster layer will be very thick in some places. If the thickness is more than 2 cm, then cracks will appear during drying, but in our case this is not a problem. Cracks do not have a negative effect on the installation quality of ceramic tiles.
If you do not have enough experience with the rule, then large irregularities will have to be eliminated with a trowel. You can work with it on slightly hardened plaster. It is not necessary to achieve a perfectly flat surface, align only large "waves". If time is lost and the mass has become too hard, then moisten it a little with water.
This completes the alignment of the bathroom walls with cement mortar.
Video - Bathroom Tiling
Leveling out large wall irregularities with slabs
We have already said that you can use various boards, but for example, let's take the cheapest of them - moisture-resistant plasterboard.
Step 1. Wall markings. Metal profiles should be spaced 60 cm apart for standard plasterboard sizes. If they have to be cut, then the distance is changed so that the fixation is also along the edge of the cut.
We recommend installing additional vertical profiles, you do not need to screw self-tapping screws into them, the main thing is that they do not allow the gypsum plasterboards to bend. The length of the profile is equal to the height of the bathroom ceiling.
Elements are cut with metal scissors or a grinder with an abrasive disc. Do not be afraid that as a result of high temperatures during cutting with a grinder, several millimeters of zinc coating will be lost, corrosion processes are so insignificant that this will not affect the stability and durability of the structure.
Step 2. Fix the guide profile on the floor, fixing is done with dowels. Fix perforated hangers on the wall, the distance between them is 50-60 cm. Make sure that all hangers are located exactly on the same vertical line.
Step 3. Proceed with the installation of extreme profiles, for this use the level. After they are in an upright position, use metal screws to secure them. Bend long sections of the perforated tape so that they do not create obstacles during the installation of sheets.
Step 4. Pull the ropes between the extreme elements and mount all the remaining vertical profiles along them. If the walls have a complex configuration, then additionally install horizontal jumpers to fix the drywall pieces. The width of a standard drywall is 120 cm, the line of the axis of the vertical profiles should be located along the edge of the sheet, carefully monitor this parameter. The distance between the profiles located in the middle of the drywall can be changed taking into account its thickness and configuration.
Practical advice. If there are risks of mechanical stress on the wall, then in these places it is recommended to increase the number of vertical profiles. Drywall has low physical strength, and the increased number of fixation points increases the resistance to mechanical stress. Reinforcing jumpers must be installed at all joints of drywall segments.
Step 5. Fasten the drywall sheets to the installed profiles with self-tapping screws. Screw in the hardware very carefully, the strength of the gypsum is so low that if the torque is slightly exceeded, the head of the self-tapping screw will completely push the plate, you will have to carry out the fasteners in another place. Make sure that the joints of the slabs are located exactly along the axis of the profile, leave room for fixing the second sheet. The work requires certain practical skills, you should not be upset if the first time there are problems with screwing in the screws.
Install all sheets in the same way, carefully work in window and door openings. There is no need to putty under the ceramic tiles. Clean the surfaces only from dust and start installing ceramic tiles.
Practical advice. It is recommended to use drywall with a thickness of at least 1.5–2.0 cm near the bath, be sure to reduce the distance between the vertical struts of the frame. Such measures serve as additional insurance and increase the performance of the structure. Ceramic tiles are attached to the glue, as soon as the board bends, the glue cracks and the tile can fall off.
Aligning the walls in the bathroom with plasterboard plates for glue
This method is recommended if the walls have a large number of irregularities, but their dimensions do not exceed one centimeter. The advantages of frameless drywall installation technology include the following indicators:
- rapidity. In comparison with the traditional frame installation method, the speed of work is approximately doubled;
- cheapness. The total estimated cost of leveling the walls is reduced by at least 30%. Walls can be finished with thinner slabs, in addition, there is no need to buy metal frame elements;
- increased coating strength. Due to the application of glue, the area of the sagging areas is significantly reduced. This is very important in the case of finishing surfaces with ceramic tiles;
- manufacturability. Work can be performed by low-skilled builders.
- at the corners of the wall, using the usual method, set the vertical strips for the lighthouses under the level. In the future, they can be dismantled or left, there is no difference. Try to do it in such a way that the wall alignment is carried out with a minimum thickness of glue. This saves material and increases the usable volume of the room;
- pull the threads above, below and in the middle of the extreme beacons;
- at a distance of about 40-50 cm along the threads, install the dowels, the height of the caps is adjusted along the threads. Thus, you get three rows of beacons, all the caps are located in the same plane. The back of the gypsum boards will rest on these caps as they are glued.
Concrete drill
By reducing the sagging areas, you can use slabs with a thickness of 10 mm or more.
Step 1. Mark the wall. You need to mark the aligned plane using the reference beacons. This should be done in the following sequence:
Practical advice. If you have a long rule for the entire height of the wall, then two rows of support beacons are enough - above and below. If you need to fix small pieces of sheets, then under each of them you need to install your own reference beacons.
This completes the marking, prepare the glue and cut the slabs to size.
Step 2. Using a trowel or a spatula, scatter the glue on the wall, the height of the glue is about 2-3 cm higher than the height of the caps of the screws. The distance between the points of glue application is 15–20 cm; in each case, adjust this parameter yourself. If you know in what places the load on the plates will be maximum, then increase the number of points of fixation with glue in them. Due to this, the risks of sagging of gypsum plasterboards are minimized.
The location of the glue on the sheet
Step 3. Attach the slab to the wall, align its position and, as a rule, press it against the supporting beacons (screw caps). Make sure that the drywall does not bend, for better alignment, tap the surface with a rule in many places. The installation of sheets should begin from the corner of the bathroom, first fix the whole plates, measure and fix the segments last. It is difficult to work alone, involve assistants.
 ... Remove the glue protruding from the seams immediately; after hardening, problems may arise. The material has such high adhesion rates that during cleaning it can destroy the integrity of the gypsum board.
The boards should be glued the first time. If, for some reason, the drywall caved in, then it is quite difficult to fix the error, keep this in mind. It is strictly forbidden to lean against freshly glued boards, do not store materials near them. If, after the glue has hardened, it was found that the plane of the plate is concave, then it should be completely removed, the remnants of the glue should be grinded and all operations should be repeated again. This is unpleasant work, and it will take a lot of time.

We have given three methods for leveling the walls in the bathroom under the tiles. Each of them has its own characteristics and is not considered optimal for all cases. Make decisions individually, consider as many factors as possible. Including your construction skills.
moisture resistant drywall
Video - Aligning the walls in the bathroom with plaster
In order for the tiles to look good in the bathroom and not fall off in the next few years, you need to properly prepare the walls for this procedure. If they were uneven, you need to eliminate this deficiency. Today there are many ways to quickly level surfaces. There are also certain rules for choosing a technique. How to align the walls under the tiles in the bathroom will be discussed later.
How to identify irregularities
To level the walls for laying tiles, you need to measure how large the irregularities are. To do this, you will need to use simple construction tools. With their help, it will be possible to check whether the corners are even in the room, as well as the correspondence of vertical and horizontal lines to each other. In addition, you will need to determine if there are potholes and bulges, what is their size.
First, check the verticality of the walls. For this, a plumb line is used. A nail with a thread is fixed at the top of the wall. Next, measure the distance from it to the wall at the top and bottom of the room. If the difference is more than 1 cm, the walls will need to be leveled.
As a long rule, the surface of the wall is examined for the presence of bulges and depressions. It is applied to the base. Then the differences are assessed. If they are more than 2 cm, you will need to pay sufficient attention to the alignment process.
It is also estimated how many irregularities there are on the wall. If there are not enough of them, you can solve the problem locally. The bulges can be cut down, and the depressions can be repaired with mortar.
Alignment methods
How to align the walls in the bathroom with tiles? There are several ways to solve this problem. The choice of technique depends on the results of checking the evenness of the walls. If the surface has many small irregularities, it can be covered with plaster. Very small irregularities and cracks can be repaired with a solution locally, without treating the entire wall. If there are many defects, or the wall has begun to crumble, it is better to cover the entire surface with a layer of solution.

Plasterboard sheets are often used for alignment. This material can be glued to the wall or mounted on a special metal frame. The second option is only suitable if the bathroom is spacious. Otherwise, the interior space will be significantly reduced. This method allows you to remove the most difficult, large irregularities.
If drywall is glued to the walls, the size of the bathroom will decrease slightly. This method is suitable for bases that have a lot of minor damage.
Varieties of plaster
What mixture to level the walls under the tiles? There are two main types of plaster on sale. They differ in their basis. These are cement-sand and gypsum compositions. To choose the right solution, you need to follow the advice of experts. They claim that gypsum plaster mixes are suitable for dry rooms. Their scope is limited.

If the walls are leveled with gypsum plaster in the bathroom, it will strongly absorb moisture, swelling and deforming. As a result, the tile will fall off such a surface very quickly. And for dry rooms, gypsum compositions are preferable, since they allow you to maintain the correct microclimate parameters.
For the bathroom, cement-sand plaster is ideal. She is not afraid of moisture. At the same time, sand cement has good adhesion characteristics. It will ensure a long service life of the tile. With the help of such solutions, you can qualitatively level the wall in accordance with all the rules and regulations.
Instruments
Some owners of private houses and apartments cannot decide whether to level the walls on their own or turn to specialists. The second option is preferable if you do not have time to do the repairs. Then you should hire a team of professionals, paying not only for materials, but also for the work of repairmen. For example, it costs about 180-200 rubles / m² to align the walls in the bathroom under the tiles in Domodedovo. The price varies depending on the complexity of the work and its volume.

If the owners of the house have enough free time to carry out repairs with their own hands, they must prepare a number of tools and materials. The wall alignment job is relatively straightforward. You just need to know some of the nuances.
In the process of leveling the base, the master will need a building level, as a rule, a trowel for sand cement and a brush for a primer. You also need to purchase a wide spatula, grater. To mix the solution, you need a container of approximately 5 liters. In the process of processing the walls, you will need goggles, a respirator, and gloves. It is necessary to prepare a grinder and a drill with a nozzle for mixing cement. Measurements are made using a tape measure and a pencil.
Cement-sand mixture
How to align the walls in the bathroom with tiles? You need to purchase a cement-sand mortar, as well as a primer. The number of materials is selected in accordance with the dimensions of the room. Building materials in different packaging are on sale.

As a rule, sand concrete of the M300 brand is used to carry out work on leveling the bases in the bathroom. It is sold in bags of different sizes. Most often, a package of 50 kilograms is purchased.
The most commonly purchased formulations today are:
- Dauer - 181 rubles.
- Fix - 159 rubles.
- "Titanite" - 144 rubles.
- Baumax - 167 rubles.
- De Luxe - 179 rubles.
Prices are for a 50 kg bag, but they can vary significantly depending on the composition, the additives included in the component and the performance properties.
Primer
In the process of work, a primer must be used. The choice of composition depends on the type of walls in the room. So, if it is a porous surface, such as a brick, you will need to purchase a deep penetration primer. It will reduce the consumption of the cement mixture and improve its adhesion to the surface.

Today, the most popular deep penetration primers are Ceresit ST-17 (1 liter - 115 rubles), Bauprofi (2.5 kg - 100 rubles). The composition penetrates into the structure of the wall, closes the pores.
How to align a concrete wall with tiles? In this case, a completely different type of primer is required. It creates a special film that improves the adhesion of the cement mortar to a smooth substrate. This is a concrete contact. A special type of composition allows you to create a rough coating on the surface. The best in this area were named the compositions "Krafor" (3 liters - 260 rubles), "Ceresit ST-19" (5 liters - 460 rubles), "Dali" (3.5 liters - 365 rubles).
Preparation of the base
Having considered the best way to align the walls under the tiles, you should pay attention to the features of this process. It is worth noting that before treating the surface with a solution or fixing drywall on it, you need to properly prepare the base.
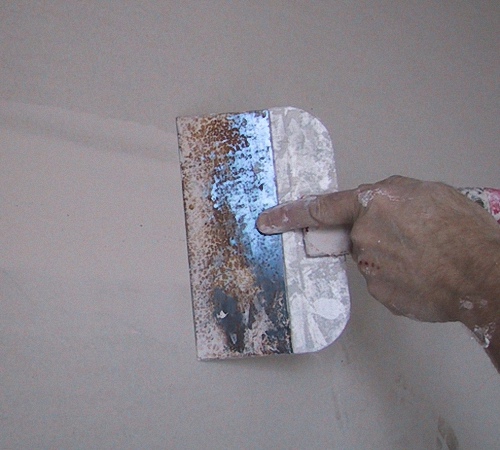
To do this, remove the old finish from the walls using a spatula. All remaining materials are cleaned off with it. It is recommended to remove all furniture and other items from the bathroom. Preparing the walls is a dusty job, therefore it is carried out with a respirator, goggles and gloves.
To speed up the process, you can use a grinder. To reduce the amount of dust, you can periodically wet the surface with water from a spray bottle. If small cracks remain after processing, they can be widened at right angles and repaired with mortar.
Plastering walls
How to properly align the walls with tiles? You need to start by installing beacons. These are guides that regulate the thickness of the layer of the cement-sand mixture. It can be applied to a surface with a thickness of 5-20 mm.

Lighthouses are installed in such a step that you can follow them by rule. Usually this figure is 150 cm.
It is necessary to prepare a solution that is consumed within 30 minutes. It should be thick enough not to drip off the surface. Then they spread it on the wall or throw cakes on it. The second option is more difficult. It is easier to spread the thick mortar on the surface of the base with a spatula.
Leveling mortar
After carrying out the above manipulations, you need to level the solution. How to align the walls under the tiles with your own hands? First, the surface is drawn with a rule. Both ends should slide over the beacons. This way it turns out to create an almost flat surface. If there are depressions, a solution is added to them.
Leave the wall to dry for 60 minutes. During this time, the solution will stick, but will not dry completely. At this moment, you need to remove the beacons from it. The cavities should be sealed with cement mortar. Next, you need to let the solution dry completely. For tiles, a perfectly flat surface is not so important, so the finish does not need to be sanded.
When the solution is dry, debris and dust are removed from it. The surface is coated with a deep penetration primer. After that, you can proceed with the installation of the tile.
Drywall for glue
You can align the walls in the bathroom with plasterboard tiles. In this case, the sheets are glued to the surface. To do this, you will need to purchase moisture-resistant drywall and special glue. This method is suitable for surfaces with height differences of no more than 2 cm.
The walls are prepared before leveling in the same way as before putty. Cutting the material is simple. To do this, just use a clerical knife. The sheets are glued to a pre-primed surface.
An adhesive composition is applied along the perimeter and in the center of the gypsum board. This is a thick mixture that should be applied in small flat cakes. The step between them should be 30 cm. After that, the drywall is simply pressed to the surface. Next, you need to use the building level. With its help, they check whether the sheet has been attached evenly. If necessary, correct its position.
Frame application
Considering, it is worth remembering one more way. Installation of drywall on the frame is justified only if the unevenness of the walls is more than 2 cm. If the space in the room is small, it is better to give preference to other options.
First you need to draw up a drawing. The plan provides for the location of all elements of the frame, as well as the location for the outlet of water, sewer, electrical and other communications. This is necessary in order to avoid mistakes during the installation process.
Each profile is set at a distance of 60 cm from each other. This is due to the standard size of drywall sheets. Their fixation takes place strictly in the center of the profile surface. If the sheet is cut, this must be taken into account when creating the frame.
The profiles must ensure the rigidity of the structure. It is unacceptable that the sheets of drywall bend. Therefore, intermediate profiles must be installed in the frame. They will provide additional fixation of the sheets in the center. In this case, drywall does not even have to be screwed to them. You just need to support the sheet on an additional metal crossbar.
Considering how to align the walls under the tiles in the bathroom, you should take into account a number of expert recommendations. They advise purchasing a profile for vertical installation, which will match the height of the ceiling in the room. If you need to cut the profile, use metal scissors or a grinder.
Installation process

How to align the walls under the tiles in the bathroom using drywall? First, the profile is installed on the floor using dowels. Perforated hangers are fixed on the wall in 60 cm increments. It is necessary to check that they are all located on a vertical line.
Having set all the elements of the frame according to the scheme, they are fixed with self-tapping screws. Next, install sheets of drywall. They are also fixed with self-tapping screws, which should not be overtightened. It is not necessary to putty the joints between the sheets. Sheets should not bend. Otherwise, the tile will fall off from such a surface.
During finishing work, for good adhesion of the material to the base, it is necessary to carefully prepare the surface. Aligning the walls under the tiles is an extremely necessary stage of the work, since on an uneven surface the tiles will not hold firmly enough. If you lay out the finishing material on the walls without their preliminary preparation, with a high degree of probability in the future, you will need to shift the tiles along the entire wall or in some of its sections. In addition, the unevenness of the wall violates the aesthetics of its appearance, each unevenness on the tile is clearly visible and noticeable.
Surface roughness assessment
Initially, it is necessary to assess the unevenness of the surfaces to be repaired. To do this, use a long building level, at least 2 m in size, or a plumb line. A nail is driven into one of the corners of the room, leaving an area equal to 2-3 mm on the surface. It acts as the first beacon. Then they take any load, tie a thread to it, wind the other end of the thread around the nail so that it does not reach the floor for several centimeters. It is optimal to choose a medium-sized nut as a load, it is best to take a nylon thread, since it is less susceptible to deformation. When the suspended load stops vibrating, the thread is pulled in a straight line. Further, at the bottom point of the load overhang, another nail is driven in, its head is located on the same line with the thread.

The whole procedure is repeated on the other side of the wall. The result is a construction of four nails on the surface, which forms two straight lines. Now another thread is fastened diagonally - from the top point to the bottom on the other side. When pulling, make sure that the thread does not touch the wall. The taut threads make it easy to identify every unevenness in the wall. This method of assessment is budgetary and does not require special tools.
With deviations in the surface up to 10-15 mm, the walls are leveled with mixtures of gypsum or cement. More pronounced irregularities are corrected with sheets of drywall. This method is also called dry plaster. All three methods are suitable for leveling surfaces for tiling.
The choice of a mixture for leveling
When choosing mixtures for leveling walls under tiles with your own hands, you should focus on how thick the layer will be applied to the walls. It is also necessary to consider the type of bonding material. In living quarters, it is rational to use gypsum-based mixtures; in these rooms, not only the quality of the finish is important, but also the microclimate that it creates. Gypsum mix meets all these factors. For rooms with high humidity - kitchen, bathroom, toilet, a cement-based mixture is optimal. These coatings retain moisture and prevent it from penetrating into the depth of the concrete base.

For self-preparation of the solution, you do not need to have specific skills and abilities. The cement slurry is prepared from 1 part of M400 cement to 6 parts of sand. The cooking process looks like this - sand is poured into the container, on top of it is crushed with a layer of cement. All components are well mixed, and then they begin to gradually add water to the container. The whole mixture is mixed until the consistency of liquid sour cream.
In some cases, craftsmen work with a mixture in the proportion of 1 part cement to 2-3 parts of sand. Such a solution is more plastic, it is easier and faster to work with it, especially if it is necessary to decorate a vertical surface from which the solution tends to drain and fall off. The finished mixture is diluted, following the instructions, it is necessary to use the diluted solution within 1-2 hours, therefore, you should not make a large portion of the working material at once. However, for leveling the walls under the tiles, the price is slightly reduced if you prepare the mixture for work yourself, and not purchase a ready-made one.
Leveling the walls under the tiles with plaster
It is optimal to use the method of treating walls with plaster on brick or block bases. This material is also laid on reinforced concrete bases, but to complete these works, you will need to install a special frame made of metal mesh. For the correct execution of work, it is necessary to install a metal beacon profile. There are two modifications of this material - PM 21x6 and PM 26x10. The numbers in the marking indicate the width of the profile base and the height of the beacon, that is, the thickness of the layer that will lie on the surface. The length of the beacons in the standard version is three meters; to shorten the beacon, metal scissors are used. Lighthouses are mounted on mortar molding in a vertical position. Leveling works are carried out according to the following algorithm:
- Installation of beacons.
First, they equip a straight line along which the beacons will be installed. To do this, use a thread that is pulled according to the method described above. 5 mortar beacons are applied to each line. A lighthouse is installed on the moldings; when installed, it is drowned in a solution through the mounting holes. Next, the installed beacon is leveled using a building level. Threads are pulled between the finished marks, forming a plane over the entire area of the treated surface.
Next, intermediate beacons are mounted, which are placed along the threads stretched between the ready-made marks. Such a distance is left between the marks, which is sufficient for the length of the tool with which the leveling work is carried out. For a rule with a length of 1.5 m, the optimal spacing between beacons is 1.2-1.3 m.
- Priming the wall.
Surface priming by craftsmen is considered one of the mandatory stages of work. Liquid primers increase the adhesion of the material to the surface. There are a large number of primers. It depends on the correct choice of a primer what the final cost for leveling the walls under the tiles will be, as well as the quality of the work performed. For each type of coating, a specific grade of material is used.
Primers are applied with a brush, roller or spray gun. If a primer is applied to a coating that has a high absorption rate, then several layers of liquid are applied, one after the other, having previously allowed the previous layer to be absorbed. For brick walls, masters recommend not spending money on buying a primer, but simply wet the wall with water. This measure ensures sufficient strength of the plaster after it has dried.
- The plastering process itself.
The entire work is conventionally divided into three parts, each representing the application of one layer of plaster. The first layer is applied directly to the material and is called spraying. This layer is applied thinly and done with a liquid solution. Its thickness is no more than 2 mm.
The second layer is soil. The solution for it is kneaded more tightly, the thickness is made from 5 to 6 mm. The third layer is the finish coat. Thinner than first coat. The material is distributed over the surface until it is completely leveled. Each previous layer is allowed to dry well before proceeding with the next. Between all layers, a layer of primer mixture is made, which is also allowed to dry well. He talks in more detail about how to align walls under tiles, see the video at the end of the section.
Leveling the walls under the tiles with putty
The putty is used for finishing work; it can be used for any type of surface. The puttying process is simpler than plastering, therefore it is most often done by hand. Plaster is suitable for leveling walls for laying tiles, and for painting, and for pasting walls with wallpaper. It is best used on concrete and wood surfaces. The algorithm for leveling the walls with putty looks like this:
- To begin with, they carry out research work on the subject of irregularities on the surface. These are various grooves, cracks or chips. The deepest imperfections are covered with plaster or blown out with foam. If possible, level it as much as possible, then treat the surface with a primer, which is allowed to dry well.

- Next, the first putty layer is applied. Unlike plaster in this work, the first layer is thicker and is 2-3 mm, and in some cases even 5 mm. If it is necessary to apply a thick putty layer, then this is done in several stages, otherwise the putty will fall off the wall under the pressure of its own weight.
- The first layer is allowed to dry well, then it is primed and dried again. The second coat is applied immediately after the primer has dried. It is made thinner than the previous one and is about 1 mm thick. This is the last layer that should level the surface.
- If the wall is leveled for laying the tiles, then the work after the application of the second layer is considered complete, since the tile itself is capable of hiding minor wall defects. If the wall was leveled for painting or wallpapering, then the surface is rubbed with fine sandpaper to remove all fine wrinkles of the putty.
Plasterboard wall alignment
Aligning the walls under the tiles with plasterboard or plywood is used if there are pronounced flaws in the walls, the depth or height of which is more than 5 cm. Experts try to do without this measure and level the walls with plaster, since the installation of drywall has one significant drawback. During installation, this material often requires the installation of a frame, in addition, the drywall sheet itself is quite thick. As a result, after all the work has been completed, the area of the room is significantly reduced. This decrease is especially noticeable in rooms with a small area.
To minimize the thickness of the drywall layer, it is not mounted on a metal profile, but on a special mounting glue. One of the most common brands for performing these works is the Perlfix glue of the Knauf company. The base for fixing drywall with glue is made as strong as possible, without crumbling areas. If there are any, they are upholstered and covered with plaster.

The surface should not be subject to condensation and freezing, spatial deformation and condensation accumulation. Before installing the sheets on the wall, it is thoroughly degreased and cleaned of residues of various substances that reduce the ability of the glue to adhere to the surface. After cleaning and preparing the wall for work, proceed as follows:
- The wall is carefully primed. For surfaces with a high moisture absorption rate, use a soil with deep penetration. For dense surfaces with a small number of pores, use the "Betonaktiv" primer. For surfaces with an average to normal moisture absorption, a versatile material is used.
- After applying the primer or before performing these works, sections of the required size are cut out of drywall. When measuring, take into account the factor that a gap is left between the sheet and the floor for the glue to dry, the width of this gap is 10 mm. A gap is also left from the ceiling to the sheet, but of a smaller size - 5 mm. Shims of any available material are used to provide these gaps.
- Before installing the sheets, it is imperative to carry out work related to communications, since after gluing the drywall it will no longer be possible to do this. All boxes, sockets and switches must protrude at least 20 mm above the base.

- Glue is applied to the cut sheets. This is done with any convenient solid tool, for example, a spatula. The glue is applied in piles, the distance between them is 30-40 cm, the distance from the pile to the edge of the sheet is not less than 5 cm.
- The sheets are pressed against the wall and glued. By tapping on the material, the glue hardens and the sheet is tightly laid. Once again, the stacked gypsum board is carefully treated with a high penetration primer. After the primer has dried, the surface is ready for further work.
Ceramic tiles are unmatched in terms of durability and hygiene. If you do not want to use the expensive services of professionals or if you want to entrust the finishing to the masters, but control them, you need to be well versed in what has to be done. Your experience and diligence will be facilitated by knowing how and how to level the walls in the bathroom, how to process the surfaces, how to ensure a high-quality result of expensive repairs.
The range of preparatory work includes measuring the base, preparing for facing, choosing its scheme and developing a laying plan. The number of tiles should be calculated in advance. It is necessary to measure the curvature of the walls and take into account that with the leveling of the surfaces, the number of tiles can be significantly reduced. Minimizing cutting work and saving time and money is easy with the sheer number of tiles installed on each wall. To create beautiful interiors, one should take into account the materials used, the method of preliminary preparation of the walls to be faced, know the laying techniques, methods of filling the joints.
The main quality of the areas where people wash and wash is a high level of hygiene. During the renovation, the prepared areas of the rooms will be tiled. With properly selected building materials, the bathroom will not only be attractive, but also "indifferent" to shampoos and washing powders.
When choosing a ceramic material for rooms, one should take into account its moisture absorption, resistance to wear (for example, to the effects of abrasive cleaning agents - I on the PEI scale - or 3 according to the international ISO system), resistance to aggressive household chemicals (designation "AA" - the highest stability, "D" - the lowest). The glaze contributes to the water resistance and abrasion resistance.

For wall cladding, tiles of non-standard increased size are often used. Working with them is not easy. They are heavy and require carefully prepared surfaces. After all, even a small unevenness will lead to bulging, which is striking with large-format blocks. Small bathroom tiles are called mosaics. It is easy for her not only to tile the walls, but also to lay out the bowls of the pools or the body of the bathtubs. Glass mosaics help to create interesting interiors. Bathroom spaces are emphasized with friezes.
Preparatory work and cleaning
The preparation of the walls in the bathroom begins with the cleaning of old coatings (tiles, paint, varnish, wood, wallpaper). The hillocks are cut off, and the pits and depressions are covered with a solution. The walls are measured and examined for the presence of irregularities. They are leveled if necessary. An obligatory preparatory stage is stitching.

What are we cleaning off? Dust, dirt, soot, grease, traces of old mastic. All this can impair the adhesive properties of the new glue and the reliability of the fixing of the tiles. Detergents can be ineffective against greasy stains. In this case, we turn to a 3% solution of hydrochloric acid or a 5% solution of soda ash... Working with them requires caution. If solutions get on the skin or mucous membranes, be sure to rinse with water.
What tools do we use?
- abrasive;
- grinding;
- as well as scrapers, fly brushes or stiff bristled brushes.
Excessively rough places in order to level the walls in the bathroom are treated with putty.
What to do with old tiles
There are 2 ways to get rid of the old one:
- removal of the used layer (starting from the top row, after taking care of the protection of the plumbing);
- laying a new layer on top of the existing one.
The second method is a "dust-free" repair option. In addition, it is used for extra-urgent rework. If the former tile was laid evenly and correctly, then this layer can be used as a base. Here it is important to choose the right special adhesive for ceramic surfaces and carefully examine the evenness of the ceramic.

Perfect evenness is a rarity. Even 2-3 years of operation do not pass without leaving a trace and reveal small and large defects, for example, cracks. In case of deviations along the axes, you will have to get rid of the tile by chipping, which in itself is laborious and almost always damages the sub-tile base. The latter will have to be repaired and leveled with a cement mortar.
What tools do you need?
- perforator, which significantly speeds up the process;
- hammer;
- chisel (we pry the edge of each of the tiles and separate one from the wall).
Under the tiles, layers of cement, thickly rubbed paint, and crumbling plaster can be found. With additional stress, these unreliable layers will fall off. Such risk zones are determined by preliminary tapping. If "the walls are baying", i.e. the sound is dull, we take the puncher in our hands and continue. The resulting potholes are closed.
Exactly on a layer of paint
Can I not remove the paint? Yes, but the only paint that gives good adhesion to tiles is water-based paint. But even on top of it, you should pull the mesh, and then use a special adhesive mixture.
All other old paintwork is removed by:
- cleaning solutions (for example, AFT-1). They are applied with a brush and remove the paint after bubbling;
- building hair dryers, after heating, the paint is removed with a spatula or scraper;

- perforators with a special paddle attachment;
- cutting machine (with an inserted card brush);
- sometimes a hatchet, spatula or scraper, sandpaper.

Cutting down hillocks
Usually, the alignment of the walls in the bathroom begins with cutting down the bumps. For soft surfaces (plaster, plaster blocks) use a spatula or hammer with a chisel. For others - a hammer drill with a nozzle or a sander. In order not to break, the disc must be suitable for the type of surface. Reinforced concrete, on the other hand, creates the problem of smooth walls. There is nothing to cling to! Notches with a hammer drill or chisel are required. Care should be taken when working in corners of rooms, under ceilings or near electrical outlets.

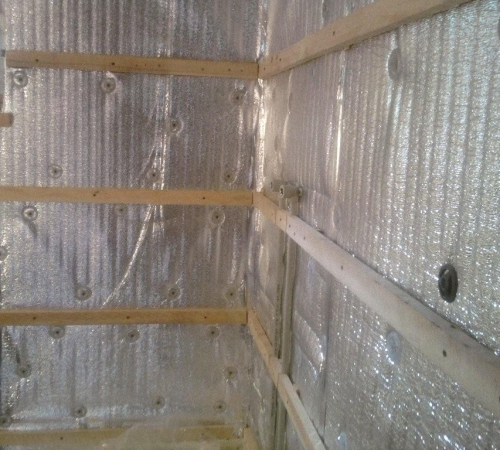
Plaster solutions for leveling walls are used only for minor roughness. Mixtures based on gypsum or cement are recommended. If the difference is more than 6 cm, plasterboard sheets with a special water-repellent impregnation are used. The material is easily cut, joins, and is sealed with putty. No primer or cutting of the mounds is needed. Ideal false walls allow you to leave layers between partitions and drywall. This contributes to both sound and thermal insulation.
Additional hanging
The purpose of hanging is to identify the most protruding part of the wall. It is determined by the minimum distance between the cord and the wall. This means that when leveling, there is a place for the thinnest plaster layer.
What do you need?
- long ruler;
- level;
- a cord or a special weight (plumb line with a cord and a fixed weight);
- nails around which stamps of plaster or mortar will be arranged.

Stitching Algorithm
- stepping back from the ceiling and corner of 30-40 cm, drive in the 1st nail;
- the distance from the cap to the base of the wall is equal to the size of the plaster layer;
- lower the weight from the nail, not reaching the floor;
- at a height of 30 cm from the floor, we drive in a nail number 2;
- his hat should touch the cord;
- vertically between 1 and 2 with a nail we drive in the third so that the cap also touches the cord;
- in the 2nd corner of the same wall, the procedure is repeated;
- hammer in the 4th, 5th and 6th nails;
- to check the base of the wall, the 1st and 6th, 2nd and 4th nails are pulled diagonally with a cord;
- if the cord touched the base, then the wall there is uneven;
- if the bulges are not cut down, the nails are removed from one row and driven in on a new one so that the thickness of the plaster on the bulges is 20 cm - 25 cm;
- on gypsum, retreating from the wall by 100 mm - 120 mm, they arrange intermediate beacons (so that later they have a layer of glue of a fixed thickness);
- horizontally nails 7 and 8 between 1 and 4;
- nails 9 and 10 between 3 and 5;
- 11 and 12 between 2 and 6;
- the distance from nail to nail is less than 2 m, and with severe irregularities it is less;
- the procedure is completed by a similar first flatness check, convexity detection and fit.

To make stamps, take 2 layers of mortar with a diameter of about 50 mm and a thickness of 5 mm above the head of the nail. After the mortar has set, the top of the mark is cut to the base of the cap, and the plane of the mark remains strictly parallel to the wall. After cutting the sides of the marks, 30-40 mm squares remain, on which the rule is attached (with mortar, nails) and plastering work begins. Thus, upon completion of the hanging of the walls, the installation of lighthouse tiles and marks from the solution, the walls are ready for facing.
Video instruction
Bathroom walls, finished with ceramic tiles, look beautiful and stylish. But for laying the tiles, it is required that all surfaces are perfectly even, otherwise the finishing material will not last a few days on them. Therefore, the alignment of the walls in the bathroom under the tiles is a prerequisite before starting finishing work. Doing it yourself is not so difficult, the main thing is to follow the instructions exactly and follow all the recommendations.
The methods of leveling the walls in the bathroom can be roughly divided into dry and wet. The dry method includes leveling with drywall, and the wet method - using plaster or special mixtures. Each method has its own advantages and disadvantages, so the choice is determined individually in each case. But the base should first be prepared for further finishing work.

Preparatory work:
- The furniture must be removed from the room.
- It is recommended to cover all plumbing with bubble wrap to protect it from dust and damage.
- The walls are completely cleaned of dirt and plaster residues.
- Cracks and chips are smoothed out and then sealed with mortar.
- On a surface that is too smooth, it is necessary to make notches every 15-20 centimeters.
- The surfaces are covered with a special primer for better adhesion of the finishing materials to the wall.
So that when cleaning the surface a lot of dust does not rise, you need to periodically moisten the walls with water. All work is carried out in a respirator and protective work gloves.
Consider whether you need to align the walls under the tiles in the bathroom
In order to determine whether it is necessary to level the surfaces before finishing work, it is necessary to measure the angles (ideally, they should correspond to 90 °), determine how even the walls are and whether there are depressions or bulges in them.

Required tools:
- Level (laser or water);
- Plumb line;
- Roulette;
- Thin twine;
- The length of the rail.
If the difference in any parameters exceeds 3 millimeters, then alignment is necessary, because laying the tiles will be impractical.
With a difference of more than five centimeters, the alignment is carried out exclusively with drywall.
Helpful tips: how to level the wall under the tiles with plaster
It is quite difficult to level the walls with plaster, but this method is considered the most reliable and financially less costly than plasterboard cladding.

In order not to be mistaken with the dosage of the components when preparing the solution, it is recommended to buy a ready-made factory mixture, into which you will only have to add water according to the instructions and stir.
It is better to use a cement-based mixture, as it is water-repellent, unlike gypsum plaster.
Stages of plastering work:
- If the walls in the building are crumbling and are not too strong, and the layer of plaster will exceed 3 centimeters, then it is recommended to install a reinforcing mesh.
- Beacons are placed at a distance of no more than one and a half meters from each other.
- A plastic solution is prepared according to the instructions.
- With a spatula, the mixture is applied in small portions to the wall and leveled over the beacons using a special tool - the rule.
- In the process of work, the beacons are gradually removed, and the cavities are filled with a solution.
- After the solution has completely dried, the walls must be primed.
Correct alignment of walls in the bathroom with drywall: different ways
Simple plasterboard wall cladding is done quickly enough even by a beginner and does not require special construction skills. The frame method of installation is more complicated, so you will have to spend more time studying the installation technology.

It must be remembered that when installing drywall in a frame manner, on each side the space of the room will decrease by 10 centimeters, so it is impractical to use it in small bathrooms or toilets.
To decorate the walls in the bathroom, only special moisture-resistant drywall (green sheets), treated with a special composition against fungus and mold, is used. Wiring must be done in advance.
Aligning the walls of the gypsum board in a frameless way:
- First, preliminary work is carried out to prepare the foundation.
- Plasterboard sheets are cut with a construction knife, according to the measurements.
- Glue is applied to the sheet in small slides along the perimeter and in the middle at a distance of 30 centimeters from each other.
- The sheets are glued to the wall with strong pressure so that the joints match.
- Joints are closed.
- Processing is carried out with a moisture resistant primer.
When installing the gypsum board, you should always control the evenness of the sheets using a level. If the material is crooked, then it is trimmed with a special wooden hammer.
The procedure for finishing the walls with plasterboard frame method:
- All surfaces are marked for the installation of metal profiles.
- Using self-tapping screws, the guide profile is screwed to the ceiling, and then, using a plumb line, the place where the guide profile is attached to the floor is determined.
- Then the rack profiles are vertically installed every 60 centimeters.
- Sheets are attached to the profiles with self-tapping screws using a screwdriver. One sheet requires approximately 100 pieces of fasteners.
- Serpyanka is glued to the seams, and they are putty.
- The walls are treated with a primer.
The joints can then be sanded with sandpaper.
Quick alignment of walls in the bathroom under the tiles (video)
Aligning the walls is a very important step in bathroom renovations. If you take it lightly, then all subsequent work will go to waste. A perfectly flat surface is a guarantee that the tile will fit easily and will hold on to the walls for a long time.