Some eight or ten years ago, the surge protector, in the eyes of most of our fellow citizens, was an exclusively computer attribute. In those days, when purchasing such a device, the buyer studied its technical characteristics for a long time and carefully in order to choose the really best one offered by sellers. At the same time, not much attention was paid to the appearance of the product, partly due to the fact that in those days most network filters looked almost the same. But, times are changing. And today, network filters are not at all an exclusively computer attribute, but have become an ordinary and familiar household device. The modern buyer is no longer as attentive and picky about purely technical characteristics as it used to be. In addition, surge protectors in everyday life are mostly considered as extension cords with a bunch of output connectors and a switch, rather than as a serious device for filtering the supply voltage. Accordingly, the main attention of the buyer is riveted to such parameters of the purchased product as ease of use, appearance, and functional equipment. It is from this point of view, in this material, six network filters will be considered. I hope that this will help some people to expand their horizons and see that not all filters are the same and are only "a piece of wire, at the end of which hangs a box with connectors."
According to the manufacturer, Pilot-S is an economical solution for protecting office electronics. In fact, the only thing that this filter will do well is to protect the user's network from possible short circuits in the power circuits of the equipment connected to it.
The considered filter is primitive both outside and inside. The network cable, the length of which is 1.78m, ends with a simple, no-frills housing (size 373x47x46 mm). In turn, the case carries a backlit power switch, a fuse reset button, and six connectors for connecting consumers. Five of them are quite modern, that is, with grounding. The sixth connector is ungrounded and made to be compatible with older plugs. All connectors are located almost close to each other, which may cause some problems for the user. I mean the case when the equipment is powered by an external power supply, the dimensions of which, most often, exceed the dimensions of a conventional mains plug.
Accordingly, when connecting such a power supply, the user will not be able to use the connector adjacent to it. In addition to this, the Pilot-S connectors do not have the so-called "child protection". By the way, the child will also be able to disassemble the housing of the filter in question without any problems. To do this, he does not even need a Phillips screwdriver, because the case covers are tightened with ordinary furniture screws, the heads of which almost protrude beyond the boundaries of the case. Only one of them is recessed so that a plasticine seal could be placed on top of it, made in the best traditions of electrical instrumentation of the Soviet era.
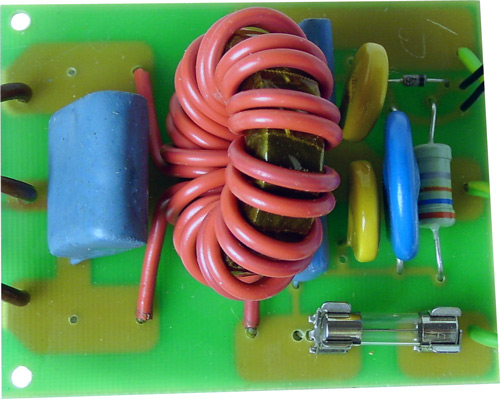
I hope that you can still convince your child that there is absolutely nothing inside the filter that deserves even a drop of attention. Actually, this is actually the case, because in addition to the switch and fuses, the filter consists of one single container. We do not compare the characteristics of filters now, but I think it is not difficult to imagine how "serious" such a filter is.


I hope you have already sufficiently appreciated the Pilot-S in question. And, in my opinion, the last thing left to consider is the possibility of attaching this filter anywhere. For this purpose, two ears with holes are provided in its design. Unfortunately, the shape of these holes does not allow hanging the filter housing on an existing screw, for example, in a wall. That is, to fix the Pilot-S on any surface, you must first install it in the place of attachment and only then fix it with a screw, screw, or whatever you will be fixing it with. The design of the hull does not provide for any other options, which cannot but grieve.

This model is no longer as economical as the Pilot-S discussed above. The electrical circuit has become more serious and has grown to the LC filter that has already become traditional in such devices. True, the manufacturer still managed to save money. Instead of six output connectors, as was the case with the Pilot-S filter, in this case we have only five. Four of them are grounded and one is not. But, compared to the younger model, the location of the Pilot-GL connectors is more convenient for the user, since the universal connector (the one that does not have a ground connection) is 11mm apart from the others. Of course, not much, but if it includes not very large external power supplies for the equipment, then the adjacent outlet will still remain available to the user.

In comparison with the previous model, the Pilot-GL has improved not only the electrical circuit of the filter, but also the indication. So, in addition to the illuminated power switch, the Pilot-GL additionally has a green LED. It glows if everything is in order with the device. If, as a result of an overload or short circuit in the filter, the protection works, the LED will turn off. At the same time, the power switch will continue to glow, indicating the presence of voltage at the Pilot-GL input. I must say that such a function is sometimes very useful.
Here, in general, this is where all the positive differences between the Pilot-GL and its younger brother end. Everything else, unfortunately, migrated from the younger model to the older one without any changes for the better. The network cable remained the same length (1.78m). The output connectors are not "child proof". The body covers of the device are pulled together with exactly the same screws as in the Pilot-S. True, there are two more ears for attaching the filter. But, the holes in them, just like in the Pilot-S, do not allow hanging the filter housing on a screw or screw already screwed into, for example, a wall. In general, in my opinion, Pilot-GL is definitely better than the simpler model described earlier. But, the final conclusions are still far away, so let's move on to the next filter.
Hello to all do-it-yourselfers!
In everyday life, we all often have to use various extension cords. Moreover, if for street conditions or a summer cottage, extension cords with a long cable, several tens of meters long, are mainly used, then for premises (sheds, garages, workshops or at home), such extension cords with a block for three, four sockets and wire length from 3 to 5-7 meters.

In my experience, I have found that when using such extension cords, it is best to hang them on the wall. In this case, neither the extension cord itself, nor its wire, as well as the wires of electric tools connected to it, will interfere, as if you simply put the extension cord on the floor.
However, the problem is that not all manufacturers make canopy holes on the back wall of their extension blocks, thanks to which they can be hung on the wall.
Here, for example, on this extension, there are such canopies.

And this one doesn't have them.

Of course, you can make canopies on the back wall of the block yourself by drilling holes in it. However, this is often dangerous because it can lead to electric shock and sometimes not very convenient.
I found a simple way out of this situation by making such wooden canopies from small planks on many of my extension cords.

And to make such a canopy is quite simple.
For this, from the materials you will need:
- two small screws;
- as well as a small plank, 10-12 mm thick, one and a half to two times longer than the length of the extension block and slightly wider than it.
Of the tools you will need:
- electric jigsaw with a saw;
- an electric drill with a feather drill for wood, with a diameter of 20-25 mm, and a drill for metal with a diameter of 4 mm;
- as well as a screwdriver.
The procedure for making a canopy
First, from one end of the blank plank, in the center, you need to drill such a through hole, with a drill bit for wood.

Then, stepping back a short distance from the edge of the circle drilled earlier, drill another hole with a diameter of 4 mm.

Exactly the same hole must be drilled from the other end of the plank.

In this case, the main thing is that the distance from the edge of the circle to the upper hole.

And from the end of the plank to the bottom hole were the same.

After that, using a jigsaw, you need to cut the grooves to the top and bottom holes.


And then you can round the ends of the plank, although this is not necessary.

The canopy board itself can be lightly sanded and painted or varnished, although this is also not necessary. Well, after that, it remains only to fix the extension block on our canopy.
To do this, you need to disassemble the block into two parts by unscrewing the screws and removing the cover with sockets and terminals.

And at the ends of the rear wall of the block, you need to drill two holes with a diameter of 4 mm, and screw it with small screws to the canopy.


After that, the block can be assembled.

And now our extension with a canopy is ready!

Using a canopy for an extension in work
After that, it can be easily hung on the wall by screwing two screws into it. Moreover, you can hang the extension cord either vertically.
Or horizontally, which seems more convenient to me, especially for an extension cord with a switch.

By the way, this extension cord constantly hangs on my porch wall, near the main outlet.
I must say that this is very convenient, since the main, rather powerful socket is used to connect a large load, for example, electric welding. And in the event that you need to connect several power tools, I just use this extension cord by connecting it to this outlet.

If this extension is needed elsewhere, it can be removed very quickly and then hung back.
So using extension cords with similar canopies is very convenient!
Well, that's all for me! Bye everyone and good luck in the new year!
You are here now — home — All about repair:
When you're going to hang something on the wall, it's not a question at all!
You will need a hammer drill or impact drill. A couple of dowels. Level, hammer, tape measure.
If this is a shelf or a cabinet, then we put it in that place and approximately mark the level of the hole. Well, then it’s quite simple, we measure the distance between the holes on the shelf or cabinet.
We mark under the first hole, take the level - draw, take a tape measure, set the distance. The intersection of a straight line in terms of level and a distance in terms of a roulette will be your second hole!
If there are several shelves or cabinets, then we do this:
We start, either from the extreme right point, or the extreme left point, we drill, hammer in the dowel, tie the thread, level it. In the place where the person holds the thread, it is required to somehow fix it. It is possible to drill and fasten to the dowel only if the hole from the draft dowel is either hidden by a shelf or cabinet.
An ordinary dowel 6 x 40 will withstand a minimum of 50 kg per cut, in a concrete wall. I think that you will not have more than 100 kg in one closet!
Why all this, how to hang a shelf, or how to hang a closet is such a simple operation that it’s even somehow boring!
But here's what I wanted to tell you.
How exactly to hang the first time?
How to hang something, to the holes of which there is no direct access!?
Imagine a situation that you measured, hammered a nail, and did not fit in size, for various reasons, but drilling is already next to impossible!?
Has there been such a situation?
Since I worked a lot at the construction site and as a carpenter and joiner, I had to see a lot!
And often just such a situation turned out to be almost unsolvable the first time!
But there is a way that is ingenious, like all the simplest! And I remembered this method when it became necessary to hang an extension cord!
Hang the extension cable for the computer on the back of the table the first time and exactly in the place where you need it! The top table top extends a little beyond the back panel, so we have a limiter!
We need to make a template.
1. We select self-tapping screws so that they freely fit into the hanger hole.
2. In this case, I had a thin piece of cardboard lying around.
ATTACHING THE EXTENSION CORD
It is more convenient than a simple sheet, because the screws will hold better there.
3. Insert the screws and move them to the extreme point of the hanger,
4. We take a piece of cardboard, and aligning it on one of the sides, we press on the cardboard so that the self-tapping screws appear on our side.
5. We take out the cardboard with self-tapping screws, put it in the place where our object should be, in this case the extension cord.
6. We wrap the screws, tear out the cardboard, adjust the screws in height.
7. We put on the extension cord.
That's what we got, fast, simple, accurate and the first time! The story turned out to be 10 times longer than the process itself!!!

How to hang a router.
Using absolutely the same technology, we will attach the router in the place where it is needed on the back panel, or on the wall, but the first time.
In this case, ordinary paper was used as a template!

Here is our router hanging on the back of the table! Very simply cheap and cheerful!

Before installing electrical wiring in a new apartment or before replacing wiring during a major overhaul, any owner faces a choice of how many and which sockets he needs to install in each room. In modern apartments, sockets are rarely installed one at a time, usually two, three, and in some cases even four electrical sockets are placed side by side. For example, it is better to install 3-4 sockets at a workplace with a computer, otherwise you will not be able to do without an extension cord.
Practice shows that there are never too many outlets. If we need to install two sockets side by side, then we have a choice - to install two single electrical sockets in a two-gang frame or one double electrical socket. The Florence series features double rosettes and multi-gang frames, so both options can be implemented. What to choose?


- Double sockets are designed to instead of one old socket, one double socket could be installed into an existing socket.
Ideas for the home: how to hide the wires
This allows you to double the number of outlets during the redecoration of the apartment. For this, double sockets were developed.
- The price of a double socket is less than the price of two single sockets in a two-gang frame, we will see this on the example of white or beige sockets of the Florence series.
1. Calculation of the price for two single sockets in a two-gang frame
2. Calculation of the price for an alternative option - for a double socket

It is possible to mount the wiring so that powerful electrical appliances are connected to each single socket, i.e. so that a current of up to 16 A flows through each. But for this, it is necessary that the sockets are either powered through two separate lines with cables of the usual cross-section for connecting sockets (2.5 mm2), or powered in series through an oversized cable. As a result, it is possible to ensure that the total maximum current, which can flow through two single electrical outlets would be 32A. This cannot be done by mounting a double electrical outlet.
Summing up, we can say that double sockets are indispensable if we are faced with the task of increasing the number of sockets in pre-installed sockets. This is mainly true when replacing sockets in the process of redecorating, if the wiring is not being replaced with the installation of new socket boxes. Single sockets under a multi-gang frame look more aesthetically pleasing than double sockets and offer more freedom of choice. This option is suitable for an overhaul of an apartment with a replacement of wiring or for arranging an apartment without finishing in a new building.
Content:In everyday life, situations often arise when the available sockets in an apartment or a private house do not allow the use of any electrical appliances or household appliances. The main reason is their inconvenient location, so the owners prefer to use an extension cord. In some cases, increased power outlets or a longer cord are required. In this case, home craftsmen make an extension cord with their own hands. A hand-made extension cord will be much cheaper than a branded one and much more reliable. If you have the skills to work with the tool, the whole procedure takes from 15 minutes to half an hour.
Preparing to assemble the extension
Before making an extension cord, you first need to decide on its purpose. This will determine the possibility of connecting certain devices, as well as the maximum allowable power. These factors have a direct impact on the choice of cable cross-section and other components. All parameters are recommended to be selected with a small margin, so that in the future it will be possible to connect more powerful electrical equipment.
First of all, you need to buy a wire that will be used as a cord. The most optimal option is copper, characterized by increased flexibility. If there is a grounding contact in the socket, the wire must be three-core, and if it is not available, a cable with two cores can be used. At the time of purchase, you should carefully study the labeling of the product.
If the brand "PVA 3 x 1.5" is indicated, this means that the wire is three-core, and the cross section of the core is 1.5 mm. These parameters allow you to connect a load with a power of up to 3.5 kW. For a power of 5 kW, a cross section of 2.5 mm is required. Data for calculations can be taken in a special one, which will greatly speed up the solution of the question of how to make an extension cord with your own hands.
When choosing a cross section, it is necessary to take into account the factor of the length of the conductor. For example, if the cable length is more than 100 meters, then during operation, a voltage drop is possible due to the connection of high power devices. Therefore, it is recommended to choose a cable with a larger cross section than is provided for in the calculation table.

Then you need to choose the right one, which should be collapsible. It is not recommended to purchase products of the "euro" type, if you plan to use sockets of the old design in advance. Otherwise, you will need an additional adapter. On the body of each plug there is a marking with the designation of the maximum current. For example, at 16A you will need a cable with a cross section of 1.5 mm, and for 25A the cross section will be 2.5 mm. If there is grounding, then the plug must have a grounding contact in the design.
The socket is not recommended to be selected in a single version. The socket block should be at least double, and best of all - with three or four elements. When choosing, you need to be very careful not to accidentally buy an overhead structure designed for use with open wiring. It does not have a special clamp that protects against accidental pulling out, and over time, the back cover of such sockets falls out. For extension cords, there are separate options in the form of socket strips or cable sockets. If you want to connect a computer or other office equipment, then in this case a surge protector is made, in which there is a push-button switch and light indication.
After all the materials are prepared, you can begin to assemble the extension cord. This procedure is carried out with a knife, screwdriver and pliers.
How to assemble an electric extension cord with your own hands
At the first stage, the upper insulating layer is removed from both sides of the cable by about 5-7 cm, after which the ends of each core are stripped by 1 cm. Next, the plug is disassembled by unscrewing the mounting bolt. After that, you need to loosen the screws on the clamp that fixes the cable inside the plug housing. Then the stripped wires are connected to two fork contacts.

The location of the conductors does not matter, the most important thing is to correctly connect the grounding contacts on sockets and plugs. After connecting the conductors, the plug is reassembled.
At the final stage, the socket block is disassembled and two cores of conductors are connected to the contacts. The third core is connected to a grounding contact, exactly the same as on the plug. Thus, both ground contacts are connected by a single wire.

If the core consists of many wires, then it is recommended to solder it or. In extreme cases, simple twisting of the wires with pliers is allowed. After all connections, the cable is fixed inside the case and the final assembly of the unit is performed. The finished extension cord is checked by plugging it into a home electrical outlet or using a multimeter.
How to properly operate a homemade extension cord
When using a homemade extension cord, several mandatory requirements must be observed.
- There should not be any damage on the cable, and if they do appear, they must be insulated. Isolation is performed when the extension cord is unplugged.
- If the plug or socket is out of order, they must be replaced. They should be protected from moisture and avoid excessive overloads.
- When operating at maximum loads, the cable must be unwound completely to avoid overheating.
In Ideas for the home: how to hide the wires
Unfortunately, wireless technologies have not yet become commonplace in offices and homes. So, in the near future, a bunch of annoying wires on the table will not go anywhere. I will tell you a few tricks that will help you get rid of the mess and hide the cables from prying eyes.
1. Hide the power strip with chargers in the box
 *
*
An extension cord with chargers constantly gets in the way on the table or under your feet, collects a lot of dust, and it looks unaesthetic. Dealing with this problem is very simple: take a nice box, make a few holes in it and hide all the wires and cables there.
2. Fix the wires under the tabletop

***
To fix the wires and extension cord under the table, you will need binders and screws (they must be at least a quarter less than the thickness of the table top in length, otherwise they will go through and the table will be damaged). First of all, fix the extension under the table top, preferably in the middle of the table or closer to the wall. Then fix the binders in the right places with screws. Connect everything you need to the extension cord and assemble the wires with clamps. Visually, the table has become much cleaner and neater.
There is a simpler option if you do not need to hide a large number of wires. This will require a construction stapler. To prevent the long wire from the lamp from dangling under your feet, carefully fasten it with paper clips at the table leg. A small extension can also be fixed with paper clips. For thicker wires, it is better to use special clamps.

Do you like stapler staples? Regular zip ties will do. Secure the cable to the table leg with cable ties. The wires that run along the floor can be covered with plastic or a plank to match the color of the floor. The extension can be fastened under the tabletop using a wide Velcro: fix it with screws on the back of the tabletop, and then attach the extension. To keep the wires from dangling under the table, run them through cable ducts - these can be purchased at any hardware store. You can fix the channels themselves with electrical tape or a regular plaster.
 *
*
3. Organize cable storage
Getting rid of the confusion in the wires will help their proper organization. To get started, collect cords from phones, a player, a game console, and tablets around the house. Then take the boxes (preferably prettier), place cardboard separators inside them, sign the place for each cable (so as not to get confused later) and lay everything out neatly. To avoid tangling the wires themselves, use ordinary ties.

***
If you don't feel like messing around with boxes, buy a basket and stock up on toilet paper rolls.

4. Keep all the necessary wires close at hand
Not all cables we can hide in a box: we need some of them almost constantly. The solution is simple: mount them on the edge of your desktop so that you can reach out and connect the device to the right wire if necessary.