The usual way of gardening, with its characteristic digging, an excess of pesticides, wintering "bare" soil, depletes and infects the soil. Productivity falls, crops develop poorly, get sick, fruits shrink. A summer resident from the Far East suggested moving away from traditional agriculture and replacing it with natural, restoring soil fertility. Warm beds and Igor Lyadov's amazing garden allow you to increase yields regardless of the condition of the soil, site conditions and the vagaries of the weather.
Advantages of Lyadov's technology
According to Lyadov, the essence of rational truck farming comes down to combining two technologies:
- growing crops on narrow ridges, according to the Meatlider method;
- transition to natural farming.
Lyadov shows the harvest
Where did the ideas come from?
To pay attention to the technology of Mitlider, Igor Lyadov was forced by the plight of his own garden. Plants suffered from an excess of rain moisture characteristic of the Far Eastern climate, lost their taste and benefits after fertilizing with mineral fertilizers, the fruits became smaller, the yield fell from year to year.
Noting that on traditionally wide garden beds (1.5-2 m), only those crops that grew from the edge developed well and resisted diseases, Igor Nikolayevich suggested that their condition was influenced by the access of fresh air, light and space.

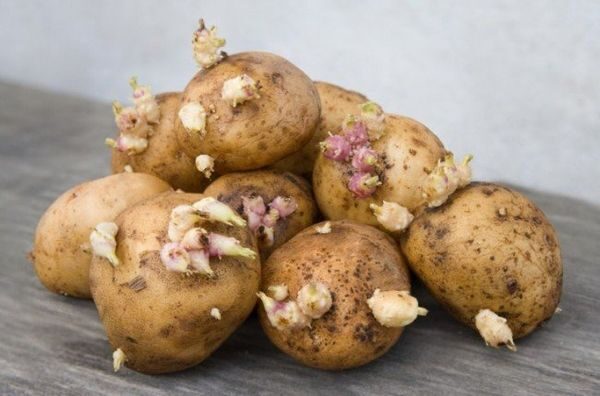
Igor shows his potatoes
This was confirmed by the Meatlider method of vegetable growing in narrow beds (up to 45 cm wide) in combination with wide row spacings (75 cm). But unlike Mitlider, Lyadov raised his ridges above the paths by 15-25 cm in order to get rid of constant flooding, and "wrapped" them in a wooden box. Such a vegetable container had a lot of advantages over an open planting:
- kept the shape of the ridge;
- retained water after watering;
- promoted rational composting of the land;
- prevented the loss of nutrients and carbon dioxide released by bacteria.

Plants are stronger and healthier in tall boxes
Lyadov's own developments
The only thing that Lyadov decided to abandon in favor of the ecological purity of the final product was the use of mineral fertilizers. The beds according to the Lyadov method receive only organic fertilizing based on manure, humus, ash, and herbal infusion.
The width of the Lyadov ridges allows 60-100 cm, and the passages - 60-80 cm. Moreover, the passages do not "walk" idle, but work to increase yields, because, according to scientists, 60% of the culture's nutrition is obtained from the air. If necessary, the ridges can be turned into a greenhouse, providing them with arcs and covering material.
Caring for the vegetable container is not difficult: there is no need to do hilling and autumn digging. It is only necessary to weed occasionally and in the spring, before planting, loosen the soil by 5-7 cm with a hand cultivator in order to knock down the crust.
Thanks to this, according to Lyadov, the garden is also called lazy beds. There is no need for top dressing during the summer. Such a planting is itself a compost heap and excessive diligence can overfeed the plants.
Igor Lyadov's tall beds, thanks to the internal organic "filling" that decomposes and releases heat, can be used for early sowing of heat-loving crops, as well as in areas with short summers and harsh climates. In arid regions, in order to reduce overheating of plants in the sun, the author suggests painting the outer walls of the box with white breathable paint or lime.

Narrow ridges
Pluses of high beds
Natural farming, sparing the soil, protecting it from temperature extremes and loss of nutrients given to plants - that's what Igor Lyadov's warm beds and amazing garden are. The benefits and rationality of this approach to gardening are as follows:
- the ridges will "work" for 5-6 years, not requiring much care, labor-intensive tillage, and a number of manual operations are not needed at all;
- during heavy or prolonged rains, the height saves the root system from damage;
- wide aisles give 100% light and air;
- the absence of mineral fertilizers preserves the purity of the fruits, the fertility of the earth is restored;
- organic matter that provides internal warmth allows early planting;
- the area where Lyadov's smart beds are laid out is clean, tidy (there are no untidy compost heaps, they are hidden in containers) and looks more like a park than a vegetable garden, especially if the aisle is sown with lawn grass;
- thanks to the layer-by-layer filling of nutrient material, the boxes are ready-made compost boxes and when planting, fertilizer does not need to be added to the holes;
- the volume of the harvest is 2 times more than in an ordinary vegetable garden, and the area of the summer cottage for sowing is less occupied;
- moisture is well retained inside the container and it is often not necessary to water crops;
- the structure can "work" for several years without replacing and fertilizing the earth.

Cucumbers don't touch the ground
What is grown in warm beds
Despite the narrowness of the planting area and the absence of mineral fertilizers, Lyadov's beds are ideal for planting any crops: leafy, root, berry (strawberry).
What cultures love height
When growing in raised, narrow beds, it is important to respect the proportions:
- large-fruited (cabbage, pumpkin and others) and bushy (tomatoes, eggplants, peppers) should be planted in two rows in a checkerboard pattern closer to the edge;
- leafy and small-fruited in 3-4 rows (radishes, carrots, beets, garlic, onions, lettuce);

Crops from the beds
Chess seating, according to Igor Nikolaevich, is one of the best geometries, in which plants develop well and are productive. He also noticed that the more light and air around the plants, the better the harvest in the beds. A small landing area with large aisles best meets this requirement. In addition, a small area of land shares organic matter more generously with crops than a large one.
The amazing productivity of Lyadov's beds is due to the correct layering of heterogeneous organic material in the built vegetable container. This "layer cake" gradually decomposes, provides good nutrition and warms up the soil.
To prevent mold and pathogens from developing in this compost heap, constant air exchange is needed. The use of sand helps to solve this issue. They are diluted with loamy and clayey soils, they become lighter and the roots breathe better in them.
Alternating landings depending on age
The beds according to Lyadov can be used for 4-5 years in a row without feeding, and here's what is better to grow on them in accordance with the "age":
- In the first year of the container creation, microorganisms intensively decompose organic raw materials. There is a lot of warmth and nutrition for plants in the soil. Such conditions are ideal for cucumbers, zucchini, pumpkins. In the first two years, it is better to refuse planting beets, radishes and lettuce, as they accumulate nitrates.
- In the second year, you can continue to plant cucumbers, zucchini. There is still a lot of nutrition in the soil. Tomatoes and cabbage are also suitable for planting.
- In the third year, the reserves of organic matter decrease, but they are quite enough for peppers, beans, cabbage, tomato, potatoes, lettuce, carrots and beets. The last two crops are best planted side by side, as they help each other in growth and strengthening.
- In the fourth year, you can still do without additional feeding if you plant crops that are undemanding to nutrition: peas, greens.

Once made, the beds will last for many years
In the future, you can act in two ways:
- Transfer the contents of the vegetable containers to the garden or vegetable garden to improve the structure of the earth. And fill the formwork again.
- Sow the garden with green manure, for example, oats. There is no need to fertilize the soil with rotted manure or to make compost. In autumn, mix oats with soil, it will become the best compost and food for microorganisms.
Do-it-yourself Lyadov's beds
In a nutshell, this is a fence made of any available material, filled with dissimilar organic matter. The geometry and design of Igor Lyadov's high beds can be anything: rectangle, wave, oval, photos will help you choose the best option. The construction of a bed-box will require the cost of boards, nails, paint and time, but this is the only drawback of this vegetable growing technology.

Typical device diagram
Construction of bed-boxes
It is better to start creating a bed-box with your own hands and filling it in the fall. Then, by spring, the earth will sink, due to the work of microorganisms and the debate of tops, foliage, and it is easy to fill it up. The box is assembled without a bottom. Igor Lyadov himself builds his beds from logs and boards. Below is his construction methodology.
- On a flat area, logs are laid at a distance of 60-120 cm (depending on the aridity of the area: the greater the number of hot summer days, the wider the box can be made). The length is arbitrary.
- The logs are fastened with nails. Instead of the bottom, the platform inside the box is covered with cardboard. He will save crops from weeds and pests.

The process of creating a box
The height of the box wall varies from 15 to 30 cm and is chosen depending on the climate: the rainier the summer season or the further north the area, the higher the walls. It is necessary to arrange the bed in a straight line "north-south" so that it gets the maximum sun rays.
A well-known summer resident proposes to fill the paths-aisles with sand or sawdust, cover with roofing material or PVC film, so that they remain clean of dirt and weeds.

Box of boards
Craftsmen improvisation
Wood is not the only material from which summer residents build vegetable containers. Having figured out the question of how to make Lyadov's beds, they improvise from any materials:
- A beautiful and durable alternative to wood would be stone or brick bumpers. These materials are appropriate in any landscape, look impressive and allow you to build a high bed of any shape.
- An inexpensive substitute for wood and brick is plastic sheet. The main thing is to choose an environmentally friendly material.
- A bed of wicker branches looks very original, but it is very short-lived.
- There are options for arranging beds from glass and plastic bottles. Bottles are stacked in rows or lined up with a wall and fastened with cement mortar or rope. An economical option, but plastic is not a durable material.
- As sides, you can use welded together sheets (wide strips) of stainless steel. The option is very durable, durable, but expensive. It is not recommended to use non-stainless steel, since corrosion products will constantly be washed into the ground by rainwater.
- You can make high beds from slate, new or left over from an old building. If you paint the sides in bright colors, it will be rosy and original. This is an economical option, since slate is durable and cheap.

Slate vegetable containers
A variant of a “buried” warm bed is also possible, when organic raw materials are laid in a prepared trench. The elevation above the main ground level for such a planting is small, or it may not be at all.
This option is suitable for areas where melt water does not stagnate in spring, and groundwater does not come close to the surface. It is cheaper to build it (there is no need to purchase materials for the sides), and it is easier to take care of, the deep planting requires less watering.

Disposal of bottles
Filling the ridges
Layer-by-layer laying of dissimilar raw materials in high narrow beds of Igor Lyadov is carried out according to the following scheme:
- The cardboard, which serves as the bottom of the box, is covered with a thin layer of sand. Sand dump will provide drainage.
- A vegetative layer of 1.5-3 cm is spread on the sand from large organic raw materials: branches, heads of corn, tops of tomatoes, potatoes, tree leaves, the remains of a sunflower. This layer will provide top dressing for the crop root systems.
- A fertilizer layer that is formed from various infusions: herbs, manure and promotes the breeding of microorganisms. Infusions are watered with organic matter and covered with earth removed from the rows.
- The earth is covered by 8-10 cm, but not flush with the sides, so that there is a place to mulch Lyadov's organic beds.

Filling scheme
In total, the raised beds contain no more than 30 cm of organic material and thanks to this, the roots of the plants do not overheat, but grow strong and healthy.
Video: How to build tall beds with your own hands
Using a smart vegetable garden saves time and energy, and organic farming, proposed by Igor Lyadov, helps plants to open up and give a person the maximum of their capabilities. On the way to a rich and healthy harvest, it is important to take the right first step: build and fill a tall garden bed. And if you have any doubts, contact the specialists.
A modern person needs a dacha not only to satisfy the peasant's instinct and provide his family with vegetables and fruits, but also as a place to relax from city problems and bustle. And no one doubts that it is always more pleasant to have a rest in a conveniently equipped beautiful territory. The topic of our article is "smart" beds from the point of view of organic farming.
The main goal of organic farming is to preserve and increase soil fertility. And the technology of the device "smart" beds will help us learn how to properly plan and decorate a personal plot.
Beds in organic farming can look different, but the main principle of their formation is to make the most of small areas.

"Smart" paths should be at least 40 centimeters wide - so it will be convenient to walk on them, carry a wheelbarrow, carry water, and so on. The most inconvenient thing in the garden is right angles. Therefore, when laying "smart" beds and "smart" paths, you will have a wide field for experimentation and creativity. You can equip oblique, triangular, radial beds, in this case everything depends on the convenience of their use and maintenance.
"Smart" beds can be raised above the ground or deepened into it, can be "edged" and filled with humus. The height of the raised beds ranges from 20 to 80 centimeters, and the width can be different, it all depends on what is planned to be grown on such a bed.

Organic farming is constantly evolving. Practicing gardeners from year to year improve the methods of creating "smart" beds, come up with various forms and configurations. The main thing here is to understand the basic principles, to understand the essence of the process, and then everything will depend only on your desire and capabilities.
Raised container beds
The vegetable container is a type of raised bed used in organic farming. The width of this structure, as a rule, is about a meter, any length, and the height is from 30-40 cm to 70-80 cm. It is convenient to organize such beds right on the lawn, and decorated with tiled laying they will give your garden a unique design - a kind of flower beds for vegetables ... A trellis for climbing crops can be installed in the center of the bed. Ideally, such a “flowerbed” should be covered with a transparent roof, this will protect vegetables from various diseases.

For the walls of a vegetable container, thin materials (plywood, slate, thin boards, and especially iron) are not suitable, since such a bed will be very hot in hot weather. And you cannot equip it in the shade - there will be no good harvest. In this case, the frame must be made thoroughly, because strong winds can damage it, and the weight of the plants during the fruiting period is not small (50 kg per running meter). It is best to use timber or logs, brick or wild stone.
The lined vegetable container is filled in layers only with organic matter. At the very bottom, you can put rotten large tree branches, shavings, wood chips. Next, a coarse, unripe organic matter is placed, which is watered with bacterial fertilizers to accelerate ripening. We will talk with you in more detail about these fertilizers in the following articles. Unripe organic matter is sprinkled with humus and earth. Further, to the very top, the bed is filled with a layer of ready-made compost. It is important that this layer is not less than 15-20 cm. Sand or earth should not be mixed with the finished compost, from this it becomes compacted and settles. It is not required to loosen such a bed, in the spring you just need to add a layer of ready-made humus on top, and when the planted plants grow up, the soil must be mulched with straw or other suitable materials.

Watering the vegetable container is best done internally. To do this, when laying the beds, you need to evenly dig in several containers with holes (pipes or plastic bottles), which should be filled with water as needed. You can also bury hoses under the humus, wrapped in nylon stockings or other synthetic materials that allow water to pass through. The end of the hose is led out and connected to a water source. The main thing is not to forget to turn off the water after 15-20 minutes, so as not to overmoisten the garden.
A vegetable container is best made with a roof made of transparent materials (plastic wrap, cellular polycarbonate). This, of course, somewhat increases the cost of the structure, however, the roof reliably protects the plants from diseases. There is practically no dew under it, which provokes the appearance and development of late blight, peronospore and other dangerous diseases.

The vegetable container is raised high enough above the ground level, so the soil in it warms up and ripens earlier. Any thermophilic crops in such a bed can be sown earlier than usual. If you correctly calculate the time and location of the plants, then here you can first harvest radishes and watercress, then build a trellis for tomatoes or cucumbers in the middle, and plant beets, onions or carrots in place of the radishes. After collecting the root vegetables in the fall, you can sow the radishes and salad in the vegetable container again.
As you can see, the vegetable container is convenient and beautiful. Such a bed saves space in the garden and allows you to get a harvest of various crops during one season. The large volume of nutrient compost minimizes watering, feeding, weeding and loosening. There are a lot of advantages, however, there are also disadvantages.

You need to build a vegetable container, and you need to find strength, time and money for this. For such a bed, a lot of organic matter is required, which also needs to be taken somewhere and made sure that it is of good quality. These three perceived shortcomings lead to the fact that the vegetable container is not often found in personal plots.
Experienced gardeners, taking the arrangement of the container garden as a basis, came up with simpler and cheaper options, but no less effective and convenient. For example, some crops can be harvested directly on the compost heap. For this, an additional compartment is attached to the place where the compost ripens. In the spring, half-prepared humus that has been lying under the film all winter is thrown into this compartment. You can plant zucchini, cucumbers, pumpkins and tomatoes on such a bed.
Beds-boxes
Raised box beds are very popular among adherents of organic farming due to their ease of arrangement and high efficiency of use.
A box is a stationary bed, the sides for which can be made from available material. In this case, any boards, slate, plywood and the like are suitable. The height of such a bed, as a rule, is 15-20 centimeters, the width is 1-1.2 m, and the length can be made at your discretion. The bed-box is filled with organic matter: a layer of semi-ripe manure or compost is poured onto the bottom, and ready-made high-quality humus is laid on top, with a layer of at least 6-7 cm.

If the box is wide, then the rows can be located both along and across. In order for the plants to receive more sunlight, the rows in such a bed should be arranged in a north-south direction.
In the middle of the bed-box, a trellis is made for climbing crops, such a bed can be covered with a roof. That is, to put it simply, a box is a low container. And its main advantage in this case is the moment that a lot of organic matter is not needed to fill the garden. However, a thin layer of compost quickly loses nutrients and moisture, and in hot weather such a bed should be watered more often. This can be done with a hose, or with buckets from a large container. A sufficiently thick layer of mulch is required to retain moisture. For feeding the crops growing in the box, it is recommended to use various organic fertilizers, which will be described in detail in the following articles.

If the soil on the site is good, then it is not necessary to loosen the box. The earth will loosen under it on its own to a sufficiently large depth (in the first year already twenty centimeters). As we have already found out in the article "Stop destroying the earth by digging and weeding", soil inhabitants - earthworms and bacteria - will be engaged in structuring and loosening. Next spring, you just need to pour a few wheelbarrows of ready-made compost into the garden, and plant vegetables directly into it. If the organic matter is of good quality, then there will be few weeds, and those that appear are removed quite easily.

With the help of a simple frame or wire arcs, the bed-box can be quickly turned into a greenhouse, in which it is convenient to grow seedlings of various crops in the spring.
When using this type of "smart" beds, the main thing is to fertilize them correctly and water them in a timely manner. Then in boxes, as in a vegetable container, three or four crops of different vegetables can be grown per season.
Deep bed trenches
As you have already noticed, our list of "smart" beds is built on the principle - from expensive and productive, to cheap, but no less effective to use. Practicing farmers on their plots combine the advantages of all types of beds, reduce the cost of laying them and adapt them to the conditions of a particular site.
If the groundwater is low enough on the site and it never gets heated, the narrow compost bin can be dug into the ground. Thus, a kind of garden trench is obtained.

The main advantage of recessed beds is that they can be dug right into the virgin soil. To do this, a trench is dug in the sod, two bayonets of a shovel wide and a bayonet deep. The length, as in previous cases (vegetable containers, box beds), depends on your desires and capabilities. Even boards made of boards are not needed here. Half-ripe manure is laid right on the bottom of the trench, and on top is a layer of ready-made compost, at least 6-7 centimeters high.

Tomatoes, cucumbers, peppers, cabbage, beans can be planted on such beds ... After the plants have grown, the trench must be mulched with any available material. We will describe in detail what materials can be used as mulch in the following articles.
In the future, all care will consist in timely watering as needed. And you still have to mow the grass in the aisles with a sickle a couple of times a season. In order not to do this, the aisles can be covered with burlap, and covered with gravel from above - and it is beautiful, and the weed does not grow.

The main advantage of recessed trenches is that they retain moisture remarkably, and the plants grow well here, even with moderate watering. And the main drawback is that you certainly can't get away from the classic gardener's pose when caring for such a bed.
Ornamental garden basics
As already noted, a modern person needs a dacha not only to grow vegetables and fruits. Most people use their vegetable gardens as a family getaway. Let's figure out how to decorate a personal plot without spending a lot of space, effort and time.
Structures such as gazebos, fences, and southern walls can be used to equip garden beds. If the fence is made of mesh, then it itself will be an excellent trellis for tall climbing crops. You just need to dig a trench nearby and fill it with organic matter. This bed is ideal for growing cucumbers and beans. The advantages are obvious - there is no need to build a trellis, and it does not take up space, and flowering plants, with skillful care, are also a wonderful decor.

In the same way, you can surround the gazebo with a trench. In this garden, you can plant various types of decorative pumpkins and beans that bloom with red, white, and even purple flowers (hyacinth beans). A gazebo decorated in this way will become a highlight of your summer cottage and a favorite place for family gatherings. It should be noted that it is not recommended to plant the gazebo with cucumbers, sometimes they get sick and lose their decorative properties.

The southern and eastern walls of various summer cottages are able to warm up well in a day and give the plants reflected light and heat, which contributes to the acceleration of the growth and development of heat-loving crops. Such walls can be an excellent support for cherry tomatoes, and below you can plant attractive-looking cabbage varieties such as kohlrabi and broccoli.
In order to give the backyard a well-groomed look, all the free spaces between the "smart" beds need to be mowed regularly - this will turn the weeds into a motley lawn.
We master the virgin lands
You have become the proud owner of a summer cottage. But here's the bad luck - the land on it has never been cultivated or has been cultivated for a long time, and you do not see any opportunity to grow a crop in the first year, since the development of virgin lands is an unusually time-consuming business. Do not despair, on the contrary, you are in luck - you received a plot with living land and, with a skillful approach and correct processing, you can preserve its fertility for many years. What can you do in order to be able to grow your own crop this season?

Experienced gardeners, in the process of studying and understanding the principles and techniques of organic farming, came up with several ways to use virgin soil for garden beds already in the first year. We have already talked about deepened trench beds.

According to the principle of in-depth beds, you can arrange a place for growing various melons and gourds. You don't even need to dig trenches for this. To set up such a bed right in the sod, it is enough to dig a hole about a meter in diameter and two bayonets deep. We fill the hole as usual - semi-ripe manure will go to the bottom, which can be mixed with coarse immature organic matter. On top, in a layer 6-7 centimeters thick, pour fully ripe humus. In such pits, pumpkins, cucumbers, zucchini, melons and watermelons grow beautifully.
All subsequent care for such a bed will only consist in timely watering. In order to prevent weeds from growing here, the virgin land around must be covered with burlap or some other material (cardboard, old rugs, etc.), and covered with organic mulch (straw, sawdust) on top. Under such a carpet, the weeds will die, and next spring you will only have to loosen the soil with a flat cutter.
Another great way to treat turf easily and efficiently is with a special mulch for virgin land reclamation and weed control. This technique is considered one of the "smartest" techniques used for many years by permaculture gardeners and organists. Its essence is as follows.

At the beginning of May, fresh weeds filled with juice are trampled down - this is a wonderful food for soil organisms. A layer of unripe humus mixed with manure and a small amount of compost are scattered over the weeds. To speed up the process, all this from above can be treated with special bacterial fertilizers. Newspapers and magazines are laid on humus with manure in 2-3 layers; you can use packing cardboard for these purposes. A layer of nutritious organic matter is poured directly onto the paper, 10-15 cm thick (this can be unripe manure and unripe humus). From above, all this "cake" is covered with straw, foliage or hay. With such a coating, paper or cardboard cut off weeds, and a layer of organic matter holds moisture well and provides nutrition.
Of course, you cannot sow seeds on this bed in the first year - therefore, seedlings of large plants (tomato, peppers, eggplants, as well as various melons and gourds) are planted here. They plant in a certain way - they dig up straw and manure a little and pierce a layer of paper with a shovel, and the roots themselves will find their way down. Then watered and again buried with a layer of mulch. If it rains relatively often, then there is practically no need to water such a bed.

The next year, all this "pie" will settle and turn into high-quality compost, the soil will loosen from below, and the happy gardener will have a new fertile and weed-free garden bed. All that remains is that every year add humus - and you can sow whatever your heart desires.
So, let's summarize our conversation about the establishment of organic beds. What do you need to plan and organize a convenient and beautiful personal plot for a long time and without significant time and financial costs? Let's highlight several basic principles:
- we always use the geometry of narrow beds;
- on dry areas, we lower such beds into the ground, and on flooded areas we raise them above the soil surface;
- we fill any beds with organic matter, and later we mulch well;
- we periodically mow down all the paths between the beds to prevent the growth of weeds.

By following all these not very complicated rules, you can not only grow a good harvest, but also turn your garden into a conveniently organized and beautiful place for the whole family to relax.
- bulk earthen structures raised above the ground, intended for planting and growing herbaceous plants. They are used in garden plots for garden crops and for planting flowers.
Pros and cons
An elevated piece of land has a number of advantages and disadvantages:
| pros | Minuses |
| No shedding of the side walls of the soil, with protected structures by means of partitions. | Soil moisture escapes faster through the side walls made of "breathing" material, as a result of which the frequency and volume of irrigation must be increased. |
| Regardless of the soil on the site, you can use purchased black soil. | Periodic costs are required for the purchase of black soil. |
| Creation of a favorable climate for plant growth, - elevation above the general ground level significantly reduces the risk of cold damage during the frost period. In addition, the garden bed can be easily protected from external influences by covering it with a tarpaulin or covering material. | The limited interaction with the total mass of the land forces an increase in the use of mineral fertilizers. |
| An earlier period of growing crops - in the spring, snow melts earlier, the soil warms up faster. | There is a risk of insect breeding, which will harm the planted plants. |
| The possibility of creating a greenhouse or mini-greenhouse, which are dismantled with the onset of the warm season. | At the initial stage of creating high beds, you have to bear material costs and make additional physical efforts to create a land structure. |
| Good drainage to optimize watering and soil moisture. Due to this, there is no risk of waterlogged soil, moss growth, and plant rotting. | Restriction on plant assortment - not all plants tolerate an open, blown area. |
| Deep digging of the soil is carried out 1 time in 3-4 calendar years. The rest of the time, shallow loosening is sufficient. | |
| Convenience when working with low-growing plants, this is especially important for the elderly or those with disabilities. | |
| Getting a higher yield compared to traditional plant growing methods. | |
| The high ground level reduces the physical effort required when cultivating the soil, tending green spaces, and harvesting crops - for example, you can use a folding chair. | |
| Optimal layout of the garden area. | |
| Creation of beds with an unusual shape and design. |
From the above comparative data, it can be seen that the idea of high beds has a right to life. Measures aimed at reducing negative factors will contribute to this.
How to eliminate the cons?
Ways to reduce negative factors:
- The increased use of organic fertilizers contributes to a decrease in the amount of mineral fertilizers applied to an elevated plot of land:
- bird droppings, manure from cattle, the creation of tinctures on their basis for liquid feeding;
- the use of ash from burning wood in stoves or fireplaces;
- creating a compost pit on the site for processing residues from plants and human food, which will reduce the amount of purchased black soil;
- use of sludge from a septic tank.
- To reduce dependence on watering, the device of "drip" mode will help: such designs can be found in abundance on the Internet.
- Reducing material costs required when creating high beds contributes to:
- the use of materials left over from the construction of a country house or arrangement of a fence, for example, or corrugated board;
- the use of industrial substandard material, which is sold at significant discounts;
- remnants of construction products that appear during the demolition of dilapidated housing, or in other similar cases.
- The appearance of harmful insects and weeds can be avoided by preliminary soil preparation:
- chemical treatment,
- removing the roots.
Views
High beds differ from each other in several ways:
- geometric dimensions - length, width and height above the general level of the site;
- finishing of the side walls.
Wooden

Wooden high beds
Wood material is used as side support walls:
- boards;
- plywood of moisture resistant grades, for example, OSB-3;
- log structure;
- materials with the presence of wood, for example, sheets of wood concrete (wood concrete) - a mixture of cement and shavings;
- twigs from the vine.
Main advantage of this material - its availability and ease of processing. But common deciduous (birch, aspen) and coniferous (pine) varieties of wood are prone to rotting, they are sharpened by bugs. The use of resistant species, for example, larch, is associated with its higher cost and difficulty in processing. But this type of wood improves its properties over time (part of the old Venice rests on Siberian larch to this day).
Plastic

For fencing, products made of dense plastics are used:
- plexiglass;
- , including cellular;
- corrugated board made of polymers;
- plastic pipes, for example, used for sewerage devices with a diameter of 100-200 mm;
- container, - plastic boxes with perforated walls.
Dignity- plastic belongs to "eternal" materials, does not rot, does not decompose, is resistant to water and the effects of bacteria and insects.
But in winter it becomes fragile, therefore, during this period of the year, it requires careful handling.
Easy to machine, easy to install. Plastic products come in a variety of colors, which helps to decorate the garden area.
Metallic

For the construction of an earth embankment, finished products and semi-finished products are used:
- galvanized metal sheet, for example, going to the roof;
- corrugated board and other metal products.
Basic requirement for metal- absence of corrosion, therefore, in the absence of protection, it is necessary to take measures to cover the surface of the products with anticorrosive compounds. Externally, the beds can be made in a classic rectangular shape or given a designer look - to simulate an oval structure, reminiscent of a large bath.
In addition to the above materials, slate sheets, bricks, concrete products, gabions and many other products that fall under the requirements for earthen embankment fences are widely used.
Technology
Before considering the technology of a high bed device, you must familiarize yourself with a number of rules.
Creation rules
Requirements for the beds are necessary for proper placement on the site, they must take into account local climatic conditions, the range of plants grown.
- The sizes of the beds. The length of the embankment is limited by the size of the site and ease of passage. Hence: the optimal range is 2–5 m. The width is up to 1–1.2 m, a large value will create inconvenience when processing the middle part. The height of the structure should not exceed 1 m, otherwise it will also create problems with plant maintenance and will require significant costs when using purchased soil. The minimum level is 25-30 cm, - determined by the climate and the size of the fence available "at hand".
- The soil. The meaning of creating high beds is to increase fruiting and quickening of the harvest. Chernozem is one of the components. Therefore, saving on the quality of land means spending your efforts, time and finances in vain.
- Location. The abundance of sunlight is one of the keys to the normal growth of plants and their fruiting. It is advisable to arrange the beds in open, unshaded places. But you should take into account the general layout of the site - not to the detriment of other plants and outbuildings.
- Fencing material. You should not chase ultra-modern products - the boards left over from the formwork, or old bricks will fully fulfill the functions of the enclosing walls. And money will be saved.
- Protection of green spaces. Most of the country is located in difficult climatic conditions, in which frosts are not uncommon at the beginning and end of summer. To reduce the risks of damage to plants by cold air, a pre-assembled protection system, for example, a construction for a greenhouse, will help.
Earthen embankment device
Stages of work:

Landing planning
It is advisable to arrange high beds in late summer or early autumn - this will contribute to additional overheating of organic matter and the creation of its own local microflora. If it is necessary to create a planting site in spring or summer, if possible, the soil must be filled up at least 1 month before planting plant material.
Most of the vegetable, berry and flower crops can be grown on elevated land plots. Moreover, they can be successfully placed on the same fenced area. For example, cold-resistant ones: radishes, green onions, lettuce, can be planted around heat-loving ones - in the summer all these plants will be comfortable, and tomatoes will receive additional protection when the air temperature drops.
Berry and vegetable crops on such raised embankments, under favorable temperature conditions and timely watering, ripen 1-2 weeks earlier, so it is necessary not to miss the harvest time, otherwise it will begin to rot and simply disappear.
You can appreciate the advantage of tall beds even on one initial experience - it is enough to start with simple crops - onions, radishes, carrots and gradually expand the experience that has appeared to other plants.
At the request of many of my friends, I will tell you how I grow vegetables.

I work, so I can go to the summer cottage only on weekends. At the same time, you need to rest after a week of work, eat a barbecue, take a steam bath, and do a little work on the ground. Currently, there are several problems in horticulture: soil fertility is declining. The earth becomes dense, depleted and gray in color. A drop in fertility leads to a decrease in the harvest.

The use of mineral fertilizers and pesticides leads to contamination of soil, water, air and food, which leads to human diseases. Traditional agricultural techniques used by most gardeners are very laborious. And this reduces interest in gardening among young people.

Nevertheless, all these problems can be easily solved if Natural is used instead of traditional farming. Such agricultural technology not only preserves, it also restores soil fertility. The consequence is an increase in the yield of horticultural crops. Mineral fertilizers are not used, which preserves the purity of Nature and preserves human health. A number of gardening operations in natural agricultural technology are used less frequently than in traditional ones. And some are completely absent from it. All this reduces the labor intensity of land cultivation and plant care.

In my opinion, it is more important to return to nature and forget the postulate that the soil should be stuffed with fertilizers, torn with shovels and sprinkled with pesticides. Natural farming is, first of all, gentle tillage, protecting it from temperature extremes, returning nutrients that the land has generously given to the plants.

Every spring, when we come to our summer cottage, we sow or plant vegetables in our beds. The size of the beds is from 1.4 meters to 2 meters wide, the paths between them are from 20 cm to 40 cm maximum. This is called the traditional way of planting vegetables in the garden. The plant in such beds, especially in the middle, often gets sick, is subject to decay, it does not develop well, the vegetables are small, they are not stored for a long time. But for pests, a weakened plant and good nutrition, and offspring can be laid near it. To weed, to process such beds is one torment.
But on such a bed, I saw one positive side. The extreme plants, relative to those located in the middle, looked more worthy. The larger ones are not susceptible to disease and are convenient to weed, thin out, etc.

I also thought about one more factor. A single tree along the alleys within the city, no one feeds it, the foliage that it throws off, and then they try to remove it for appearance and beauty. Although this foliage could serve as a tree feeding. So how does this tree exist and where does it get its nourishment? In recent years, scientists have found that about 60% of the plant takes its food from the air. It's interesting, of course.

The unpredictability of our Far Eastern climate, high temperature fluctuations, night and day, dry or rainy summers, excessive precipitation by the end of August and the beginning of September confirmed the methods of growing vegetables that I have chosen over many years of trial and error. I came to the conclusion that we need to look for another method that is less time consuming, but at the same time with the ability to get higher yields. I have combined two technologies.
1. "Narrow ridges - a unique technology of vegetable growing for small areas."
2. "Agrotechnics of natural farming".

I have become firmly convinced that it is organic matter that can reveal all the possibilities of plants, saving time and energy. Only on good compost can one see and evaluate the quality of Western and domestic varieties: most of them are created for organic soil. I am sure: we cannot get away from organic matter. All in all, business: learning how to compost and also arrange stationary beds - once for many years.
Vegetable growing on narrow ridges was developed by J. Meatlider in the 70s of the last century and brought by the author to Russia in 1989.
But blind copying of techniques and advice, even the best, will lead nowhere. There must be a creative approach to understanding the biological laws of the culture itself, and the processes occurring during its cultivation. Meatlider has one drawback (this is my opinion) when using mineral fertilizers, the taste of the fruit is unnatural. To fix this, instead of mineral dressings, I use humus, ash, manure, herbal infusion, etc. (I am a supporter of organic fertilizers). I am for a clean ecological product.
But one should not perceive mineral fertilizer as a poison. The only thing is to keep the dose. It is better not to feed the plant than to overfeed it.

For which I am especially grateful to J. Meatlider - for the development of narrow beds. Although Meatlider does not recommend putting the box on narrow beds, I did put together boxes. Nature itself told me this. In the spring, many suburban areas are flooded, the water does not have time to drain, there is water in the passages. We have the same problem in late August and early September - it rains day and night. And in the middle of summer it can rain for 2 - 3 days, or it can fill the whole garden in half an hour.
Therefore, raising the bed 15-25 cm above the path solves this problem. The width of the ridge is 60 - 100 cm, the length is arbitrary. The gap between the beds is 60 - 80 cm. It only seems that the earth in the aisles is walking without benefit. It is the passages that work, and how!

A vegetable container is a high bed, the walls of which are made of bricks, logs, beams, boards, stone, slate ... The beds stretch from north to south. The passages between them can be covered with sand, sawdust, roofing felt, etc. I preferred the lawn, which I cut once a month with a trimmer. I covered some passages with sawdust. The beauty of the garden leaves no one indifferent. There are no weeds, the site is clean and beautiful.

Box - the box is filled with organic matter. Plant residues (grass, straw, foliage) are put down, then compost or manure, or spill with herbal infusions and the like; the top layer is filled with earth from the aisles. Thus, the box is filled.
Each bed is 2 rows of vegetables, planted along the edges in a checkerboard pattern between the vegetables. In this geometry, a huge reserve of productivity is hidden, it has long been noticed: the extreme plant develops almost twice as well as those in the middle - they have much more light and space for growth. And here - all the plants are extreme. A wide aisle is needed in order to give them light and space. A small area of organic matter gives more than a large area of soil. Anyone who has worked on narrow ridges for at least one season is convinced of the enormous possibilities of this method and simply cannot return to traditional technology. Working on the ridges, a person experiences joy not only from a good harvest, but also from the very process of growing vegetables.

The beauty of the vegetable garden, which looks more like a park, leaves no one indifferent. There are no weeds, the site is clean and beautiful.

In two rows in a checkerboard pattern, I plant cabbage, eggplants, peppers, tomatoes, etc.
In four or three rows, I plant onions, garlic, beets, salads, radishes, carrots, etc.
Disadvantages Requires material costs in the first year for the construction of the garden. This tiny flaw makes the container inaccessible to most summer residents.

Such a bed works for several years, one might say forever (to replenish it with waste, plant residues, foliage, etc.). After digging, sow green manure. When planting, you do not need to add compost or rotted manure to the hole. Such a bed is itself compost.
The humus is not washed out, since the garden bed is fenced. According to many agronomists, 60 - 80% of the plant is fed from the air, therefore large passages play a significant role in the biological process of the plant. The culture receives good light and sufficient air flow.

About 30% of the plant is fed from the ground. Naturally, the consumption of organic and mineral fertilizers on a narrow bed is 2 times less than a standard bed. At the same time, you will get a much higher yield from a narrow bed. I've tested this for several years and you can see it in my photos.
Contains a large amount of nutrients, moisture reserve.

Watering is convenient.
No stagnant water.
Does not require hilling.
Does not require weeding - if the bed is mulched.
Does not require digging, only loosening by 7 - 10 cm.
You can plant early, since the beds in the spring warm up faster than usual.
In narrow beds, it is easy to rotate. Where you planted onions last year, this year you can plant carrots or cabbage. The beds are all the same width.
The yield increases by 100% or more.
Tubers, root crops are clean with no visible signs of disease.
Beautiful and easy to work with.
Takes up a minimum of space, does not create dirt and clutter.

It is very convenient to make a shelter with plastic arches, which are sold in seed stores. We put 2 pegs on both sides of the bed and put an arc on them. The distance between the arcs is about a meter. Depending on the length of the bed, you set the required number of arcs. Covering material or film can be used over the arcs until the threat of frost has passed.

This system of narrow beds allows me to get consistently high yields, independent of the vagaries of the weather and the conditions of the site itself.


Isn't it great? And this is even considering that Igor lives in the Khabarovsk Territory, in Komsomolsk-on-Amur!
And we are told the zone of risky farming, the zone of risky farming :)) 
Creation of a bed-box.
At the request of many of my friends, I will tell you how I make a garden. A vegetable container is a high bed, the walls of which are made of bricks, logs, beams, boards, stone, slate. The beds stretch from north to south.
In the photo you will see the bed is made of logs. The logs remained after the houses were dismantled, they were not taken into construction, since the core rotted away, but they will go for the garden.
We prepare a flat area.

We lay the logs firmly in the ground, you can even deepen it a little. Width from 80 - 120 cm, it all depends on climatic conditions, the hotter, the wider the bed.

The length is arbitrary.

We knock down the logs between ourselves with nails or screws.

I put cardboard on the bottom so that a perennial weed does not develop ...

... as well as pests such as beetles, wireworms, etc.


We put coarse plant residues of corn, sunflower, etc.

Moreover, it is necessary to paint or whitewash. Water-based paint for facades is now on sale. This is so that the sun does not heat the earth and insects will gnaw less, and most importantly, the beauty of the garden.

Then I put the plant residues of other crops, carrots, cabbage, potato tops, tomato, etc. Whether they are infected with diseases or not. Effective microorganisms will process all sores. You can not lay down a perennial weed. I don't use Baikal and the like.


Igor Lyadov uses 4 types of top dressing tinctures

1. I believe that every farmer can independently prepare microbial preparations for themselves, almost as diverse in composition as the EO crops sold, but from their own local microbes adapted to the climate and soil, which will be more environmentally competent and practical.

We offer a practical, simple and cheap way to restore soil fertility and increase plant productivity. Considering that the main component of EO is yeast and lactic acid bacteria, which are already enough in the soil and around us, we suggest using ordinary sugar-yeast mash as a ferment for organic infusions.
The infusion is being prepared. A 200-liter container (barrel) contains:
- shovel of wood or grass ash;
- half a bucket of manure or dung;
- a bucket of rotten straw or leaf litter;
- a shovel of humus, compost or just garden soil;
- a shovel of sand;
- a liter of whey or yogurt;
- 3 liters of mash!
The brew is prepared as follows: 5 tbsp is taken for 3 liters of non-chlorinated water. tablespoons of sugar and a pinch of yeast. It wanders for 2-3 days, then it is added to the general tank. Before use, store the mash in the refrigerator - it is valuable until it sours.
In the common tank, the whole bodyag is infused for a week. Sometimes it should be mixed. When used, the infusion is diluted at least twice. (Yuri Slashchinin)

2. In a 200 liter barrel I put 2/3 of the barrel of weed grass. (you can add ash 2 shovels). I fill it with water, cover it with a film on top. It is insisted for two weeks. When using the infusion, I dilute 1 to 10.

3. I put fresh manure into a 200 liter barrel, 1/3 of the barrel. I fill it with water. It is insisted for two weeks. When using the infusion, I dilute 1 to 10.

4. I put chicken droppings in a 200 liter barrel, 1/3 of the barrel. I fill it with water. It is insisted for two weeks. When using the infusion, I dilute 1 to 20.


Growing potatoes in Dutch is a technique that takes into account every little thing. When planting using this technology, up to 250-300 kg of tubers are harvested from one hundred square meters.
Dutch technology provides potatoes:
- sufficient warmth;
- oxygen supply to the roots;
- fertilizers.
How many technologies for growing potatoes are there
In addition to traditional and Dutch cultivation, there are other new methods: Chinese; technology developed by the doctor of agricultural sciences Jacob Mitlider from the USA; the method of Galina Aleksandrovna Kizima, who spent her childhood in a working village in the South Urals.
Which varieties are suitable
The varieties from Holland are immune to diseases, they are high-yielding, but they are not not suitable for planting in the north of Russia... It is better to plant domestic zoned varieties there, adapted for home conditions.
It is required to plant early and late potatoes in the country.
Suitable Dutch potato varieties:
- Anosta- early. The tubers are yellow, even. The pulp is creamy. Potatoes are immune to nematodes.
- Red Scarlett- early. The tubers are scarlet, the flesh is snow-white, does not change color when cooked.
- - early variety. It is planted in the Central regions of Russia and in the Siberian Federal District. It takes 50 days from germination to harvest.
- Jarl- early. Unpretentious in care, they are planted even in depleted lands.
- Prior- early. He has immunity to viral diseases, nematodes, late blight.
- - medium early. The tubers are pinkish, the flesh is snow-white. Immune to late blight.
- Monaliza- medium early. It is immune to all diseases.
- - mid-season. The tubers are yellow, the flesh is creamy. Resistant to mechanical damage.
- Eba- medium late. Immune to viral diseases. Tubers are yellowish.
Domestic varieties:
- - mid-early variety. Immune to nematodes, cancer, scab, mosaic and other diseases. But its minus - the tubers are stored at a temperature of about 0 degrees, otherwise they will germinate.
- ... It is immune to disease. It tastes great, but there is very little starch in the tubers, so it does not boil over. You can collect 600 kg of potatoes from a hundred square meters.
- - early variety. It is immune to all diseases. The tubers are yellowish, the flesh is snow-white.
- Zdabytak- late grade. Immune to diseases. There is a large amount of starch in tubers.
Is this method suitable for growing potatoes in the country
Potatoes are grown in the fields, using technology, and in summer cottages, doing all the operations by hand.
Technology detail
What is the Dutch way
- For growing tubers, varieties from Holland are taken, immune to diseases, in which a large number of tubers grow. And in the northern regions of Russia, domestic zoned varieties are planted. Select required only healthy tubers... Change the varieties you planted.
- Tuber crops are selected with 3-5 cm in diameter, with 100% germination.
- According to the planting scheme, 1 m2 is planted 6-8 tubers... It seems to the Russian gardener that with such a planting, the land is empty in vain, but according to this technology, the bushes grow sprawling, they have powerful roots, and the harvest is greater than with the traditional planting method.
- The Dutch also feed potatoes, taking into account the needs of this variety.
- It is required to spud and sprinkle combs with a height of 10 cm.
- The crop must be harvested on time. If you need seed, then the potatoes are dug up a month earlier than the tubers intended for consumption.
Selection and preparation of seed material
For planting, even healthy tubers are chosen. diameter 3-5 cm, best varietal.
Potatoes, which are smaller in size, should not be chosen, since the grown bushes will be very weak. Larger potatoes are only planted if the harvest is from their own seeds. Each selected tuber has 5 eyes.
A month before planting, potatoes are germinated. Potatoes are planted when the sprouts at the eyes are 0.5 cm, but this is for mechanized planting.
It is required to choose the right planting time so that the sprouts do not die from return frosts. The tubers are carefully placed in polyethylene bags with handles, when the sprouts are 0.5 cm high. So it is convenient to transport the potatoes to the place of disembarkation. For planting by hand, they wait until the sprouts, placed in plastic bags, grow to 2.5-3 cm.
Land cultivation before planting
Potatoes will be less sore and less affected by pests if planted in one place every 3 years... It is required to give the soil a rest and not plant anything at all for 1 year, but mow the weeds. If you do not have this opportunity, then plant tubers in the place where beans, peas, oats, rye grew before.
Phosphorus, potassium, nitrogen are scattered on a flat place in the fall and the soil is dug to a depth of 22-27 cm.
If you have a slope, then in the fall, do not dig up the soil and do not put top dressing, since in the spring the flood will wash away all the nutrients.
Care

- In the spring they dig up the soil, make holes 6-8 cm deep... The distance between the rows is kept at 75 cm, and between the holes - 30 cm.But such a long distance has its advantages:
- The soil for hilling is poured from the aisles, because of this, the tubers are located above the aisles. The ridges are well illuminated by the rays of the sun, and oxygen is supplied to the root system.
- The cross-sectional area of the ridge is 1200-1500 cm².
- With heavy rains, the water does not stagnate under the bushes, as it is in the aisles;
- In case of heat and no rain, there is enough moisture in the ridge so that the potatoes do not die from drought to rain or watering.
- Rotted manure or humus is first put into the hole.
- Then add 100 g of ash and a handful of crushed egg shells, as well as a little onion husk, which will scare away the wireworm and slugs.
- Tubers placed in the wells sprouts up and sprinkle with soil.
- If you see weeds growing, pull them out.
- When sprouting sprouts, spud them so that the ridges have a height of 10 cm.
- If there is a threat of frost, then young shoots are sprinkled with soil, and tall shoots are bent and sprinkled with earth. When the weather is warm again, the bushes are raised and poured with water from a watering can.
- 14 days after planting, weeds are pulled out, and the soil from the rows sprinkled with sprouts so that the ridges become about 25 cm high, the width of the ridges at the base is 75 cm, and at the top - 30 cm.
- When Colorado beetles attack, the bushes are sprayed with insecticides.
- If there is a drought, then the bushes are watered 1-3 times per season (1-2 times before the buds bloom, once - when the flowers bloom).
When and how to harvest
Mow the tops first, then dig out the bushes after 10 days.
Then the peel will be strong, and the potatoes will be able to lie for a longer amount of time without spoiling.
That is, growing potatoes in the Dutch way is planting tubers at a distance of 30 cm, observing a distance between rows of 70 cm. This is also poured high ridges and taking into account the need for potatoes in fertilizers.