As a rule, we throw away kitchen appliances that no longer function. Take, for example, a blender that's already out of date; there really is no other way for it but to be sent to the trash can. However, don't throw this broken blender away!
This DIY project is for you if you think throwing away broken equipment is useless waste. In the video below, you will learn how to use an old blender and remake it to become a decent drill or even an engraver!
The blender motor is powerful enough to handle light drilling and engraving jobs, so instead of throwing away your blender, why not repurpose it so you can still use it for your future projects? Watch Evgeny Budilov's video and how he successfully turned his old kitchen blender into another useful tool.
Don't throw away the blender! Repurposing old products at home is one way to save money, in addition to reducing waste in the environment and giving you an extra tool to use at home.
The video below shows how you can turn an unnecessary blender into a mini electric drill or engraver. Many thanks to the creator of the video "Evgeny Budilov".


In this video, you'll see how an old blender can make a decent engraver, drill, or hand-drilled machine tool. As shown, the engine power is sufficient for processing wood, plastics and soft metal. RPM indicators are nothing more than good ... Budilov
We decided to make squash caviar. The question arose, how to grind zucchini?
Blender too small and weak for such tasks, and a meat grinder is not able to grind into a homogeneous paste.
Small lumps remain, and the caviar turns out to be, as it were, grainy. Therefore, I decided to make a large and powerful blender out of a drill, which every DIYer has.
The design is so simple that it does not require any drawings and is done literally on the knee.


Materials and tools
- Drill. (every DIYer has it);
- PVC pipe 50 mm (plumbing store);
- PVC pipe plug 50 mm. (same place)
- Chrome metal tube with a diameter of 16 mm (furniture store);
- Plastic dowels 14 and 8 mm. (building materials store);
- Self-tapping screws 16 mm with a wide head (ibid.);
- M8 and M6 screws. (in the same place);
- Cutting knife blades (household goods);
- Clamp 50 mm (ibid.);
- Empty tin can (trash can)

Making a blender
The blender consists of 3 knots.1 - drive, 2 - housing, 3 - knife shaft.
Since an ordinary drill acts as a drive, we will consider the remaining 2 nodes.
Making a knife shaft
Since the most time consuming is the knife shaft, we will start with it.The most optimal solution is to cut an M6 internal thread to a depth of 20 mm in one end of a 9 mm diameter bar. Unfortunately, not everyone has access to a lathe (you can do it without a lathe, but it's troublesome), therefore there is a second, very technological option. At the end of a steel tube with a diameter of 10 mm. hammer in a plastic dowel with a diameter of 8 mm. And screw the M6 screw with knives into it. But I have never seen steel tubes with a diameter of 10 mm on sale anywhere. Therefore, those for whom the first and second options are unacceptable choose the third. This is using a 16mm tube that can be bought at any furniture hardware store. You should buy with the thickest walls. For they are different ...
A 14 mm dowel is driven into one end of this tube. and the next 8 mm dowel is driven into this dowel and 8 mm into the dowel. screw M6 is screwed in. Since it is impossible to clamp a 16 mm tube directly in the chuck of an ordinary drill, in the opposite end, we also hammer a 14 mm dowel into which an M8 screw is screwed. Leave the 30 mm protruding screw for the clamp in the drill chuck, cut off the rest. Only in this version it is necessary to take into account that the optimal length of the knife shaft (without the knives and the part that is clamped in the chuck) is 100 mm, and the length of the dowel 14 mm is 80 mm.
it makes sense to shorten the dowels to 50 mm.


With the tube sorted out, now - fastening the knives. On an M6 screw with a wide flat head, we put on through washers (I used 2 washers between each knives) 4 blades for a mounting knife, broken off to the desired length. Place the knives crosswise and tighten with a nut. We screw this screw with knives into an 8 mm dowel. It is screwed in very tightly, but it holds securely. So, the knife shaft is ready.


Manufacturing of the case
The body is made of PVC pipe with a diameter of 50 mm, a plug for this pipe, and a tin can. And another clamp.
Cut off the thickening for the rubber cuff from the pipe socket, since it is not needed.
Next, take a suitable shallow empty tin can and drill a 1 - 2 mm hole in the center of the bottom. larger than the diameter of the cutter shaft. We drill the same hole in the center of the plug. Along the perimeter of the can, we drill several holes with a diameter of 10 - 12 mm for the exit of the ground mass (It is much more convenient to drill holes in a can with feather drills on wood). We combine a can with a plug, and fasten it with self-tapping screws.


We put a pipe on the plug and also fix it with self-tapping screws. In order for the pipe to fit tightly onto the plug, several turns of electrical tape should be wound on the latter.

We measure the length of the knife shaft fixed in the chuck, and adjust the body to this size. In the upper part we make 2 slots 30 mm deep.

Since the inner diameter of the pipe is slightly larger than the diameter of the drill neck, a gasket is needed, which we will make from the remainder of the same pipe. We cut off a ring with a height of 20 mm and from this ring we cut out a section of 15 mm. We glue the ring on the inside of the extension cord so that it does not get lost.
We glue on one point so that there is a possibility of squeezing. Next, we apply an extension cord to the drill neck (or simply measure it with a ruler, which is somewhat more accurate :), mark the location of the key hole on it, and drill it with a 20 mm drill.

The body is ready.
By the way, I forgot to write. If there is no suitable empty tin can at home, you can replace it with any suitable lid, or use a 100 mm pipe plug. Which will look much more "firm" :)

We put the body on the drill, until it is completely secured, insert the knife shaft into the pre-spread cams, turn the body until the key hole on the body coincides with the socket on the chuck, tighten the shaft with a wrench, and finally secure the body with a clamp.
Everything. As the saying goes, the design does not require adjustment and starts working immediately when it is turned on.

It also grinds potatoes for potato pancakes into a homogeneous mass, which previously had to be manually ground on the smallest grater, because the meat grinder leaves lumps, apples for applesauce, crushes nuts for cookies and much more.
P.S. Since I had a steel tube with a diameter of 10 mm, which I cut off from another leaked heated towel rail before throwing it out, I used the second option in the manufacture of the knife shaft.

This review is dedicated to those who do not like to throw away their work items. It seems that some nonsense has broken, but the thing has become partially operational and can no longer perform the main function. A new thing is bought, and the broken one is removed on the back burner until better times (desire to repair, think of something) ... This review is about how to make an almost dremel out of a blender.
Story: My mother-in-law had a Ufesa blender. Like that. 
He served faithfully for several years, until one day she decided to make mashed potatoes with it. And this could not be done for this blender model, since the adapter sleeve from the motor to the knife shaft is made of plastic. Due to the temperature, this clutch simply turned and stopped transmitting rotation. The motor is working, and the knives do not rotate. The nozzle is non-separable. 
The clutch was removed from the shaft and I went to the repair shops looking for a replacement. As it turned out, they do not make such spare parts, do not repair such malfunctions, and generally advised to buy a new one, since such a model is no longer produced. So a new blender appeared ... And the broken one went to the bins to await its fate, where it could be adapted ...
And then one day, wandering through the vastness of aliexpress in the DIY sections, I came across such cartridges for motors. This chuck allows you to clamp drills from 0.3 to 4 mm. 
Adapters for different shaft diameters were also sold there.
Bingo! The diameter of the motor shaft was measured and a chuck with an adapter for the shaft of 5mm was ordered.
After a while, I received an envelope with a chuck, key, hexagon and adapter. 
Now it was the patient's turn.
From the outside, no attachment is visible, I had to start with the button. 
The button is held on latches. In attempts to remove the button, the push rod of the button itself was broken. However, in the future it will not be useful to us. 
Under the button was the only torx fixing screw. 
The screw was unscrewed with an ordinary flat screwdriver and the cover was removed. When removed, it turned out that there were still two plastic hinges at the outlet ... 
The inclusion was carried out in this way. The button stem pressed on the spring-loaded contact, when 220V was closed, it was fed to the control circuit and the motor was turned on. 
Such a button is not very convenient when working with a dremel, you need to keep it pressed constantly. Therefore, we will replace the button with a rocker switch.
Let's mark the hole for it. 
A hole is cut and the edges are processed. 
The button is soldered from the board. 
and solder the switch on the wires. 
The final trigger. 
The motor itself can be pulled out of the clamping contacts without problems. 
IMPORTANT Remember which side the motor is installed. If you install the motor on the other side (by turning the motor around the rotation axis by 180 degrees), the contacts will change and the motor will rotate in the other direction.
If anyone needs such functionality, then it is enough to install a toggle switch that changes these contacts. 
Output shaft close-up. 
It remains to fix the adapter on the shaft. 
insert the sleeve with buttons. It is possible not to return this sleeve with buttons to its place, then through the holes for the buttons there will be access to the screws that secure the adapter on the shaft. But I thought that it looks more aesthetically pleasing with closed holes. 
And put the cartridge itself on the adapter.
We close the case. 
Due to the shape of the case, such a dremel cannot be fixed on the table, just hold it in your hands. However, I also have a regular dremel with anchoring.
Runout test according to the method from the comments.
At this point, let me finish the story. I plan to buy +30 Add to favourites I liked the review +134 +190
From time to time, even the strongest and most independent woman who does not like to cook wants to feel like a real cook.
Inspiration for culinary feats can overtake a woman at any time, the absence of a mixer should not prevent her from accomplishing them.
As a rule, such a desire is not limited to simple scrambled eggs, you certainly want something like that. For example, to make a breathtaking bizet, but, as evil, there was no mixer at hand, without which it is simply impossible to whip the protein properly. Sudden creativity shouldn't be overwhelmed by the lack of a mixer. Self-made mixers can be for the kitchen, for children or for construction.
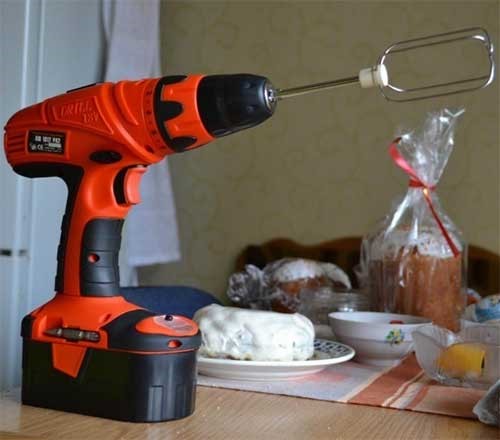
If there is a whisk, then an ordinary drill can save the situation.
Homemade Kitchen Mixer
Quite by ourselves. For this you will need:
- First of all, you need to get a motor. It has to be powerful enough to handle the egg white; we won't talk about foods with a harder consistency for now. A suitable motor can be obtained from an old cassette player, for example.
- Tin. Everything is simpler here, you can cut off a piece from a can of any drink.
- Plastic jar lid.
- A pair of plastic cups.
- You will also need a switch.
- The power supply unit is selected depending on the power of the motor.
- And of course, all this will be tinkering with a regular screwdriver.

One of the motor options
Capacity and drive
It's time to get started. We start with a glass, in which you need to make a small hole. To do this, we heat the metal end of the screwdriver with matches or a lighter, then with the heated tip we make a hole right in the center of the bottom of the glass.
Next, we place a motor in the center of the glass and draw a marker around its edges, marking in this way where it will be located. While the engine moves to the side and manipulations with the glass continue. That is, it is clear that the mixer body is assembled first.
Now you need to cut a hole along the lines marked with a marker with a clerical knife at the bottom of the glass, into which the motor will be placed. The motor should fit snugly in the hole and not fall out, so the hole should be slightly smaller than the motor.

This motor will be more than enough
Nutrition and communication
Now you need to prepare a place for the switch and wiring. If the power supply has two wires, then one is attached to the switch and the other to the motor. Then the switch and gearbox are connected together using a piece of copper wire.
Thus, a kind of mixer body is obtained. In order not to worry that the structure will fall apart, you can fix the motor and switch with superglue.
Screw
Let's move on to the second step. A tin is needed to make a screw. To do this, we put a thin piece cut off from the can, fold it into a ring, and wrap the resulting ring in the middle with the second piece of the same kind, so that in the end we get a figure resembling a butterfly. We got the screw, now we put a silicone nozzle on it with glue, which will be put on the pin.
While the tin is set aside until the glue is dry. We return again to the body with the motor. Place the glass with the cut side down. Here you need a second glass, in which a hole has already been made in advance with a screwdriver. It must be installed on top of the motor. The result is a design in the form of a cup on a stand. In the center of the glass, a pin, about a centimeter long, pre-glued to the motor is placed.
During this time, the glue on the screw should have dried completely. We attach it to the pin. Done, now you can try. Put the necessary ingredients in a glass with a screw, cover with a plastic lid for mixing without splashes, and turn on the mixer.
Homemade doll mixer
Every child enters the age when he wants to be like an adult, necessary, responsible, to do the same as adults, girls in this period often copy the behavior of mothers, and boys, fathers. The child shows interest in household chores, including seeking to help parents in the kitchen. However, not all household appliances can be allowed to children. For example, a mixer, this is not a safe toy at all and improper operation can lead to tragic consequences.
You can get out of this situation so that the child is satisfied and the parents are calm. Namely, build your own mixer for him. For this you will need:
- Plastic tube.
- Electric motor.
- Any two wiring.
- Batteries or portable power supply.
- USB cable
- Small switch.
It will not be difficult to make such a simple device, and the child will be satisfied not only with the result, but also with the assembly process itself. And an adult will enjoy creating something with his own hands from improvised means, you can feel like the host of the program "Crazy Hands".
So, to begin with, the switch is glued with a silicone gun or superglue to the motor. Next, we take a USB cable, cut off one side of it to free the wiring, clean the rubberized base from the wiring by about two centimeters. There should be two wiring. We connect one to the motor, the other to the switch. After that, the switch and the engine are connected with a copper wire. It is better to secure the wiring with a soldering iron, but if you do not have one at hand, then you can simply tighten them properly.

Children love when something is done especially for them, he and this will appreciate more than the most expensive toy.
Now it's the turn of the straws for drinks, we cut it into two pieces 6 centimeters long. We glue them well together along. A motor is attached to the lower part of the connected tubes. While the glue dries, grab the stirring element. To do this, you need a simple lollipop stick. A quarter of the stick must be bent in such a way that the letter "G" is obtained from the stick. With an even tip we attach the stick to the pin at the base of the mixer. Ready. We connect the USB cable to a portable battery or any other power source and press the switch. Such a miniature of the mixer will perfectly cope with mixing tea or eggs, and there will be no limit to the delight of the child.
DIY construction mixer
The repair process is very laborious and sometimes you can't keep track of everything. For example, you need to mix a concrete solution, now everything is bought and ready, when it suddenly turns out that the construction mixer is out of order or it was not there at all. How to be in such a situation? Run to the store? But extra spending can not always be foreseen, and there may simply not be funds for such a purchase. You can get out of the situation by making a concrete mixer yourself. For such a mixer you will need:
- Drill.
- Hairpin 8, 40 cm long.
- Four metal plates.
- Nuts and washers.
So, work begins with a hairpin. It must be turned in such a way that it is convenient to screw on the nut. On the other hand, you need to grind the hairpin under the triangle. This is necessary in order to properly attach it to the drill.
Next, we take on the plates. With an 8 mm drill, you need to make one more hole from the edge on each. Now you can proceed to the assembly of the mixer. A nut, washer, then platinum is installed on the length of the stud. The distance should be at least three centimeters. The top and bottom plates need to be bent like blades.

It should look something like this
The second end of the hairpin is attached to the drill, that's it, the construction mixer is ready. However, this type of home-made construction mixers will only handle small volumes of mortars.

Such a mixer will not master large volumes of work.

For stirring more liquid substances, for example, paints, this option is also suitable.
For a large amount of mortar, you will need a concrete mixer, which you can also make yourself, but this will take much more time and materials, so that it will be easier to borrow from friends or use the rental services. Moreover, such a device is more beneficial when completely independent than requiring constant supervision. In this case, it is better to choose the gravitational method of mixing the solution.

An example of a concrete mixer made by yourself
The main thing to remember is that when assembling any mixer, you must observe safety precautions, and if you are not confident in your abilities, then it is better not to undertake such painstaking work, but to go to the store and buy a worthy product.
How to make a blender with your hands

You, budgetary (angle grinders), simply called a grinder, they do not have adjustable electronic modules in their design, where the engine speed controller is not a soft start. The owners of such grinders after a while begin to understand that their absence dramatically reduces the functionality of the tool. Here they refine the angle grinder by installing home-made devices on its surface.
What is the speed regulator and soft start for?
When power is applied to the grinder motor, abrupt increase in revs from zero to ten thousand no more. Those who worked with the angle grinder know well that it is sometimes difficult to keep it in the palm of their hand when starting up, especially if it is installed.
It is because of such abrupt increases in engine speed that the mechanics of the apparatus burns out.
Also, in starting, a huge load is applied to the rotor winding, not the stator of the electric motor. Since a collector motor is installed in the grinder, it starts working in the mode: the electromagnetic field is already “trying” to turn the rotor, but it remains motionless for a couple of months, since the inertial force does not allow it to be done. As a result, the starting current in the motor coils rises sharply. Despite the fact that the manufacturer has invested a certain margin of safety for the coils, taking into account the overload at start, sooner or later the insulation does not withstand, which leads to an interturn short circuit.

In addition to launch problems, the absence causes some discomfort. Nettle, grinder speed regulator can come in handy for certain types of work:
- when grinding, as it is also called polishing any surfaces;
- for installing large diameter tools;
- for cutting some materials.
Today, with tacks, there is a high probability of wire jamming in any gap. If the spindle speed was high, then the grinder can simply be pulled out of the hands.
If you connect a power (speed) regulator with a soft start module to the angle grinder, then the above-described problems will disappear for ours, the device will increase, the safety of its use will not increase.
Homemade regulator circuit
Read the same
One of the most popular schemes for a grinder engine with the ability to adjust the speed is presented below.

The basis of this regulator is the KR118PM1 microcircuit, and in addition, the triacs, which are the power part of the device. Using this scheme, you can make a power regulator on your own, even without special knowledge in electronics. The main thing is that you know how to use a soldering iron.
This block works like this.
- After pressing the start button of the unit, the electric current begins to flow, first of all, to the microcircuit (DA1).
- The control capacitor begins to charge smoothly after a couple of weeks, gaining the required voltage value. Therefore, the opening of the thyristors in the microcircuit occurs with some delay... Like oil, it depends on the time it takes to fully charge the capacitor.
- Since the VS1 triac is located on microcircuits operating under the thermistors, it opens just as smoothly.
How to make a BLENDER with your own hands
rework drill into drive blender.
The above processes occur in periods that are reduced each time. Therefore, the voltage supplied to the motor windings does not grow abruptly, but slowly, as a result of which the grinder starts smoothly.
The capacity of the capacitor C2 determines the time for the electric motor to reach full speed. The capacitor capacity of forty seven microfarads allows the engine to start in two seconds. When the angle grinder is turned off, the capacitor C1 is discharged using the sixty kΩ resistor R1 in three seconds, after which this electronic module is again ready to start.
If you replace the resistor R1 with a variable, then you get a speed controller, which will reduce the engine speed.
It is important that the VS1 triac has the following characteristics:
- the minimum current strength for which it is designed should be twenty five A;
- the triac must be rated for a maximum voltage of four hundred V.
This circuit and the regulators made according to it have been repeatedly tested by many craftsmen on grinders with a power up to two thousand watts... It is worth noting that this device, thanks to the KR118PM1 microcircuit, is designed for a power of up to five thousand watts. So it has a considerable margin of safety.
Ideally, to solder for the grinder, you will need to draw a printed circuit board, etch the contacts with acid and then plunge them, and solder the radio components. But everything can be made easier:
- solder all the details of the circuit by weight, that is, leg to leg;
- attach a radiator to the triac (can be made from sheet aluminum).
The regulator welded in this way will take up less space, and it can be easily placed in the grinder body.
How to connect a regulator to a grinder
No special knowledge is required to connect a homemade power regulator, and any home craftsman will cope with this task. The module is installed break one wire through which the power goes to the grinder. That is, one wire remains intact, and the regulator is soldered into the gap of the second.
Read the same
In the same way, you can connect a factory power regulator worth about one ruble, which is often purchased by craftsmen in China.
If there is very little space in the grinder, then the regulator can be placed outside the instrument as shown in the following photo.

Also, the regulator can be placed in an outlet and used to reduce the speed not only of the grinder, but also of other electrical appliances (drills, sharpeners, milling or woodworking, etc.). This is done as follows.
- Purchase from an electrical store junction box(suitable with dimensions 65x65x50 mm).

- You should also buy a small outdoor socket and a power cord with an electrical plug.

- Drill a hole in the side wall of the junction box to insert the variable resistor regulator.
- A factory regulator board or homemade device is placed inside the junction box. Any protruding parts in the box that interfere with installation can be cut off.

- The socket should be fixed on the cover of the junction box, having previously pulled the wires inside the latter.

- In the picture above, you can see that the wires of the network cable touch the radiator, which heats up during operation. Therefore, it is wearing a PVC tube. But it is better if you drill a hole for the network cable in a different place so that it does not come into contact with the heatsink.
The regulator is connected as described above - at a break in one of the wires of the supply cable.
The following photos show how the finished outlet will look like, which has a built-in grinder speed regulator, which can be used for other electrical appliances.


Instead of a junction box, you can use any plastic case suitable size. You can also make the box yourself by gluing the pieces of plastic with a glue gun.
Read the same
What homemade products can be made from the Ural chainsaw Homemade products from the Ural chainsaw testify to its enormous abilities. Made in the beginning as a tool for sawing wood, like oil, coupled with additional attachments that the industry produces, it became functional. But the master craftsmen never cease to amaze themselves ...