One of the most common and popular vegetables are cucumbers. Many vegetable growers grow them on their plots. There are various ways to grow this vegetable. However, most often, when growing cucumbers, so-called trellises are used. This device is installed in the garden bed and bushes are tied to it. Before growing vegetables, you need to find out how to make a cucumber trellis with your own hands.
Supporting cucumbers greatly simplifies their cultivation and improves yield. If the bushes are tied to the structure, they will have virtually no contact with the ground and will not be able to become infected with infectious spores on the ground.
You can use supports for cucumbers in open ground and in greenhouses. The main advantages of their use include the following:
- The use of a trellis for cucumbers saves the used land area several times. A bed with cucumber supports takes up much less space. At the same time, sometimes it contains even more bushes than during conventional cultivation.
- With the help of such a device, the risk of disease is reduced. During cultivation, contact of leaves and stems with the ground is minimized. It is thanks to this that the likelihood of powdery mildew or peronosporosis is reduced.
- Using a support for cucumbers, you can speed up the growing season. All tied cucumbers receive much more heat and light, thanks to this the bushes develop much faster.
- Using supports for cucumber bushes increases yield. Many gardeners who grow cucumbers using this method claim that they manage to harvest more than 50 kg of fruit from 3-4 square meters.
- Tiled plants are much easier to care for. When the stem begins to weave, processing and harvesting are greatly simplified.
How to make an iron trellis
Many vegetable growers use metal structures when growing cucumbers. To make a trellis for cucumbers with your own hands, you will have to make drawings with measurements in advance and prepare the following tools and materials:
- wire;
- shovel;
- hammer;
- sharp knife;
- welding machine;
- strong twine or hose;
- roulette;
- several iron stakes;
- two metal stands, the height of which should be about two meters.
To create a support from scrap materials, you need to transfer all the prepared tools to a greenhouse or vegetable garden. Then, iron posts are dug into the bed with planted cucumbers. They must be dug into the ground 40-50 cm so that in the future the created structure will be strong and stable. When installing the pillars, holes are made, 20-30 cm deep. The pillars are placed in them, which are driven into the ground another 20 cm using a hammer. After this, all the holes are filled with soil and thoroughly compacted.
When all the columns for gartering cucumbers are installed, a special crossbar can be placed on them. It is attached using screws or welding. Also, it is necessary to install iron stakes along the beds. They should be located at a distance of 20-30 cm from each other.
At the final stage of creating the trellis, twine is stretched at the dacha. To do this, you need to tie a string to the last peg and pull it up. It is tied to the crossbar and then lowered down to the peg, which is located on the opposite side. This procedure should be repeated with each peg located on the site.
Some vegetable growers use iron wire instead of twine to create a garter net. This allows for a more durable structure.
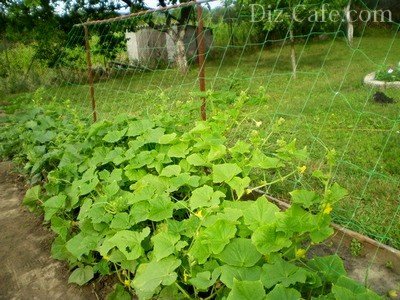
When the cucumbers grow and begin to curl, the resulting trellis will look like a hut or other similar shelter.

How to make a wood trellis correctly
Some gardeners make mounts for cucumber bushes from wood. To make a support for cucumbers in a polycarbonate greenhouse or outside, you need to prepare:
- bayonet shovel;
- nails;
- leg-split;
- wire;
- 3-4 wooden crossbars at least 90 cm long;
- 3-4 wooden blocks about three meters long;
- bar 3-4 meters long.
The technology for installing such a trellis for cucumbers is quite simple. First you need to prepare the area where the frame will be located. Three deep holes are created at a distance of 2-3 meters from each other, into which wooden pillars will be dug. In each of the holes made, in a vertical position, bars are placed. They are driven into the ground with a hammer and covered with earth. After this, a crossbar is attached to each block so that the resulting support resembles a T-shaped canopy.
The resulting T-shaped structures should be connected. To do this, a wide strip is attached to them using nails. After this, the frame for tying climbing cucumbers will be ready. A metal wire must be attached to the horizontal bars. To do this, one part of it is fixed to the outermost bar and stretches along the row to the outermost bar, located on the other side of the bed. Some vegetable growers stretch not one, but several wires at once so that the bushes braid better. When all the wires are installed, twine is attached to them, with the help of which a lattice is created for tying the bushes.
Sometimes, support structures that resemble a hut or have the shape of a wigwam are created using bicycle tires. To create this design you will need the following materials:
- two bicycle rims;
- wire with cord;
- shovel;
- fittings 2-3 meters long;
- 5-10 bricks.
To learn more about the simplest way to create such a support, you need to familiarize yourself with the process of its manufacture. First you need to prepare the rims. During their preparation, you should get rid of all the knitting needles, as they will not be needed. After this, a garden bed is made in the area that will be planted with cucumbers in the future. Its width should be 20 cm greater than the diameter of the wheel.

A small hole is made in the center of the created bed, the depth of which should be about 40 cm. Reinforcement is dug into it, after which the hole is filled with soil and compacted well. For greater reliability, you can dig several bricks on the sides of the rod.
After this, the first rim is passed through the reinforcement and lies on the ground. Then, a second rim is attached to the top using wire. The result will be a structure that will consist of reinforcement, at the edges of which there are bicycle rims. Now you can start attaching the thread. It is passed through the holes from the spokes in the lower rim and attached to the upper one.
This procedure is repeated about 20-30 times until there are free holes for the knitting needles.
When the support is created, young cucumber seedlings can be planted. In summer, mature bushes climb much better and a support overgrown with cucumbers will look very similar to a cabinet.

How to tie cucumbers
Tying greenhouse cucumbers to a trellis is quite simple. For this, it is recommended to use fabric strips 3-5 cm wide. If you tie the stems to supports with ordinary threads or wire, the bushes can be accidentally damaged.
Additional fastening ropes are often used when young bushes are not yet weaving on their own. In this case, the stem is tied to the bottom of the trellises using a strip of fabric tied under the second or first leaf. Over time, they will begin to fasten on their own and ropes will no longer be needed.
Conclusion
Quite often, when growing cucumbers, a pergola or other trellis supports are used. To make such a stand for cucumbers, you need to become more familiar with the features of creating trellises.
A trellis is a gardening device made of wooden pegs or metal rods installed vertically. A metal wire, fishing line or plastic mesh is stretched between them. It serves to form shoots of climbing crops. A trellis for cucumbers, which is easy to make with your own hands, will increase the yield and ensure uniform exposure of all plants to sunlight. This is due to the fact that the crop in question will branch upward, closer to the sun. The structure can be installed both in open ground and in a greenhouse.
The trellis allows the cucumbers to reach towards the sun
Advantages of growing plants using a trellis method
The main advantage of trellis growing cucumber crops is the correct formation of shoots and increased yield. It also increases the length of the growing season and makes the most efficient use of the planting area. Growing cucumbers in a trellis way ensures optimal air and light flow in the greenhouse and on the ground. By following cultivation technology, you can get from 10 sq.m to 150 kg of healthy and beautiful fruits.
With this method of planting, only a small amount of condensation appears on the leaves below, the influence of changes in daily temperature conditions on the plant is reduced, and the soil surface between the rows remains free throughout the growing season. It greatly simplifies the care of fruits, which do not fall or spread on the ground, remain clean, and do not rot. Cucumbers remain constantly visible, which allows you to determine their ripening in time.
In addition to accelerating the formation of plants and their maturation, the trellis method makes harvesting easier. With tied plants, the risk of injury and stem breaking is minimized. Trellis can be installed on any vertical surface using stretched fishing line and twine. In a greenhouse it will be practical and convenient, and in the open ground it will play an additional decorative function.

The trellis makes caring for bushes and harvesting easier
Design features
The trellis structure can have various types, in the form of a square, trapezoid, triangle. The main materials for its manufacture are metal reinforcement, wooden stakes, concrete pillars or other improvised means similar to them. An elementary device is to build a trellis with your own hands from twine or PVC mesh.
Mount two posts along the edges of the beds, about 1500 mm high. Another beam is installed on top of them. It will act as a support for the twine thread or mesh.
This will prevent the structure from sagging during fruiting. On both sides of the bed, stakes are driven in, onto which the mesh, previously wrapped around the main posts, is fixed.

Trellis for cucumbers in the form of a triangle
Wooden trellis
To make a wooden trellis structure with your own hands, it will take 2-3 hours. They erect it before the first seedlings appear. You must first decide on the shape of the device. It must be remembered that the outer pillars are placed stronger than additional stakes, since they will take on the main load. For example, for a trellis building 3 m high, you should select bars for the outer supports with a cross-section of at least 50 mm, and for safety bars - at least 35 mm.
If the construction is planned for several years, it is better to take durable types of wood (oak, chestnut, ash). Soft and rotting trees are not suitable. To increase the service life of wooden parts, it is advisable to treat the lower parts in contact with the ground with an antiseptic.
Step-by-step instruction:
- Installation of supports. The posts are driven into the ground along the edge of the proposed bed at a distance of 1.7-2 meters. The depth of digging of pillars should be at least half a meter.
- Giving the desired angle. The outer anchor posts are installed obliquely, maintaining a slope of about 70 degrees. The structure should be securely fixed using guy wires, attaching them to durable metal or other elements.
- Frame. The horizontal beam is attached to the vertical posts using nails. A sheathing of thinner bars will be fixed on it.
- Lathing. Slats 30-40 mm wide are attached to the supporting frame with self-tapping screws or nails. The fastening scheme is reduced to ensuring that the cucumbers in the trellis have cells measuring 150 mm.
If the structure is mounted in a greenhouse, its height and further possibility of movement for planting and crop control should be taken into account. The mesh for the trellis is attached to brackets; they are simply made from bent nails. Then all that remains is to simply pull the main rope and threads vertically. To obtain a mesh, they are first intertwined with a transverse bandage, the remaining edges are tied to stakes driven into the ground.

Trellis for cucumbers made of wood can have a variety of shapes
Making a metal trellis with your own hands
It is possible to make a trellis structure from metal reinforcement in open ground and greenhouses. The following equipment will be required:
- Reinforcing rods 2 m long, cross-section from 8 to 14 mm.
- A thin tube that will serve as a crossbar.
- Metal stakes, welding.
- Drill, hammer, steel wire.
On both sides of the site, two tubes are dug into the ground to a depth of about 400 mm. After installing the rods in the hole, they are additionally driven in with a hammer to enhance the strength of the structure. Using welding, fix the horizontal tube. The formation of the entire trellis is carried out according to the principle of a wooden structure.
A metal trellis must be primed or painted to avoid corrosion processes.

Metal rods can be installed in the form of arches
Alternative option
The trellis can be made from tractor tires and available tools. The original design is suitable for any variety of cucumbers, as well as for planting them in open ground or in a greenhouse. To create a device with your own hands, you will need a tire from a large vehicle, a bicycle rim, burlap, twine or wire.
The tire is cut one way and placed on the intended landing site. In its inner part, a pair of rods is inserted crosswise to form an arc convex outward. Soil is poured into the tire, covered with burlap, the edges of which are tucked under the bottom of the tire. For cucumbers, holes are made in the trellis by cutting them out of burlap.
After planting the selected variety of seedlings, the trellis is covered with polyethylene or other similar material (not necessary in a greenhouse). During loosening or irrigation, the film is raised.
After the seedlings reach a height of 300 mm, the top covering and burlap are removed. A post is installed in the center of the tire, on which the bicycle rim is mounted horizontally. By pulling the garter thread towards it from the bottom, the final version of the trellis is formed. In principle, it is not difficult to make such a design with your own hands.

Trellis for cucumbers made from tires
Preparing seeds and soil
In a greenhouse and in open ground, soil preparation for planting cucumbers should be carried out in the fall. Phosphate, potassium, and nitrogen fertilizers are added to it in the proportions recommended in the instructions for use. The land is fertilized with organic components in the form of compost or manure.
The soil is dug up, not covered for the winter, and channels are prepared to collect and retain moisture. With the onset of spring, the surface is loosened. Then the area is divided into squares for the installation of trellises. Having installed the main pillars, the soil is loosened again. Before planting the selected variety of cucumbers, stretch several rows of wire or twine. The bottom row should be approximately 150-200 mm from the ground, and the top row should be at the height of the trellis posts (1,800-2,000 mm). Next, prepare furrows 100-130 mm deep.
As a rule, when growing climbing varieties of cucumbers in a greenhouse and in open ground using a trellis method, the seedless method is used. Before planting, the seeds are calibrated in a saline (3%) solution for several minutes. This allows you to screen out hollow and undeveloped samples. The seeds are washed and treated in a boron-manganese solution for 12-15 hours. This stimulates disease resistance, development and formation of healthy fruits.
Next, the planting material is dried under natural conditions. Seeds are sown in early May. Ready seedlings are planted at the end of the last spring month, when the soil temperature does not drop below 8 degrees, even at night. Before planting, the hole must be well watered. The density between plants is allowed about 4-5 pieces per 1 square meter.
To reduce the risk of disease, it is preferable to water cucumbers along the furrows rather than irrigate from above. After the formation of a couple of mature leaves, a twine or thread is pulled near each plant, slightly twisting the shoots around it to ensure the correct formation of the bush and give direction to growth.
It is worth noting that growing cucumbers on a trellis has many advantages. Firstly, they do not get dirty or wet. Secondly, they are convenient to process and assemble. Finally, the fruits receive even daylight and create an aesthetically pleasing structure.
Building a trellis with your own hands is absolutely not difficult. All you need to do is stock up on some simple materials, find a couple of hours of time, and you will get a structure that will make it easier to grow cucumbers, ensuring high yields. The construction of a trellis structure is quite possible and without any costs from scrap materials.
They are allowed to spread freely on the ground, but this method of cultivation inevitably leads to a decrease in yield and a deterioration in the quality of the greens. In greenhouses, due to the limited space, the unsupported method of growing cucumbers is generally unacceptable, therefore the arrangement of trellises in such structures turns from a recommended measure into an urgently necessary one. Today, trellises of various sizes and shapes are sold in specialized gardening centers, however, in order to save money, you can make supports with your own hands from improvised materials, the quality and reliability of which is not inferior to purchased structures.
In addition to the above-mentioned savings in the usable area of the greenhouse, the use of trellises when growing cucumbers:
- allows you to achieve the best illumination for plants, which in turn leads to an increase in the productivity of bushes and accelerated ripening of gherkins;
- simplifies the care of cucumber vines and facilitates the process of harvesting fruits;
- extends the growing season of plants and reduces the risk of their disease with powdery mildew and brown spot;
- minimizes the risk of breaking the lashes;
- improves the presentation of fruits that do not touch the soil, and therefore do not rot and remain clean even after heavy watering;
- neutralizes the harmful effects of temperature changes and prevents the formation of condensation on the lower leaves of cucumber bushes;
- provides a good overview of the plants, which allows pickers to promptly and without misses remove from the bushes all greens that have reached marketable condition.
Design features of homemade cucumber trellises
To tie cucumbers, structures with vertical or inclined working supports are used. Depending on the number of load-bearing elements, such trellises are divided into general and individual.

Materials for making trellises
As a rule, several dozen cucumber vines are placed on the trellis. In order for the structure frame to withstand such a load, it should be made of durable materials - thick, 10-14 mm steel reinforcement, metal pipes or wooden beams with a cross-section of about 5 cm.
Advice. In order for the structure to serve for a long time, use hardwood rather than pine for its construction. Before assembling the frame, treat the beams with drying oil. If you have chosen metal pipes as a building material, coat them with an anti-corrosion primer.
In addition to the frame, to arrange the trellis you need supporting elements along which the cucumber vines will climb. The fastest and easiest way to solve the problem with supports is to install a factory-made PVC mesh purchased at a gardening store, but it costs a lot, and it sags over time, so it makes sense to use durable and cheap construction twine or soft flexible wire instead.
Construction of a trellis from wooden beams: instructions plus advice from professionals
To build a wooden trellis you will need:
- beams 3-3.2 m long with a cross-section of 50 mm for edge pillars, and 35-40 mm for intermediate ones. The number of beams depends on the length of the beds, because they should be driven into the ground at intervals of 1.7-2 m;
- a long metal pipe, a steel rod or several beams for the crossbar;
- shovel, hammer, drill and hacksaw;
- nails, screws, metal corners or staples for fastening the crossbar;
- spool of construction twine;
- iron pegs with heads bent into a ring.
 Installation of trellis
 Operating procedure
- Dig or drill holes at two edges of the cucumber bed and install the main support pillars in them. If the distance between the main supports exceeds 2 m, drive intermediate posts into the ground to increase the strength of the frame.
Attention! To prevent the cucumber trellis from one day collapsing under the weight of the vines and the fruits ripening on them, all supports of the structure should be buried in the ground by at least 0.5 m, and the edge posts by the full 80 cm!
- Carefully compact the soil around the supports and level their length, i.e. if any post rises above the rest, cut off the excess on it.
- Place the crossbar on the supports and secure it with brackets or metal corners.
- Drive pegs with rings into the ground under the supports.
Attention! As a rule, for cucumbers in greenhouses, a two-line planting scheme is used with a distance between rows of 40-45 cm, and between bushes in a row - 20-30 cm. In accordance with these parameters, install the stakes, that is, place them in two rows, separated by 20 cm in either direction from the projection of the crossbar onto the ground.
- Stretch twine over the trellis frame. To do this, tie the end of the string to the first peg, throw a roll of twine over the crossbar and wrap it around it once for security, then lower the bobbin to the ground, cut the string with a margin and attach it to the starting peg from the opposite row.
- Using the method described above, stretch the twine along the entire trellis.
The construction of a simple trellis is not difficult even for a summer resident inexperienced in such matters. By spending a few hours building such a structure, you will not only make your future work in the greenhouse easier, but you will also receive a significant increase in yield.
DIY cucumber trellis: video
Cucumbers are climbing plants and love sunlight. Therefore, you definitely need to be able to make supports for them on which they will grow
ADVANTAGES OF GROWING CUCUMBERS ON A TRELLE
Of course, you can grow cucumbers in the usual way, but the use of special supports on which they can easily climb is much more effective in terms of yield. In addition, the use of trellises has the following advantages:
- Cucumber bushes suffer much less from pests and infections, since microbes and fungi usually do not get above 10-15 cm.
- Fruits and leaves do not rot from lying on wet ground, since cucumbers and tops mostly hang in the air and are blown from all sides.
- The soil surface area is significantly saved in contrast to growing without a frame.
- The growth processes of a bush proceed faster if it does not lie on the ground, but is in the air. This is due to the fact that on the ground the tops are more sensitive to changes in temperature and humidity than in the air.
- The collected fruits do not get dirty with soil and can be eaten immediately.
- Caring for the crop is also easier, since it is more convenient to spray and water hanging bushes than those spreading on the ground.
Any equipment for maintaining cucumber bushes and other crops can be purchased at the store. However, making stands yourself has a number of advantages:
- This option will be much cheaper.
- You can adapt the frame specifically to the characteristics of your garden bed and the required number of bushes.
- By making the frame yourself, you can gain good experience that will be useful on the farm.
FEATURES OF GROWING CUCUMBERS ON A TRELLE NET
The benefits of a support for cucumbers are obvious, and at the same time it is not difficult to make even from scrap materials. Therefore, various structures in garden beds can be found in many summer cottages. One of the support options is a trellis mesh. To grow cucumbers on it and get high yields, you need to take into account a few simple rules:
- Rows of cucumbers should be placed in an east-west direction, since in this case the crop will receive the greatest amount of sunlight.
- The mesh usually consists of three rows, each of which is secured to posts, with the posts spaced 4-5 meters apart. It is enough to put them in height up to 1.4-5-2 m.
- If you plan to make a long net for a large garden bed, then in the middle you need to place a support (for example, a strong branch), which will prevent the net from sagging under the weight of tops and fruits.
- It is better to leave the interval between the wires at least half a meter. The fact is that the more freely the leaves grow, the more sunlight they will receive, and accordingly, the faster they will grow and bear fruit.
- The last wire is fixed along the upper edges of the posts (at a height of 2 meters), since cucumber bushes, as a rule, do not grow higher. In addition, harvesting from higher supports will be difficult.
- Seedlings with cucumbers should be planted exactly under the net in rows, and approximately 0.4-0.5 meters should be left between the bushes for freer growth of the crop.
- How to make a wooden trellis for cucumbers
- Any structure consists of load-bearing parts and intermediate supports with wires or meshes stretched between them. The use of wooden sticks and beams to construct a support has its advantages:
- wood is an accessible and inexpensive material;
- wooden elements can be easily fastened together with ordinary tools (hammer, nails, screwdriver, self-tapping screws);
- finally, the tree slowly heats up in the open sun and just as slowly gives off its heat to the cucumber bushes in the evening and night hours, which helps create a favorable microclimate for the crop.
- The sequence of actions for building your own wooden trellis will be something like this:
- Determine a place in the garden bed for support posts - usually they are located clearly in the corners.
- Dig support posts in the corners to a depth of at least half a meter, as well as in the space between them (about every 2 meters), if the bed is long enough.
- Next, you need to ensure that the supports are slightly tilted away from the bed, since as the bushes grow, they will begin to lean towards the center of the bed.
- Secure the supports to each other using strong metal wire, which should be stretched as tightly as possible between the posts.
- Next, the frame is made, for which a long horizontal transverse stick is taken and nailed into the supports to the maximum height. You need to make sure that it runs parallel to the ground.
- Finally, the frame lathing is done. To do this, you will need small slats up to 3 cm thick. They are screwed to the supports using self-tapping screws at intervals of approximately 17-20 cm from each other.
- If you plan to use the trellis for a long time, it is better to treat it with a special protective varnish against the effects of precipitation.
- Making an arch from a metal meshMetal as a material for a trellis is inferior to wood in some properties. However, it has one significant advantage - durability, which is ensured by the following features:
- the metal is resistant to moisture and precipitation;
- the metal is resistant to chemicals and fertilizers that will be used to treat the crop;
- the metal structure is more durable, it does not split or deteriorate under the constant influence of the weight of cucumber bushes.
- wooden boards of various sizes;
- hammer, nails, screws, screwdrivers.

- The algorithm of actions is as follows:
- First of all, you need to make a base for the arch, thanks to which it will stand firmly and not move apart due to the elastic force of the mesh. For this, 2 wooden boxes are constructed from wide boards. You can fasten them into a rectangle using nails or self-tapping screws. They will look the same because they are placed along the edges of the bed (lengthwise).
- The collected boxes are placed on the bed and lightly compacted into the ground (you can simply press with your feet or lightly knock with a hammer).
- The main difficulty is to bend the metal mesh, giving it the shape of an arch. To cope with this work, you need to place a heavy longitudinal object (a log is ideal) in the middle of the mesh (where the future arch is supposed to be), and then bend both edges.
- Finally, you need to connect all the structural elements into a single whole. To do this, one edge of the mesh begins to be fastened to the inside of the wooden box using nails with a wide head. The movement must begin from 1 corner of the grid to the other.

- How to make simple cucumber supports from branches The simplest and most affordable material is strong wooden branches, from which you can quite easily make several arches. As a material, you can choose branches of peas, hops or honeysuckle, which grow in almost every area. Important! It is better to choose long branches with a diameter of at least 10 mm that are not too dry (they should bend easily). The operating algorithm is as follows:
- Cut branches of suitable plants with pruning shears (their length should be the same and range from 3 to 4 meters, depending on the height of the future structure).
- Remove all side branches and shoots from them, as well as greenery.
- To carry out bending, you can drive several strong supports into the ground at a distance of up to half a meter (depending on the size of the arch arc).
- Carefully bend each of the branches.
- Tie the two halves of the arch with a strong rope (hoove) so that it remains bent after making.
- Next, the arch is dug into pre-made recesses. It would be better to drive the ends into narrow pipes in advance and dig them into the ground - this option is the most reliable.
- CARE OF CUCUMBERS ON TRELLS Watering, fertilizing and protection from pests of cucumber bushes grown using trellises have their own characteristics.

- Watering and fertilizingFeatures of watering cucumbers in this case will be as follows:
- You can make a deep hole near each plant where water will accumulate (this option is suitable if you grow few bushes);
- if you plan to grow cucumbers in large quantities in a long bed, then you need to make a whole row in the form of a mound;
- and one more important tip - the sides of the bed should rise to a height of at least 12-15 cm.

- Formation and tying of lashes As soon as the seedlings began to grow rapidly (in June) and began to produce the first lashes that rush upward, care must be taken to tie them to the support in a timely and correct manner. To do this, several conditions must be met:
- Tie cucumber bushes gently with a wide striped cloth, because the rope can cut the stems due to strong winds.
- The knot on the garter must be made double to avoid untying.
- At the same time, you should not tie the cucumbers too tightly - this can damage the bush.


Cucumbers, like any climbing plants, try to be caressed by the sun's rays, wrapping their thin stems around supports along the way and strive upward. In the wild, these supports are nearby trees. When growing cucumbers as cultivated plants, trellises are built to facilitate their care and obtain a rich harvest. Let’s take a closer look at how to make a trellis for cucumbers with a minimum of effort and expense, while creating a reliable and durable structure.
Growing cucumbers on a trellis is much more productive than on a spread. This is due to the fact that when placed vertically, the crop can get rid of last year’s “deposits” of infection spores in the soil. And even if pathogenic spores get into contact with water on the lower leaves of the plant, they do not spread further, quickly drying out along with dew drops.

Trellis - a structure consisting of a support and a stand along which a wire or cord is stretched for entwining the graceful stems of climbing plants
Ready-made vertical surfaces are often used for arranging supporting structures, constructing trellises using stretched wire near walls, pillars and fences.
The trellis can be used when growing cucumbers both in open ground and in greenhouses. This installation has a lot of undeniable advantages, the main ones being:
- Saving land area. A bed equipped with cucumber trellises takes up minimal space, but can accommodate twice as many plants.
- Reducing the risk of crop diseases. By excluding contact of the stem and leaves of the vine with the ground, the easiest way to prevent damage to the crop by peronospora and powdery mildew.
- Acceleration of the growing season. In well-ventilated crops, the daily temperature difference is not so noticeable. Thanks to vertical growing, the plant receives more light and heat, which has a positive effect on its development.
- Increase in harvest volumes. As the experience of gardeners who use trellises when growing cucumbers shows, with proper care, up to 80 kg of healthy greens can be harvested from a plot of only 5 square meters. Vegetables hanging from the vines are not deformed and have a uniform, rich color.
- Facilitation of crop care. By entwining the rods, the vine is evenly distributed over the support. This greatly simplifies the treatment of plant stems and leaves from pests, as well as fertilizing and watering.
- Harvesting a clean harvest. Due to the vertical placement of the crop, the ripened fruits do not touch the wet soil, which prevents them from getting dirty.
And harvesting from a trellis takes a minimum of time and effort. It is convenient to move between vertically located supports. By evenly distributing the plant along the support when removing fruits, it is easiest to prevent creases and damage to the graceful stems.

When growing a crop vertically, there is no need to rummage through all the foliage in search of fruit, given that the fast-growing stem can reach three meters per season
This growing method is also convenient because when picking ripe fruits, the skin of the hands is less injured from the thinnest needles of small thorns, which are often present on cucumber stems.
Classic trellis design
Support trellises for cucumber vines can have a wide variety of designs in the form of:
- rectangle;
- square;
- cabinets;
- tent
The function of supporting pillars of the structure can be performed by metal tubes, wooden beams or cement pillars. The mesh can be made of interwoven ropes of hemp twine, metal wire or special plastic.
Often, gardeners, trying to minimize the cost of manufacturing the structure, build a trellis from metal stakes driven into the ground, between which a PVC mesh is stretched
The finished PVC mesh, which is sold in gardening centers by the meter, is fixed along the upper edge with wire to the posts. The lower edge of the mesh is buried in the ground, pressing it with hooks made of stiff wire.

Such a trellis with its canopy can shade shade-loving garden crops that are vulnerable to sunlight: beans, rhubarb, chard, arugula, mustard greens
A beautifully designed cucumber trellis will be a worthy decoration of the site, acting as an original decorative design element.
Methods for making supports with your own hands
There are many ways to build a trellis for cucumbers with your own hands. It all depends on the size of the area allocated for their arrangement and the chosen material of manufacture.
Option #1 – wooden trellis
It will only take a couple of hours to erect a wooden trellis. It is constructed when the seeds have already been planted in the ground, but the first seedlings have not yet appeared.
Before you start making a trellis for cucumbers, you should decide what kind of design the structure will be.

A trellis on wooden posts can look like an elegant staircase with rigid rungs or a translucent vertical screen made of thin slats
In any case, it should be taken into account that the outer trellis posts must be stronger than the intermediate ones, since they will take the load of the entire row. So, when making a trellis 2.7 m high, you should choose beams with a cross-section of 50 mm for the outer support posts, and 35 mm for the intermediate ones.
To make a trellis that will last for more than one season, it is better to choose hardwood, for example: chestnut, oak, mulberry, ash. Poplar, maple or birch wood is not suitable for this purpose, since they are most susceptible to rotting. To extend the service life of wooden elements, before burying them in the ground, cover the bars in 1-2 layers with drying oil or an antiseptic composition.

The trellis looks no less presentable, in the construction of the cells of which wooden slats replace strong strands stretched between the frame beams
The work is carried out in several stages:
- Installation of support pillars. Support posts are driven into the edges of the future bed, placing them at a distance of 1.5-2 m. To obtain a firmly standing structure that can withstand its own load along with the harvest, posts under the trellis are dug to a depth of 60 mm.
- Securing the supports. To give the structure a slightly inclined position, the edge anchor supports are installed at an angle of 70° relative to the ground surface. It is necessary to anchor the inclined supports using guy wires, the free edges of which are tied to metal corners buried in the ground at an angle of 90°.
- Frame construction. A horizontal cross member is nailed to the upper edges of the vertical posts. It will act as a frame, behind which a sheathing of thinner slats will be attached.
- Performing lathing. Thin slats 30 mm thick are screwed to the frame with self-tapping screws in such a way as to obtain cells measuring 15 cm in size. The joints can be additionally glued with waterproof glue.
Do you want the trellis to carry not only a functional load, but also act as a decoration for the garden? Then equip it with an original arched structure, which can be easily cut out using a template from leftover wood. The arches and segments of the structure can be easily connected by “seating” them with glue and staples, and the arch itself can be attached to the support using a bolted connection.

The cells can be given the shape of a rhombus or a square; if desired, the sheathing can be easily “drowned” into the frame by trimming the edges of the planks
When making a trellis mesh, it is convenient to use staples to secure it to the frame, which can be made from ordinary nails. To do this, several nails are nailed onto the slats, placing them at a distance of 40-60 cm. If desired, the heads of the nails can be slightly bent, giving them the shape of hooks. All that remains is to tie a thick rope to each bracket and pull it parallel to the ground, with the free end tied to a support pole standing nearby.
Vertical threads are tensioned using the same principle. To create a mesh with cells, vertical threads are first intertwined with cross wire, and then the free ends are screwed to pegs driven into the ground.
Option #2 – metal structure
To build such a structure, more effort will be required, but it will definitely last for decades.

Racks made of metal rods can be placed at a distance of 2-4 meters, but if the materials allow, then the supports should still be placed more densely
To work you will need:
- reinforcement rods 180-200 cm long;
- thin pipe for the crossbar;
- metal pegs;
- electric welding machine;
- garden auger and hammer;
- steel wire.
In the places where the support posts are installed, holes 35-45 cm deep are made using a garden drill. Pre-cut metal rods are inserted into them. The pillars installed in the holes are “driven” into the ground using a hammer. The remaining voids between the rods and the walls of the pits are filled with earth and compacted tightly.

The vertical supports are connected to each other by laying a horizontal crossbar along the upper edge between them; the metal elements are connected by electric welding
To protect the structure from rust, all elements should be cleaned and coated with an anti-corrosion compound or oil-based paint.
Having built the frame of the structure, they proceed to arranging the fabric for braiding. To do this, you can use steel wire, which is simply pulled between the crossbar and metal pegs driven into the ground. They are placed at a distance of 15-20 cm from each other on both sides of the bed.
To create the most durable structure, you should use wire with a thickness of at least 2 mm. To create a mesh fabric, the wire is placed in several rows, stretched between supports starting from a height of 15-20 cm and every half meter. It is advisable to make the top row from thicker wire (d=3.5 mm), since it will bear the main load.
The metal trellis is a rather heavy structure, which is problematic to move around the site every season in order to organize crop rotation of the land. To simplify your work at the site where it is installed next season, you can plant climbing beans or peas.
Option #3 – support from tire and wheel rim
To construct a cost-effective trellis option, you will need a used tire. It will be the “heart” of the structure. The best tire for this purpose is a tire from a large vehicle: a tractor, combine harvester or truck. The role of supporting the upper part of the structure will be performed by a bicycle rim, from which all the spokes must first be unscrewed.

Thanks to its presentable appearance, a trellis made from a bicycle rim can rightfully become an original element of vertical gardening and an elegant decoration of the site
First of all, use a grinder to cut the tire lengthwise. The cut part is placed in the place of the future bed. 2 metal rods 1.5-2 m high are inserted into the center of the circle, placing them in such a way that the structure has the shape of a hut.
Then fertile soil is poured into the center of the circle, located inside the hut, and into the cavity of the cut tire.
The space remaining above the wheel must be “hidden” by covering it with pieces of old burlap. The edges of the cuts are tucked under the tire laid on the ground, thereby giving the bed a more neat appearance.
In the lined burlap, several holes are cut at equidistant distances for planting seedlings. To protect tender seedlings from temperature fluctuations, agrofibre is stretched around the perimeter of the improvised bed, lifting it only for the time of loosening and watering. Remove the covering material along with the burlap after the mature sprouts reach a height of 15-20 cm and the ambient temperature has finally stabilized.
To create a vertical surface, a pole is installed in the center of the round bed, onto which a bicycle wheel is secured with a wire. The easiest way to do this is to thread the wire through the spoke holes on the opposite four sides of the rim one at a time, and then wrap it tightly around the top of the rod.
To make the ribs, all that remains is to stretch the wire through the spoke holes in several places, connecting the edges of the rim and the base of the tire.
When the cucumber vines and leaves wrap around the stretched wire, the trellis will look like a green tent.